How to make a dance beat in fl studio
Free Dance Beat Loops Samples Sounds Beats Wavs. Free Downloads
The free dance beat loops, samples and sounds listed here have been kindly uploaded by other users. If you use any of these dance beat loops please leave your comments. Read the loops section of the help area and our terms and conditions for more information on how you can use the loops. Any questions on using these files contact the user who uploaded them. Please contact us to report any files that you feel may be in breach of copyright or our upload guidelines.
This list only shows free dance beat loops that have the word dance beat in the title or description. Use the search box to find more free dance beat loops and samples.
By MemberBy Keyword
CategoryAll CategoriesAccordionArpeggioBagpipeBanjoBassBass GuitarBass SynthBass WobbleBeatboxBellsBrassChoirClarinetDidgeridooDrumFluteFxGrooveGuitar AcousticGuitar ElectricHarmonicaHarpHarpsichordMandolinOrchestralOrganPadPercussionPianoRhodes PianoScratchSitarSoundscapesStringsSynthTablaUkuleleViolinVocalWoodwindGenreAll Genres8Bit ChiptuneAcidAcousticAfrobeatAmbientBig RoomBluesBoom BapBreakbeatChill OutCinematicClassicalComedyCountryCrunkDanceDancehallDeep HouseDirtyDiscoDrum And BassDubDubstepEDMElectroElectronicEthnicFolkFunkFusionGarageGlitchGrimeGrungeHardcoreHardstyleHeavy MetalHip HopHouseIndieIndustrialJazzJungleLatinLo-FiMoombahtonOrchestralPhonkPopPsychedelicPunkRapRaveReggaeReggaetonReligiousRnBRockSambaSkaSoulSpoken WordTechnoTranceTrapTrip HopUK DrillWeird
KeyAny KeyAAmA#A#mBBmCCmC#C#mDDmD#D#mEEmFFmF#F#mGGmG#G#mDateAny DateLast 24 HoursLast 48 HoursLast 7 DaysLast 30 DaysLast 60 Days
BPM / TempoOrder By
DefaultDateTitleAuthorTempoDownloadsComments DescAsc
Tags : 100 bpm | Reggaeton Loops | Vocal Loops | 3. 23 MB | wav | Key : C#m | FL Studio
Description : Summer vibe vocals for a club banger dance beat.
Manos do Brazil vamos tornar esse loop num hit de verao, mandem mensagem no IG.
Latin brothers lets turn this into a club banger.
DM me on IG
Click in my picture for the IG info.
Vocal loop made with kontakt bank in flstudio.
Tags : 180 bpm | Reggae Loops | Flute Loops | 3.59 MB | wav | Key : Unknown | Reaper
Description : I originally had this for a slow dance beat I have but ended up not using it. I think its very beautiful and I hope you can get some joy out of it!
Tags : 133 bpm | Latin Loops | Drum Loops | 1.22 MB | wav | Key : Unknown | Sonar
Description : A rhythm section plays the Afro-Cuban dance beat, The Conga.
Tags : 131 bpm | Dance Loops | Drum Loops | 1.24 MB | wav | Key : Unknown | Sonar
Description : Let this 80's-style dance beat spin you 'round.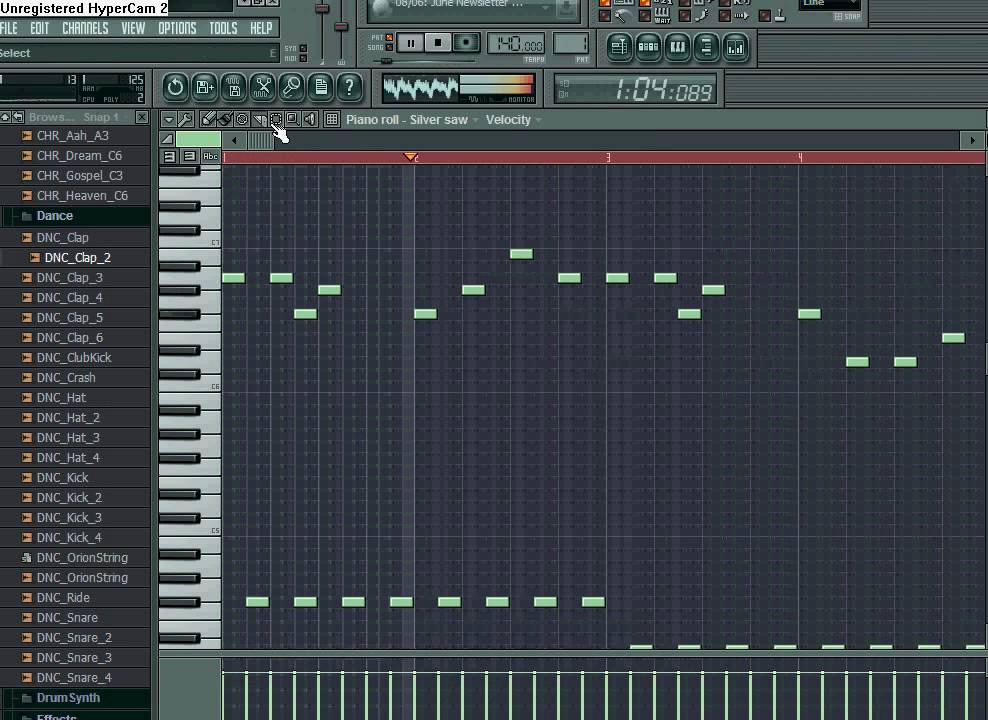
Tags : 118 bpm | Dance Loops | Drum Loops | 2.74 MB | wav | Key : Unknown | Sonar
Description : Drumkit plays a Portuguese-style Lambada dance beat.
Tags : 130 bpm | Dance Loops | Drum Loops | 1.24 MB | wav | Key : Unknown | FL Studio
Description : Good for EDM, Dance or any kind of other electronic music productions.
Tags : 88 bpm | RnB Loops | Drum Loops | 7.34 MB | wav | Key : Unknown | Logic Pro
Description : Afro drums
Hmu on IG for any music related enquires or if you need beats (Click on my profile image to see the links)
Feel free to drop a comment if you use this loop
Tags : 120 bpm | Dance Loops | Drum Loops | 689.17 KB | wav | Key : Unknown | Mixcraft
Description : FUNK DANCE BEAT
Tags : 115 bpm | Dance Loops | Drum Loops | 1.41 MB | wav | Key : Unknown
Description : A 1980's club/dance beat... amped-up and goosed-up.
4 seamless bars.
Tags : 120 bpm | Dance Loops | Drum Loops | 1.35 MB | wav | Key : Unknown
Description : I hope this is usable.
Made in FL Studio 12.
Tags : 140 bpm | Dance Loops | Drum Loops | 1.15 MB | wav | Key : Unknown
Description : Suitable for any dance groove, made using Reason Redrum and my own samples
Tags : 130 bpm | Punk Loops | Drum Loops | 1.25 MB | wav | Key : Unknown
Description : 4 seamless bars of a pounding Darkwave dancebeat in the 80's style.
Tags : 102 bpm | Pop Loops | Drum Loops | 1.59 MB | wav | Key : Unknown
Description : 4 seamless bars of a 1980's-style drumgroove, with gated snare and highly-swung shakers.
Tags : 166 bpm | RnB Loops | Drum Loops | 1.95 MB | wav | Key : Unknown
Description : 8 seamless bars of a fast dancebeat inspired by the 1960's Motown hit, "Cool Jerk" by The Capitols. Also reminiscent of records like "Too Many Fish In The Sea" by The Marvelettes, "First I Look At The Purse" by The Contours, and "The Name Game" by Shirley Ellis. See what you can do with it!
Tags : 75 bpm | Dance Loops | Drum Loops | 2.15 MB | wav | Key : Unknown
Description : Here's a simple dance beat I used for my new projects. Stepping into new genere's:)
Tags : 110 bpm | Electronic Loops | Drum Loops | 1.60 MB | wav | Key : Unknown
Description : dance beat
Tags : 130 bpm | Dance Loops | Fx Loops | 1.24 MB | wav | Key : G
Description : A funky dance loop created with Harmless.
Tags : 128 bpm | Dance Loops | Drum Loops | 647.85 KB | wav | Key : Unknown
Description : heres a beat for a dance song with some bass in it
Tags : 110 bpm | Dance Loops | Drum Loops | 2.21 MB | wav | Key : Unknown
Description : Shake yo booty
Tags : 178 bpm | Hardcore Loops | Drum Loops | 929.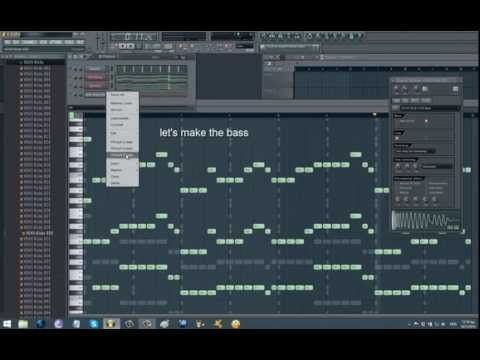 25 KB | wav | Key : Unknown
Description : Interesting lo-fi drum sounds come together to form a hardcore dance beat. Would be a fun one to chop or manipulate in some way.
Tags : 100 bpm | Dance Loops | Drum Loops | 826.95 KB | wav | Key : Unknown
Description : I wasn't trying for a dance beat, but it happened all the same... speed it up I guess
Tags : 100 bpm | Dance Loops | Drum Loops | 826.95 KB | wav | Key : Unknown
Description : I wasn't tryin for a dance beat... but it happened all the same. speed it up I guess
Tags : 150 bpm | Rock Loops | Drum Loops | 600.04 KB | wav | Key : Unknown
Description : just drums for the dance loops
Tags : 150 bpm | Ambient Loops | Strings Loops | 600.04 KB | wav | Key : Unknown
Description : echos for the dance beat loops
Tags : 150 bpm | Electronic Loops | Synth Loops | 600.04 KB | wav | Key : Unknown
Description : loop made in fl studio 10
How to make a beat in FL Studio | Step by Step Guide (2022)
Producer Sphere how to make a beat, how to make a beat fl studio, make a beat fl studio, making a beat in fl studio, start making beats fl studio
So you want to make a beat in FL Studio? Below is a no-nonsense guide to making your first beat, from a beginners perspective, to simplify the whole process for you.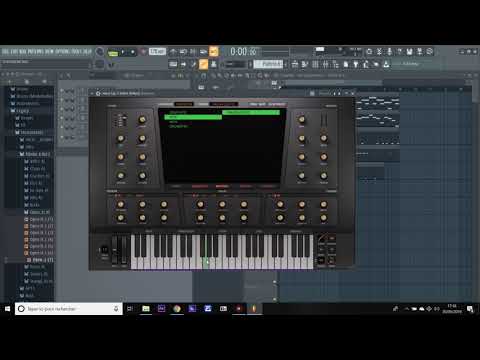
In the video below we’ll run through a beginners tutorial to making beats. You can either watch this video, or keep scrolling to read more!
Making a beat in FL Studio: Before you beginFor a beginner, FL Studio can seem very daunting and sometimes overwhelming. We’ve all been there.
But FL Studio is an unbelievably powerful program, and when used correctly, can be used to make any sound or track you can imagine.
In order to begin making a beat in FL Studio, you must have the following:
1. A full (or even the trial version) of FL StudioThe producer and signature bundles of FL Studio can get quite pricey, and for a beginner this can be very off-putting.
The most basic version of FL Studio, “Fruity Edition” definitely has everything you need to create incredible beats. So you aren’t ready to pull the trigger on the more expensive versions, this version will definitely give you what you need in the early days of your music production journey.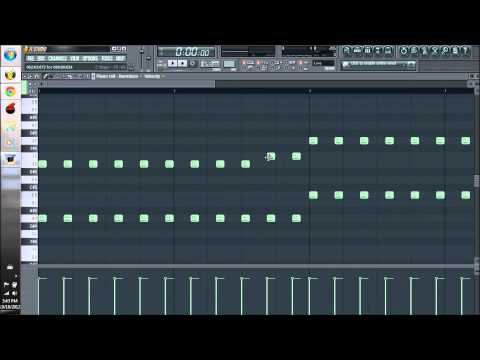
Here are the pricing options for Fl Studio:
| FL Studio Edition | Price |
|---|---|
| Fruity Edition: | $99 |
| Producer Edition: | $199 |
| Signature Bundle: | $299 |
| All Plugins Bundle: | $899 |
FL Studio also has a free trial version of the product, where you can use almost all the plugins available, however you can’t re-open a file once it’s saved.
Click here to download FL Studio’s free trial.
2. A very basic understanding of the FL Studio interfaceThis seems obvious, but don’t jump before you can walk. If you try and skip the learning curve and start making beats before you even understand the first thing about FL Studio’s interface, you’ll probably end up confused and unmotivated.
Make sure you understand the very basic functions of the 5 main windows of FL Studio – the browser, the channel rack, the piano roll, the playlist and the mixer.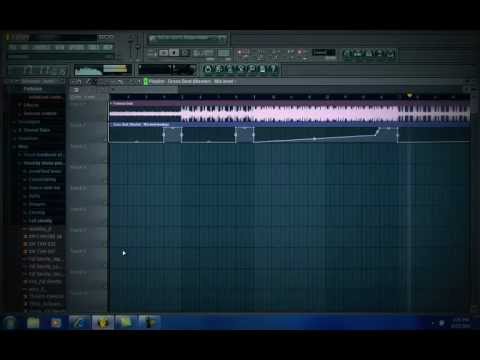
This video below outlines the basics of FL Studio 20 you NEED TO KNOW before you start making beats.
3. Some samples/sounds to play around with.
To make a beat in FL Studio, you’re going to need a selection of drums and other samples to play around with.
You’re in the early days of production, so I’m assuming you don’t want to be forking out a huge amount of money, if any, for samples right now.
Here is our HUGE list of FREE sample packs across a wide range of genres.
Or check out our guides to the best sample packs for genres such as Lofi, Hip Hop, House, Trap, etc.
So now you should have a copy of FL Studio, a few samples/sounds of your own, and a basic understanding of the program.
Now it’s time to get creative, and learn how to make a beat in FL Studio.
Here are the main steps to making a beat (FL Studio):
1. Creating a drum pattern in the channel rack
2. Adding a VST instrument sequence
3. Adding other elements (percussion)
4. Building and structuring the beat in the playlist view
5. Automation
6. Mixing/adding effects
The “Channel Rack” is where you’ll create your drum patterns1. Creating a drum pattern in the channel rack
The first step to making a beat in FL Studio is to create a simple drum pattern that will be the backbone of your beat.
The default drum sounds that come with FL Studio are pretty terrible, and you definitely want your own drum sounds to create the beat.
Click here for a great resource for free sample packs, or click here for our guide to the best sample packs for Lofi, Hip Hop, Trap, House + more.
Now you’ve got your sounds, it’s time to import them into FL Studio.
Importing your sample packs into FL StudioOpen FL Studio, go to Options in the top menu, then to File Settings, then under Browse Extra Search Function, click a folder down the left hand side to add a folder to the browser.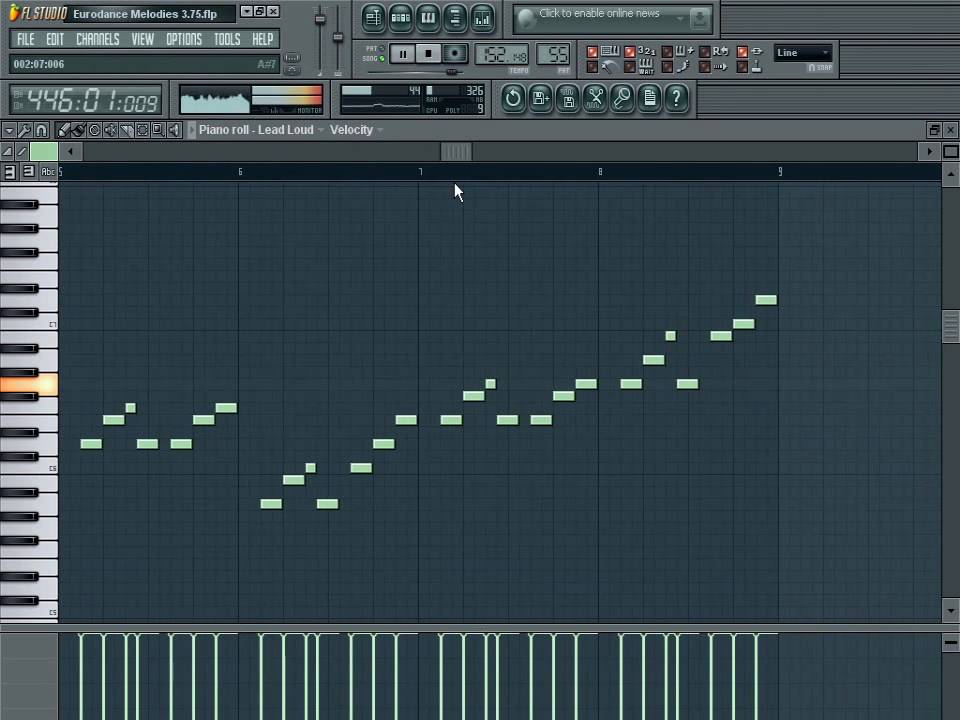
Once you’ve chosen a folder, click OK, and if you want, you can rename the folder with FL Studio by clicking the name in the Browser Name column on the right. You should now see your chosen folder within the browser panel.
Note: Sometimes the folder won’t automatically rename itself within the browser. To fix this simply click re-read (the arrow next to the magnifying glass at the top of the browser, and your folder name should update.
How do I get sounds from the browser into my track?To import a specific drum sound into the project, simply left click on the desired sound file in the browser, and drag it into the channel rack. The best thing to do is drag and drop the files just below the bottom sound in the channel rack, as dropping it on top of another file within the rack will replace it.
For the next step, add a kick, snare, clap and a hi hat that take your fancy. You can add more percussion elements later, for now you just need to create a basic drum beat.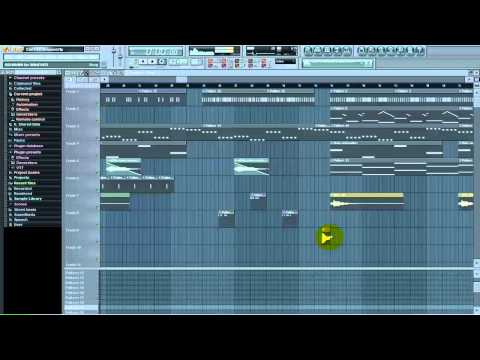
This is where the fun really begins. FL Studio’s iconic step sequencer is one of the easiest ways to create a drum pattern in any DAW. Hands down.
To add a step or drum “event”, left click on any of the step buttons and they will light up, and to delete steps, just right click your highlighted step. You can also drag left or right click to select multiple steps within a channel at once.
In the step sequencer, play around with creating some simple drum patterns.
If you’re a bit lost, try recreating one of these drum patterns:
Basic hip hop beat
Recommended tempo: 80-90 bpm
Basic trap beat
Recommended tempo: 70 bpm
Basic house beat
Recommended tempo: 125-130 bpm
Make sure you rename and colour each drum track to keep your beat organised. To do this, simply right-click a sound, click “Rename, Color, and Icon…“.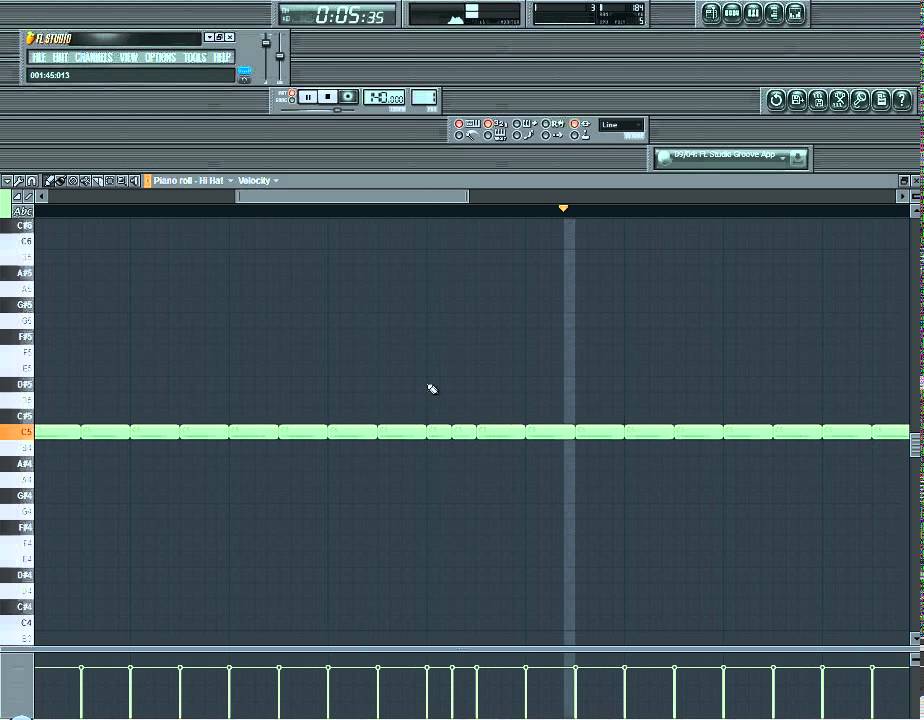
To add your pattern to your track, simply left click within the playlist section, and your pattern will appear.
Unlike almost all other DAWs, you can place any pattern anywhere within the playlist, and each pattern is not limited to its own track row.
To keep things organized, right click on the track name, and select “Rename, color and icon…” and name it “Drums”. It’s always easier to produce full, complex tracks when sounds are kept within their corresponding tracks.
Go ahead and add 4, 8 or 16 bars of the drum pattern to your playlist. Your screen should now look something like this:
2. Adding a VST instrument sequence
So you have your basic drum beat, and have sequenced it into the playlist view…
Now it’s time to add your first instrumental sound or sample. The main way to do this would be to add a VST instrument and program a melody or chord progression using the piano roll, or using a MIDI controller/keyboard.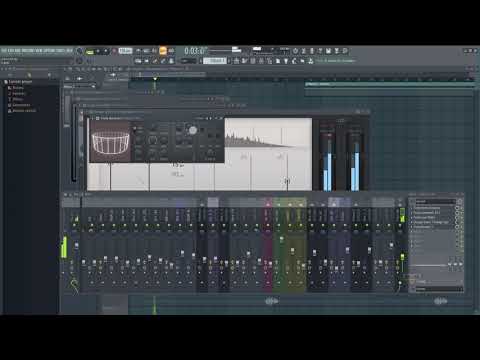
There are other ways of adding your first instrumental sound, such as sampling, speeding up/slowing down and looping other songs or “sampling”. For the sake of keeping things simple, I’ll just focus on adding a MIDI pattern using a VST instrument.
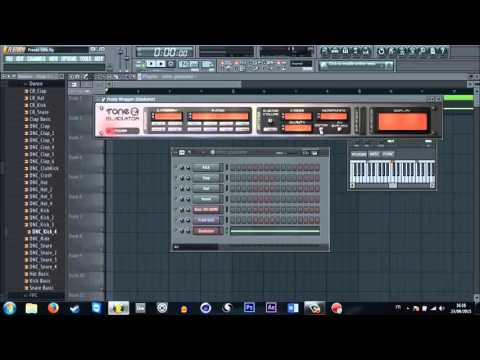
“Massive” – Native Instruments heavyweight VST synthesiserWhat is a VST instrument?VST Instruments generate audio and act as software-based instruments. They often emulate recognizable sounds of famous synthesizers and other instruments. Popular VST instruments include Serum, Massive, FM8, Sylenth 1 and Absynth.
These programs can seem daunting to a beginner, as many VST interfaces appear very complex and overwhelming.
So for now, instead of creating a new sound with one of these programs, we’ll just use one of the thousands of presets available for FL Studios instruments.
Click here for our guide to the best VST plugins for beginners.
Creating a new pattern for your VST instrumentBefore you begin creating MIDI patterns for your VST instrument, make sure you’ve selected a new pattern, so your drums and instrument patterns are separate.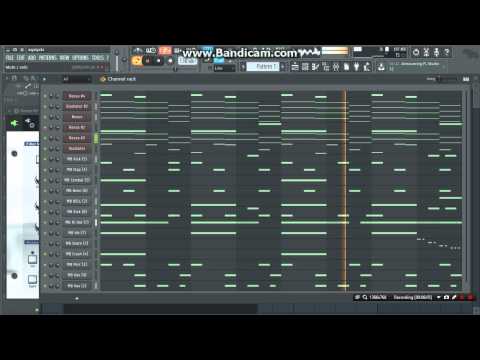
To do this, navigate to the pattern selector in the top menu and select the plus button to create a new pattern (see above). This creates a blank channel rack within which you can create your new instrumental pattern.
How to add a VST instrument to your channel rackTo add a VST instrument to your track, simply click the plus button at the bottom of the channel rack (see above), and choose from the list.
Again, for simplicity, I will be adding Sytrus, a great FL Studio plugin with lots of fantastic presets.
If you’re unsure about how to install and add your own VST plugins to FL Studio, here is our quick, easy guide.
Creating a MIDI sequence for your VST instrumentYou can create a MIDI sequence in the piano roll for your chosen instrument.
The incredibly intuitive piano roll of FL StudioThe piano roll is where you can compose, slice and edit MIDI notes of a selected channel with an incredible amount of detail and precision.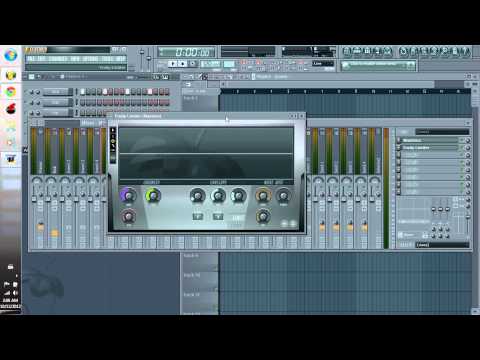
It is incredibly helpful for example, to tweak a MIDI keyboard performance or lengthen certain notes within a sequence.
To open to piano roll for a chosen channel, right click on the channel name and select Piano Roll.
Have a play around with the piano roll, creating chord sequences and melodies for different VST instrument presets and sounds.
Try recreating these jazzy chords within your piano roll if you’re stuck for ideas.
Click here for our full guide to FL Studio, including an in-depth look at the piano roll editing features.
Adding your VST instrument pattern to your trackTo add your pattern to your track, simply left click within the playlist section, and your pattern will appear.
Add it below the drum pattern you added earlier, and remember to color and organise the track.
Repeat this step as many times as you want. This way you can add and layer as many instruments as you like: Sub-bass, bass, synths, keys, pianos, strings, pads, stabs, etc.
Here’s an example of what your screen may look like now:
3. Adding other elements (percussion/vocal FX etc)
Now you have the skeleton of your beat (a drum beat and a instrument sequence), it’s time to add some additional elements to breathe some life into your beat.
Extra percussive or FX element are a great way to make your track stand out from other, more simplistic beats.
Adding extra percussionAdding extra percussive elements is a very similar process to creating your main drum beat.
Again, using the step sequencer, create a pattern of percussive elements to add to your track. This can come in the form of snare/tom fills, extra hi hats to evolve the drums in a certain section of a track and more.
A few ideas could be:
Hip hop – clap-fill for the 8th barRecommended tempo: 80-90bpm
Trap – hi hat roll and percussion fillRecommended tempo: 70bpm
Note: To add percussion hits with more precision, open the piano roll for that sound.
Recommended tempo: 125-130bpm
Add your extra percussion to your track in the relevant places (i.e for a drum fill, add it to each 4th, 8th or 16th bar.
Again, remembering to organise it effectively, your screen should now look a little something like this.
4. Building and structuring your track
So, you have a basic understanding of how to add different drums beats, percussive patterns and multiple instruments to the playlist view.
Now it’s time to build and sequence your tracks from a layered loop to an full, evolving track.
If you’re new to the playlist view, or want more information on how to edit, slice and arrange patterns within this interface, check out our FL Studio guide which will take you through this.
This step is very important for building a song, so elements are introduced throughout a track. This creates a more professional sounding song as opposed to a stand alone loop or idea.
If you’re creating instrumental beats, have a look at similar tracks in the same genre to see how they are structured. For example:
Lofi hip hop beats are usually only about 2 minutes long, without too much beat development, but include sections where drums drop out, or a filter is added, and then they come back in for effect.
Full house track mixes are often 5-7 minutes long, with lots of beat development, and usually start with a 4-on-the-floor kick pattern only.
If you’re just starting out, don’t try and re-invent the wheel. Know your genre, and once you’ve had some practice, you can start getting experimental.
5. Automation
If you’re new to music production, you may not have heard of automation. But in order to create great, professional quality tracks, you need to learn what automation is and how to use it.
What is automation?To put it simply, track automation is a way of “automating” a specific parameter, such as volume, pan, reverb etc, so that the parameter changes as your track plays.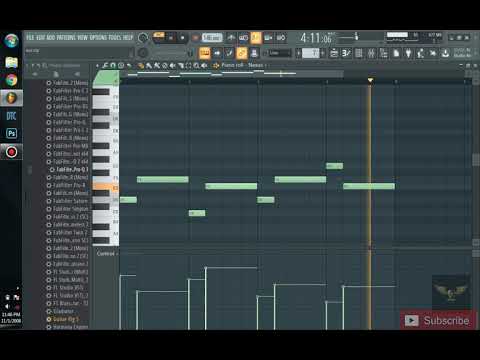
A few examples would be: slowly fading in a pad over the course of 4 bars, sidechaining, and adding more reverb to a sound during a certain section of your track.
An example of what an automation clip would look likeHow do I add automation?To add automation, simply right-click on a parameter in FL Studio such as track volume, and select “Create Automation Clip“. This will create a track-length automation clip in a free playlist track.
Seems easy? As with most things in life, it’s not that simple. There are a few extra things you have to consider while adding automation.
Always select the section of your track you want to add the automation clip toBefore adding automation clips…Always select the section of the track you’d like to add the automation clip to first, before adding the automation clip.
Adding track-length automation clips for each parameter can get very messy.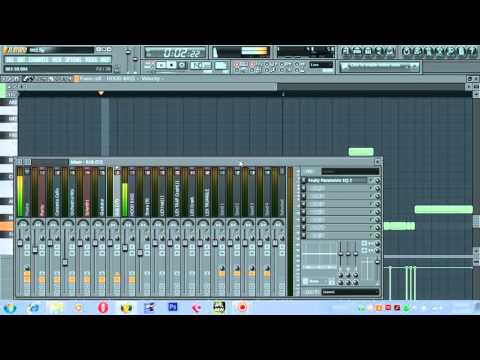
To select a section of the track, double click/Ctr + click and drag along the bar just above the playlist where the bar number is displayed (see image above). This will highlight the selected section in red.
Now, when you add your automation clip, it will only be added to this section.
Editing an automation clipTo edit an automation clip, simply right-click within the clip, and new points will be created in the clip, which you can then left-click to drag anywhere you’d like.
Useful tip #1: If you left-click and hold in the line between two created points and drag, this allows you to fine-tune the curve between two points.
Useful tip #2: By right clicking on any automation point, you can change it’s “mode”, for example creating a “pulse” or “smooth stairs” effect. This allows for a huge amount of sonic creativity.
6. Mixing
Mixing a track can be a very in-depth, complex process, especially for large, layered mixes.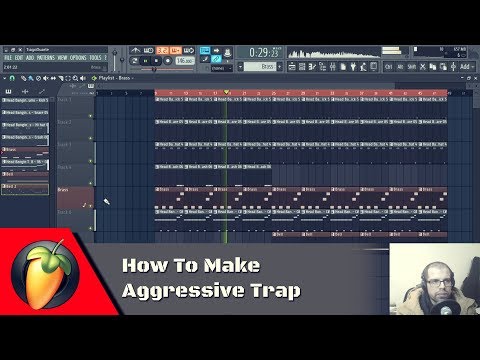 If you’re a beginner to the mixer in FL Studio, all you really need to focus on a basic track levels, and adding FX.
The mixer is where you’ll mix your song, focusing more on sound design, effect processing and fine-tuning your tracks. You can add effects such as reverb, delay, compression and many, many other audio effects to your mixer channels.
Using this mixer effectively can completely transform your songs into professional-sounding masterpieces.
Sending sounds or instruments to mixer channelsTo send a specific sound to a specific mixer channel, left click and drag the numerical value to the left of the sounds name within the channel rack to your chosen value. This will send your sound or instrument to the corresponding mixer channel, in which you can now add effects or change certain parameters.
You’ll notice the far left mixer channel is your master channel, which allows you to edit the overall pan, volume and other functions of the entire track.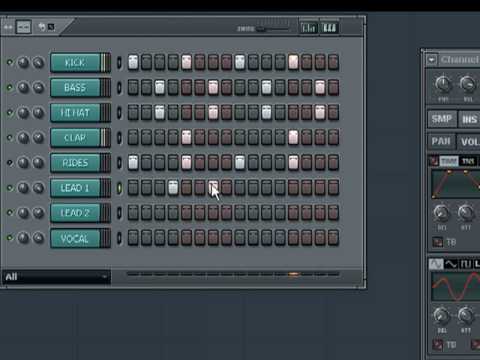
Focusing on one individual mixer channel along the mixer window, you’ll see multiple buttons and a large fader control for each mixer channel. For a more complete guide to these controls and how to use the mixer, click here.
Adding effects to a mixer channelOn the right hand side of the mixer channel, you’ll see 10 effect slots. By selecting one of these slots, and choosing an effect, it will add the selected effect to your mixer channel.
There are so many effects plugins included with FL Studio, and thousands more available online.
Here is an overview of the best effects to play around with for beginners (all included with FL Studio).
Fruity Reeverb 2: This is a incredibly high quality reverb plugin that honestly sounds unreal straight out the box.
Fruity Parametric EQ 2: My favourite EQ plugin, period. Maybe it’s bias as I’ve used it for so long, so it’s my favourite plugin for fine-tuning and automating EQ.
Fruity Limiter: A fantastic limiter for limiting and compressing sounds. In the compression mode, it visualises the sound you’re compressing as it’s being played, which is a very useful tool for getting your compression levels right.
Fruity Love Philter: A versatile, powerful tool for adding filters and modulating effects.
Now you can add multiple effects to your tracks, add automation clips for the actual effects, sequence your patterns and structure your track into a fully fledged song.
To conclude…
And there you have it, a basic guide to making a beat in FL Studio.
You’re either feeling one of two things right now: creatively inspired, or completely confused.
If you’re feeling inspired and ready to create, I have nothing more to offer you. Get to work and create some amazing tunes.
If you’re feeling confused and overwhelmed by all this information, don’t worry. It took me forever to understand FL Studio, and even longer to create something half decent.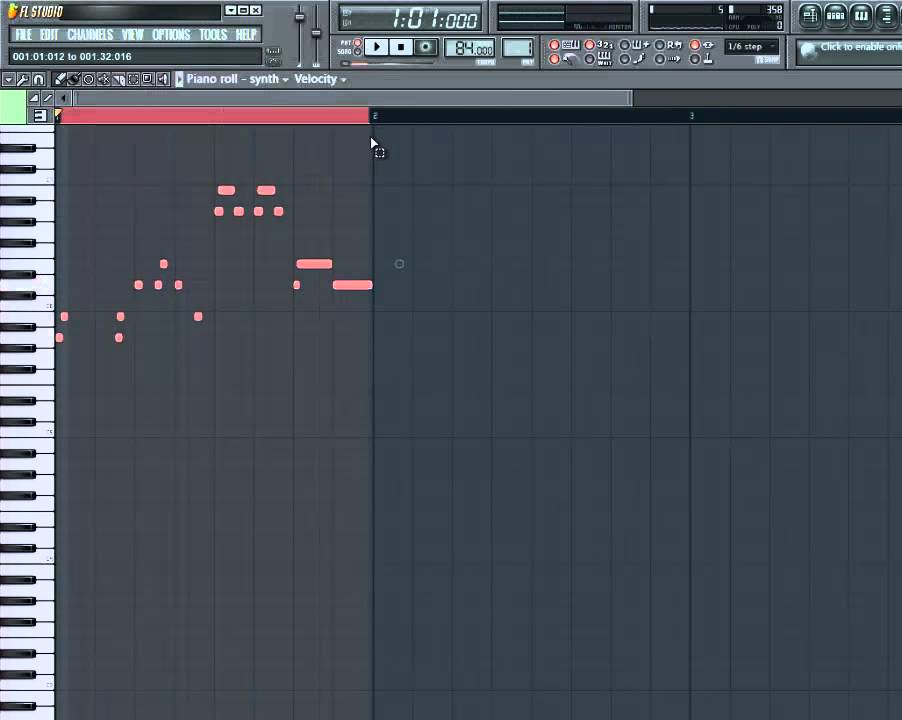
Keep practising, and do your research. There are so many guides and Youtube videos available to show you how to use this incredible program.
Be prepared to create some terrible music, because eventually you’ll actually create something worthwhile, and that is the best feeling in the world.
Dance beat
DANCE BEAT 2020
play تشغيل
download تحميل
HOW TO MAKE A DANCE TRACK LIKE ON THE RADIO
play تشغيل
download تحميل
HOW TO MAKE A DANCE BEAT IN FL STUDIO 20
play تشغيل
download تحميل
LJ Not With Me Rap Dance Beat
play تشغيل
download تحميل
DANCE BEAT WITH MEVL GUITAR VAVAN TYPE BEAT
play تشغيل
download تحميل
FREE DANCE BEAT CLUB INSTRUMENTAL 95 BPM
play تشغيل
download تحميل
Wireless dance mat 32 bit
play تشغيل
download تحميل
EDM POP RAP BEAT
play تشغيل
download تحميل
Awesome Rap Club Beat 2020 No Matter Prod Exception Beatz
play تشغيل
download تحميل
Elj Style Dance Beat 2021 Fashion Shoes Prod The ARTISANS X SinVstyle
play تشغيل
download تحميل
GUNNEST STYLE DANCE BEAT SOLD
play تشغيل
download تحميل
Pop Dance Beat 2018 Dance For Me
play تشغيل
download تحميل
Dance Pop Minus Club Beat 2019 Say No More
play تشغيل
download تحميل
DABRO STYLE DANCE BEAT
play تشغيل
download تحميل
Deep House TYPE BEAT FREE BEAT I Free beat I Dance beat I Club beat I
play تشغيل
download تحميل
Awesome butt banger beat in 10 minutes at FL Studio 20
play تشغيل
download تحميل
FREE MACAN X Jaro Hanza Type Beat Oasis Dance Beat
play تشغيل
download تحميل
ORIENTAL DANCE BEAT IN THE STYLE OF GIDAYYAT GAZAN
play تشغيل
download تحميل
FREE Club summer dance beat minus CLUB DEEP HOUSE TYPE BEAT Prod By MALGIN 2022
play تشغيل
download تحميل
Creating a hip hop beat in FL Studio - Musical Corpuscle
- Sound synthesis, parts
5 comments
This article will discuss how to create a hip hop beat using the FL Studio program. First we need to find the material, drum samples, from which we will create a beat. You can find the sner bass kick and cymbals on sample CDs, or you can download them from the internet. In this example, free samples from the Mafz DrumKit Vol2 collection, which you can also find and download on the Internet, were used. I used 44 bass drums from this compilation.
Let's create a pattern in the sequencer and set the tempo of the project to 100 bpm.
Not a bad start! But I want the kick drum to sound dirtier. To do this, I will add another acoustic snare sample (snare drum) to it, I used a sample from the same assembly - Snare 35. The snare repeats the bass drum part:
Next, you need to change the timbre of the snare, or rather the attack time. To do this, open the channel settings window sner ( Channel Settings window ). Press the INS button and add ATT to increase the attack time of the sner.
The next step is to reduce the volume of the sner a bit and correct its fundamental frequency to better match the bass drum. We can filter the sner with the same channel filter. I changed the filter type from Fast LP to HP (high pass filter). I also changed the Mod X value:
I thought the snare sounded like a cymbal, so I sent it to the mixer track and processed the sound with a parametric equalizer
Next, I took the Kick 10 sample from the above compilation and processed it amplitude envelopes (amp envelope) in order to remove everything except the attack of the sound. To do this, use the drop-down box of the channel properties. I also reduced the sound level by 40 percent.
In order to diversify the beat, I took the Clap 22 sample from the collection and placed it in the sequencer as follows:
volume at 60 percent.
Next, I added another clap (Clap 14), only on the second beat, lowering its volume by 40 percent.
Now the 2nd and 4th beat really sound different. Also, for better reference, I used an amplitude envelope to process the last clap:
Now it's time to add cymbals to the beat.