How to do the splits dance
What You Need to Know
We all have that one friend who is uber flexible and as dancers we are all always working on flexibility. But sometimes our stretching practices can end up being more harmful than helpful in the long run. One stretch that has dancers obsessed due to its WOW factor is oversplits. But, what do you need to know about oversplits? MTD looked to the experts to find out more.
Questions we are answering about oversplits:
- Are oversplits something all dancers can do?
- It is a static stretch, so what does that mean?
- So, what are the risks?
- Can I do them?
- What are the alternatives?
Let's answer those five questions.
Stretching and flexibility is a major component of a dancer’s routine and practice. As such, certain stretches are highly valued for their WOW-factor that they provide for dancers. One such stretch is the oversplit.
Oversplits are a type of split that go further than 180 degrees and bring the legs and feet above the hips. While most dancers can achieve this type of split through consistent practice, learning these splits should be approached gradually and with caution as they do pose potential physical risks.
Here at More Than Dancers, we looked to the experts within this field to find out more, and in this article, we will cover whether oversplits are truly a stretch any dancer can achieve and how they can go about doing so. Plus, we will cover the risks of and the potential alternatives to oversplits.
As mentioned, oversplits are a type of stretch that go beyond the 180 degrees required for full normal splits. Because of this, this type of split can be fairly difficult to achieve since it requires practitioners to already have a solid foundational ability to perform regular splits to the fullest extent.
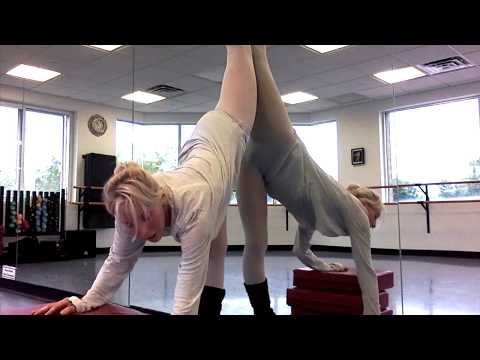
Oversplits also require additional equipment in order to be practiced, since simply stretching on the floor does not allow for the legs to go beyond the 180-degree requirement. This extra equipment generally comes in the form of blocks or bolsters that are traditionally used in yoga practices but are also frequently utilized by dancers.
Some dancers who regularly include oversplits into their routine will even use heightened surfaces, such as chairs or low tables, to get their front leg even higher. However, using a heightened surface to achieve the split should not be attempted by those dancers who have not gradually worked up to that extreme of the stretch, as it has the potential to cause serious strain or injury.
Are oversplits something all dancers can do?When it comes to oversplits, it can be particularly tempting for dancers to attempt the stretch when they observe their peers completing it.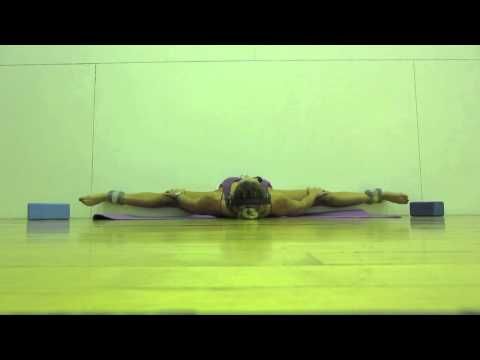 The reality with oversplits, though, is that they are not only an incredibly difficult stretch to achieve but they must also be learned in a gradual and precise fashion so as to avoid unwanted injury.
Think of it this way: would you ask a five-year-old to do 32-fouettes en pointe? No, you wouldn’t, because that type of movement requires a large amount of training and is not something that is immediately expected from a young dancer. The same goes for oversplits and all kinds of stretching – certain movements require time and a strong foundation before they can be achieved.
According to Shift Movement Science, correct execution of oversplits requires dancers to meet a number of qualifying factors, including having enough muscle, stability of the joints, the correct mentality, and a strong understanding of their own body.
They also remind teachers that the majority of students are still growing, which means that their growth plates are still open. While for some younger students open growth plates can result in heightened flexibility, it can also cause them to be more susceptible to injuries that will affect the overall maturation of their bodies and limbs.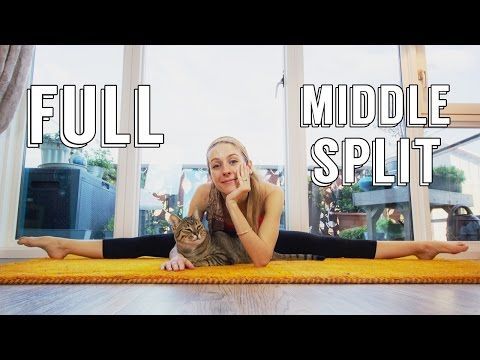
Marika Molnar, the director of NYCB physical therapy program and founder of Westside Dance Physical Therapy, stated that static stretching is anytime you are holding a position for over 30 seconds. In extreme positions, such as oversplits, this becomes extremely dangerous as it loosens the ligaments around the hips and knees. When those ligaments are loosened, they do not have the elasticity to go back into their protective position. Thus, your muscles and ligaments can not react quick enough to movements; leading to injury. This is also a danger of over-stretching.
Oversplits are Static StretchesPart of understanding the mechanics and feasibility of oversplits is understanding what category of stretching they fall into. Oversplits are considered static stretches, which focus on stretching a muscle group to its furthest possible extent and then holding this position for a set period of time.
According to an article published on Pointe Magazine, dancers should avoid holding stretches in extreme positions, such as oversplits, for longer than 30 seconds. This is because holding an extreme stretch for an extended amount of time loosens the ligaments around the hips and knees, heightening the risk of injury.
Static stretching in general is often met with mixed reviews and criticisms. There is some belief that static stretching can actually weaken the muscles and overall power an athlete’s body is capable of. However, a recent 2019 study found that the negative effects of static stretching on athlete’s overall power and strength were minimal, but that coaches were advised to keep these stretches at a short duration.
So, what are the risks?Like all aspects of dance, there is a risk and the potential of injury involved. Molnar states that in oversplits, the femur is pushing on the hip at such an angle that the cartilage within the hip can tear. This can lead to surgery and potentially a career-ending injury. Shift Movement Science stated, that after research it was determined that oversplits can cause micro-subluxation in the hip as well which means instability within the joint.
All aspects of dance involve some degree of risk and potential for injury. Oversplits in particular pose a strong risk, as dancers need to be at a high degree of flexibility and bodily awareness in order to complete the stretch successfully and safely.
Even with just regular floor splits, there are risks involved that are similar to those posed by oversplits. The primary area of concern for splits of any kind is the potential damage that can be caused to ligaments, joints, hamstrings, and muscles if the person stretching pushes their body too far, according to University of Utah Health Care.
This is known as overstretching, and often occurs when a person’s muscles are pushed far beyond their normal range of motion. The issue becomes that each individual dancer is going to have a different baseline range of motion and inherent flexibility. Hence, dancers need to be keenly aware of their own capabilities and understand the difference between normal pain associated with stretching versus pain associated with overstretching.
Safe stretching should not be actually painful. What is often described as pain during stretching is actually a sense of discomfort and tension. Pain, comparatively, is characterized by a sharp or stabbing sensation and is indicative of overstretching.
Overstretching during oversplits is particularly risky when it comes to the potential for hip issues and injuries. When overstretching occurs and is held for too long a period of time, the ligaments of the hips are loosened which leads to hip instability.
Hip instability puts dancers and athletes at a much greater risk of hip injury or hip dislocation that will potentially require intensive medical care. Furthermore, there are genetic factors that can contribute to hips being inherently unstable, putting those with genetic hip instability at greater risk when overstretching occurs.
According to Aurora Health Care:
“An accident or injury can cause hip instability or hip dislocation. But in some cases, people are born with structural problems in the hip joint – called hip dysplasia – that can cause the hip joint to dislocate. If this is the case for you, doctors might identify dysplasia at birth, or it might not be noticeable until you’re older.”
Therefore, it is majorly important for dancers to be aware of the inherent and genetic range of motion and stability of their hips. Those with hip issues need to be especially careful when stretching, and potentially should avoid oversplits altogether.
Patience is the number one key in minimizing risks posed by overstretching. The reality is that it takes considerable amounts of time and consistency in order to train the body to overcome its inherent range of motion.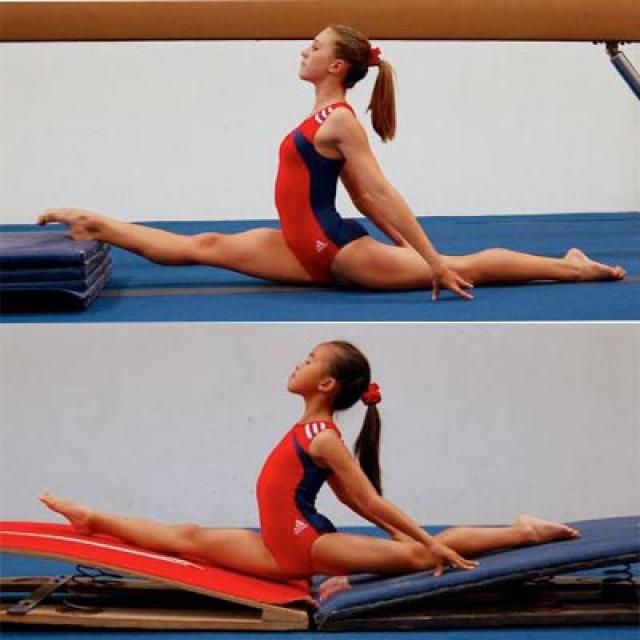
The International Association for Dance Medicine and Science states:
“If increasing flexibility is a goal, it should occur over time (at least six weeks) and should occur following class, rehearsal or performance when the muscles are already warm and more likely to make permanent changes to increase flexibility.”
Additionally, Healthline provides guidelines for how to prevent overstretching from occurring. These guidelines include:
- Maintain proper hydration
- Use proper form when stretching
- Use proper gear or footwear when needed (such as props used for practicing oversplits)
- Avoid exercising when overtired or in pain
Should Dancers do Oversplits at All?Oversplits are a tricky subject and often a point of differing opinions. While most instructors and researchers would agree that we would prefer not to see oversplits happening at all, many dancers will continue to practice and perform them.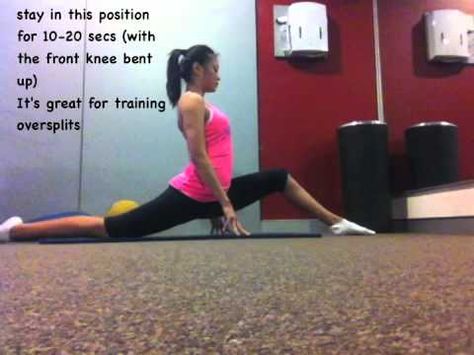
This type of stretching is not outright impossible or dangerous, but the reality is that oversplits are often the focal point of dancers’ fascination and admiration, which can lead them to pushing themselves too far without first establishing the proper foundation of skill, flexibility, and form needed to properly complete oversplits.
To put it frankly, dancers can in theory do oversplits, but the time and commitment it takes to learning oversplits may not ultimately be an efficient use of their time if that is their primary focus. Additionally, dancers should be able to do full floor splits without any discomfort or tension before moving on to training for oversplits.
For those still planning to train their oversplits, it is important to note that this type of stretching should be performed after dance practice or rehearsal rather than before. This is because the body is more likely to experience permanent changes to its flexibility if static stretching is performed while the body is warmed
Can I do them?After learning all about oversplits, your real question is still: can I do them? While most instructors and researchers would agree that we would prefer not to see oversplits happening, many dancers will continue to do them. If you do choose to attempt oversplits, assure your muscles are properly warmed up. Also, check with an instructor who knows you well if they think you are physically prepared to stretch in such an extreme way. After stretching your oversplits, allow time for the muscles and joints to recover. In other terms, don’t go and dance right away as this is when injuries occur.
Alternative Stretches to OversplitsDynamic stretching is really the future of stretching. Giving movements that promote mobility while not compromising the body is the ultimate goal.
The most effective stretching routines should ultimately include both dynamic and static stretches, as both have their own sets of advantages and limitations. While oversplits may be a seductive goal, in truth the biggest increases in overall flexibility and skill will come from a daily reiteration of basic movements and stretches that slowly expand the body’s overall range of motion and increase the body’s comfort within certain positions.
We suggest you check out the Ballet Blog produced by physical therapist, Lisa Howell. She provides many amazing videos on how to work on stretching properly.
Another option would be visiting with a physical therapist who can give you exercises that work with your body specifically. Additionally, a physical therapist will be best equipped to help you determine your inherent range of motion and plan a training routine that is gradual enough to meet your body’s needs.
Dancers typically have a competitive spirit on top of their athleticism, which can lead them to compare themselves to other dancers. As such, when a dancer observes one of their peers doing a move considered to be extreme and highly skillful, such as oversplits, they may feel compelled to try such a move themselves.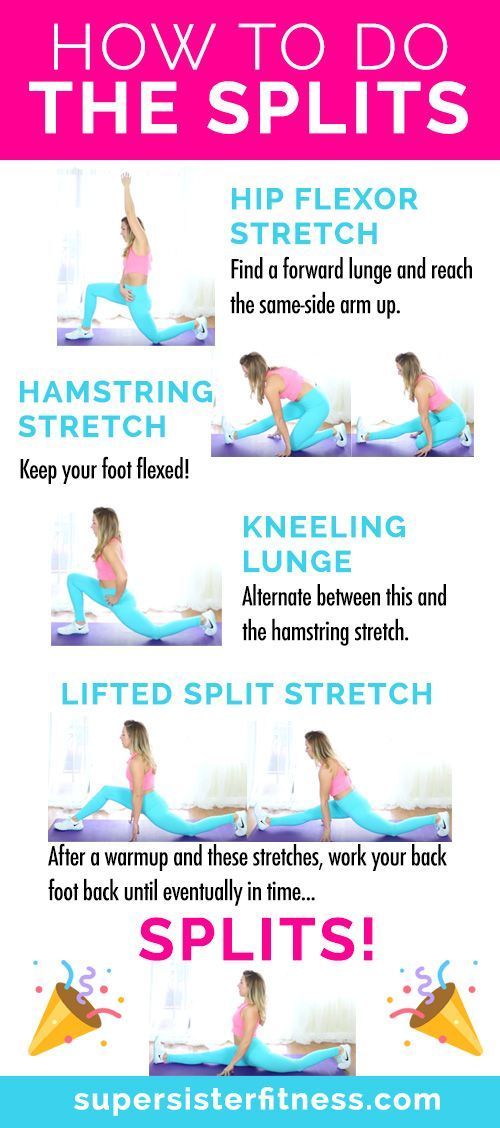
It is important to always keep this competitiveness in check, as every person’s body has individual strengths and limitations, and lasting change does not happen overnight. For those who wish to learn oversplits, the crucial first steps towards this goal are to establish and understand the body’s starting range of motion and to accept that training must be gradual with an emphasis on first solidifying one’s ability to do regular splits.
If you are experiencing pain during a stretch it may be time to dial it back and listen to what your body is telling you. By always prioritizing staying in tune with your body, you will find yourself able to accomplish much more.
5 Tips For Flexibility And The Splits
Whatever your goal is in dancing, flexibility is critical. Without it, you are much more prone to injury. With it, you have more options for anything from cleaner looking lines to dramatic splits. Consider these 5 tips for flexibility and the splits to help you with your goals.
The first thing to keep in mind is that with care and commitment, almost anyone without a medical restriction can become more flexible that they already are. Your goal at the start may not be full splits, but having a bit more stretch than you have now. Just keep in mind, it will not happen by just dancing more. Like most things in life, you have to have a not only a goal and but also a plan.
Advertisement[pro_ad_display_adzone]
1. Plan a specific and regular time to work on your overall flexibility
- Always warm up before stretching or you will risk injury. Ten minutes of light activity is all you need, or you can do your stretches after your dance practice as part of your cool down.
- You can start with simple extensions of every part of your body:
- Roll your neck while you think of stretching it. Do this by moving your head from side to side while drawing a half circle in the air from one shoulder to the other with your nose.
 If you want, you can then go a bit further by thinking of drawing as big a circle as you comfortably can with the top of your head. Just remember to keep the neck extended while doing so.
 - Reach your arms in every direction as far as they will go. Keep your body still and your shoulder blades down, to isolate the stretch in your arms.
- Extend your legs in various directions while sitting on the floor or on a chair. Keep your hips in a square position with your sides at right angles to the ground, and the base of your pelvis flat, not tilted up or back. Alternate between pointing your toes and flexing your ankles.
- Stretch your sides by turning your upper body while your hips remain square and facing front, and your head remains still. Think of pointing one elbow exactly in front of you and the other exactly behind, then switching.
- Try extending your torso by thinking of lengthen your spine by an inch. Do this with your shoulder blades down and your spine flat.
 To make sure that your spine is flat, start by standing with your back against a wall if you need to, making sure that there are little or no spaces between your back and the wall. It is interesting how many people feel awkward with a truly straight spine, so do not be surprised if it takes a while before this feels natural to you.
 - Hold each extended position for at least a minute to start, and increase the time as you can.
2. Try to get those feelings of stretch when you dance, and in your daily life
- The simple stretches noted above should feel great to you, and will make it clear to you how little we actual stretch our bodies in daily life.
- There are several easy stretches that are great. Each of the ones selected are simple enough to do anywhere and can be used as you dance, to enhance your look.
- Consistency in stretching is key. You need to focus time on this at least 10 mins everyday in addition to incorporating your stretching into your daily life.
 Any effort that is inconsistent, will not yield much benefit. Even starting at 5 mins every day is better than 15 mins every once in a while. The more consistent you are, the better you will feel, and the faster your flexibility will build.
3. Once the general stretches are comfortable, you can set a specific goal that is within your reach.
- Do not set you goal nor measure your progress based on what you see in someone else. Everyone is born with slightly different types of flexibility in addition to different levels. As well, just because you are flexible in one area of your body, does not necessarily mean that you will be just as flexible in another.
- If you are not sure where to start for your specific goal, ask your coach what would benefit you the most.
- Many people have goals of greater flexibility in hips and hamstrings to do high kicks, long strides and splits, so we will cover that next.
4. Preparing your body to do the splits.
- Generally speaking, it is easier to start with the kind of splits where one leg is in front of the other as opposed to both legs out at each side. With this, it is best to start with the front splits.
- Only try the side splits when your hip flexors and hamstrings are both extremely flexible and very strong. You will know when you are ready for this when the front splits are very easy for you, no matter which leg is in front.
- Lunges and squats are a great way to start preparing for the front splits and training you to keep your hips square and facing front as you stretch.
- It is also beneficial to stretch the quadriceps. You can do this by pointing your bent knee to the floor and holding your foot behind you.
- When you are ready to get into the split position, lower your body as far as you can without pain, while keeping your legs straight or knees slightly soft (not bent) and your hips facing forward.
- To progress, you need to push to the point of being uncomfortable, but never, ever, ever to the point of pain.
- Hold the position for at least 2 minutes. You might need to work up to this, but the 2 minute point is the point where you will get the most benefit.
- Stay completely still. Never bounce. It will not help you and you may injure yourself.
5. Use it or lose it.
- No matter what level of flexibly you have, you can keep it for a lifetime if you are in good health and you practice your flexibility consistently.
- You can also lose even great flexibility very quickly if you don’t actively do things to maintain it.
- Flexibility truly does protect your health as well as enhance your potential in dancing. With this, it is a good investment of a few minutes of time and effort every day.
Author: Miss P [Celebrate DanceSport]
Photography: Egorich.ca
Exclusively for Dance Comp Review
Twine stretch. Fitness for dancers
Twine is one of the fundamental elements in sports dances, gymnastics and ballet. The ability to sit on the twine clearly indicates a good physical shape: high elasticity of the muscles and mobility of the joints. All types of twine, even relatively simple ones, look impressive.
This fact justifies the interest in them among the townsfolk, who are little familiar with sports. However, this complex exercise should not be an end in itself. The ability to sit on a twine is a consequence of an excellent stretch, which can be achieved with the help of quite affordable, but always regular exercises.
Why sit on the splits?
The need for this exercise in sports, dance and ballet schools is obvious to everyone. But this skill will also help anyone, as a good stretch guarantees grace and smoothness of movement and helps prevent injuries (both sports and quite ordinary). Stretching activates the metabolism. This means that fat burning will occur faster. In addition, stretching (in particular, all types of twine) improves the blood supply to the organs of the genitourinary system and prevents some of their diseases. People who can sit on the twine rarely suffer from varicose veins. And women with mobile hip joints and trained ligaments have an advantage during childbirth.
Contraindications
Twine is an exercise that requires good sports training. There are few contraindications to its implementation, but they still exist.
These include: severe lesions of the musculoskeletal system, bruises, pain in the sacrum and lower back, inflammation of the hip joints, the presence of cracks in the bones and high blood pressure. But even people who do not suffer from these ailments, while stretching, should be careful: you cannot perform the exercise without warming up the muscles and ligaments with a warm-up.
Types of splits
The most common variations of this exercise are the longitudinal and transverse splits.
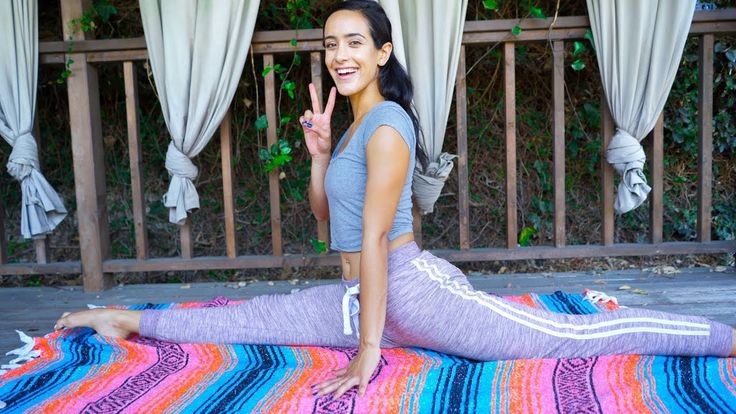
- With the longitudinal legs extended in one line: one - forward, the other - back.
- With the transverse legs spread apart, the pelvis is on the floor surface.
These twines are considered "plain". Other types are available only to professionals. Among them, we can mention the vertical, which is performed while standing and can be both longitudinal and transverse, and twine on the hands (it can also be both transverse and longitudinal).
How long does it take to do the splits?
Numerous articles posted on the net do not give a clear answer to this question. This is not surprising: the speed of mastering twine is determined by natural abilities, health status, physical fitness, age, anatomical features and many other purely individual factors. It is known that twine is given to young athletes easier and faster. But the point here is not only in the mobility of the joints and the elasticity of young muscles, but also in the fact that in the gymnastic sections with pupils they usually do not stand on ceremony. Adults who exercise on their own treat their bodies more humanely. As a result, progress is slower.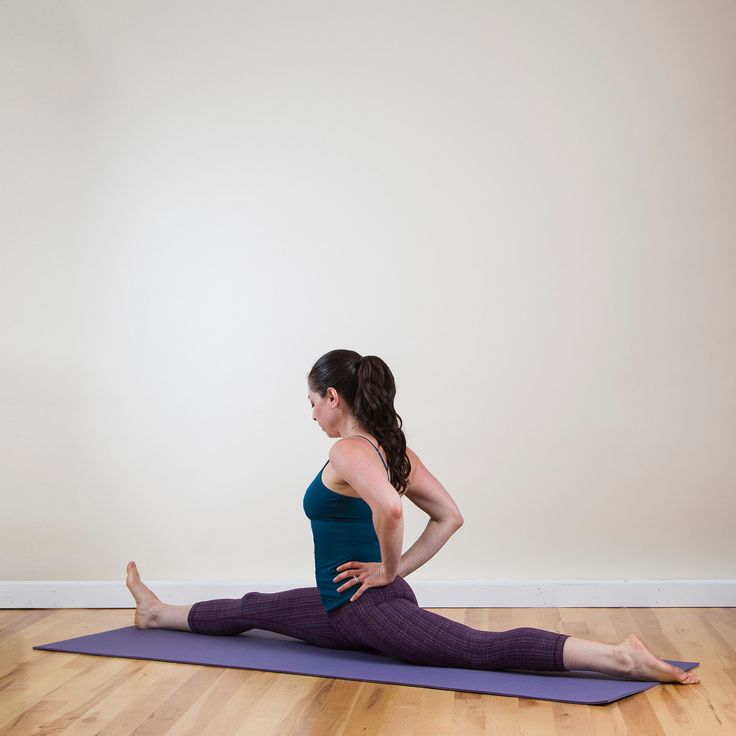 Nevertheless, even in adulthood, a person can master the longitudinal or transverse twine.
Another thing is that some of them will take several weeks, while others - several years.
Precautions
Whatever type of splits you are learning, the key exercise should be preceded by a warm-up. It can be any kind of physical activity: jogging (including on the spot), cycling or a simulator, strength training or a set of cardio exercises.
The meaning of the warm-up is to warm up the muscle fibers. This measure prevents micro-tears in the muscles and prepares the joints for stress. In addition, heated muscles relax faster and easier, and this is important, since only a relaxed muscle can be stretched (and even then not immediately). If time is short, a few simple stretching exercises can be used as a warm-up. You also need to remember that stretching does not tolerate haste. Do not even ask how much your friends sit on the twine, otherwise you will always compare yourself with someone.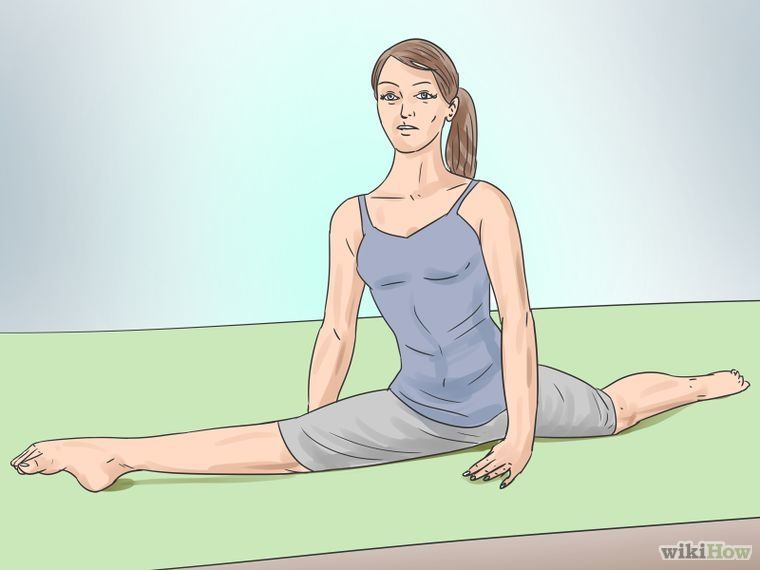
Listen only to your body! All movements must be performed carefully and slowly; in the same position you need to be at least 30 (or better - 60) seconds. Most likely, you will experience pain, but they should be moderate. Sharp pain signals an injury that has occurred. It is incompatible with training.
Twine stretch for beginners (universal muscle stretching exercises)
It is also important to note that the workout should be long enough - at least an hour. But the most important thing is regularity. Success can only be achieved through daily practice. You should start with simple exercises performed in several approaches: swings with a straight leg, squats with legs apart, forward bends with straight legs. The more muscles involved in a workout, the better.
Also recommended are exercises that are performed lying on your back: right angle leg lift, knee bend and chest pull.
Classical exercises are very useful: "paperclip" and "butterfly". In the first case, it is necessary, on your knees, to spread your heels and lean back (ideally, lie on the floor). In the second case, you need to sit on the floor, bring your feet together and spread your knees, and then try to press your knees to the floor. Twine stretching for beginners should consist of relatively simple exercises that do not cause discomfort. The easier they are given to you, the closer you are to the final goal.
Longitudinal split
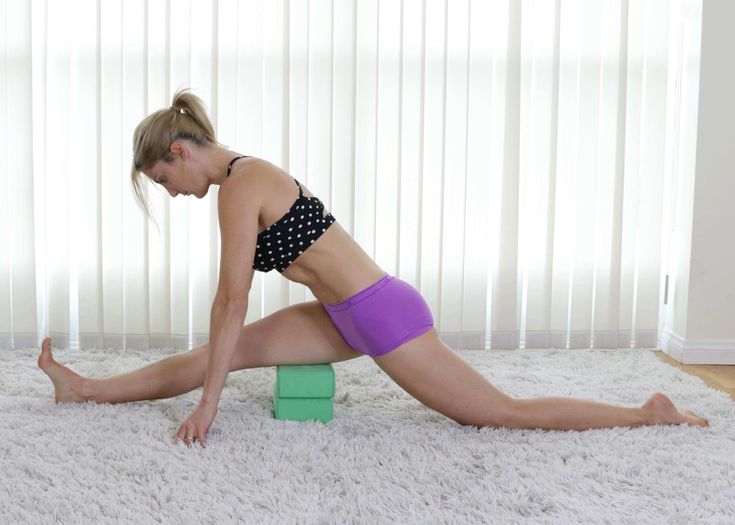
It is believed that learning to perform longitudinal twine is more difficult than transverse, but it is less traumatic. First you need to take the "runner's pose". To do this, one leg is pushed forward (the thigh and lower leg should be at a right angle, and the knee should be directly above the ankle), and the other is set back as far as possible. In this case, you need to stretch the heel of your left foot back, leaning on the toe, as shown in the second photo.
Twine is unlikely to submit to you immediately, so you can put blocks or stacks of books on both sides of the mat and lean on them with your hands.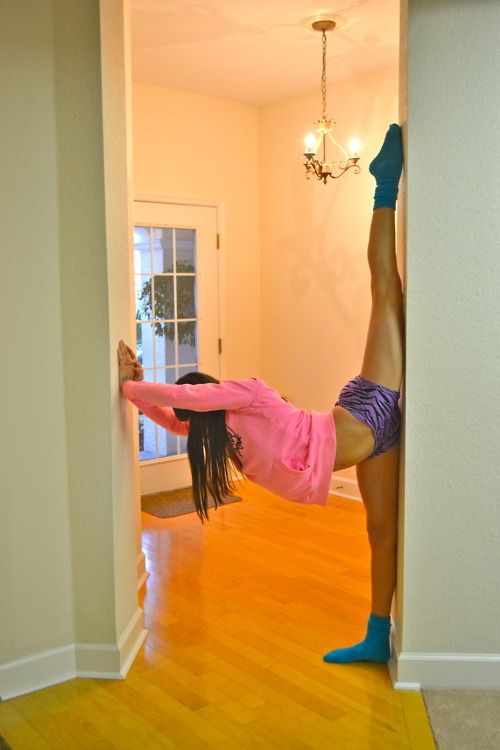 Gradually move the foot of the front foot forward and lower the pelvis down (you can put a few pillows under it. As the stretch improves, you will refuse them). It is important to ensure that the torso is located exactly above the pelvis and does not move forward. You can't hurry. When you reach your limit, try rocking back and forth. Hold this position for a few tens of seconds, then repeat all over again. It will not be superfluous to watch some video twine lessons before starting classes.
Longitudinal twine is a complex gymnastic element that is actively used in yoga, dance, ballet and even Pilates. The exercise maximizes the involvement of the hip joints and leg muscles, especially the inner and back of the thighs. How to sit on a longitudinal twine without pain and injury? To do this, you need to gradually stretch the muscles and develop the mobility of the joints, this is the only way to achieve the desired result with little blood. Of course, you will experience some discomfort, but it is better than walking with torn ligaments and dislocations.
How to sit on the longitudinal split quickly and painlessly?
Follow the golden rules of effective stretching, then training will give you only pleasure and you will be able to count on quick results:
- Any workout should start with a warm-up. Any cardio load can serve as a warm-up for longitudinal twine, but it is better to give preference to a bicycle or a rope.
- If you want to achieve results faster, then train twice a day. Morning stretching is very heavy, but the most effective. In the evening, the muscles are more flexible and supple.
- Try to give preference to static stretching methods, dynamic loading and pulsating movements can lead to sprains and tears.
- Each pose must be held for at least 30 seconds, and only then increase the amplitude or change the exercise.
- Always focus not only on technique, but also on your own feelings. There should be no pain, just a slight tension and a slight burning sensation in the muscles.
- Always watch your back, don't round it. If you are doing bends, then reach for your legs with your stomach, and not with your head.
- As in all sports, the main thing in stretching is regularity! Do not start training and try not to rest for more than two days in a row.
And now let's look at a set of stretching exercises that will bring you closer to the longitudinal twine.
Ballistic lunges
If you are new to stretching, it is best to start with a simple and familiar exercise - classic lunges. In order to sit on the longitudinal twine, this type of training needs to be slightly changed. The load on the muscles should not be dynamic, but static. To do this, you need to fix at the bottom point of the exercise and stay in this position for at least 30-45 seconds. Then you can immediately change the leg. If you perform lunges with dumbbells, then the stretching of the muscles will be stronger and much more effective. You can also significantly increase the amplitude if you perform the exercise on a hill, for example, use a bench or platform. Perform 25-30 repetitions on each leg and move on to the next exercise.
Butterfly Exercise
An excellent exercise for joint flexibility and tendon development. A similar pose is found in the course of yoga and Pilates. This type of stretching will help you master the longitudinal twine much faster.
Technique:
- Sit on the mat with your back straight and your feet together.
- Try to get your knees down on the floor. If you succeeded, then do not waste time and move on to the following types of stretching, but not everyone can boast of such innate joint mobility.
- Slowly press down on your legs with your hands, slowly lowering them down. The main thing here is not to make sudden movements and not to overdo it with the applied effort. Take your time, watch your breathing: at the point of maximum muscle stretch, exhale, and in moments of relaxation, inhale.
Sitting Bends
Mastering the longitudinal split for beginners is a rather painstaking and difficult task, because the muscles adapt to such types of loads for a very long time and are reluctant, especially if you have not had good flexibility since childhood. When doing stretching exercises, always move from simple types of training to more complex and multi-joint ones. Do not forget that you need to stretch all the muscles of the legs separately. For example, tilts from a sitting position work on the inner thighs and adductors.
There are several variations of this exercise:
- One-leg bends. This is an option for beginners. One leg is extended forward, the other is bent at the knee and the foot reaches for the groin. When doing bends, try to stretch your chest to your knee, while keeping your back straight and try not to hunch over.
- Leg extensions. This is a more advanced version of the stretch, it involves the simultaneous study of the posterior and internal bundle of the femoral muscle.
 Try to spread your legs as wide as possible, you can even do the exercise against a wall or with a partner. Then repeat the tilt technique from the previous type of exercise.
Barre stretching
Longitudinal split stretching can be done on the barre. However, any crossbar, fence, high table and even a window sill can easily replace it. The main thing is to have a desire to train!
There are several options for stretching with the machine:
- Inclinations to the "working" leg. Put your foot on the machine or support, try to keep it as straight as possible and be sure to pull the toe. Make a deep bend directly to the leg, you can even wrap your arms around it. At the same time, it is unacceptable to round the back or bend the leg at the knee joint; all phases of the exercise are performed at maximum tension. If you position your "working" leg straight in front of you, then the quadriceps will stretch, and if you slightly to the side, then the inner thighs will take part in the stretch.
- Ballet squats. This exercise requires little experience in stretching and some skill, but it maximizes the load on the adductors. To perform the exercise, fix one leg on the machine and begin to squat slowly. Be sure you will feel how your muscles work and tense. Get as low as you can and pause. After 30-40 seconds, you can climb back.
A Bit of Yoga: Runner's Pose
There are two types of training that are always accompanied by stretching. This is yoga and gymnastics. Longitudinal twine can be very useful when performing complex choreographic exercises and all kinds of asanas. However, some yoga poses can be easily used as stretching training, such as the runner's pose.
Biomechanically, this asana is a bit like a lunge, the difference is only in the placement of the supporting leg. She should be straight, not kneeling. Also, do not forget that this is a static exercise, which means that we simply stand in a pose, while stretching the muscles to the limit, and try to maintain balance as long as possible. It is very important to monitor your breathing here, it should be even and very calm, also try not to twitch or make other sudden movements.
Downward facing dog
We continue to do stretching on the longitudinal twine using yoga exercises. This is an excellent workout for the back of the thigh and buttocks. Your task is to form an absolutely right angle from the body and legs.
It is desirable that the feet remain firmly pressed to the floor, try not to tear off the heels throughout the exercise. This type of stretch can be made slightly dynamic. After you have taken the starting position, start pulling your knees to your chest in turn, this will increase the load on your buttocks.
Hip stretching exercises
If you want to master the right longitudinal split first, you should stretch your right leg more actively. So you will achieve results faster, but your body will be developed disproportionately. It is better to train both parts of the body in equal volume, then you can easily do the splits on each side.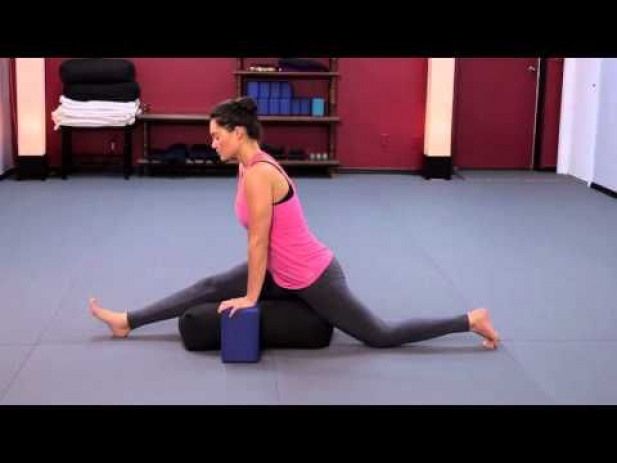 To make the muscles softer and more flexible, you need to knead and stretch them yourself. Some exercises can cause overstrain in the legs, which means that it is imperative to perform a warm-up and self-massage at the end of the session. Lie on the floor and try to relax your legs. Lift one of them up and use your hands to pull it to your chest, while intensively massaging the muscle sections. You should not only stretch, but also relax your muscles as much as possible. After all, if they are excessively reduced, all the exercises in the next lesson will be given with great difficulty and pain.
Muscle readiness test
A set of longitudinal split exercises will help you achieve the desired result in the shortest possible time, but you need to constantly monitor the dynamics of success. To do this, you can use a regular ruler or a stack of several thin books. The second option is much more convenient. Place the stack under you and try to sit on the splits, hold in this position for as long as you can.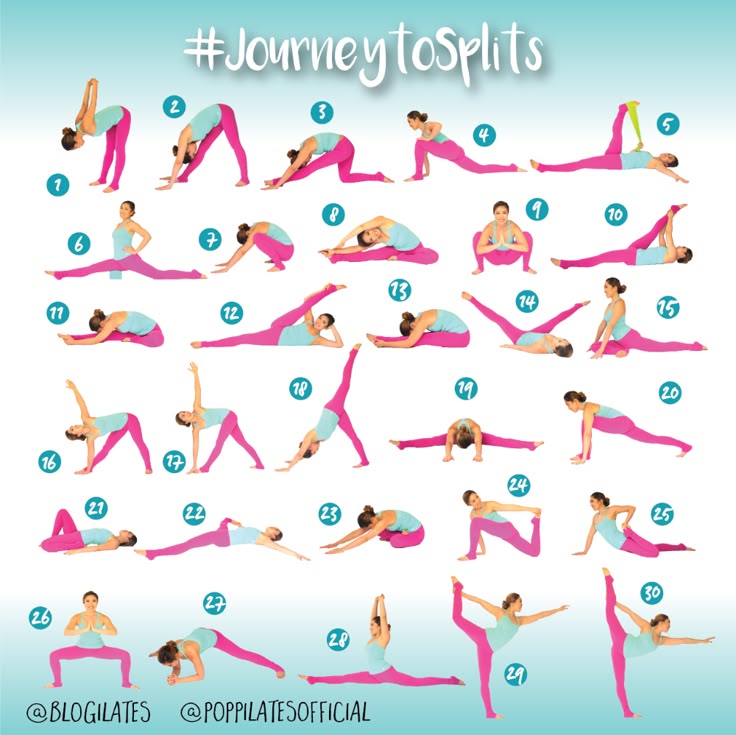 If after a while you feel that you can reduce the distance to the floor, then remove one or more books. Fix again in the starting position. If you feel that you can no longer sit lower, then your muscles and joints are not yet ready. You need to return to training and repeat the test in 2-3 weeks. You will succeed, the main thing is not to rush.
Longitudinal split technique
The most common mistake in longitudinal split is incorrect technique. If you try to sit in a pose without observing all the rules and subtleties, you can seriously harm yourself. To avoid injury, it is necessary to perform the splits on a slippery floor in closed clothes and socks, so nothing will interfere with the exercise. Take an emphasis while sitting and spread your legs, begin to gradually lower yourself down, reducing the distance between the buttocks and the floor. Don't make sudden movements. If the strength of your hands is not enough to support the weight of the whole body, then do the splits using special stands or on low bars. Before the lowest point, linger a little, this will allow the muscles to get used to the unnatural position a little.
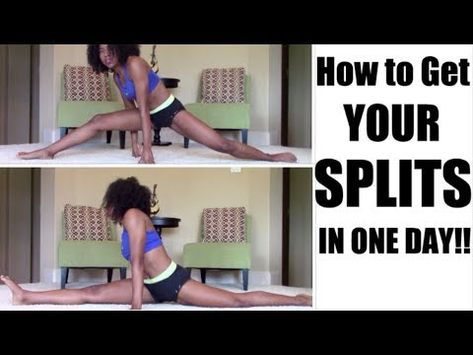
Cross Split
First, spread your legs and do a few forward bends. Try each time to linger in the lower position for a few seconds. Rest your palms on the floor (mat, stack of books, etc.) and begin to slowly and evenly spread your feet to the sides. Bend your elbows and try to lower your chest to the floor. To avoid overstressing the knee ligaments, you need to rest on the floor with your heels, and pull your socks up. Ideally, you should lower your legs, pelvis and stomach to the floor, and then sit up and straighten up. It will likely take you at least a month to master the cross split.
How to sit on the transverse twine correctly?
This type of twine is considered more difficult to perform, many do not have enough willpower to achieve such a result. The main thing here is to set a goal and have the desire to achieve it.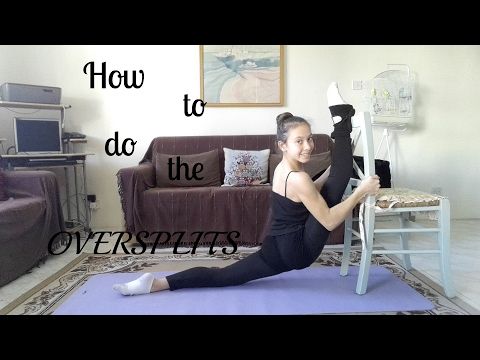
Basic rules on the way to the transverse split
It should be clear to everyone that it will not be possible to sit on the transverse split quickly, so you need to follow a few rules that help you achieve the expected result much faster.
- 1. Muscle stretching. In no case should you do physical exercises without stretching, especially twine. These exercises will warm up the whole body. To do this, it is worth making a few light movements: running in place, tilting the body and swinging the legs to the sides. To get a double benefit, it is recommended to warm up after cardio training.
- 2. Daily workouts. To the question of how to sit on the transverse twine, one answer is regular exercises that can lead to success. It is advisable to do stretching at any free time throughout the day. First, it is worth training every other day, and when the body gets used to the loads - every day.
- 3.
 Clothes. The final result depends on how a person dresses during training. You need to do it only in a warm room, after putting on a loose T-shirt, sweatpants and socks. Just socks allow you to slide on the floor, which has a positive effect on stretching, so it is better to prefer the floor to carpet. Sliding must be controlled, otherwise you can tear the ligaments.
 - 4. Workout for two. To make the classes more interesting, you can attach your friend to this. And a more experienced person will tell you how to keep your posture and perform the correct transverse twine. A friend can press on the shoulders and legs, which helps to deepen the split.
- 5. Don't rush. In everything you need to know the measure, this also applies to stretching the muscles. Too much pressure will lead to injury, after which you will have to abandon any exercise for a long period.
- 6. Environment. You can work on the twine both in a quiet and in a noisy place, it depends on the preferences of the person.
 The setting should be inspiring. Only in a comfortable environment will a person be able to focus on his body and sensations. For example, some people cannot imagine classes without loud music and TV.
Cross Split Exercises
Any workout should start and end with a stretch, especially splits, where the whole load falls on working out the muscles of the legs.
To avoid problems such as torn ligaments and muscle tears, you must first warm up the body. In this case, do not try to do all the exercises at once.
"Wasp"
SP: legs wider than shoulders, toes to the side, deep squat. The feet are pressed to the floor, the hips are parallel to the floor, the knees turn to the sides. In this position, you need to rest your elbows on your knees, while pushing your pelvis forward. This will help stretch your pelvic muscles. This exercise will help you start training and bring you closer to your cherished dream - to sit on a transverse twine.
Side lunges
PI: one leg is extended to the side, the body weight is concentrated on the other (bent leg). The foot is completely placed on the floor, and the thigh is stretched as much as possible. After 30 seconds, the weight of the body is transferred to the second leg. This exercise can be performed a little differently: the foot is not placed completely on the floor, and the leg rests on the inside of the foot, tensing the muscles in the knee joint.
"Frog"
IP: sit on your knees, bars - on the side. The knees are pulled apart and placed on the bars, hands rest on the floor. The angles between the thigh, lower leg and body should be straight. Here you need the help of a friend who sits down from above. Now you need to try to relax all the muscles as much as possible, while the partner will observe the correct position of the pelvis. This exercise is a little painful, because the inguinal part is stretched.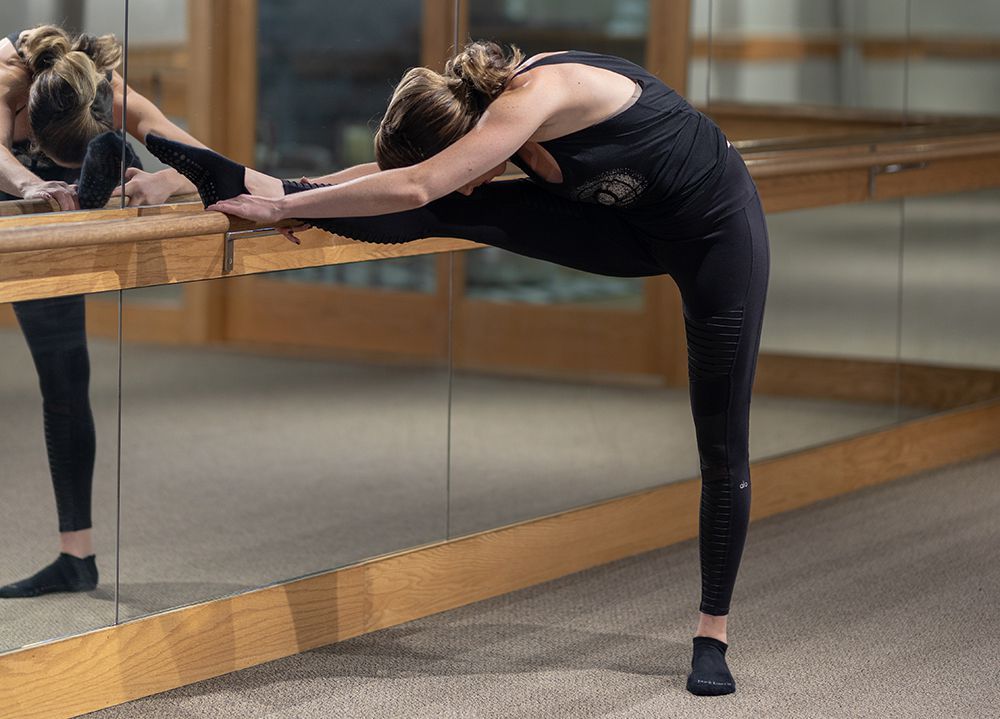 You shouldn't hurry. For those who do not know how to sit on the transverse twine, but really want it, the exercise becomes more complicated. You need to remove the bar under the knee and stretch the leg to the side. The foot is also fully pressed to the floor. Stretch should be at least 3 minutes, changing legs. Next, the second bar is carefully removed and the second leg is extended.
"Butterfly"
IP: sit on the floor, legs bent at the knees, feet connected. The heels are pulled to the body as much as possible, the knees are pressed to the floor with the help of the hands. The back does not bend and is kept straight. Hands are placed in front of the feet and forward bends are made. The back is straight and the knees are fully pressed to the floor. This exercise helps to stretch the inner thigh and increase the flexibility of the groin tendons.
Pancake
IP: sit on the floor, legs straight, spread apart, toes pointing up. Hands are stretched forward, a tilt is made in front of you. You need to try to touch the chest to the floor and stay in this position for a few minutes. With outstretched arms, turns are made to one leg, and then to the second. You need to try to grab your foot with your hands and do 10 tilts in 5 sets. This exercise allows you to effectively stretch the inner and back of the thigh and tendons under the knee and acts as an effective stretch for the transverse split.
Touching the toes
PI: standing, legs straight, feet together. An inclination is made to the floor - one must try to reach out to the toes. The knees should remain straight, and with each tilt, you need to linger in this position for 40 seconds.
This exercise can be done with one leg bent, which has a beneficial effect on the muscles and tendons in the knee area.
Touching the floor with elbows
SP: standing, feet - shoulder width apart. The legs should be straight, and when leaning forward, you should try to reach the floor with your hands. In this position, you should bend as much as possible and put your elbows on the floor. Standing, bends are made to the ankles in turn - you must try to clasp them with your hands. This exercise is one of the most important and is performed before you sit on the twine. You need to do it 10 times in 5 sets.
Warnings for beginners
Never sit on the splits abruptly, this will not lead to good results, but only injure the muscles and ligaments.
Unfortunately, many people do not have a question about how to sit on the transverse twine, because their body structure is not designed for full stretching. In this case, it is physically impossible to sit on a full transverse split, regardless of the number and duration of training.
Tips for beginners
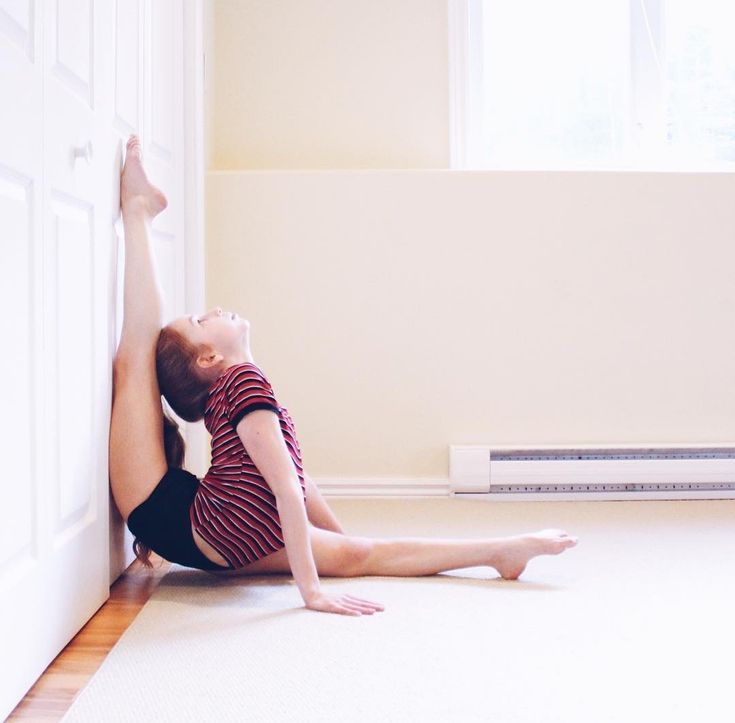
You need to be extremely patient, because you won’t be able to do the splits from the first workout. Sometimes you can achieve the desired result after a few months of intensive training, but not hours. For a change, it is recommended to do the splits against the wall, stretching your legs in front of the wall, as if trying to do a split. It is permissible to perform other exercises only after feeling tension in the muscles of the legs.
Twine for children
Many adults think that children are flexible from birth and do not need training for twine. This is a deep delusion, because the child needs to be trained, taught to sit on him correctly, and stretching on the transverse twine will help with this.
If children are taught to exercise from an early age, they will differ from their peers in plasticity and flexibility. The best time to introduce a child to sports is 5-7 years old, when the muscles are especially elastic. Classes are held regularly, and you need to start with flexibility exercises.
Stretching exercises | Dance school Cosmo Dance
If you want to practice dancing, gymnastics or ballet, you will definitely need the ability to sit on a twine . And many people have a question, where to turn to easily learn how to sit on the splits and get high-quality workouts for stretching , , which will become noticeably more effective in the shortest possible time. Our dance school has extensive experience in this area and will definitely help you.
Why stretch?
A good stretch shows a physical disposition to dance, ballet and gymnastics, and also gives a high elasticity of the body, muscles and their mobility. Even the simplest type of twine impresses with its action, which is why many strive to learn how to do it.
Stretching can be learned by ordinary people who have never been involved in sports. Our dance school will show you that it is possible and in a very short time you will be able to see for yourself and sit on the twine.
In order to sit on the splits , it is necessary to carry out a set of physical exercises, which are not at all complicated in principle. The main factor is the regularity of such actions.
Twine is one of the elements that is trained in sports dances and ballet schools. Good stretching will result in minimal injury, your movements will be smooth and graceful, and you will feel light.
Stretching can improve your metabolism and therefore reduce your weight. Also, twine and stretching contribute to better blood circulation and improve the functioning of the entire genitourinary system. It will be easier for women to give birth on their own, because their joints will be more mobile, and the ligaments will be elastic.
Varieties of twine
An important point that should always be remembered, even by experienced people, to perform stretching should be well warmed up, only in this way you can not damage your ligaments and will feel in great shape.
Among all varieties of twine, there are:
- longitudinal;
- transverse.
Longitudinal is a stretch for the legs when the legs are extended in one line, that is, one leg tends forward and the other back. With the transverse, the pelvis is located on the surface of the floor, and the legs are spread apart in different directions. These types are the simplest and almost everyone can master them with the help of our specialists.
In addition to them, there are also vertical splits and splits on the hands. These species are already professional species. These views can also be both longitudinal and transverse
The time it takes you to do the splits with the help of our professionals
Each organism has its own characteristics, which it received from nature. Therefore, the time during which you can sit on the twine can vary significantly for each individual person. Also important is the physical fitness of a person, his state of health, age and other individual characteristics.
Young athletes and young athletes learn this type of stretching faster, but this is achieved not only due to age, but more because of the pressure of the coach. In old age, you can also learn to sit on the twine. People at this age are more sensitive and treat their body better, they listen to it, so this period may take them longer.
Therefore, the total time that may be needed is from a few weeks to several years.
What you need to remember
It is important to remember that no matter what kind of twine you comprehend, you need to warm up and warm up the muscles, so you do not damage them. As a warm-up, there can be jogging, cycling, various sets of exercises.
When the muscle fibers are warmed up, they are more stretchable and more elastic. You can say that you are preparing them and warning that there will soon be a certain load. With warm muscles, work is easier, they relax better. When doing stretching take your time and try to complete this exercise for beginners as quickly as possible. Do not compare yourself with your acquaintances or friends.
You only need to listen to your body, especially if you are a beginner , and do everything individually.