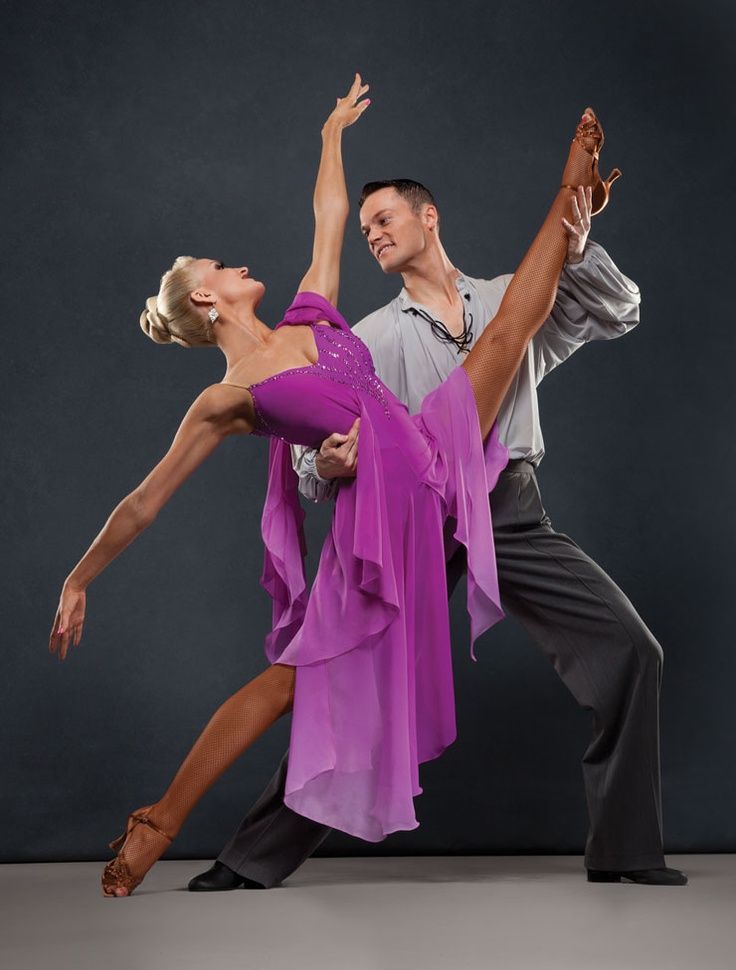
How to do the leg kick dance
5 Exercises Injury Free Exercises for Dancers
It’s the worst right? Your season is starting, everyone is healthy and young (don’t we all feel younger at the beginning of our season?) your dancers are throwing their kicks, things are snappy, things are sharp and before you know it, things are not ok.
With most dancers, there’s typically two ways they manage to get their kicks where coaches want them.
1. The naturally flexible and mobile dancers simply snap their leg up toward their face just because they can. They grip in the hip and lift.
2. The not so flexible dancers ?snap their legs up with sheer force and momentum until their leg gets near-ish their face. Usually gripping in the quad and sinking in the back.
Neither is a good option and both will lead to injury.
The goal is to get both types of dancers to improve their dance technique while preventing injury by doing the following:
1. Understand which muscles MOVE the leg and strengthen those muscles.
2. Continue to use those muscles even when tired.
3. Avoid injuries in the hips and back because the leg can move freely but with control
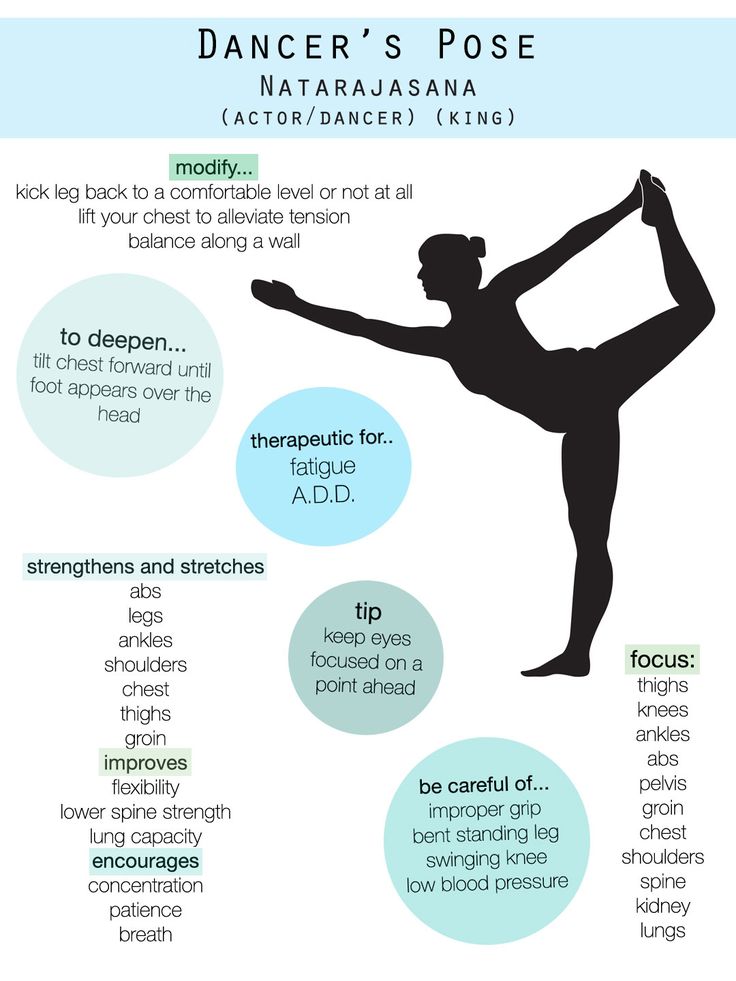
The main muscles responsible for lifting your leg front and side are:
– Psoas
– Quadriceps
– Outer hips
These muscles work best when we stabilize the hip with the:
– Hip rotators
– Inner thigh muscles (adductors)
– Deep abdominal muscles
If the glutes, hamstrings and low back have to act as stabilizers, it leads to gripping and they can’t move freely.
Below you’ll find 5 of my favorite exercises to help your dancers do just that!
These exercises will reduce gripping in the hips, lengthen the hip flexors, strengthen the glutes and overall create more power in their kicks with correct activation and alignment.
Keep your dancer’s hips and backs healthy this season by using these exercises in your dynamic warm up or create a small circuit after you stretch.
Do each exercise 15 – 20 times 2 – 4 times through:
Hover Fire Hydrants With Band On Ankles
STEPS:
• With a band around your ankles, start with your hands below your shoulders and knees below your hips. Push your hands in to the floor until your knees are 2 inches above the ground.
• Slowly lift one leg out to the side while keeping your hips faced toward the ground. Repeat other side
Adductor Slide
STEPS:
• Starting high on your knees, extend one leg out from your hip.
• Using a towel or slider, slide the extended leg away from your body.
• Slowly draw your hips back over your knee.
Dead Bug
STEPS:
•Begin laying on your back with hands gently pressing rib cage down and knees tucked in toward chest.
•Leaving rib cage down and low back glued to the floor, extend one leg out about 3 inches from the floor
•Extend the opposite arm above your head toward the back wall
•With the other hand, press against the thigh of the bent leg.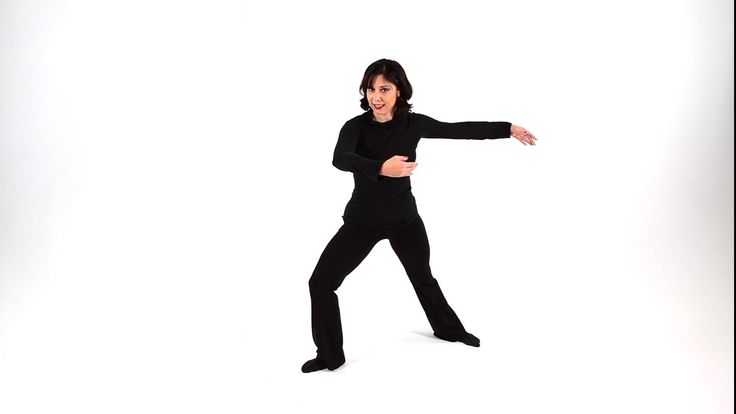
•Hold for a breath.
•Switch legs and hands.
Psoas March
STEPS:
Lying on your back, lift one leg 4-6 inches off the ground.
Hinging at the hip, draw your knee up towards your chest creating a 90 degree bend in your knee.
Straighten your leg, still hovering 4-6 inches off the ground.
Hip Flexor Stretch
STEPS:
• Starting on your knees, step one foot forward into a lunge
• Raise your opposite arm above your head and rotate your hips sitting deeper into the lunge.
• Hold for 30 seconds and repeat on the opposite side
Once you’re kicking with ease, try turning with consistency. Grab your FREE CONSISTENT TURNS training plan here: https://forms.aweber.com/form/42/573432342.htm
Teaching & Developing High Kick Technique — SHOWMAKERS OF AMERICA
Audiences truly appreciate viewing a well-crafted high kick routine with skilled kickers performing. And there is nothing better than a routine centered on intricate kick sequences, show-stopping synchronization with solid jazz technique incorporated into the visuals. When I was director/choreographer of the Texas State University Strutters, I often would end their routine by having the team execute a traveling airborne split leap (connected) and landing in a perfect split. This was their signature trademark, and at the time it was always a big crowd-pleaser. A lot of hard work goes into training and perfecting high kicks. It is important to ensure dancers are not only “powering up” their kicks and “whipping” their legs down in sync, but also safely using the correct muscles to sustain them through physically demanding rehearsals and performances.
By increasing flexibility and technique, both will give individuals the solid foundation needed to integrate with the team and to become an accomplished kicker. To be able to kick without pressing down on the teammate next to them, it is most important for the dancer to maintain a strong core by incorporating planks, sit-ups, (even Pilates) into their workout. Begin students on a training program that will enable them to develop muscular strength, endurance and develop core strength and flexibility. By doing so, individuals will have far less injuries and will develop enough strength to perform advanced skills and high kicks. Teach students proper stretch technique to include static stretching of the hamstrings, quadriceps, hip flexors, calves, low back and groin muscles. Static stretching helps loosen muscles, removes lactic acid, and prevents the muscle tissues from healing at a shorter length after a heavy workout. Incorporate squats, lunges, and push-ups to help build core strength. This program is necessary for the development of skills, kick combinations, and for attaining height goals. As the core strengthens, your dancers will find it easier to perform their skills. You will also notice improved posture, a stronger back, and overall sense of muscle support.
Finally, I recommend a new training method (Water Pilates) that is sure to assist in your teams’ desire to become accomplished kickers. As a dancer and coach, I have taken this technique to a higher level by incorporating the Pilates method of conditioning in the water, and included dance technique into the training regime.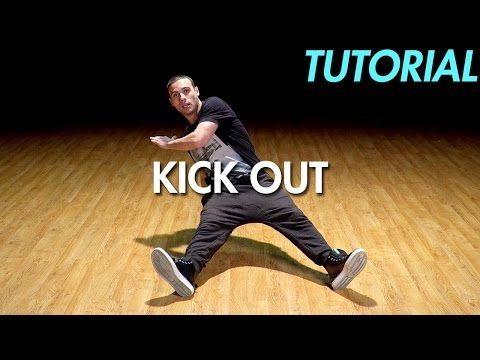 When coaching precision dancers and dance teams, I have found this method most effective in developing precise placement of movement and body alignment concepts. As a coach, you must decide if you are willing to commit to the time that is necessary to develop your teams’ strength, flexibility, technique, and endurance. Many of today’s students do not possess the work ethic to train on their own.
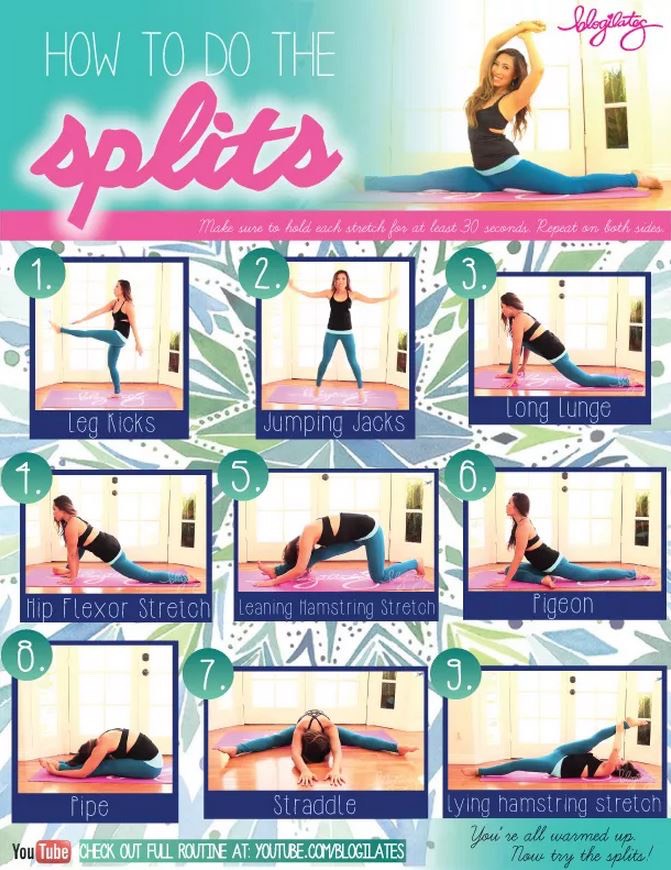
Why Stretch?
Stretching improves physical efficiency, postural alignment, increases ones’ range of motion, and promotes endurance and healthy joints. Stretching hamstrings, quadriceps, hip flexors and low back muscles regularly, enhances relaxation in the tissues thus reducing the strain on one’s back. Dynamic warm-up exercises (before stretching) loosen tendons, increase blood circulation, and help prevent injuries during workouts or any activity. ALWAYS warm-up muscles before stretching (never stretch cold muscles). Muscles need a certain amount of oxygen before they will accept an appropriate stretch. Cool-down stretching helps relieve muscle soreness and tightness. Be sure to teach ALL stretches correctly as to prevent injury. The core is an area of the body that if well-conditioned, will make your dancers stronger athletes. When teaching proper high kick technique, many think that working the hamstrings are the most important muscle to condition, but in reality, your leg is pushed by the hamstring, pulled by the quads and held up there by your abdominals and gluts. All of those muscles need to be conditioned in sync. It is VERY important to incorporate a good stretch routine into your program. Note: If you are not familiar with proper core training technique, see your school athletic trainer for help.
Before Stretching:
It is very important to warm up the muscles and joints through dynamic warm-ups. Stretching cold, tight muscles can lead to injury, so have your dancers first perform some gentle joint rotation exercises and an easy aerobic exercise. Warm-up stretching exercises loosen tendons, increase blood circulation, and help prevent injuries during workouts or any activity.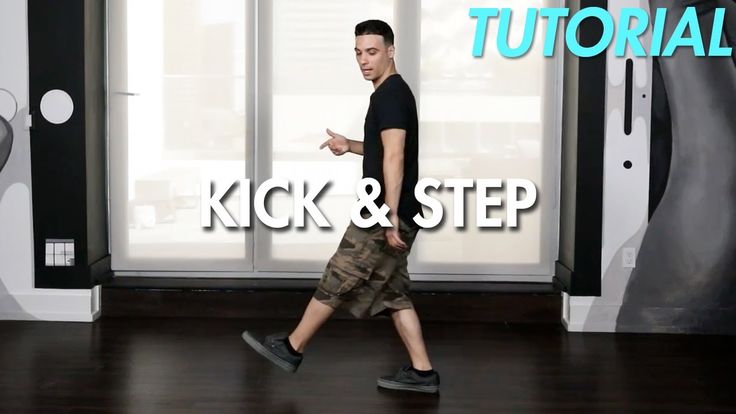 ALWAYS warm up their muscles before they stretch! Joint rotations are done by working head to toe using small, slow circles (clockwise and counterclockwise) at every joint until they all move smoothly and easily. You can also have the dancers execute some jumping jacks to raise their core temperature and increase circulation before they stretch.
Example: I recommend easing into stretching with this safety-first routine. Personalize it with movement, music, and stretches that your students enjoy.
5 to 10 minutes of warm-up to raise core temperature (try jumping jacks or jogging around the studio/gym). Students should be sweaty but not tired.
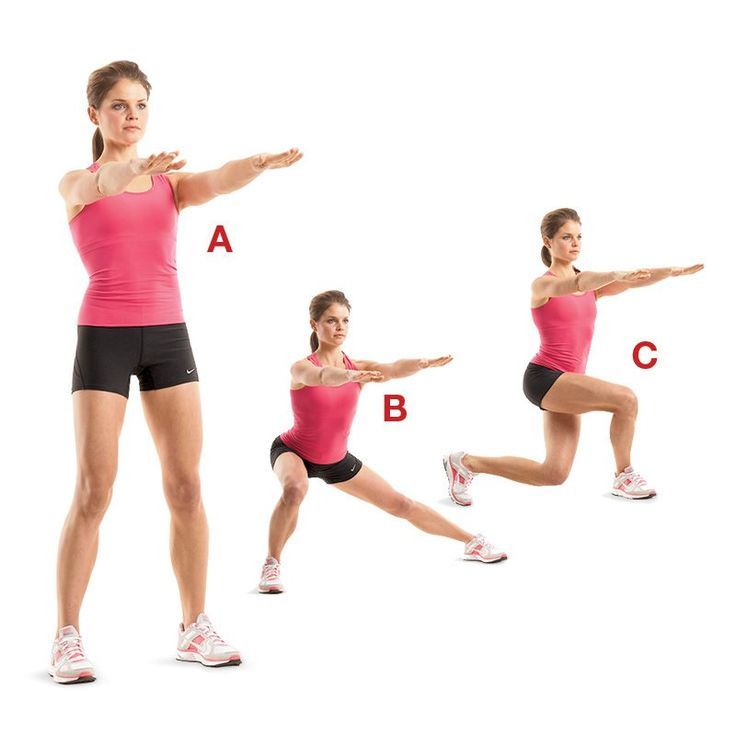
5 to 8 minutes of general dynamic stretching (leg swings, walking lunges, etc.).
3 to 5 minutes of dance-specific stretching of the dancers’ choice, including static stretches held for up to 15 seconds.
Do Not Overstretch
If muscles start to quiver at any point during stretching, back off a little. Quivering means the muscles are being overworked. Overstretching can involve muscles, joints or both. It occurs when the muscle or joint is pushed well beyond its normal limits. Muscles that are overstretched will appear lax instead of toned and can cause instability issues within a joint, creating problems ranging from microscopic tears in the tissues to full tears of muscles, tendons or ligaments. Joints are also more likely to become hyperextended. Do not allow your students to overstretch! To develop long-term improvements in flexibility, stretch every other day for at least six weeks. Keep in mind that when you stop using or stretching this new flexibility, you are likely to lose the gains you made. Incorporate balanced stretches into your routine is a must. For dancers who want to kick higher, it is not only important to stretch hamstrings, but equally important to stretch muscles like the hip flexor and quads. Finally, help students seek a balance between strength, stability and flexibility.
 If you notice that a dancer is extremely flexible by nature, still have them stretch, but also add in strengthening exercises to help maintain their muscle stability.
Warm Up/ Cool Down
Preventing Soreness: Although it is just as important as warming up, cooling down often gets overlooked. Including dynamic warm-ups is critical for warming up and cooling down. Before your group begins running or stretching, do a few gentle exercises to bring oxygen and blood to their muscles and joints (a few jumping jacks and gentle jogging very slowly before they increase their pace). If running, do not allow your students to stop their run abruptly. Spend the last 3 to 5 minutes backing off the pace until they are walking. A cool down stretch flushes out lactic acid and helps prevent soreness. If you need your team to be at their best and over the soreness, consider an ice bath.
WORKOUT TIPS
While on a core training program, work on good form and proper technique.
 Technique must be developed first! Height will develop after good habits are instilled.
POOR HABITS DIE HARD! It is important to begin teaching proper form, carriage, footwork, leg alignment, and landings before executing precision kicks.
►Determine the proper alignment and style of the kick that your team will be trained in.
Example: Straight leg alignment (natural extension: brush the leg up from a tendu, to a dégagé, to a full grand battement in NATURAL leg alignment coming towards your shoulder) or kicks out of alignment and aimed at the nose.
The student must be familiar with all details of kick technique to become an accomplished kicker.
Directors/officers should always detail and demonstrate to a beginner prior to a trial run-through.
Create various kick technique exercises and teach them to the group. Incorporate the exercises into the daily workout.
Teach your team or pre-drill class a technique/control routine.
 Leg control and proper extension is a must! This will also help in muscle development and strength. Create an exercise that requires extension from knee to toe, from a parallel level, hold, then slowly lower to parallel first.
Example: Passé rt. forward on (1), extend rt. forward on (2), hold (3-4), slowly lower to parallel first (5-8). Reverse and repeat on left. You can increase repetitions as the student begins to develop muscle control. Put together a complete technique warm-up routine.
Kick Drills Across the Floor
Incorporate kick drills into your daily workout to ensure development in technique, strength, alignment, and precision. These drills will help them achieve their goals if they remain focused on executing all parts of the drill correctly.
Walk Kicks: Include detail of “foot articulation” in the transitional movement and encourage them to be mindful of working on the footwork.
 Always remind your team to point and stretch their feet the second their foot leaves the ground. Step forward on left in turnout (ct. 1), swing kick R leg forward (ct. 2), walk forward in turnout R, L, R (cts. 3-5), kick L forward (ct. 6), walk forward in turnout L, R (cts. 7-8) Repeat. *Make sure heel remains down while kicking, bring the leg to the upper torso (do not allow the back to bend). Keep ribcage lifted, arms straight (and barely touch hookups), focus up. Do not let the head hunch or meet the kick! Make sure your team is working together to keep lines straight! Kick line precision MUST be mastered in the beginning!
Power Kicks: This particular drill will assist in developing timing and whipping down recoveries. Chassé forward on L (1&2), swing kick R forward (ct.3), whip leg down and touch point (ct. 4), repeat same down the floor working R leg, then work L on return. *Make sure your team is working together to keep lines straight! Train them to “power up” and power down” the leg.
 This will assist with timing. Again…kick line precision is a MUST!
Fan Drills: as with walk kicks, include detail of “foot articulation” in the transitional movement and encourage them to be mindful of working on the footwork. This drill will assist with developing the complete rotation of the fan kick. I trained my team to “power up” the first kick of the fan and allow it to carry the rotation…I’ve found the technique to be an effective teaching tool. Step L to L in turnout (ct. 1), power fan R to R (from the L) (ct. 2), walk in turn out to the R front diagonal R, L, R (cts. 3-5), fan L to L (ct. 6), walk in turnout to L front diagonal L, R, L (cts. 7-1) Repeat. *Make sure your team is working to keep their line straight, focus up and back straight.
How often do you notice that your students do NOT point their feet? And do you wonder why telling them to do so, doesn’t always work? Training your team to develop strength in their feet and ankles should start when you pull the new team together at training camp. When I directed the Texas State Strutters, drills were incorporated into their workout to develop clean transitional movement by articulating the feet. Articulation of the foot has to be over emphasized in order for it to be an “automatic response” when moving (and to develop muscle memory). This is one of the most difficult exercises for students to connect with movement, AND it takes time to achieve this technique. The end result…pointed feet!
Building the Foundation
Preparatory connecting steps require precision in order to appear smooth and ensure that what follows works well for the performers (and is visually pleasing to any audience). Teach common transitions and incorporate the basic movement fundamentals into your warm-up exercises and across-the-floor combinations. These fundamental footwork elements can be developed and perfected if they are worked on daily. (In an ideal world, it would be terrific to start practices with technique exercises every day.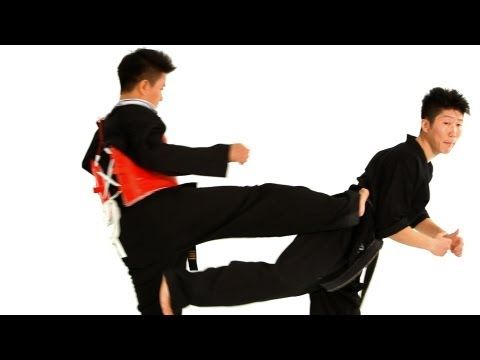 Unfortunately, most teams are on a “time crunch”.) Be sure to alternate between those emphasizing quick movement patterns and exercises that use the floor’s resistance to articulate the feet. (I have used this phrase often with my team to emphasize the importance of footwork.) Teaching combinations as a series of understandable units or relating them to everyday motions like walking, will enable your students to progress to the finished movement.
Improving High Kick Foot Points
Incorporate kick drills into your daily workout to ensure development in technique, strength, alignment, and precision. These drills will help them achieve their goals if they remain focused on executing all parts of the drill correctly. Include detail of “foot articulation” in the transitional movement and encourage them to be mindful of working the footwork. And always remind your team to point and stretch their feet the second their foot leaves the ground. Emphasizing the importance of clean transitional movement, will become an “automatic response” when moving. If you follow these teaching techniques, your students are sure to develop the quality and artistry of each transitional movement.
Work Your Feet Through Transitions
For the most part, dancers are trained to point their feet and turn out when executing an extension, pirouette or any position where the foot is off the floor. But many times, I find dancers are not paying enough attention to their feet when they are actually on the floor. For instance, when stepping out of an extension or battement, the foot or leg should be turned out as it is placed back on the floor. This attention to detail during transitional movement is the true mark of a dancer who is aware of her technique. Feet are like hands in their expressive capability, but they are not often used to their full potential. ALWAYS train your dancers to “articulate” their feet and show expression through transitional movement.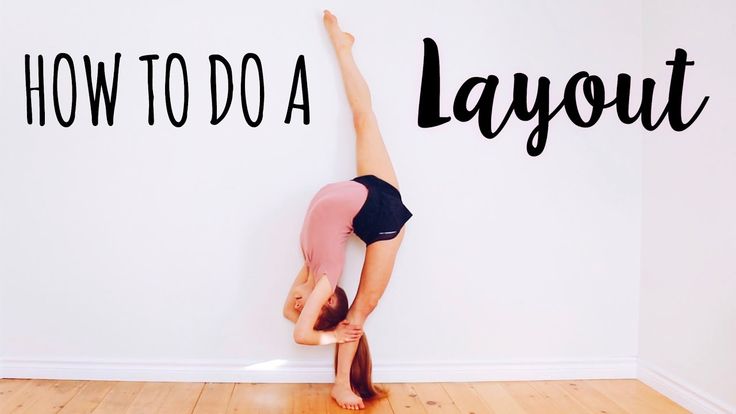
Strengthening
There are a variety of exercises to help strengthen ankles including rising to the balls of the feet to drawing each letter of the alphabet with pointed feet. Your students need to develop an understanding of what they need to feel and accomplish while executing ALL strengthening exercises.
In closing, it is imperative that your team develop muscle memory through the development of articulating their feet through combinations across the floor and transitional movement. Articulation of the foot has to be over emphasized in order for it to be an “automatic response” when moving (and to develop muscle memory). This is one of the most difficult exercises for students to connect with movement, AND it takes time to achieve this technique. The end result…pointed feet!
WHAT TO LOOK FOR & CORRECT
Posture/Bending backs – Must have good body alignment (vertical back), shoulders down, ribcage lifted, focus up, and tighten abdominals.
 Hips should remain square to the front. A strong tight core will aid in keeping backs straight while kicking (tightening the core needs to be an automatic response)
Lack of spring on a jump kick
Leg alignment *Determine placement
Developpé kicks *Legs should be straight
Foot turnout on kick *Entire foot should be straight
Lifting hip / leaning & sitting into kicks *Hips remain squared front (not rotated)
Shoulders lifting
Pulling & bending arms while kicking *Arms should be straight with no pressure placed on connections
Hands spread on hook-up *Fingers should be closed
Over jumping
Dropping kick past proper placement during transition
Timing (power up & power down)
Keeping heel down on swing kicks
Recoveries and “finish-off” *Whip leg down for timing and determine recovery position
Preps prior to kick (feet together, then kick)
Line whipping
Bent legs and flexed feet *Legs must be straight
Lunge kicks
Endurance * Incorporate a cardiovascular program to help promote cardio-respiratory endurance, muscular strength, and flexibility.

Straight backs / lifted rib cage
Head hunching *Head should not meet leg…leg comes to you!
Kick line precision (keeping line straight while kicking and moving)
Clean foot articulation! Always remind your dancers to point and stretch their feet the second their foot leaves the ground.
Remember…bring the leg to YOU, do not meet the kick by bending to it.
"Kick" - an element of dance
Name:
Kick (English) - push, kick, kick.
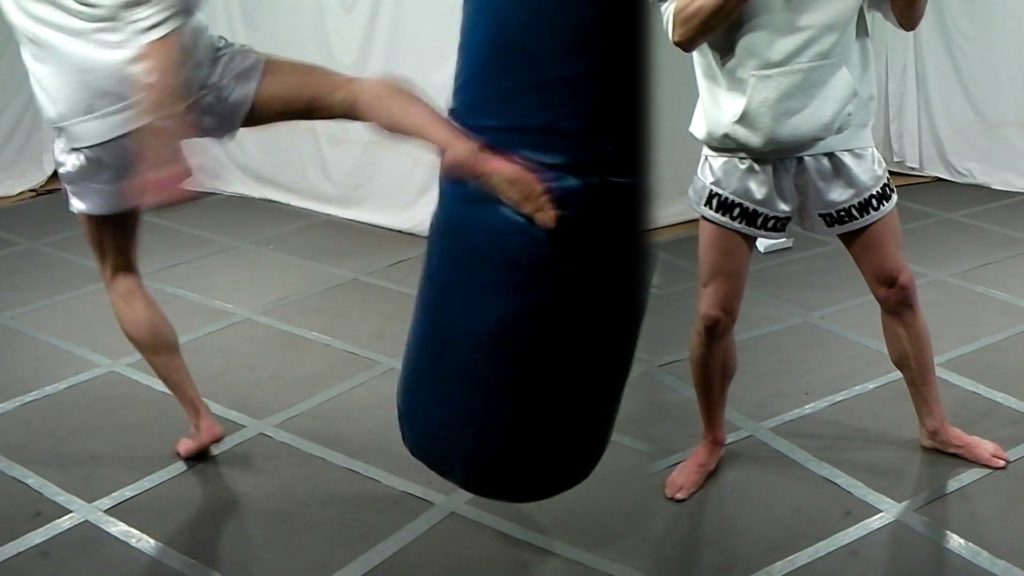
The dance movement "Kick" is an accentuated sharp and quick throw of the leg from the knee (shin swing), with leg straightening. (The movement resembles kicking a ball.)
The "Kick" movement is not only a sharp throw of the lower leg from a bent knee, but also a sharp return movement of the leg towards you.
"Kick" can be done forward, sideways, back.
Music
Time signature 2/4.
Score: I-1-I-2
Preparatory exercise:
Leg raise/up with bent knee
Starting position
The dancers stand in lines.
Legs - in 1 pos.
Hands on the belt.
| Account | Movement description |
| 1 | Bending the right leg at the knee, lift the thigh of the right leg up almost parallel to the floor, (the knee of the right leg rises forward/up). The foot of the right leg with a drawn toe slides along the lower leg of the supporting left leg and is pressed against the knee of the left leg. |
| 2 | Lower the right leg, put it in the starting position. |
The same - with the left foot.
"Kick" with the right foot forward
Starting position
The dancers stand in lines.
Legs - in 1 pos.
Hands on the belt.
| Account | Movement description | |
| Start-up (I) | Bending the right leg at the knee, lift the thigh of the right leg up almost parallel to the floor, (the knee of the right leg rises forward/up). The foot of the right leg with a pulled toe slides up along the lower leg of the supporting left leg and is pressed against the knee of the left leg. The foot of the right leg with a pulled toe slides up along the lower leg of the supporting left leg and is pressed against the knee of the left leg. | |
| 1 | With a quick and sharp movement with a slight throw, extend the right leg (straighten the knee of the right leg) forward / down and slightly crossed in front of the supporting left leg, the toe of the right leg is pulled. The distance between the floor and the toe of the right foot is approximately 15 cm. | Again sharply bend the right leg at the knee, lifting the thigh up (knee of the right leg - forward/up). The foot of the right leg with the toe extended is pressed against the knee of the left leg. |
| 2 | Bring the right foot to the left foot in the starting position. |
"Kick" with the left foot forward, as well as "Kiki" to the side and back are performed similarly.
Video for the dance element "Kick"
The dance element "Kick" is demonstrated by KONDRATENKO G.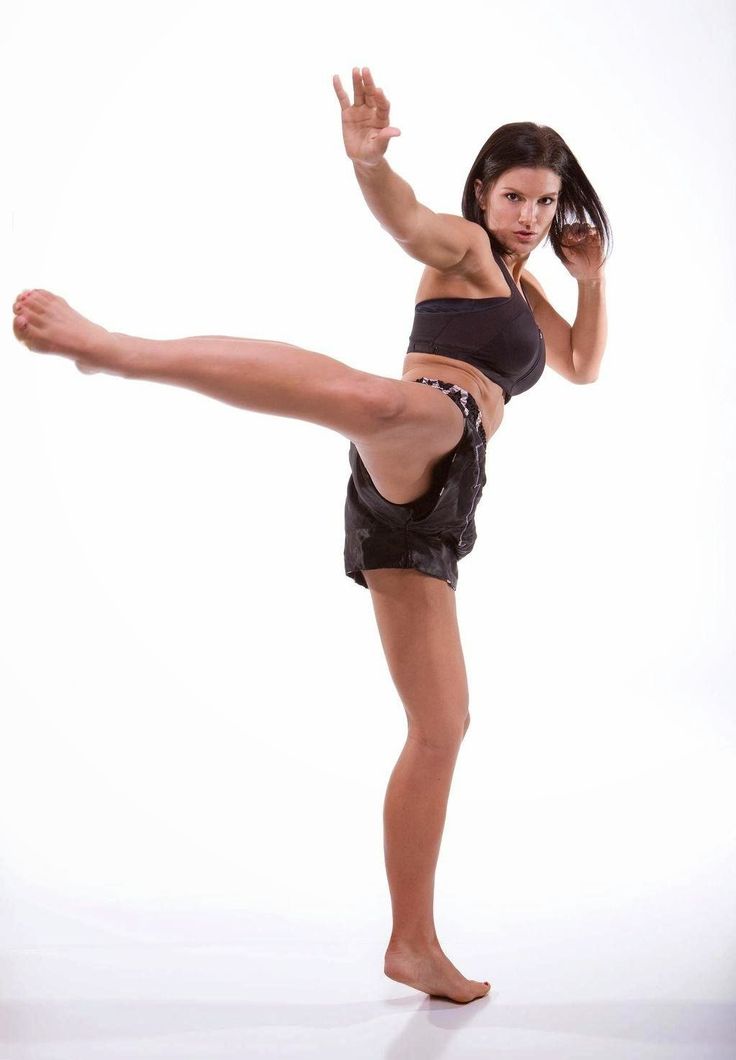 M. - Head of the City Methodological Association (GMO) of ballroom dance teachers at the St. Petersburg City Palace of Youth Creativity. The recording was made at the Dance Seminars - Workshops of the UNESCO International Dance Council in St. Petersburg, 2014-2015 academic year. PAVLOV V.G. Club "Phoenix" DKiT them. I.I. Gaza (St. Petersburg), Fellow and Examiner of the International Union of Dance Teachers (IDTA).
The video was made at the Advanced Training Courses for Ballroom Dance Teachers held by MAUT.
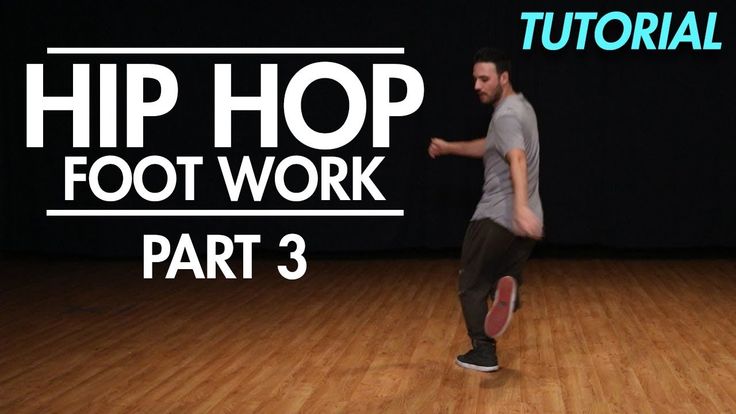
Basic elements in Hip-Hop (practice)
Exemplary team Dance and sports club AJAX #RedPAntherscrew
Basic elements in Hip-Hop style
2 Learning the basics 9.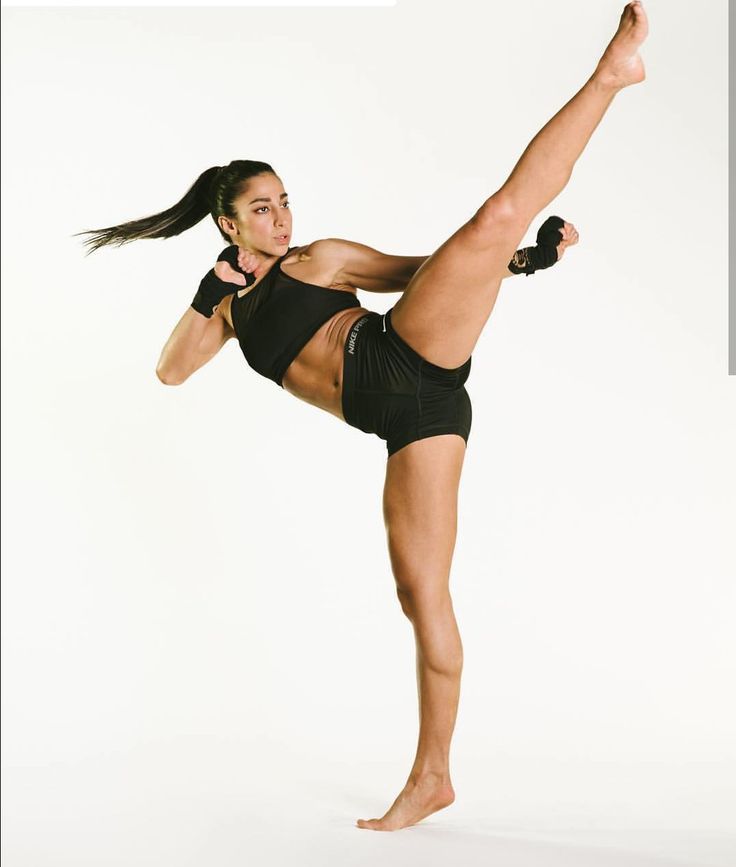 16 initial movements
 Each dance is based on the basic elements on which it is built. Same goes for Hip-Hop
After the student has caught the approximate nature of the movements and understood what he is moving and how, we begin to acquaint him with the base.
Important. The second and third stages take place simultaneously.
We take 2-3 new movements at each lesson. We disassemble. Adding hands.
At the end - freestyle, to secure all the material.
In this way, we repeat and consolidate the old material and impose new material on it, which allows the student to accumulate knowledge, and not learn new things every time and forget. Every student must know the basics.
Here are 16 basic moves and their variations that can be combined:
1.Steve Martin 2.Running man 3.Kick 4.Roger Rabbit 5.Alf (March Step) 6.Kriss Kross 7.ShamRock 8.PartyDuke 9. Monestery 10.Bart Simpson 11.Bobby Brown
12.Happy Feet 13.Sponge Bob 14.PartyMachine 15.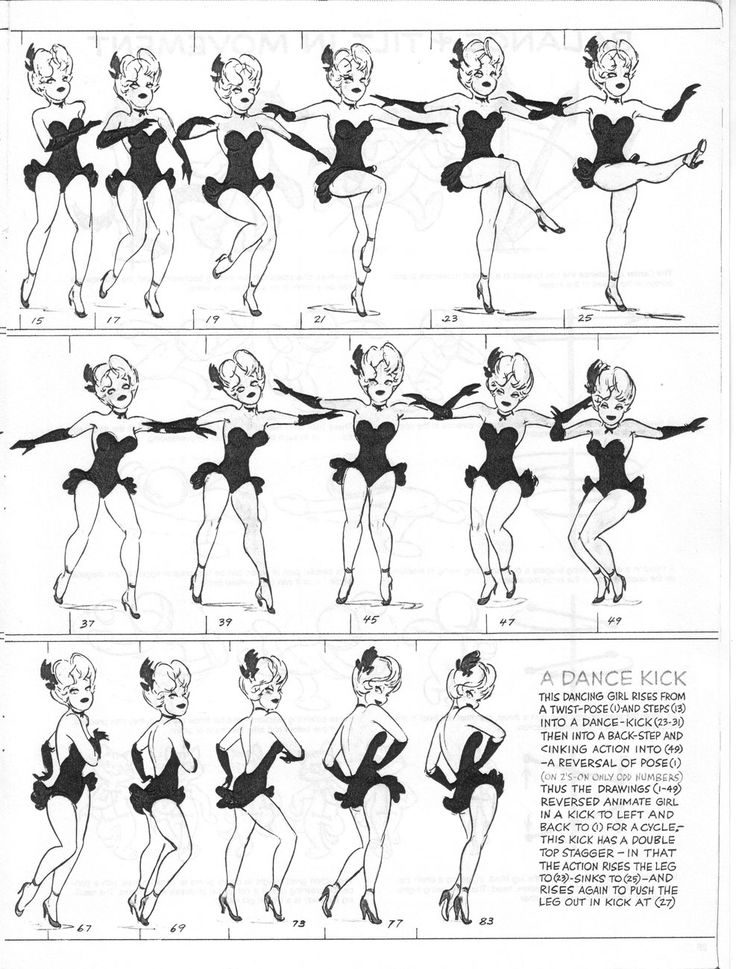 Atl Stomp 16. Reebok
Basic hip-hop elements
Old school (1979 – 1990) Basic hip-hop elements of the old schools
- Basic Bounce Combo
- Two step - two steps or step, prefix. The simplest movement found in many hip-hop dances. "One" - a step towards the launch vehicle. "Two" - the second leg is substituted for the PH. The movement is repeated on the other leg. Step stand to the side, forward, diagonally, loop back.
- Step slide, slide step , Glide , Circle Glide / Turn Glide Combination with kick - kick - raise the knee - stand with a body turn. Mandatory accented pumping. We raise the knee and rebound back, without swinging, lifting the leg from the calf muscle.
- Criss cross step on the rise with a jump, cross - initial, add lower back on the sides, knees bent. Add diaphragm and uncomplicated hands.
 Do not strain your neck and back!
 - Criss Cross variations
- Humpty Dance In this dance, the “Kach” of the pelvic girdle becomes the main one. The dance is performed in the second wide position and the knees must always be bent. Starting position II free position of the legs. "And Raz" - Chris Cross. "I" - the pelvic part of the legs is retracted slightly back. "Two" - So with an accent moves forward. "And Three", "And Four" - "And Two" is repeated. You can add hands, as in the video below, or come up with something of your own.
- Kick it drink it. Kick [Kik] is one of the most common movements in modern dance. A simple kick in the air. When performing, you must remember about the Groove (Kach). Starting position: I parallel position of the legs. "And" - kick [kick] or kick with the right foot forward. The movement is similar to kicking a soccer ball. The body makes a “pitch” forward. "One" - the right leg returns to its original position.
 The left leg swings back. The body leans back slightly. "And" - the left foot makes a kick [kick] forward. "Kach" forward. "Two" - similar to the movement to "One", only from the opposite leg. On the next beat, the movement is repeated. Kick, Kick + Back jump
 - Kick and slide kick and slide. A kick is made with one foot, and then a slide is made with the other.
- Kick & Step - Kick Cross Step
- Kick ball change On I swing, for once swing up, on I swing, 2 steps back and kip up. Hands work in opposition. Back and to the side, back with a twist in the hips, forward, back with a turn and to the side, forward and forward crosswise . Kick out - leg bent to the side, kick, change of leg to the side.
- Party Duke + variations - leg abduction to the side.
- Cabbage patch The name comes from the Cabbage Patch Kids, a toy popular in the 80s and 90s.
 Usually performed comically. Often accompanied by funny "grimaces". The starting position is free. Hands move in a plane parallel to the floor. Starting from the chest describe a circle. During performance, the shoulders rise. Any steps can be used in the legs.
 - Smurf [Smurf] is a movement named after cartoon characters. The knees do a swing with an emphasis down, the body and head with an emphasis forward. Hands in turn move forward, as in swimming. Starting position - free. "One" - one hand begins to "float" forward in a small arc. In the legs, body and head, "kach" begins.
- Prep (Pretty Boys)
- The wop
- Reebok - swing up with shoulder and arm jumping. : Reverse, With touch. Raise the knees, when descending, the weight of the body between the legs, hands “pump”
- Reject Step
- Shamrock - step sideways out, back, bouncing legs together, landing.