How to make a hip scarf for belly dancing
DIY Basic Belly Dance Hip Scarf Pattern (with Tassels)
I’ve done all kinds of hip scarfs and overskirts tutorials over the years, but I’ve realized I don’t have a good, basic belly dance hip scarf pattern yet! So that’s what we’re going to make today. 🙂
This design is very basic, cute and versatile, and super easy to make!
In this video, you’ll see how to make this hip scarf and decorate it with tassels. Let’s get started!
Click here to join the FREE course “Belly Dance Costume Making 101”!
To make this belly dance hip scarf, you need:
Light to medium weight fabric – You need about 25cm (10in) of 150cm (59in) wide fabric.
Matching color thread
Decorative items – I’ll be using this cute tassel trim for this example, but you can use beaded tassels, fringe, embroidered tape, coins…. Whatever you like. I used about 3m of the trim. (You can find similar ones at the trimming section of a fabric store. Etsy has a lot of selection too.)
How to Make Basic Belly Dance Hip Scarf with Tassels
Basic Belly Dance Hip Scarf Pattern
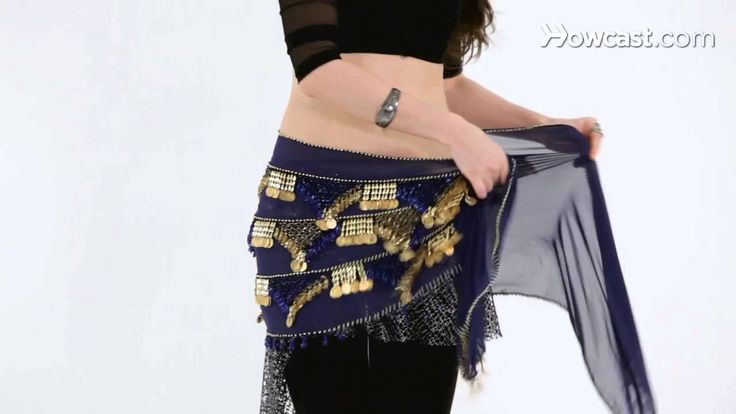
First, take your fabric, and wrap it around your hips. Match up the excess fabric, and mark where the fabric meets with pins.
Place it on a flat surface, and fold it in half wrong sides together.
At the fold, from the top edge, measure 22cm (8 1/2in) and make a mark.
At the pins, measure 12cm (4 3/4in) and make a mark.
Connect these 2 points with a gentle curved line.
And extend the line horizontally, so the ends are 12cm (4 3/4in) wide.
At this point, measure the length from the pin to the end, and if it’s less than 30cm (12in), end the hip scarf 1cm (3/8in) away from the pins, and make separate ties underneath that are 30cm (12in) long or longer.
Cut along the outline. Alright, let’s start sewing!
Sew your hip scarf!
All we have to do is finish the raw edges.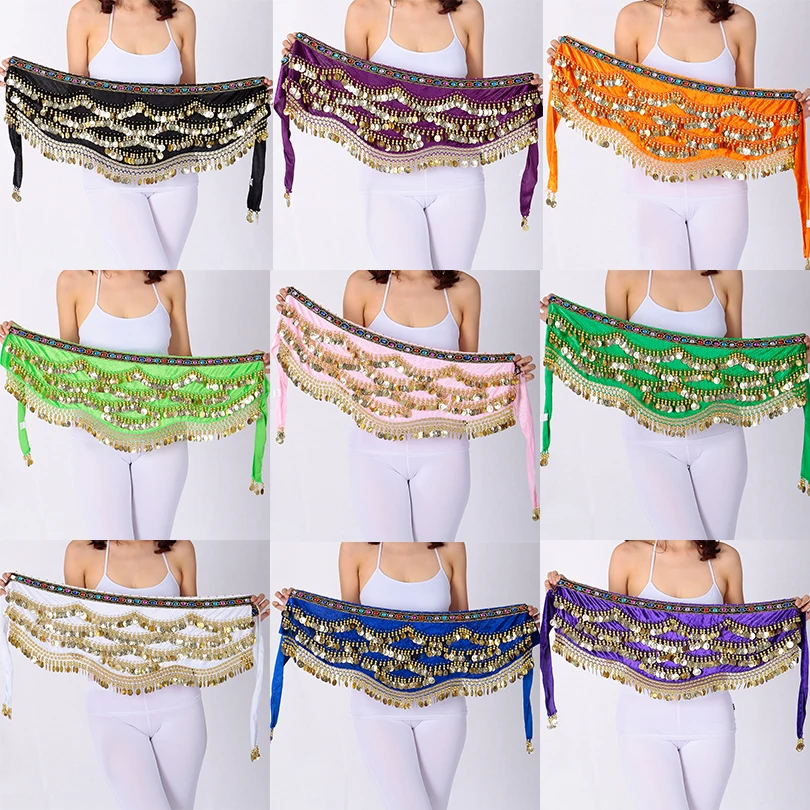 If you’re using stretch fabric, fold 1cm (3/8in) from the edges towards the wrong side, and do a zigzag stitch. (Stretch fabric doesn’t fray, so if you’re going to hide the edges with trimming later, you don’t even have to finish it. It’s up to you.)
If you’re using lightweight woven fabric like I am here, you can do a narrow rolled hem or a simple zigzag stitch along the raw edges or use a serger.
If you have separate ties, place a tie and an end of the hip scarf right sides together, and do a straight stitch.
And your basic belly dance hip scarf is complete!
Decorate Your Belly Dance Hip Scarf
Be creative and decorate your hip scarf as you like!
Here, I placed the tassel trim along the top and put clips there. Same for the bottom edge.
I left the tie areas untouched because these areas will get pulled and tied and the tassels will get damaged easily.
And did a straight stitch at the top and bottom of the tape to secure these rows of tassels in place.
I also cut and sewed short pieces to decorate the ends of the hip scarf.
And you have your very own belly dance hip scarf! It’s super easy, so it’s a great idea to make a whole bunch for your troupe members too! You’ll feel awesome showing off your handmade hip scarf at your next class!
If you’re hooked on making hip scarves, I have lots of other ideas, so if you’re curious, have a look at these tutorials:
Hope you liked this DIY belly dance hip scarf pattern and tutorial, and if you did, please share this tutorial with your dancer and costumer friends!
And if you’re new to belly dance costume making, join my free email course, Belly Dance Costume Making 101 below. It’ll give you a great introduction to costume making and beginner-friendly projects.
Click here to join the FREE course “Belly Dance Costume Making 101”!
Thanks for reading, and keep sparkling!
P. S. Pin this image on your hip scarf board 🙂
Like what you read? Want to make more costuming bits yourself?
Learn more and sign up for my free email course, Belly Dance Costume Making 101 here!
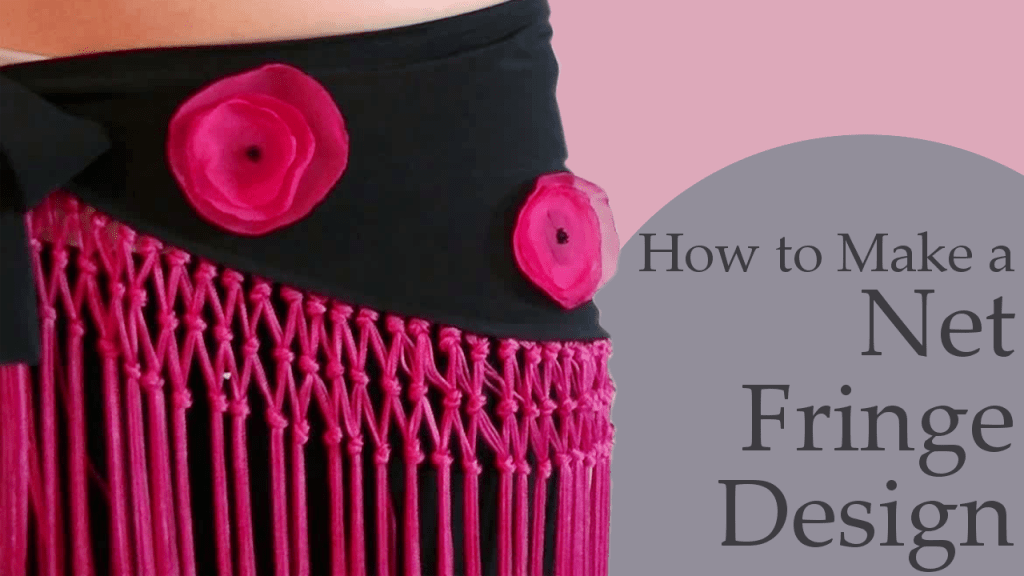
DIY Fringe Hip Scarf for Belly Dance
by Mao on in DIY Belly Dance Costume Blog, Uncategorized • 4 Comments
As a belly dancer, you can’t have enough hip scarves. They are great for practice and of course for easy costuming!
So today I want to go back to basics and create this cute and simple fringe hip scarf. Let’s get started! 😀
Click here to sign up for my FREE email course Belly Dance Costume Making 101! 😀
To make DIY fringe hip scarf, you need:
1yd (1m) light to medium weight fabric – I’m using some leftover fabric, and I actually don’t even have 1yd here.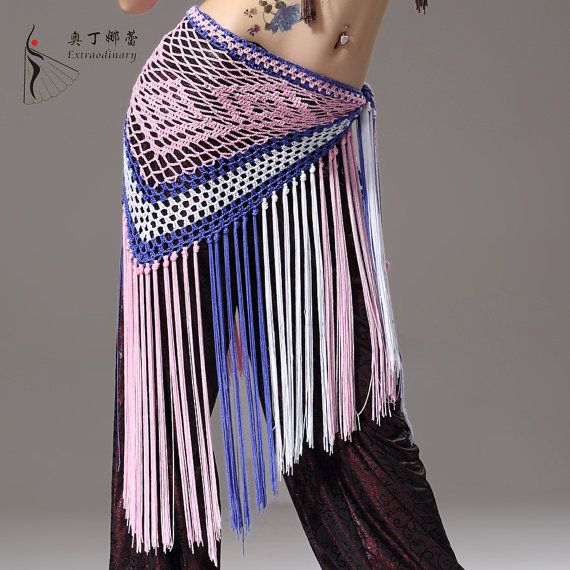 But I’ll show you how you can make a hip scarf out of leftover fabric like this. Also, this is stretch fabric which makes this project even easier. You’ll see it in a minute.
2yd (2m) of fringe of your choice – I’m using 4in wide fringe.
2yd (2m) of about ⅜ in (1cm) wide ribbon
DIY Fringe Hip Scarf for belly dance
First, wrap your fabric around your hips and see how much fabric you need. This is how you can check if you have enough fabric if you are using leftover fabric. If the corners of your fabric touch, that’s the minimum amount you need. I can wrap this fabric around my hips and have an about 4in (10cm) overlap, which is just enough. If you have more, simply mark how much you need.
Place your fabric on a flat surface and have the top edge up. Fold it in half, or up to the point you marked.
From 1in (2.5cm) down from the corner, measure 45 degrees and extend the line until it meets the folded edge, and cut along the line.
If you don’t have a ruler like this, you can simply fold a corner of a paper to make a 45 degree angle.
Now what’s great about using stretch fabric is that it doesn’t fray. So you can leave all edges unfinished, which makes this project really easy. I wanted a little more finished edge at the top, so folded the top 1/2in (1cm) from the edge, and did a zigzag stitch. And I left other edges unfinished.
Then cut your ribbon in half, and fold all ends twice and sew or glue so they don’t fray.
Take one of them, place an end at the corner on the scarf right sides together, and do a straight stitch, and a top stitch to keep the ribbon in place. Or if you want to avoid sewing, you can glue on the ribbon to the corners of the scarf.
Repeat for the other side.
Now place your fringe around the edges, and do a zigzag stitch to sew it on. Again, you can glue this too, but after gluing, the fabric won’t stretch anymore, so just be mindful of that.
And that’s it! It’s super cute, and the scarf is wrapped around so it will fit different sizes.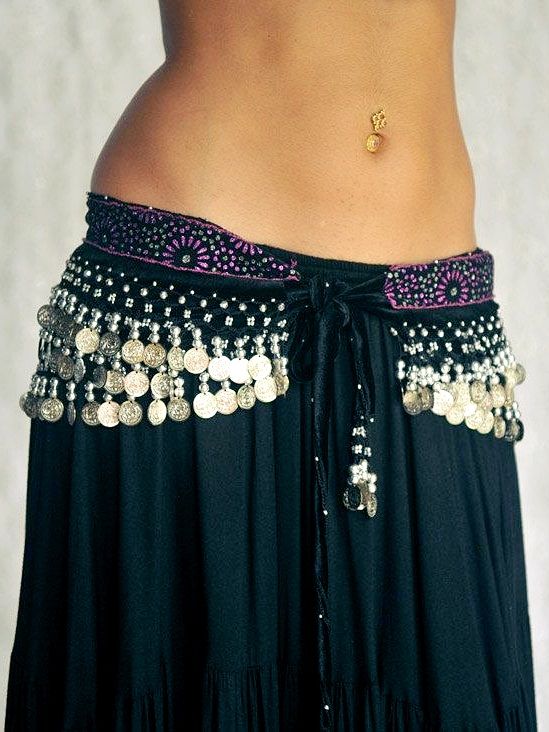 It’s an easy costuming piece for troupes, so mix and match colours and designs and have fun!
And next week, I’ll show you how to make this gorgeous 25-yard tiered skirt which goes perfectly with this hip scarf for a gypsy or ATS style of belly dancing. I’m super excited about this skirt. So sign up for my newsletter and stay tuned!
Hope you liked this DIY fringe hip scarf, and if you did, please share this post with your dancer friends!
And if you want to make more belly dance costumes like an easy top and a circle skirt, sign up for my free email course, Belly Dance Costume Making 101 from the link below.
Click here to sign up for the free course and start making more belly dance costumes!
Thanks for reading, and keep sparkling! 😀
P.S. Pin this image for your future project! 😉
Like what you read? Want to make more costuming bits yourself?
Sign up for my newsletter here and get my free email course, Belly Dance Costume Making 101!
| Polina Reg. | Good day to all! |
| Owl Reg. | Polina, I worked a lot on a knitting machine with Lurex thread. Usually it is a thin flat lurex in 5 or more additions + a lowercase thread or any other for a hook, probably something thicker will do. . As for elasticity, so, in my opinion, everything that is crocheted stretches, If necessary, you can put it on a lining of skin-colored tights. good luck |
| Polina Reg. | Owl, hello! Thanks for the answer. What kind of thread is suitable for this? What materials should be in it and in what ratio? Cotton, elastane, or something else? Advise |
| Sova Reg. | Good, what do you have there! |
| Arabica Reg. | Polina, our girl at the dance brought a crocheted belt, there are also beads with monists. I can take a photo. Many, following the example, have already been linked with us. I also tied it, only the monist remains to be sewn on ;-) |
| Marusya Reg. Awards: 1 | Of course, take a picture, pliiiiz! |
| Afonea Reg. Awards: 1 | Oh girls, I want that belt too! In general, I really like to have an original belt for each item, but there really is nothing to buy from us. |
| Arabica Reg. | Well, it's more like a rehearsal belt to make the coins feel |
| Brunya Reg. | and this is my new scarf belt. coins were not supposed - the teacher does not allow ... but the sequins also look good
|
| Magic Pen Reg. | Oza, you got very beautiful belts, you can't take your eyes off. And you do not tell me how you attached the coins. Are they already attached to the finished product (tied) or tied? |
| Katerina Kes Reg. | Thank you Oza! |
| amori Reg. | I saw very good. beautiful belly dance belts. Type of knitted scarf, mesh, with glass beads. Does anyone have a description? |
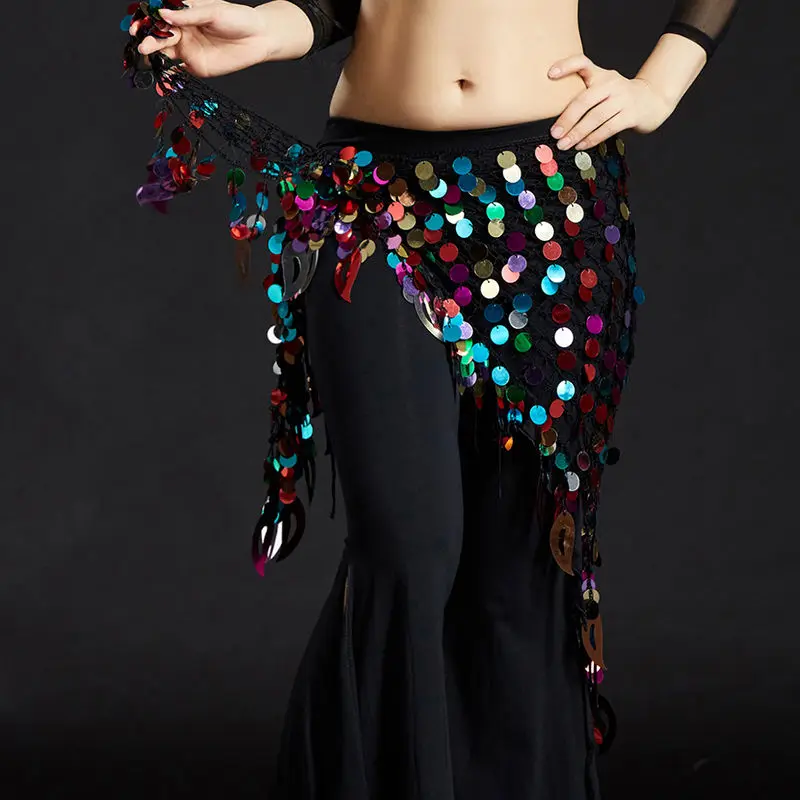
| Fata Morgana Reg. | I saw in the store, in my opinion there is an ordinary fillet and sequins. |
| amori Reg. | I saw at the girl's, in my opinion there is a bugle strung there. I didn’t immediately consider it, but now I’m thinking about it ...) |
| Pretty Lady Reg. | I saw such scarves in advertisements in "glossy" magazines. |
 It can be any color, any thickness and texture. As a rule, it is not used in its pure form, but is added to the main thread. But this, as a rule, and a costume for oriental dances is not the right thing.
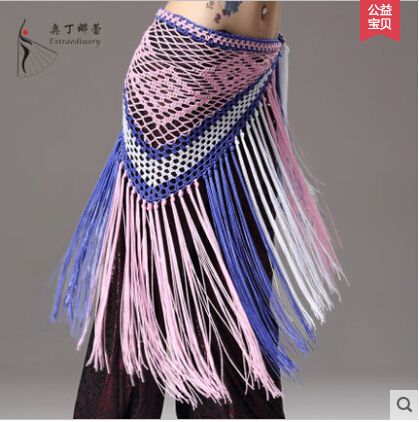

 It also seems to me that beads are strung on the yarn. Along the short edges, the kerchief was decorated with a fringe of yarn of the same color as the kerchief itself.
 DIY for belly dancing
Views: 11 136
Belly dance is a beautiful act that not only captivates, but also takes you to oriental fairy tales, with majestic palaces, fluffy carpets and enchanting music. Dancers with skillful movements of the hips, with a mysterious look and the most beautiful outfit, create these miracles.
Currently, oriental dances have conquered the female half of humanity so much that in dance schools and studios, you can meet representatives of various age categories. We, in our article, will tell you how to make your dance lessons beautiful and charming with the help of a handmade oriental dance scarf.
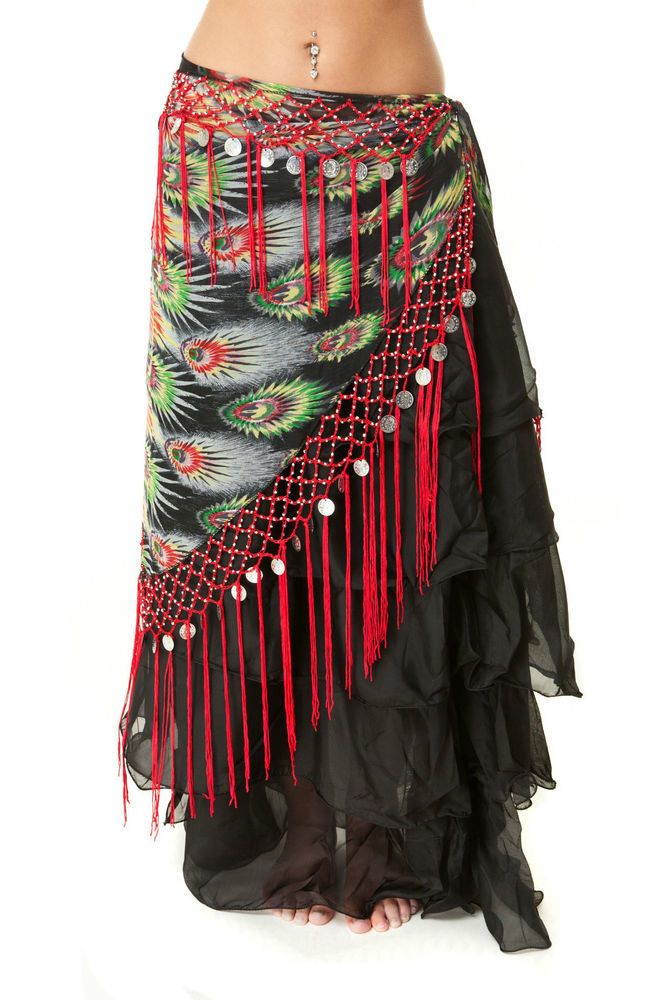
Openwork loincloth for oriental dances
Hip scarf, for oriental dances, is considered an integral part of the dance costume, without which the image of the dancer will not be complete.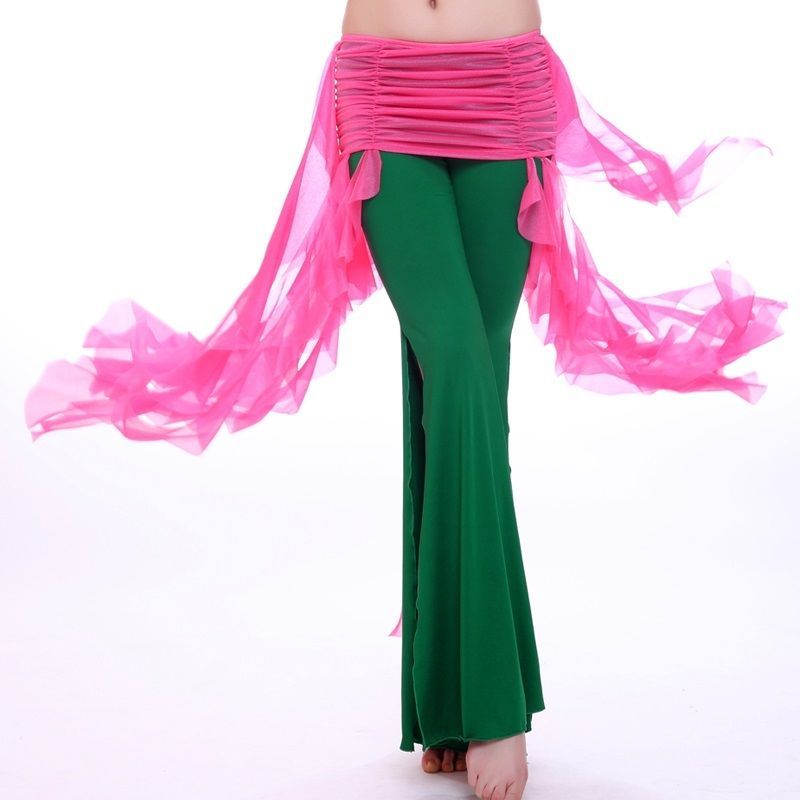 A step-by-step description and a diagram will help you cope with the manufacture of an openwork accessory for classes, with your own hands. By the way, a knitted openwork scarf is not only an element of a dance costume, but it can also be added to a woman's wardrobe.
We knit with our own hands
What could be more beautiful and sweeter than something that is made by one's own hands. Moreover, in independent creative activity there are no restrictions in the flight of fancy and all kinds of inventions. Buying such an accessory is not easy, but knitting it yourself is quite easy and affordable. They will help in the creative embodiment of the accessory: a hook, a diagram and a description for them.
To make an openwork accessory with your own hands, we need:
- Fine cotton yarn - 100 gr.;
- Hook - according to the size of the thread;
- Decor - golden beads;
- Matching threads and fine needle for sewing on beads.
Step-by-step instructions:
Abbreviations:
- VP - air loop;
- runway - air lifting loop;
- RLS - single crochet;
- CCH - double crochet.
There are two ways to knit a thigh triangle, decreasing or adding loops.
In our master class, the description is given in addition, firstly, it is much more convenient to knit in this way, secondly, you can’t go wrong with the size of the finished product, and thirdly, the edges look more beautiful.
1 rub.; We collect 3VP and in 1PP we knit 5SN.
2 rubles; 3 runway and in the first loop of the base we knit 4 dc, in total together with the VP, we get 5 dc, sc in 3 dc of the previous row, 5 dc in the last loop of the first row.
3 rubles; 3 runway, 4 dc in the first loop of the base, sc in 3 dc of the previous row, 5 VP, sc in 3 dc of the previous row, 5 dc in the last loop of the second row.
4 rubles; 3 runway, 4 dc in the first loop of the base, sc in 3 dc of the previous row, 5 ch, sc in the arch of the previous row, 5 ch, sc in 3 dc of the previous row, 5 dc in the last loop of the third row.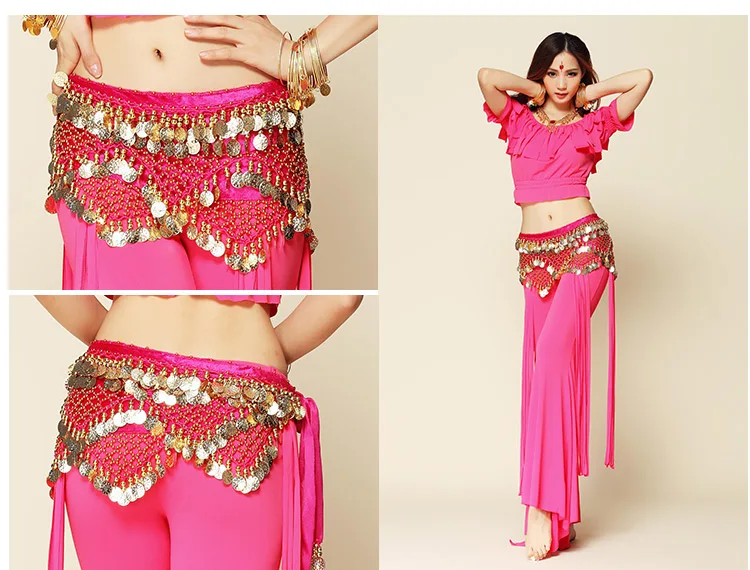
Next, we knit according to the scheme, do not forget to do 5 dc on the sides to expand the triangle.
We knit until the scarf reaches the desired size, for this it will be necessary to try on several times.
After the product has been knitted to the desired size, it must be tied.
We tie the short sides of the scarf according to scheme No. 2, the long side - No. 3.
1 rub.; for the basis of the pattern, as well as smoothing the edge of the product, it is necessary to tie the RLS on all three sides of the product.
2 rubles; RLS in the first loop of the previous row, in 4P before. row we knit 7SSN, * in 4P before. RLS row, in 4P before. row we knit 7СН *, repeat from * to * to the end of the row.
3 rubles; CCH in the first loop of the previous row, 3VP in 4P before. row we knit 7SSN, *SSN in RLS before. row, 3VP in 4P before. row we knit RLS, 3VP *, repeat from 8 to * to the end of the row.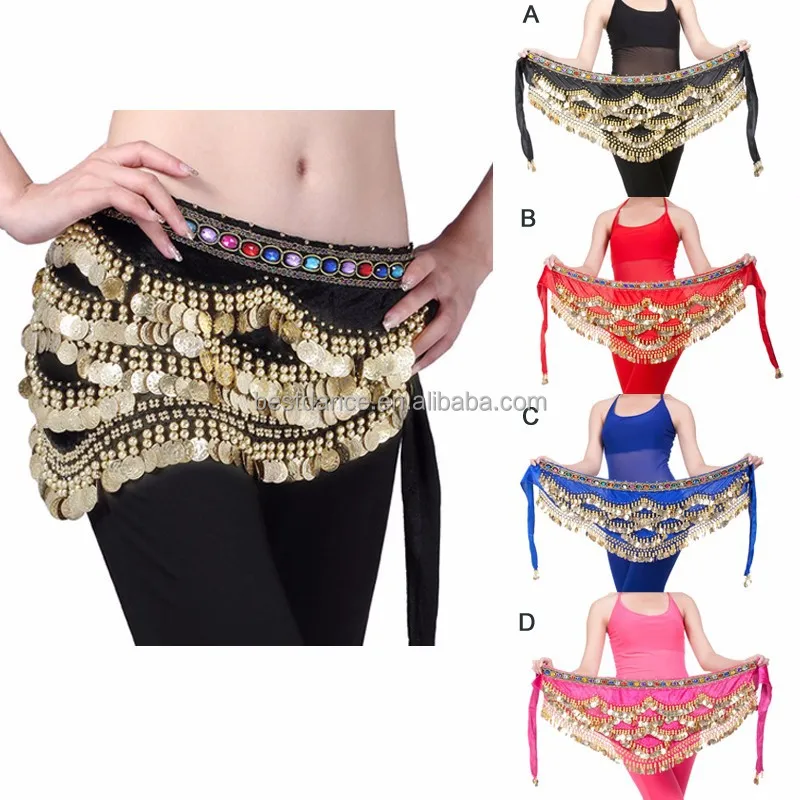
Description of tying a scarf according to scheme No. 3
1 rub.; knit completely RLS.
2 rubles; 2VP, in the second column from the beginning of the row we knit * RLS, 3VP, RLS, skip one loop before. row *, then knit from * to * to the end of the row.
The pattern will be dense, but beautiful, the binding is necessary so that the thread of the product does not stretch or deform.
Sew beads around the edges of the loincloth for decoration.
Belly dance scarf
Consider the shape of belly dance scarves.
Square scarf
The classic standard scarf is made of chiffon and has the following parameters:
- Width -1.10 cm;
- Length - 2.20 cm.
For dancing, you can sew a hip accessory according to your own taste and preference. The parameters of the product can vary from 2 to 3 meters in length and from 0.8 to 1.5 meters in width, depending on height, dance style and arm span.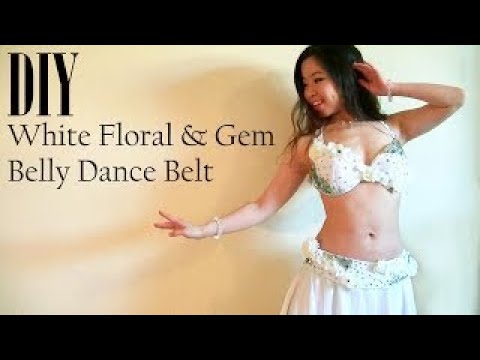 Keep in mind that a short accessory will not allow free movement of the arms, so the length of the fabric should be 25 cm longer than the span of the arms on each side.
For a dance where the fabric is wrapped around the neck, its length must be at least 3 meters.
Scarf with wings
Dance accessory - in scope resembles butterfly wings. In fact, this is a classic rectangle, cut in half, but not completely. “Wings” are also sewn from two squares 1.10x1.10 cm, the corners of which are fastened together with jumpers made of beads or braid. The upper corners of the wings are attached to the back of the neck accessory.
For ease of dancing, the lower edges of the wings, which hang freely, are rounded off. The squares themselves can be changed in size, at your own discretion.
Half round scarf
Semi-circular accessory, this classic rounded rectangle. Moreover, the corners are rounded only on both sides along the length. How much to round the corners depends on personal preference.
A scarf with rounded corners is in great demand in various shows, for the convenience of its use, the fabric is attached to the bracelets not on the hands.
Round scarf
The name itself speaks for itself. The product has the shape of a circle, which has a radius of 2.20 cm. A round accessory is cut in half and wings are made from it. And if you increase the diameter of the fabric and insert sticks along the edges, then the scarf turns not only into beautiful butterfly wings, but with such additions it is very convenient to dance.
For ease in dancing, attach the fabric to the "collar", and add, if necessary, bracelets.
Tube scarf
Trumpet scarf, unusual accessory for belly dancing. It is usually used for show programs and for dances with specific movements. The sections of the scarf are trimmed, as a rule, feather boas.
To make such an accessory, you need to take chiffon, crepe de chine or silk, a fabric that will easily fly and flow beautifully during rest.