How to do the flare dance move
How to Flare – Breakdancing Ninja
A very cool move that is a sticking point for most breakdancing careers. Most breakdancers train until they can do half or one flare but do not put in the work to do continuous flares which places you in the advanced category. Flares are difficult because you have to be very good at a couple of things at the same time; strength, flexibility and technique.
Pre-requisites
Strength
Wrist / Forearms
You need handle your bodyweight on your wrists. Learning flares is harsh on your wrists and weak wrists get injured. This is the most common injury when learning flare and not all breakdancers overcome it. Get your wrists strong do these exercises:
Shoulders
Once your wrists can handle your bodyweight the next higher up muscle needs to support your bodyweight, your shoulders. I’ve previously covered shoulder strength so to summarize be proficient in handstands and handstand presses. If you don’t know what that is you aren’t ready for flares yet. Below is the shoulder training to be injury free and strong for flares.
Flare Exercises
L-Sit
Can be done on the ground, strive to hold your feet above your belly button. Do 10 second holds 3 times a week. This will strengthen your hip flexors so you can raise your legs high in the front position of flare.
Flexibility
Lack of flexibility limits your ability to perform the correct flare technique. This makes the move alot harder to perform, under rare circumstances bad flexibility can be compensated with great strength, however its harder to perform the flare this way and it doesn’t look good. You need enough flexibility to raise your knee your face and shoulder to get really clean flares.
Shoulder flexibility is overlooked in flares. You need to be competent at skin the cats so you have the shoulder flexibility to raise your hips high in the front part of the flare.
Technique
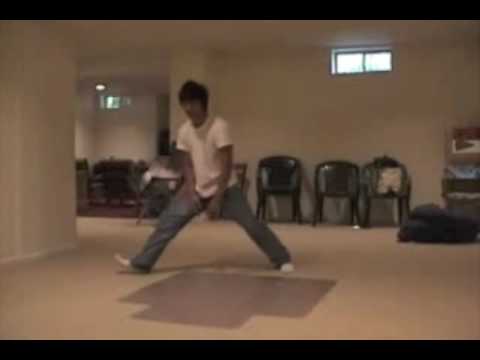
The best way to practice the flare is start double leg circle training with the bucket.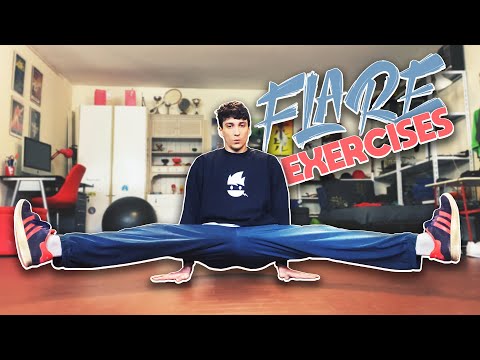 This cuts the move in half. When you first start training there is a lot happening at once in the flare. Double leg circle training reduces what you have to think about so you can focus on hand placement, keeping your legs straight and pushing with your shoulders. This video shows double leg circles:
Once your hands and shoulders know what to do, the last step is controlling your legs. Your legs kick again and again in a flare at different times. You can practice leg control by trying the move, but this is the most frustrating way. You can practice parts of leg kicking with your butt on the floor, this is good for the front portion of the move in the beginning but not helpful as you advance. There is a flare drill for working the rear part of the flare that is real good and shown below.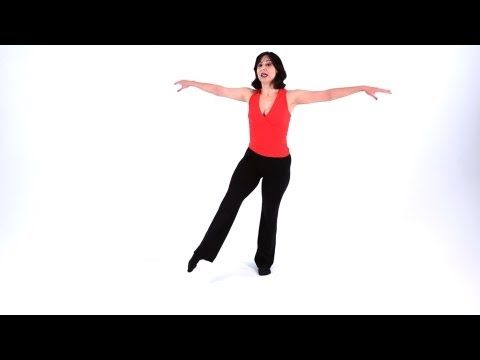
The best way to work the legs is to use a flare trainer that holds your legs then you can perform many repetitions and learn the technique.
What isn’t mentioned in the video is the amount of time it takes to get flare. If you are a beginner it will take at least 6 months to get decent strength and flexibility. From there another 6 months to get enough repetitions to be able to do a few rounds of flare. This is the best case scenario and it is common for breakdancers to dabble in flares for years and not be able to do more than one or two.
Flare | Hip Hop Dance Wiki
The flare is an acrobatic move in which the performer alternates balancing the torso between either arm while swinging the legs beneath in continuous circles.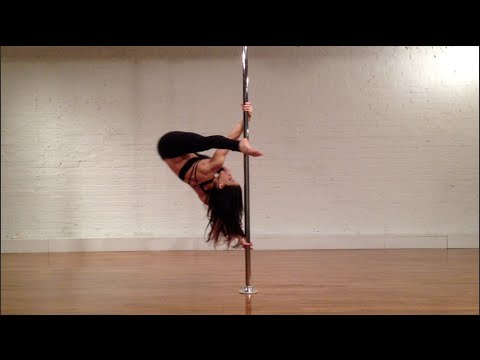 It is a fundamental b-boying power move, and in gymnastics it may be performed on a pommel horse or during the floor exercise. The move is commonly spelled flair in gymnastics and further may be called a "Thomas flair" after its purported originator, Kurt Thomas.
Contents
- 1 Step-by-step
- 2 Variations
- 2.1 Air Flares
- 2.1.1 Variations
- 2.1 Air Flares
- 3 External links
Step-by-step[]
- The description assumes counter-clockwise rotation
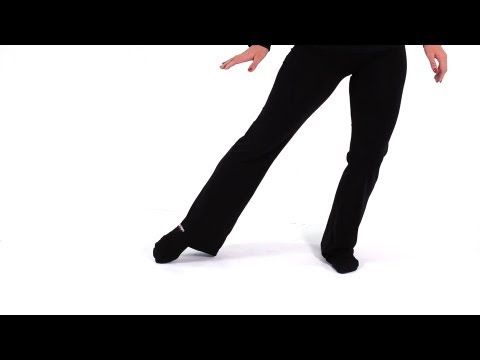
The left leg begins about 10 inches behind the right (not lined up). If the breaker already has momentum, he/she quickly puts down his left hand close to the left leg facing the fingers away from the body, towards the left. Next, the left leg is swung around as hard as possible while doing a jump. The breaker is prepared to put down the right hand. All of the breaker's weight shifts to the right arm, and he/she kicks the left leg up as high as possible. The right leg swings under the left and then the left hand comes down in front, such that both hands are now in front. Arching his/her back and without touching the ground, the breaker kicks the right leg up again and swings the left leg around low for another rotation.
A progression for this move would be double leg circles on a mushroom (similar to a pommel horse but rounded and lower down). This consists of his/her legs rotating around the mushroom 360 degrees elevated roughly 40 cm off the floor with nothing but his/her hands touching the mushroom.
Variations[]
There are several flare variants:
- Elbow Flares - The forearms (and thus the elbows) are used to support the body rather than the hands. Due to the low clearance of the legs this is a difficult variation.
- Lotus flares - A flare with the legs in lotus position.
- Half-Flares - Similar to Lotus flares, except the continuous swinging motion is performed in a figure-four position instead of a "V" position.
- Half-Flares - Similar to Lotus flares, except the continuous swinging motion is performed in a figure-four position instead of a "V" position.
- New Yorker Flares/Atomic Flares/Power Flares - starts with the opposite hand than a standard flare normally would be started with. For example, if the legs are going to the right then the flares will start with the right hand placed on the ground first.
- Chair Flares - a flare done exaggeratedly so the swinging motion to the front looks like an air chair freeze.
- Double Chair Flares - a chair flare done with two airchair freezes (two bent arms), and no hops between the arm switch.
- Circles/Virgin Flares - The legs stay together and straight. In gymnastics, it is referred to as a circle and is considered the prerequisite for a flare.
- Hopping Flares/King Flares - Hopping on the available (load bearing) hand as the legs swing through from the front to the back. C-zeching is required for this move. The breaker must c-zech along with the hop in order to position himself properly to continue doing the flare.
 The term c-zech means the movement that makes one turn in the opposite way one is going during the flare. For example, if one is flaring CW, he c-zechs the flare so his body will face a bit more left after each flare round. In gymnastics, a c-zech is called a spindle.
 - Threaded flares - A unique flare motion where one uses the supporting arm (prior to supporting the swinging motion) to thread the two legs together. The legs become free as they swing through the front flare motion (Bboy Lilou the first who had done this move).
- V-flares - An advanced flare style where the legs stay straight in a V-shape close to the body and all momentum is exerted from the hips, as the legs stays to unmoving and provides no basis of support. These are also known as 'piked flares'. Much effort is needed to master V-flares.
- British flares- A flare which comes from a handstand position (placing one hand on the ground you kick the opposite foot into the air letting it catch momentum then you kick it through, the other foot you kick when you are coming down to let it pass under.
 Its used when coming from Air tracks to flares.
 - Solar flares- A flare with the hips very high in the air and the legs piked together over the front torso (as if, the legs are flaring over the bboy's head and body). After switching from the starting arm to the opposite arm and when the torso is facing the ground, the hip pops out from under, giving the feel of the sun's explosive solar flare. It looks very similar to an airflare and a chair flare combined, but without the hop between the arm switch.
Air Flares[]
The Air Flare is an advanced move that is similar in concept to a Halo, also known as Headtracks or just tracks. This is because they share the feel when it comes to piking your legs and swinging them in between the hand switch. While performing an Air Flare, the breaker is inverted with his torso at a 45 degree angle to the floor. (angle can differ. the smaller the angle, the greater the difficulty). his legs in a V-shape, and his arms straight.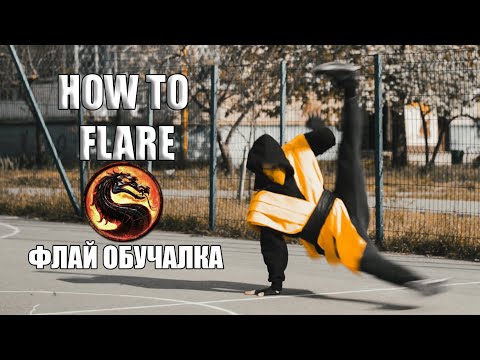 The hands are the only body part that touch the floor as the move is being performed. The bboy whips his legs, then arms around so that he travels in a circular path. Air Flares can also be referred to as Air Tracks: however, Air Tracks was originally a single 360 spin in the air that would be a transition move linking to another. Later, people would start doing Air flares in the manner of a continuous Air track, rendering both names to be basically the same move, since the difference in execution is so minimal. (Air flares reach across the chest and Air tracks reach over the head - the inclination of the body is irrelevant in this case.)
Variations[]
There are many variations of the air flare. Some notable examples include:
- Elbow Air Flares/Elbow Tracks - Using your elbows instead of your hands
- Bent Leg Air Flares - One leg is constantly bent during the entire movement. Bboy Blond is known for using this technique.
- Hopping Air Flares - Both hands never touch the floor at the same time.
 A hopping motion is used to continuously hop from one hand to the other. The legs are usually bent in this variation in order to generate the hopping effect.
 - Tombstone Air Flares - The legs are closed and straight during the airborne phase of the movement
- Lotus Air Flares - Same as a regular air flare but with the legs in lotus position
- Toe Touching Air Flares - When one hand is on the ground, the other is used to touch the toes of either foot.
- Clapping Air Flares - clapping both hands in a handstand between airflares
- Munching Air Flares - The "munch" effect can be achieved by positioning the legs in munch-mill position in mid-flight. In a more advanced variation the bboy keeps his legs in this position even when the hands are touching the floor.
- Threaded Air Flares - bringing a leg through a loop created by the other leg and the non-supporting hand
- Walking Air Flares - At least one hand is always in contact with the floor, even during the airborne phase of a regular Air Flare.
 This variation requires great flexibility in the shoulders.
 - One-handed Air Flares - The hardest variation of airflare. The same swinging hand turns a full swing with only one hand at 180 degrees. Very Few breakers can achieve this move
- One and a Half Air Flares (aka 1.5 Air Flares, Airflare overspin, Airflare Bombs, Airflare suicides) - The body rotates 540 degrees and the bboy lands on this back rather than on his hands. Therefore, allowing the breaker to transition from airflares, to windmills, to flares, and back.
External links[]
- BBC Blast - Dance Watch Lil' Tim demonstrate flares in this downloadable video clip from BBC Blast.
- Six flares
- Three miniflares
Dance photography - the nuances of shooting, the secrets of success, polishing skills
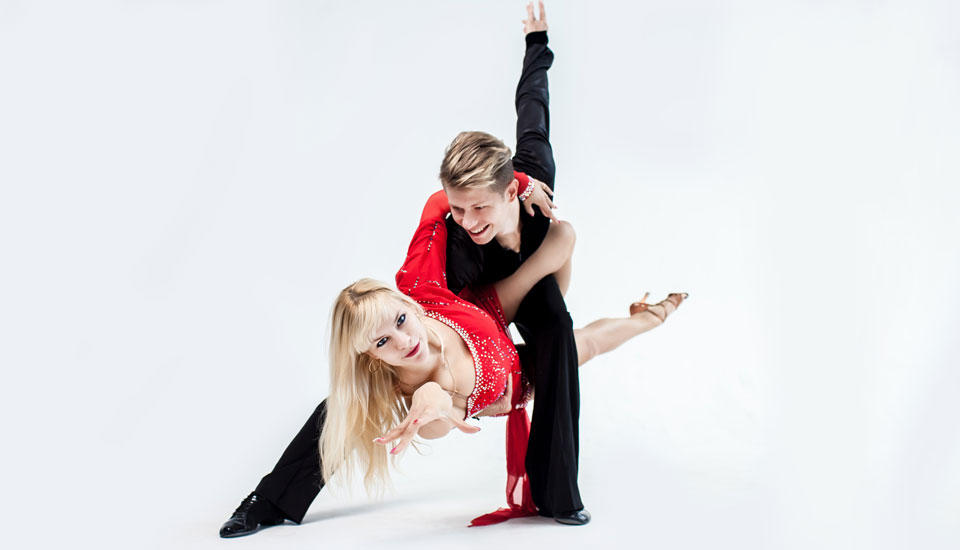
Dance photography is an expression of the beauty of movement and emotions. Dance can be a source of great shots, but it's no secret that photographing dancers is very difficult: framing, focusing and releasing the shutter at the right moment - absolutely everything must be done, and at the same time with the best exposure in the available light. For Bernie Ng, one of Singapore's most prolific dance photographers, shooting choreography involves not only capturing the action, but also the aesthetics and emotion that permeates the movement. She shares some tips for capturing dramatic shots of dancers.
EOS 5D Mark III / EF24-70mm f / 2.8L II USM / Manual exposure (f / 2.8, 1/250 s) / ISO 2500 / WB: Auto. "Pure" by T.H.E Dance Company (2016) / Choreography: Kuik Swee Boon / Dancers: Anthea Seah & Wu Mi
- Exposure
Getting the exposure right is probably the most difficult aspect of dance photography . Since flash photography is generally not allowed indoors, you should do your best with the available lighting, which will vary from one show to the next.
Use fast lenses
This will allow enough light to reach the camera sensor so you can keep the ISO sensitivity as low as possible to minimize visible noise. Ideally, your camera kit should include both a wide-angle lens for capturing the entire scene and a telephoto lens for close-ups.
Shoot in manual mode or use exposure compensation in Av or Tv mode
The action in the scene (and hence the shooting conditions) can change very quickly, so you'll need to keep control of your exposure settings. Bernie prefers to shoot in manual mode to fine-tune the camera. But if you choose to use semi-auto, she advises using compensation to get the right exposure.
For beginners, aperture-priority (Av) mode will probably be easier to use: you just need to set the maximum aperture and the camera will give you the fastest possible exposure without underexposure. Shutter priority mode (Tv) gives you control over shutter speed, but it can be a little more difficult for an inexperienced photographer to get an adequate exposure.
Shutter speed. Know what you need
Consider factors such as dance style, choreography, and the type of shoot you want. Bernie's shutter speed is 1/250 second, which she adjusts as needed. For example, she may decide to use a slow shutter if she feels it is necessary for the image.
EOS 5D Mark III / EF24-105mm f / 4L IS USM / Manual exposure (f / 4.0, 1/13 s) / ISO 800 / WB: Auto. "Giving" by Frontier Danceland (2015) / Choreography: Adrian Skjoldborg
Using a slow shutter speed can add momentum to a photo and bring the whole composition to life. In the shot above, you can see that the photographer chose to use a slow shutter speed to create some motion blur while keeping the dancer in focus. This filled in the empty spaces and added movement to the image.
Pro Tip: If you have access to a stage crew and lighting designer... about the upcoming show. Bernie usually asks what the lighting will be like.
Creative ideas: stroboscopic lighting can be a great opportunity!
EOS 5D Mark III / EF70-200mm f/4L IS USM / Manual exposure (f/4, 1.3s) / ISO 320 / WB: Auto. "Planet Romeo" / Presented at DiverCity as part of the M1 Contact Contemporary Dance Festival (2015) / Choreographer and Dancer: Daniel Kok
Some shows use stroboscopic lighting, which can cause you to miss many moments if you're not ready. However, if you prepare and react quickly enough, this can be an opportunity to get creative. For the shot you see above, Bernie made a quick decision to slow down the shutter and get a strobe effect.
- Dance is more than just action
EOS 5D Mark III / EF24-105mm f / 4L IS USM / Manual exposure (f / 4, 1/400 sec) / ISO 12800 / WB: Auto. "The Ordinary Man" by T.H.E Dance Company (2014) presented by Huayi - China Arts Festival, Esplanade - Theaters in the Bay / Choreography: Wu Yi-San & Kuik Swee Boon
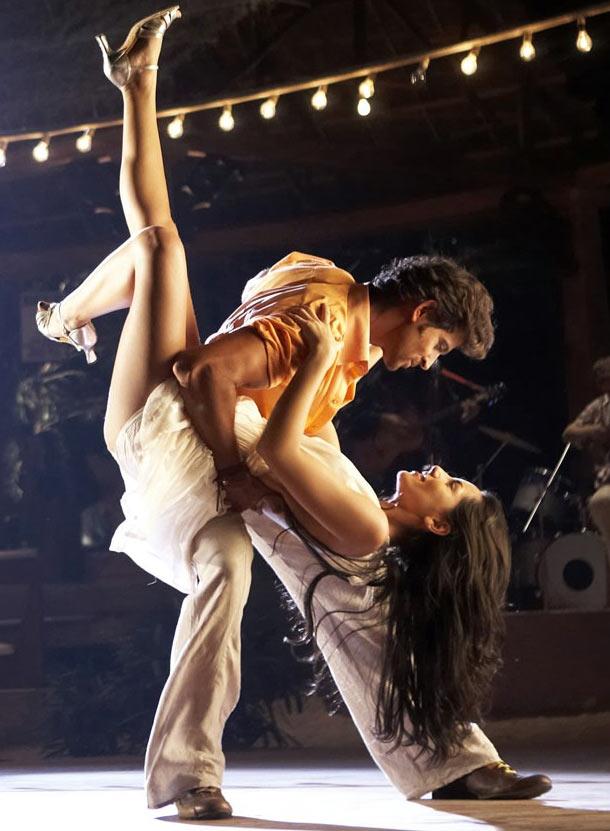
A lot of people think about snapshots in a jump at the mention of dance photography, but quiet moments can be just as dramatic.
Your photography will definitely be influenced by:
- beautiful lines and correct poses
Find out which ones work well and which don't. They can be different for different dance genres. However, you don't have to have a dance background to take decent shots - basically it all comes down to a well-developed sense of aesthetics. Make the dancers look good in the frame.
- dancers' faces
A big part of dance is conveying thoughts and feelings to the audience, so Bernie tries to capture the emotions and facial expressions of the performers. This is exactly the moment when it is useful to know what the choreography really is before you shoot! The intriguing facial expressions of the dancers above reflect the comedic nature of the choreography. Take those shots where the dancers blink or their eyes are empty and unfocused (unless it's part of the choreography) and mercilessly throw them in the trash.
Pro Tip: Be sensitive to the shots you take
Remember that your camera can capture things that the human eye cannot see: pressing the shutter button will inevitably take pictures that may not be the most flattering for dancers. Be very careful and careful when choosing the final set of shots (if you are an invited photographer and completed an order). Get permission from a particular dancer or company if necessary, especially if you share images on social media, a website, or wherever.
Dance photos don't have to include the entire body of the dancer!
EOS 5D Mark III / EF24-70mm f/2.8L II USM / Manual exposure (f/2.8, 1/100s) / ISO 400 / WB: Auto. Pallavi in Time by Chowk Productions (2017) / Choreography: Raka Maitra
Close-ups of the dancers' faces or other details of the mise-en-scene can also create memorable shots.
"The legs were very important to this choreography," Bernie recalls of the above shot. She wanted to get closer to the ankle bracelets of the dancers. The photo turned out to be successful also because the lighting was also focused on the legs.
Bonus: if you really want to capture the jump…
EOS 5D Mark III / EF24-105mm f / 4L IS USM / Manual exposure (f / 4, 1/250 sec) / ISO 5000 / WB : Auto. "Schubert Symphony" Singapore Dance Theater (2016) / Choreography: Chu-San-Go
The most important thing in pictures of dancers in a jump is the exact time: "If you see a jump, you are already too late. " To get the timing right, the photographer advises not to rely too much on continuous shooting. Instead, learn when to press the shutter button. Sometimes you can tell from the music at what point the dancers are getting ready to jump. It will probably take a lot of trial and error, but it will only improve your photography skills.
Other noteworthy parts
- You will need to react very quickly.
As mentioned above, things obviously move quickly on stage and you have to anticipate the moments and react almost instinctively to get the shots you want. What will help?
- - The presence of a fast and "responsive" camera.
- - Good knowledge of the functions of your camera and its configuration at the level of intuition. Customize your own shortcut buttons.
- - If you focus with the back button. This makes shooting more efficient because you don't have to refocus every time you press the shutter button.
- - A lot of practice helps you think faster.
- - If you watch a lot of dancing, even outside of filming. This will help you familiarize yourself with the timing of the shutter release and aesthetics. In addition, it is easier to evaluate the dance when you see it with your own eyes, and not through the lens!
- Respect who is on stage and respect the audience.
It's easy to get carried away here, but be aware of both the audience and the dancers on stage.
YES!
- - Take pictures only when allowed.
- - Turn off red light autofocus.
- - Turn off your flash.
NOT…
- - Get too close to the dancers. This can be quite distracting if you (or your huge telephoto lens) intrude into their space, especially since they will have heightened spatial awareness as they dance.
- - Make it difficult for the audience to see.
- Last but not least, respect the dancers.
The dancers work very hard to perfect their art, and without them you wouldn't have your photos.
- - Think about how they would like to look in the frame. Show them in the best light, and make their efforts worthwhile.
- - Never forget to credit the dancers and choreographers on your photos when you post them on your social media profile.
- - Create your connection to your object. Watch more dances or even take choreography classes! Your increasing appreciation of your subject may be reflected in the pictures you take.
The career of dancers is short. Your photographs of performing on stage in the dance element may be the only record of these precious moments, so try to take pictures that will bring joy to people and bring back fond memories.
Structural dance improvisation (Excerpts from the book) Joyce Morgenroth
The method of structural dance improvisation that I describe is a way to comprehend dance from two sides at the same time: thinking and acting. While the formulation of each improvisational task focuses the dancers' attention on achieving a common structural goal, the dancers must respond physically at every moment to the movements of the others. Structured group improvisation focuses on the process of integration in three areas: the individual with the group; new skills with existing ones; and physical ingenuity with structural intuition.
Structured improvisation is a mixture of conscious choice and spontaneous reaction. It includes periods of uninterrupted concentration and moments of unreproducible magic. Responding to the imagination, intelligence, style and energy of each individual, dancers find ways to break through patterns of thought and movement that have limited them. Witness the spontaneous outburst of laughter and applause at the end of a successful improvisation.
Practical considerations for leading an improv group
Organization of an improvisation group
The leader of an improvisation group can be a teacher, choreographer, therapist, or dancer. Although the facilitators will organize the sessions according to their own ideas, some useful guidelines are given here.
Dance improvisation does not require prior skills and skill. However, if there are both experienced dancers and beginners in the group, both can be frustrated. If this situation has arisen, the dancers can break into subgroups for a while according to their level. Or the exercises can be adapted so that beginners can work with simpler versions of the exercises. Then more experienced dancers will be able to work separately at the same time. In some circumstances, a mixed group serves as a stimulus for growth, and thus is beneficial to both parties.
Many of the improv exercises can be adapted for groups of three to thirty people, although I find a group of ten to twelve dancers to be optimal. The twelve dancers can easily be divided into small groups, each of which can work simultaneously or alternately; several dancers can be observers while others are moving. In simple exercises, the group can work as a whole.
The best place to work is a clean, large dance studio with a raised wooden floor. The group may also use the gym, stage, large room, or outdoor activities.
The group may meet from twice a week for one or two hours, up to five times a week for four hours. One meeting a week is the minimum for group cohesion to develop. More regular sessions are, of course, better for the progress of each of the participants. In most cases, the group leader is responsible for setting the purpose of the sessions as a whole and for each individual meeting—whether it is to introduce creative aspects to a dance technique class, develop dramatic scenes, introduce choreographic techniques to a dance composition class, or provide direction and character research for the actors. In each case, the facilitator can determine how best to present the task to the group, how to emphasize the acquisition of movement, composition and performance skills, how to emphasize the process of group improvisation as an end result in itself.
Lesson Planning
The exercises are listed thematically for ease of reference and not necessarily in the order in which they should be performed. In general, limiting the session to one or two topics helps the group develop and refine the acquired skills. Each topic includes some simple and some difficult exercises. A "simple" exercise can mean solo or pair work, or a limited choice of activities for a group. More complex group tasks connect composition with fantasy and offer greater freedom of choice for the dancers. In any session given here, working on simple exercises prepares the group for more complex tasks in the same area.
Since both physical involvement and awareness are central to improvisation, topics that involve a good balance of movement and thought can be devoted to separate sessions. When choosing a sequence of exercises for a session, the facilitator should keep in mind that work done earlier can affect what happens later. If the dancers are doing an exercise that increases their spatial awareness, then that awareness should help them throughout the session, even if the subsequent exercises do not focus on space. It's harder when they start out slow; in this case, they may need to be reminded later to move faster and more actively.
Do I need musical accompaniment for improvisation?
Music can create atmosphere and keep the energy and focus of the group. It can also make feeling and action the basis for rhythmic work, or determine the duration of an improvisation. She can unify the dancers' efforts by influencing the style, speed and energy of their movement. The danger is that the unifying effect of the music can draw attention away from the other dancers. A good solution is to work with an accompanist who can react to the dancers in the same way that dancers react to music. But even with a phonogram, dancers can learn to react consciously to what they hear, just as they react to what they see and feel. On the other hand, silence can be the strongest accompaniment possible.
Conducting classes
Each meeting should begin with a warm-up. The warm-up should be familiar to the facilitator and should not be overly technical. The technical warm-up improves the dancers' motor skills, but it can also interfere with their exploration process, as it offers a standard set of moves. For a non-technical warm-up that guides dancers through the improvisation process, see the Word-Action exercise. Once the overall direction of the exercise for the session is chosen, it is important to be flexible in following this plan. The leader needs to be responsive to each dancer, and the dancers to each other. The facilitator decides when to interrupt the exercise and when to repeat, set a time limit or allow the exercise to continue; helps guide the group to a successful conclusion. The purpose of such decisions is to help the dancers understand the essence of the task so that they are able to work together effectively and with a sense of satisfaction.
The facilitator can help with the start and end of the session. One of the most undesirable fallacies of group improvisation is the chaotic beginning. In general, improvisation should begin with the movement of one person, so that everyone who joins the improvisation knows what has already happened. Improvisation can be started by someone who has the impulse to start, or the facilitator can ask someone to start. Sometimes it is helpful to choose a dancer who will be able to provide effective material; sometimes the host may pick up someone who doesn't take the initiative. There are various ways to end an improvisation, but in all cases, dancers should get used to ending in a state of clarity, and maintaining that state before everyone else has gone. Before the start of the improvisation, the facilitator may inform the dancers of the approximate duration of the improvisation (for example, one minute, half an hour). In addition, the host may also announce the end; hint that the dancers should start looking for an ending to their improvisation; or let them finish whenever they see fit. Improvisation doesn't always have to end in stillness, and certainly not in the mess so beloved by beginners. The dancers may imagine that the light is dimming and continue to move towards the edges of the space.
 Or they may exit the stage space.
A discussion at the end of an exercise or series of exercises can help dancers review and evaluate the decisions they have made, discover other possibilities they could try, and recognize what they were doing instinctively. Discussions should not aim to decide what was done right and what was wrong, but to understand the consequences of the choice made. If the group repeats the exercise after the discussion, they can see how the new understanding will affect the outcome.
Not every improvisation leads to immediate success. The facilitator will often encounter difficulties and redo exercises. If an exercise is boring to the dancers or their audience (usually both), it is possible that the dancers are missing some side of it. Creating focused attention helps you achieve greater success. If the exercise doesn't go well from the start, the dancers can start again with new material.
If too much is happening at the same time, difficulties can arise due to the large number of people who are trying to get ahead of events. In general, the "rule of thumb" for most improvisations allows no more than two different events to occur simultaneously. The nature of the "event" depends on the topic under study. This may be, for example, the grouping of dancers or the nature of the movement.
Sometimes dancers do too much without letting others see, understand and find the answer. In general, it helps an improvisational process that is evolutionary rather than revolutionary if the dancers tend to be verbose. Not immediately, but this process leads to mutual understanding, which will have exciting results.
When a dancer breaks the rule of improvisation, this may be a means to avoid difficulties in the exercise. Sometimes this is a trait of genius. Dancers must learn to recognize this. They have to get used to not shirk, the improvisational intoxication comes when the dancer's concentration is so high that the answers come automatically. Then the structure is clear, the imagination is alert, and all previous learning has become instinct.
Preparatory exercises
Improvisation classes teach skills, but they also require skills and abilities. Dancers have to learn, get used to the process of improvisation, to concentration and focus. They must be able to see and respond to what they see. These skills are represented by exercises "Mirror" and "Unison". Once these elements are mastered, dancers can begin to acquire new skills and incorporate them into their dance work.
When working with a group, the findings themselves are not as important as the ability to use them in collaboration with other people. It starts with an interest in working together and a sense of trust in the other members of the group. The sections "Active and Passive Roles" and "Working with Weight" help to develop these qualities.
Mandatory preparation for all exercises is a warm-up. She prepares the dancers physically so that they can move freely and safely. The Word-Action exercise given here puts the dancers in an improvising state of mind, activating memory, imagination and imitation.
Warm-up "Word-Action"
Procedure
The host calls the quality of the movement. For example: rocking, stretching, twisting, walking, running, falling and getting up, shaking. The group invents movement in a given category in three ways: through spontaneous physical exploration; through past experience - movements learned in technical classes, learned in dances, seen performances or in life situations; imitating other dancers and using their variations. Dancers must maintain continuity of movement.
After a few minutes of exploring one category of movement, the facilitator calls another category. Or the dancers can name the categories according to what they feel is necessary for the warm-up.
Note .
If this exercise is used as a warm-up, it is best to start with simple movements (rocking, walking, then running and stretching) before making sudden movements or jumps. With some prompting from the facilitator, this exercise can also help warm up the minds of the dancers. Dancers can distinguish between playing already familiar material, discovering new material, imitating someone else's movement, and creating spontaneous variations. They may also pay attention to the transitions between their own exploration and other people's imitation.
Since this exercise is simple, the facilitator may suggest that the dancers work on those areas of movement or performance that need a lot of attention, such as quality of movement, use of the center, use of all parts of the body, etc.
Body parts warm-up
Procedure
Dancers stand in a circle. One dancer names a body part. All dancers move this part of the body, at first gently, then more and more actively. After a while, another dancer may name a different body part. The dancers then move the newly named body part. Thus, the group passes through all parts of the body. Dancers can repeat the movement process, where the movement starts with one part of the body, and then the whole body is involved in it
Lokomotiv warm-up
Procedure
Everyone lines up behind one dancer. This dancer moves through space in such a way as to engage different parts of the body. After a while, another dancer may take the lead in the line and take the lead using a new kind of movement. The movement should become gradually fuller and more vigorous.
Dancers should be attentive, not in a hurry, not to do too much in a short time. A dancer who feels he is not ready to make a move with the whole group may take the lead of the line and start another move, or may perform whichever variation of the move he feels is more appropriate for him. During this warm-up, the dancers must move around the entire space, not just in the center.
Mirror
Mirroring other people's movements is the basis of improvisation. Even in its simplest form, when two dancers mirror movements facing each other, mirroring brings out the skills essential to all group improvisation. The ability to perceive and reproduce movement develops through exact imitation; the ability to respond without delay comes from the need to move in sync with a partner; the ability to maintain concentration is maintained by the constant focus of the dancers on each other; and the emergence of a new movement comes from observing and responding to the movements of others. Since every detail must be reproduced, the dancers also get a kinesthetic sense of the other's movement. And, ultimately, these skills of observation and reaction are the preface to group improvisation, in which the dancers see and perceive everything that happens at this time, regardless of the size of the group.
The processes of leading, following and interacting are inherent in all improvisation. The mirroring exercises presented here provide an opportunity to experience all of these roles and then develop them. Once the dancers gain some ability to mirror each other, they can start playing with variations of these movements. They also gain the ability to mirror more dancers at the same time through the "group mirror".
These exercises are central to the improvisation process and can be repeated many times. They can even be used before the start of each session, serving as a mental and physical warm-up for subsequent improvisations.
« Mirror «
Procedure
The dancers are divided into pairs and stand opposite each other. One of them is the leader, the other is the follower. When the leader moves, the follower mirrors each movement as accurately as possible. The goal is to achieve such consistency of movement that the observer cannot distinguish who is leading and who is following. The leader must focus on moving clearly so that the follower maintains a connection, and the follower's task is to feel the connection of his movements with the movements of the leader. After a few minutes, the dancers switch roles and repeat the exercise.
Variation
Lead passes between two dancers. The change may occur in rapid succession, so that even the dancers themselves cannot tell when the change occurs. One of the dancers can also remain the leader for a while. No dancer should specifically choose whether to keep the lead or avoid it.
Note
To make the mirror image as accurate as possible, the presenters should move slowly enough and avoid sudden movements. They should look at their partners and partners, being a mirror image, look at the leaders. Dancers are not required to stay in one place. They can move along the mirror, approach or move away from it. They must not, however, move through the mirror. They must know exactly where the mirror plane passes.
The Mirror exercise serves several main purposes. It teaches the dancers to look at each other; requires the dancers to carefully and carefully observe and reproduce the movements. The change in leadership encourages flexibility in starting and following movements: a skill that is central to group improvisation.
Mirror 2
Procedure
Dancers are divided into pairs. One dancer in each pair is the leader.
In each pair, the leader moves and the partner mirrors his movements. Sometimes the leader moves so that the partner can repeat everything exactly. Sometimes he can move quickly or with accents. The follower must not let this confuse him, but must mirror these changes as well, confidently creating a rhythmic variation. The dancers change roles and repeat the exercise.
“Mirror reflection with movement variations”
Procedure
Dancers are divided into pairs. One dancer in each pair is the leader.
The facilitator makes several movements that are easy to mirror and several movements that are more difficult to mirror. When a movement becomes too fast or complex to accurately reflect, the follower may follow them in sequence or shorten the movement or create a variation. Whatever the dancer chooses, he must maintain the fullness and continuity of the movement throughout the dance.
The facilitator may also offer moments of stillness or repeat their movements, allowing the partner to develop variations more fully. The dancers change roles and repeat the exercise.
Variation
The dancers are divided into groups of three or four. In each group, one dancer becomes the lead while the others mirror with movement variations. Followers may also find a way to respond to variations of each.
Note
By noticing the reactions of his followers, it is easier for the leader to decide when to repeat movements and when to introduce new motives.
"Group mirror"
Preparation
The line crossing the center of the space marks the mirror. It can be drawn with chalk or put a tape for clarity.
Procedure
Half of the dancers are spectators. The rest are divided into pairs. One of the dancers in each pair is the leader. All presenters start on one side of the mirror, and their partners start on the opposite side.
Leaders move, their partners mirror as accurately as they can. Facilitators can interact with each other, paying special attention to the spatial coherence of the group as a whole.
The facilitator can change roles with a partner whenever he wants by approaching the mirror, touching the partner's palm with his palm and switching places through the mirror. Thus, all presenters always remain on the same side of the mirror.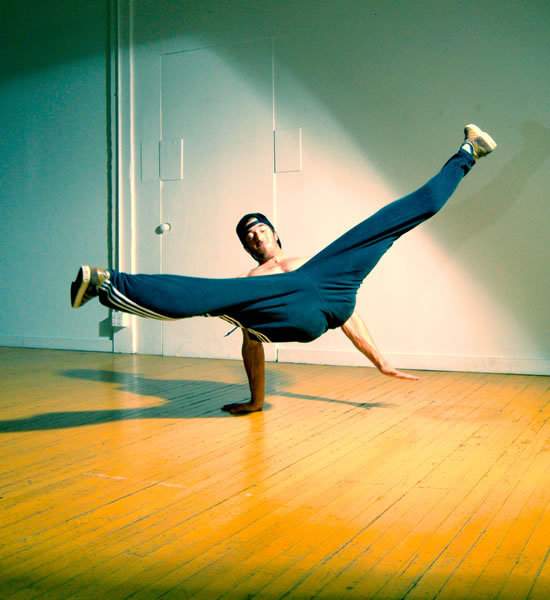
Note
This exercise works best when there is more range of motion than was possible in the Mirror exercise. Followers should try to reproduce everything in the best possible way.
This exercise can be limited to focusing on individual skills. For example, dancers may be asked to pay particular attention to the dance pattern, levels, or rhythm.
Unison
Moving in unison with others is a special pleasure, perhaps because it generates a sense of agreement and support - or anonymity.
Unison, like mirror image, is an exercise in imitation. However, in suggesting a mass movement, unison is simpler and does not require as much personal involvement than a more intimate "mirror". It shifts the focus of attention outward. The motion also propagates freely in space, not being limited by an imaginary mirror. This means that dancers can explore the use of space in different contexts without having to deal with complex movement patterns. The simplicity of the group's movement in unison makes the use of space clearly visible. The practice of careful observation and accurate imitation is necessary in the study of movement, in the dance class or in rehearsals. It is also the basis of all work in group improvisation, which depends on observing other people and reacting to their actions.
"Chain of Names"
Preparation
Each dancer writes a short dance phrase, which must be accompanied by the name. The name can be spoken during the movement, before it or after it. Dancers can play with rhythm and volume while saying their name. They shouldn't whisper it shyly.
Procedure
All dancers stand in a circle. The dancer designated as leader begins. He or she introduces their phrase by accompanying it with their name, say "Peggy", and repeats it one more time. The whole group then repeats the movement and sound in unison.
Second dancer repeats Peggy's phrase with audio and adds his own move and name, such as "Moss". He repeats both phrases. Everyone then repeats the sound and movement in unison. This process continues: Peggy, Moss, Phillip, Holly...
The facilitator can break the loop and start over with the next person if the sequence gets too long to remember.
Variations
Using names helps a new group get to know each other. But this exercise can also be performed using any sound accompaniment or in silence.
Unison in Group
Procedure
The group comes together in space, all facing the same direction. The dancer, who will be at the head of the group, begins to move. Others move in unison with this dancer. If the direction of the movement (and therefore of the group) changes, so does the leader.
The leader is always the person who cannot see the others. If two dancers standing side by side are not sure which one of them should lead, they should resolve this issue as quickly as possible. When the facilitator leans in and the focus moves back, the one on the opposite side of the group becomes the facilitator.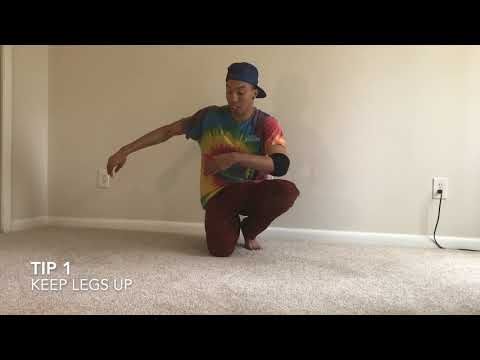 Dancers should aim for smooth transitions from lead to lead, interrupting the movement as little as possible. The group should always try to maintain unison.
Leaders should always remember that others tend to follow them and choose appropriate movements. However, you should not stay in one place. The group can move through space and change levels. Other dancers can change positions within the group during the move, so that different people become leaders, not just those on the outer edge of the group.
Variations
The dancers are divided into groups of three. If space allows, all trios can be in space at the same time. Each trio forms a triangle with all three dancers facing the same direction. The dancer with his back to the other two is the leader.
In this format, presenters can explore the range of motion that can be followed. They can move and use any movement dynamics. Followers imitate as accurately as possible.
When the leader turns to one of the dancers, the lead passes to that dancer.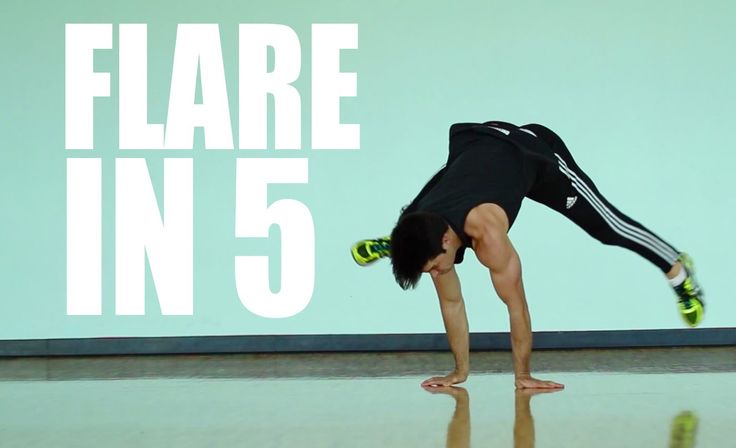 Dancers should eventually experiment with more and more frequent changes of hosts.
"Following two leaders"
Procedure
Part of the group - the audience. At least five dancers are in space. Two dancers are chosen as leaders. The dancers are distributed so that everyone can see at least one of the leaders.
Leaders move as they please, keeping their backs to followers. Followers can imitate any of the leaders. They can follow one after another as they see fit, maintaining continuity of movement during these transitions.
Note
Leaders play an important role in determining not only the movement but the links between two groups. They may oppose levels or speed, or leave one group in place while the other moves, or establish a movement dialogue between two groups. The leader may also be motionless for a while.
Slaves determine the size and arrangement of groups. They also create unexpected moments as they transition from one presenter to another.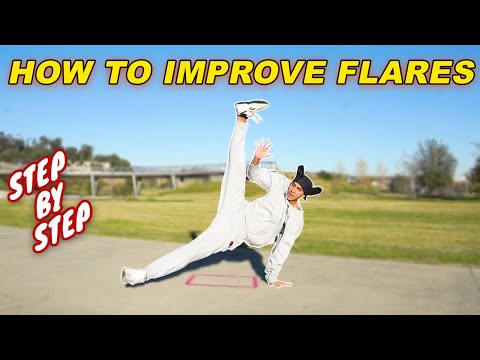 These transitions should happen quite often, as they are the most interesting part of this improvisation.
"Three groups in unison without leaders"
Procedure
Dancers are divided into three groups, not necessarily equal in size. Each group moves in unison, allowing leadership to pass among group members. In each group, the dancer who cannot see the others becomes the leader. Three groups should interact with each other, coordinating or opposing form, dynamics, speed, pattern.
Any dancer can move from one group to another at any time. However, not permanently, as one group can eventually be reduced to a single dancer. Dancers must find ways to maintain continuity of performance as groups change.
The dancer must always be prepared for the fact that the person he is following may join another group at any moment. The dancer then has to choose whether to stay in the old group or change it.
"Active and passive roles"
To improvise as a group, dancers must have confidence in the physical body and the physical aspect of movement. They should not be afraid of physical contact with each other and should know how to contact safely and how their interaction can convey ideas of movement.
The exercises below deal with the roles of initiator and follower in a literal, physical sense. This is a preparation for the exchange of initiative, which occurs when dancers observe each other and react in movement to each other's actions.
"Move with closed eyes"
Procedure
All dancers close their eyes and turn around their axis several times to lose their orientation in space. Then the dancers move in space, exploring the floor, walls, furniture. They can explore space through slow movements so that they feel safe with their eyes closed.
If two dancers collide with each other, they can interact for a while while keeping their eyes closed.
Note
Even in a familiar space, dancers can make discoveries about the size or shape of the space, or the arrangement of objects within it.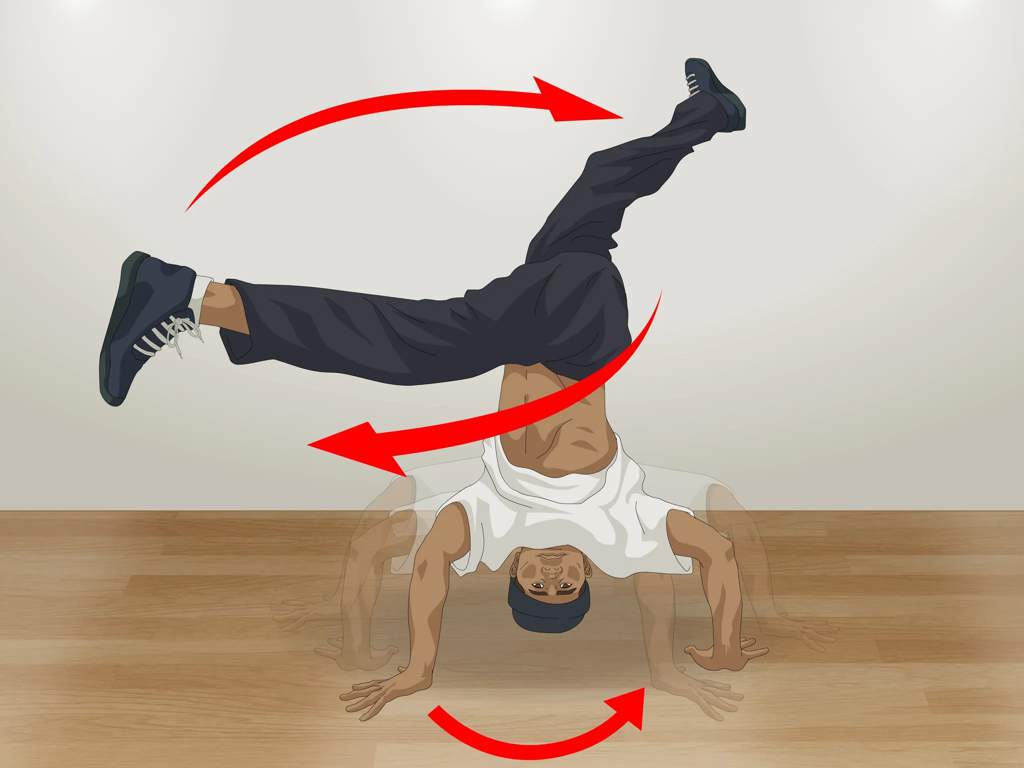 This exercise also prepares them for the trust exercise below.
Eyes Closed Lead
Procedure
Dancers are divided into pairs. One dancer in each pair closes their eyes. The partner must lead him in space. This should be done slowly at first. If conditions permit, the facilitator may lead their partner more boldly, such as by running, circling, sitting down, and standing up.
The two leaders can change partners at any time. Followers must remain with their eyes closed so that they do not know who is leading them at the moment. Dancers should strive to move easily and continuously, even when changing partners.
Dancers can switch lead and follower roles in two ways. The follower may open his eyes and meet the eyes of the leader, who then closes his eyes; or the facilitator may touch their partner's forehead, who opens his eyes while the facilitator closes them.
"Active and passive roles in duets"
Procedure
Dancers are divided into pairs. One dancer in each couple is active; the other is passive. After each of the first four procedures, the dancers must switch roles and repeat the exercise.
1. Active dancer - sculptor: gives various parts of the body of his partner new positions. The passive dancer must allow this to be done without resisting or adding his movements.
2. An active dancer gives movement impulses to his partner. For example, swing your partner's arm, push his hip with your own hip, or push your partner's shoulder with your hand. The partner must move following only this impulse, without resisting or adding his own movement. After each movement, the active dancer must allow his partner to stop before the next impulse.
3. As before, the active dancer gives movement impulses to his partner. This time, the partner somewhat expands his response movement initiated by the impulse. Again, the active dancer allows his partner to stop before giving the next impulse.
4. The active dancer gives movement impulses to his partner, who now exaggerates his response by making a more extended movement phrase, or by making a large movement in response to a small impulse.
5. Dancers constantly exchange active and passive roles. In addition, every time the dancer receives an impulse from a partner, he can choose one of the four already explored four ways of responding. This can either correspond to the partner's apparent intention, or deliberately contrast with him.
During this exercise, the active dancer must not only initiate the partner's movement, but also turn his own actions into a dance. He can also sometimes stop, putting his body in a pose that corresponds to the poses of a partner.
Note
Dancers in the passive role must be careful not to overtake their partners, but only to take over from them the impulses of movement. So they can feel the weight of their own body, its inertia and impulses.
Most dancers love this exercise because of the physical contact and the ability to push other people around.
"Active and passive roles in the group"
Procedure
The whole group or part of the group can act here. In the latter case, the rest can be spectators. Using the active and passive skills learned in the previous exercise, the dancers can choose between active and passive roles as they wish. They must consider the actions of the whole group when deciding to move from one role to another. A passive dancer can surprise a partner by suddenly becoming active.
Active dancers may treat everyone else as passive dancers. Several active dancers can together participate in the movement of one passive dancer. Dancers should explore the possibilities of a group pattern of still bodies.
Note
This exercise is just as fun as the previous one, and it also increases the interest in creating compositional solutions.
Weight work
The amount of physical contact in dance has changed significantly over the years both in the studio and on stage. Not so long ago, most choreographers indicated contact with a gesture rather than a touch. In the seventies, with the advent of contact improvisation based on the exchange of weight between dancers, people began to lift, push and pull each other in motion.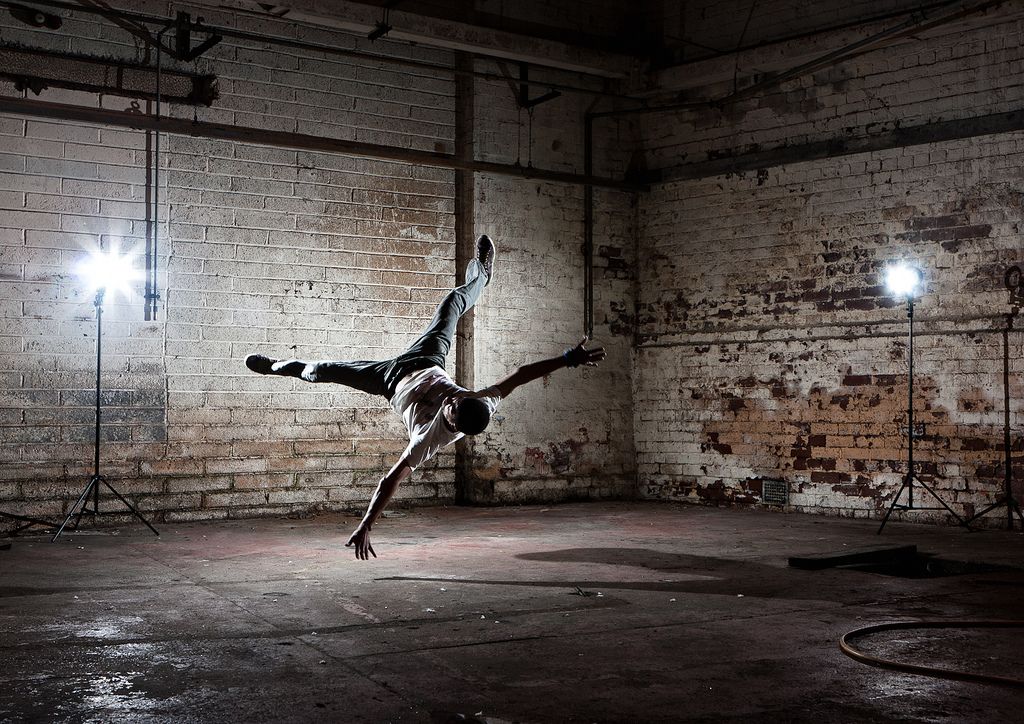
Weight work invites dancers to use their bodies and weight work to provide, in a literal sense, an exchange of movement experiences.
"Weight Work for Two Dancers"
Procedure
Dancers are divided into pairs. They can start working with partners of equal size.
1. Partners stand facing each other, toes to toes, holding with both hands (right hand in partner's left hand, left hand in partner's right). They deviate from each other, creating a balance between them. Maintaining this deflection, the dancers slowly sit down, then slowly stand up. At all times, their arms should remain taut, with their shoulders thrown back more than their hips.
2. Holding hands in the same way, both dancers lean away from each other. One dancer sits down while the other continues to stand, supporting the weight of his partner. Maintaining tension between them, the dancers switch roles, creating a seesaw effect. They can repeat this at a steady pace.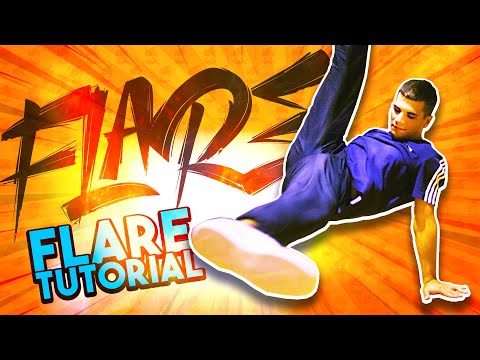
3. Partners facing each other, toes to toes, held with right hands. They lean away from each other, sit down and stand up. Then do the same with the left hand. Dancers can establish a lively, steady rhythm of squatting and standing up with a change of hands at the highest point. Partners must maintain a balance between them, neither of them maintains only their own balance. The moment of changing hands is only a suspension, not a static point.
4. Leaning back to back, the dancers clasp their elbows and sit down. They can move their legs forward to sit. They should move their legs as little as possible so as to take the weight as the dancers stand together while remaining in a back-to-back position.
5. Dancers can explore other balance positions between them. They may try to connect with different parts of the body, such as ankles, or deviate by wrapping an arm around the other's waist. They can also find balance by leaning against each other, trying different points of contact. Both dancers must keep their balance in such a way that if the connection between them is broken, both would fall.
Note
The partners do not have to be the same size. Dancers may repeat some exercises with partners larger or smaller than themselves.
Falls and Pickups
Procedure
Dancers are divided into groups of three. In each group, two stand about four paces apart, facing each other. A third dancer stands between them, facing one of them. This dancer alternately falls back, picked up by the person behind, and forward, picked up by the person in front. He must keep his body taut without letting it sag.
When picking up someone, the dancer must first keep their hands close enough to themselves, palms open. He should grab the person above the waist, stepping back with bent knees, and then stand the partner upright. The dancers change roles and repeat the exercise.
Notes
This exercise is done to feel and share the weight of the other, and to develop physical confidence among the dancers.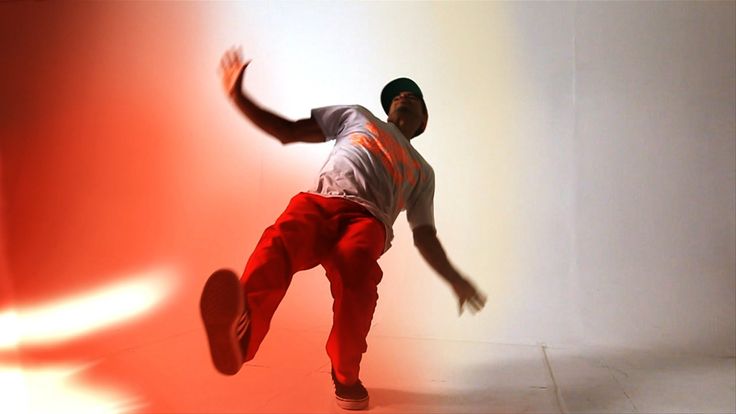 If the dancers are not experienced in this type of work, they can do this exercise in pairs, catching each other and standing upright.
Group Weight Work
Procedure
1. A group of dancers stand in a circle holding hands. Everyone deviates from the circle, finding balance within the group, although none of them maintains individual balance.
2. In the same circle, the dancers can swing and shift their weight. After some time, the dancer may leave his place in the circle and move to another place, and rejoin in some way, not necessarily with his hands. He needs to find his balance again. The group may change into configurations other than the circle, always maintaining the weight interaction between the dancers, even while moving if possible.
3. Dancers can stand or move in space. From time to time one dancer approaches another and they do a series of balance exercises as described above. This should be done without words, just by feeling what is going on between the two dancers.