How to do car dance mission in san andreas
How To Complete the Low Rider Challenge in GTA San Andreas Definitive Edition
- Home
- grand theft-auto
- GTA San Andreas
Fancy a wager on the Low Rider Challenge?
By Titas Khan
The Low Rider challenge in GTA San Andreas offer players with an unique rhythmic mini-game with an option to place wagers on themself. First available during the Cesar Vialpando mission, players can choose to participate in this challenge whenever and as many times as they want to.
However, before heading into this challenge, there are a few things that players should note. For example, in order to participate for the Low Rider challenge, players will first need to find a suitable vehicle for the same.
Advertisement
Additionally, the pace of the rhythmic beats in the challenge heavily depends upon the amount of money that the players places on their wager. While a low-amount will result in rather comfortable beat-timings, a high wager will cause the beat-timings to increase rapidly.
Having said that, let's dive in and check out how to complete the Low Rider challenge in GTA San Andreas.
Read More: Grand Theft Auto: San Andreas - Is It Coming to PC VR or PlayStation VR?
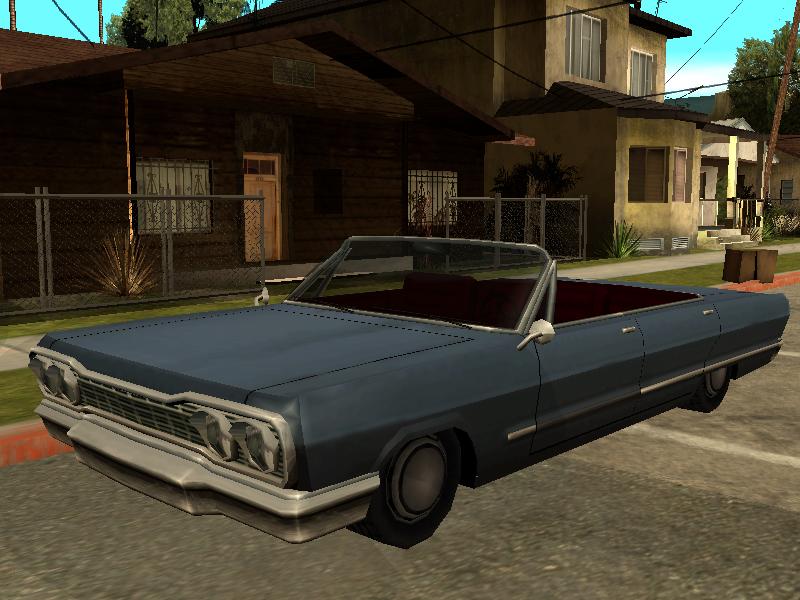
In order to get started with the Low Rider challenge, players will need to locate a suitable vehicle first. Here's a list of low-rider vehicles in GTA San Andreas:
Advertisement
- Blade
- Broadway
- Remington
- Savanna
- Slamvan
- Tahoma
- Tornado
- Voodoo
After collecting any one of these cars, the player will need to head over to the Unity Station in Los Santos.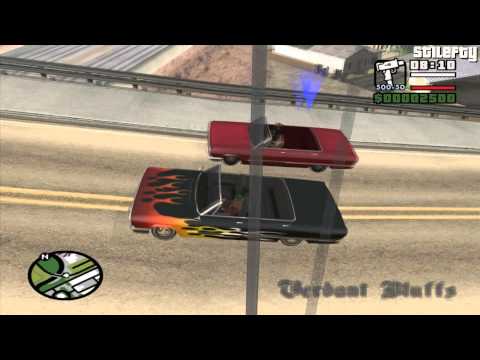 Upon arriving at the location, the player will find a mechanic NPC standing on the opposite side of the wall. Interacting with this NPC will allow the player to begin the Low Rider Challenge.
Advertisement
The main objective of this mission is ensure that the player is clicking the accurate hotkey prompts during the challenge. Needless to say, it is a fairly simple challenge and shouldn't be too much trouble to finish accurately.
However, players should note that the Low Rider challenge does not help with getting closer towards the 100% completion mark. Nevertheless, considering the amount of money that can be made by placing wagers, players should definitely give this challenge a try.
Read More: GTA Definitive Edition Reportedly Took "Over Two Years" To Develop
Gfinity Esports is supported by its audience. When you purchase through links on our site, we may earn an affiliate commission. Learn more. Looking for specific products? Visit Stockinformer.co.uk / stockinformer.com.
 Advertisement
Advertisement
Latest News
Recommended for you
Grand Theft Auto
GTA Trilogy's Physical Edition Has Been Slightly Delayed
Invalid Date
GTA San Andreas
How to Purchase Safe Houses in GTA San Andreas Definitive Edition
Invalid Date
GTA San Andreas Definitive Edition Trophy Guide & Roadmap
GTA San Andreas Definitive Edition Trophy Roadmap
- Estimated trophy difficulty: 4/10
- Approximate amount of time to platinum: 40-50 hours
- Offline Trophies: 35 (1, 5, 8, 21)
- Online Trophies: 0
- Number of missable trophies: 3: Who Needs Directions?, They Can’t Stop All of Us, Assassin
- Glitched trophies: 0
- Does difficulty affect trophies?: No difficulties available
- Do Cheats disable trophies?: Yes, must play without cheats
- Minimum Playthroughs: 1
- PS4/PS5 Autopop & Save Transfer: No Save Transfer
- PS4/PS5 Crossbuy: Yes for digital download / No for physical disc
- Free-Roam / Level Select after Story?: Yes
- Release Date: November 11, 2021
Introduction
Welcome to the Grand Theft Auto San Andreas Definitive Edition Trophy Guide (aka GTA Trilogy / GTA San Andreas Remaster on PS4 and PS5). The 2021 remaster of a 17-year old classic, this definitive edition includes upgrades and quality of life updates such as updated graphics and lighting, updated driving controls, updated gunplay mechanics, a GPS system and other features.
Unlike the PS2-to-PS4 port of GTA San Andreas, cheats will disable all trophies in this version, so you will not be able to use cheats to your advantage. The game can very rarely crash, so it is recommended that you save regularly, especially when doing stuff without autosaves such as capturing gang territories or collecting oysters. It is also recommended that you play the game in Performance mode, as when played in Fidelity mode certain mission cutscenes can cause the game to crash.
You will need to get 100% Completion in order to obtain the platinum, which consists of doing all story missions, asset missions, side missions, winning all races, collecting all 4 types of collectibles, purchasing all properties and some other smaller requirements. Nothing that is required for 100% Completion is missable, so you can work towards this however you like. For more information regarding 100% completion, please see the 100% Completion Guide & Checklist.
Most other trophies fall under the 100% requirement, however there are some you will need to go out of your way to do, such as the mission-specific trophies. There are three of these in the game and these are missable. The story itself can be completed within roughly 20 hours, with the platinum requiring 35-45 hours, however it is recommended to do some side content such as Vehicle Missions early on to unlock their upgrades, rather than doing them after the story.
Step 1: Complete the Story, get missable mission-related trophies
Play through the story in any way you please, doing as much optional and side content along the way as you want. As you play, it is advised that you swap weapons when a weapon reaches Hitman skill level, as you will eventually need to fully max out all weapons.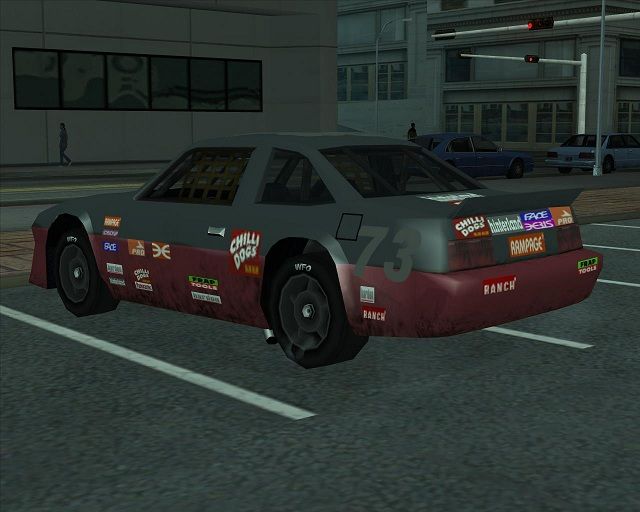 While you could simply focus on the story missions until you complete the game and do all other content afterwards, it is recommended that you complete the Vehicle Missions, as these will give you upgrades such as increased health and infinite sprint. If you do decide to do optional content as you play, do not waste your time capturing gang warfare turfs when you first unlock them, as you will lose all unlocked turfs after you first leave Los Santos.
While playing through the story, take note of the below 3 missions, as these have mission-specific trophies that are missable:
- Madd Dogg’s Rhymes: Assassin
- Mike Toreno: Who Needs Directions?
- Black Project: They Can’t Stop All of Us
Step 2: Complete all optional content for 100% Completion
With the game completed and the full map available, it’s best to focus on everything left that’s required for 100% completion. This will include all asset missions, vehicle missions, races, properties and all 4 types of collectibles, as well as several smaller requirements. A lot of the optional stuff required for 100% boils down to driving around with different conditions. It is best to do this before capturing all the gang turfs, as the unlocks from 100% completion can make that easier.
» GTA San Andreas Definitive Edition – 100% Completion Guide & Checklist
Step 3: Capture all Gang Warfare Turfs, Max all Weapon Skills and Miscellaneous Cleanup
After getting 100% completion, you will get replenishing ammo for all your weapons, and a Rhino tank will spawn under the bridge in Grove Street, both of which can help speed up the process of capturing all gang turfs. While doing this you can also work on maxing out the remaining weapon skills, or alternatively do that separately if you prefer to just use your best weapons and the Rhino for all turfs. If you haven’t earned all miscellaneous trophies, now is the time to clean them up.
Useful Tips, Tricks and Guides
- GTA San Andreas Definitive Edition – 100% Completion Guide & Checklist
- GTA San Andreas Definitive Edition – All Export and Import Vehicle Locations
- GTA SAn Andreas Definitive Edition – All Tag Locations
- GTA San Andreas Definitive Edition – All Snapshot Locations
- GTA San Andreas Definitive Edition – All Oyster Locations
- GTA San Andreas Definitive Edition – All Horseshoe Locations
- GTA San Andreas Definitive Edition – All Girlfriend Locations
- GTA San Andreas Definitive Edition – All Hidden Mission Locations
GTA San Andreas Definitive Edition Trophy Guide
For other GTA Trilogy Guides, refer to:
GTA III Definitive Edition Trophy Guide & Roadmap
GTA Vice City: Definitive Edition Trophy Guide & Roadmap
| I Ain’t No Buster Unlock all trophies. | ||
Earn all other trophies in GTA San Andreas Definitive Edition (PS4/PS5 Remaster) to unlock Platinum. | ||
| Getting Started Complete “Big Smoke”. | ||
| Automatic story-related trophy, cannot be missed. Big Smoke is the first mission in the game. You will need to drive to the graveyard, and then ride a bike back to Grove Street following Sweet and Ryder along the way. | ||
| With Extra Dip Buy 8 meals from Cluckin’ Bell throughout the game. | ||
| This trophy is a little misleading, as you have to buy 8 meals in a single purchase without leaving Cluckin’ Bell. Buy 8 meals from any Cluckin’ Bell in one go for the trophy. | ||
| The End of the Line Complete “End of the Line”. | ||
| Automatic story-related trophy, cannot be missed. End of the Line is the final mission in the game, and can be started at Sweet’s House when you have taken over at least 35% of the Gang Warfare Turfs around Los Santos. For this mission you must head to Big Smoke’s compound and steal a SWAT Truck to break inside. | ||
| Hoopin’ it Up Score at least 30 points in the basketball mini-game. | ||
In order to play the basketball mini-game, you must pick up a basketball on one of the full basketball courts and press to start Challenge Mode. You cannot do this trophy on the small court at Sweet’s House, as you cannot enter Challenge Mode here. When in Challenge Mode, you will start with 1 minute and there will be red circles indicating where to throw from, with each basket giving you 1-2 points and 10 seconds on the clock. You throw the ball by holding and letting go at the peak of CJ’s jump. It may take a little bit to find the right timing for when to let go, but when you do it will be consistent for every ball toss from any distance. It may take a little bit to find the right timing for when to let go, but when you do it will be consistent for every ball toss from any distance. | ||
| A Legitimate Business Export all three car lists. | ||
| After completing the mission “Customs Fast Track” for the Wang Cars asset, you will unlock Export and Import at the Easter Basin drydock. There will be 3 lists to complete, each with 10 cars to deliver. Completing all lists will grant you up to $1,444,000, depending on the quality of the vehicles you deliver. For a complete list of Export and Import Vehicles, please see GTA San Andreas Export and Import Vehicle Locations. | ||
| I’ll Have Two Number 9s Reach maximum weight. | ||
| Weight refers to the Fat statistic, and you can see your stats either in the stats menu or by holding . In order to increase your weight, you will need to eat meals at any of the fast food chains – Cluckin’ Bell, Well Stacked Pizza Company and Burger Shot. | ||
| The American Dream Purchase any house. | ||
| There are many purchasable properties in the game, and these appear on the map as a green house when they are available for purchase. Simply purchase any house for the trophy. | ||
| Pay ‘n’ Spray Use a Pay ‘n’ Spray with wanted level. | ||
| Pay ‘n’ Sprays can be found all over the map, indicated on the map by a spray can symbol. Simply drive into one while you have a wanted level and the trophy will pop. | ||
| Bike or Biker Complete BMX or NRG challenge. 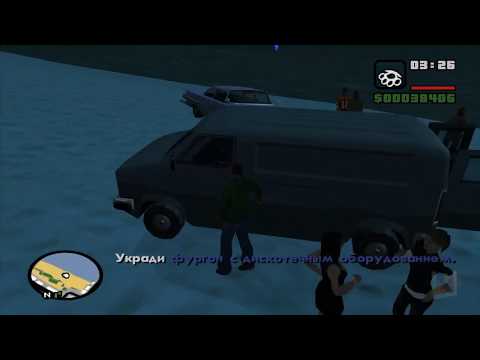 | ||
| BMX Challenge The BMX Challenge can be started by getting on the BMX at the Glen Park Skate Park in Los Santos with a cycling skill above 20%. For this challenge you will need to collect all 19 checkpoints around the Skate Park, with each checkpoint granting you 10 seconds and you starting with 10 seconds. Several of these checkpoints will require you to bunny hop with the BMX to reach (which can be done by holding ), and it is recommended that before you do this you have a cycling skill of at least 60% if not higher, as your bunny hop jump height will increase at higher skill levels. Having too low cycling skill can make some checkpoints extremely difficult to reach. NRG-500 Challenge The NRG-500 Challenge can be started by getting on the NRG-500 at the dock in Easter Basin, San Fierro. For this challenge you will need to collect all 18 checkpoints within the halfpipe, with each checkpoint granting you 10 seconds and you starting with 10 seconds. For the locations of all vehicle challenges, please see GTA San Andreas Hidden Mission Locations. | ||
| Who Needs Directions? Find Mike Toreno without any of the referenced locations during “Mike Toreno”. | ||
| Missable! Mission: Mike Toreno (Jizzy B) In this mission you are tasked with following the hints provided by Mike to find where he is located. Rather than following where the mission wants you to go, simply drive to the Easter Basin Airport in the southeast of San Fierro and the trophy will pop when you enter the airport runway. | ||
| Liberty City State of Mind Complete the “Saint Mark’s Bistro” mission. | ||
Automatic story-related trophy, cannot be missed. Saint Mark’s Bistro is the last mission done for the Mafia at Caligula’s Casino. In this mission you will need to head to the Las Venturas Airport and grab a plane to fly to Liberty City. Once you arrive you will be at Saint Mark’s Bistro, where you will need to kill all the mafioso and Marco Forelli. | ||
| Swiss Army Strife Max all weapon skills. | ||
| Weapon Skill is a rating of how well you handle certain weapons, and it applies to all pistols, machine guns, shotguns and assault rifles. All guns start at a rating of Poor (0), and work up to Gangster and eventually Hitman (1000). You will need to hit Hitman rating will all 10 eligible weapons to unlock the trophy. Other than simply using guns you haven’t maxed, there are 2 main ways to work towards this: The first is during Gang Warfare. You will eventually need to take over all 53 Gang Warfare Turfs for Ain’t Nothing But a G Thing and these will have you killing hundreds and hundreds of gang members, so if you actively use weapons that you haven’t maxed while doing these, you will likely max out all weapons before you have captured them all. If however you just want to use the tank or stick to your best weapons when doing gang wars, the alternative and more direct way to level your weapons is to simply head to a safehouse with a garage and park a vehicle inside. Shoot the vehicle with a weapon you want to level until it catches fire, then let the garage close so it repairs. Repeat this for each weapon and you can complete each weapon in about 5 minutes of shooting. The below weapons are required to max out. Many of these can be made available at the main safehouses by collecting all collectibles for that respective island, or can alternatively all be made available for purchase at Ammu-Nation (with the final weapons unlocking after completing the mission “You’ve Had Your Chips”):
| ||
| School’s Out Fully complete a vehicle school.  | ||
| Automatic story-related trophy, cannot be missed. There are 4 vehicle schools in the game, 3 of which are optional and unlock after completing the mission “Deconstruction”, while the fourth – Flying School – is done during the story mission “Learning to Fly” so you will earn this normally when playing through the story if you don’t do any of the optional schools. Simply complete every lesson in a school with at least a bronze medal for this trophy. | ||
| Horror of the Santa Maria Drown. | ||
| Head into the water and dive under with , then let your oxygen and health deplete fully. You will lose all your weapons when you die (unless you’re dating Katie Zhan), so if you don’t want to lose anything either drown early into the game or after you’ve started dating Katie. | ||
| They Can’t Stop All of Us Sneak into the underground base without setting off the alarm above ground during “Black Project”.  | ||
| Missable! Mission: Black Project (The Truth) In this mission you have to sneak into Area 69, break into the underground base and steal Black Project: the Jetpack. You will need to make it into base without setting off the alarm above ground by letting the guards or spotlights see you. You will need to go to the control room on the eastern side, so sneak along the fence going east and headshot any guards you see with your Silenced Pistol. If you need to you can shoot up to 2 spotlights, but any more than 2 and you will alert them. The guards aren’t too aware, so as long as you stay near the fence you can move without much concern. Once you open the bunker from the control room, head into the middle of Area 69 and enter through the doors. The alarms will sound once you enter, but this is normal. You will need to complete the rest of the mission as the trophy pops upon completion. If you set off an alarm while outside simply let them kill you as there is a checkpoint right at the beginning of that section. | ||
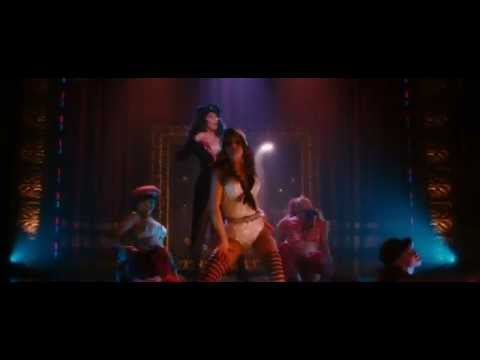
| Smooth Moves Perform a perfect dance routine. | ||
| This can be done during the dancing mini-game, which you can play during the mission “Life’s A Beach”, on dancing dates with girlfriends, or simply by entering one of the nightclubs on your own (the most accessible of which is the Alhambra in Idlewood, Los Santos). The dancing mini-game is a simple rhythm game where you have to press the correct directional button when the arrow goes through the middle, and you will get points based on your timing. A perfect dance routine doesn’t actually require you to hit all notes, it simply requires your overall performance (indicated at the top of the screen) to having the rating of Perfect. Your rating can go from Bad, Good and Perfect, depending on how accurately you hit the notes, and as long as you end the mini-game with a Perfect rating you will get the trophy, even if you miss some notes. | ||
| What the City Needs Complete 12 levels of Vigilante. | ||
| Vigilante missions will require any law enforcement vehicle, including the HPV-1000, Rhino and Hunter (in the case of the Hunter the mission is called Brown Thunder, but it still counts as the same thing). In order to complete it, you will need to reach and complete level 12 in one go. Each level will increase the number of criminals to kill by 1, with level 1 starting with a single criminal in a car, and level 12 having 12 criminals split across 3 cars. The easiest way to do this is either with the Rhino or Hunter, but these will require some effort to acquire. The Rhino can be accessed from Area 69 within the Restricted Area in Las Venturas, and entering Area 69 will give you an immediate 5-star wanted level. The Hunter can be acquired either by getting all gold medals in the Flight School, or by smuggling it out of the Heli Hell checkpoint race (by flying it to Las Venturas Airport where you start the checkpoint race and letting the race fail). If you want to do this early on however, you will need to use a regular law enforcement vehicle, of which the HPV-100 Police Bike is the best choice. With this method you will want to use any variant of SMG (preferably with 2000+ bullets to ensure you don’t run out during the mission) and drive-by the criminals until they either get out of their cars or they blow up. The HPV-100 is great for this as you can shoot forwards as well as sideways. Be careful when they get out as they can sometimes have shotguns or rifles which will destroy your vehicle very quickly. You will inevitably get a high wanted level while doing this method, meaning you will either need to find police bribes or quickly grab another vehicle to use a Pay’N’Spray. You will also likely need to change law enforcement vehicles several times during the course of this. Upon completing the Vigilante mission, you will increase your maximum armor. | ||
| Saviour Complete 12 levels of Paramedic. | ||
Paramedic missions will require an Ambulance. In order to complete it, you will need to reach and complete level 12 in one go. This mission tasks you with picking up injured civilians around the map, and returning them to the hospital, granting time both on pick up and (sometimes) on drop off, with the number required to rescue going up by 1 every level. The Ambulance has very poor handling and can flip very easily, so while doing this it is recommended to drive cautiously, and brake with when going around corners to avoid flipping. As the Ambulance can only hold 3 people at once, you will want to use your map to plan out your route each level so that you’re picking them up in an effective manner. Be careful not to run over any injured civilians or crash while moving them, as this will fail the mission. The best location to complete this is in Angel Pines (which is where you start after completing the mission “The Green Sabre”), as the town has a hospital and is very small. By doing the mission here all the patients will be very close by and you can complete the paramedic mission very quickly. Upon completing the Paramedic mission, you will increase your maximum health. | ||
| Rescue a Kitten Too? Complete 12 levels of Firefighter. | ||
Firefighter missions will require a Fire Truck, which can be found at any Fire Station or by starting a fire with molotov cocktails. In order to complete it, you will need to reach and complete level 12 in one go. Each level will increase the number of fires to put out by 1, with level 1 starting with a single car on fire, and level 12 having 3 cars on fire, all full with passengers. When you put out a burning car the passengers will get out and start running around, and you must put them out. You will receive time with every fire put out and quickly have an excess of time, so the only thing to be careful of while doing this is making sure you don’t ram into any burning cars or run over any burning passengers, as this makes you fail the mission. You will receive time with every fire put out and quickly have an excess of time, so the only thing to be careful of while doing this is making sure you don’t ram into any burning cars or run over any burning passengers, as this makes you fail the mission. Upon completing the Firefighter mission, you will become fireproof. | ||
| Yes I Speak English Reach 50 fares in Taxi Mode. | ||
| Taxi Driver missions will require either a Taxi or Cabbie. You will need to complete an overall total of 50 fares to complete this, and it does not need to be done in a single sitting. This will simply require driving from point A to point B, picking up fares, and dropping them off. Upon completing 50 total fares, all Taxis will be equipped with nitro and hydraulics. | ||
| Lucky Spinner Win at least $1,000 in a single spin of the Wheel of Fortune. | ||
The Wheel of Fortune can be found in the back left corner of the Four Dragons Casino. It is a large spinning wheel that is effectively the same as roulette but with fewer options. In order to win $1,000 in a single spin you will want to bet the maximum amount on $10, and spin it until you get a win. It is a large spinning wheel that is effectively the same as roulette but with fewer options. In order to win $1,000 in a single spin you will want to bet the maximum amount on $10, and spin it until you get a win. | ||
| What happens in Las Venturas… Complete “Yay Ka-Boom-Boom”. | ||
| Automatic story-related trophy, cannot be missed. Yay Ka-Boom-Boom is the final story mission in San Fierro, and completing it will unlock Las Venturas. You will need to pick up a rigged car and take it to the drug compound next to the Driving School. Kill the guards to get inside, then park the car in the factory by the canisters and trigger the bomb. Get out of the building before it explodes, then attempt to leave the compound. You’ll be locked in, so steal the car and use it on ramp to jump out of the compound. | ||
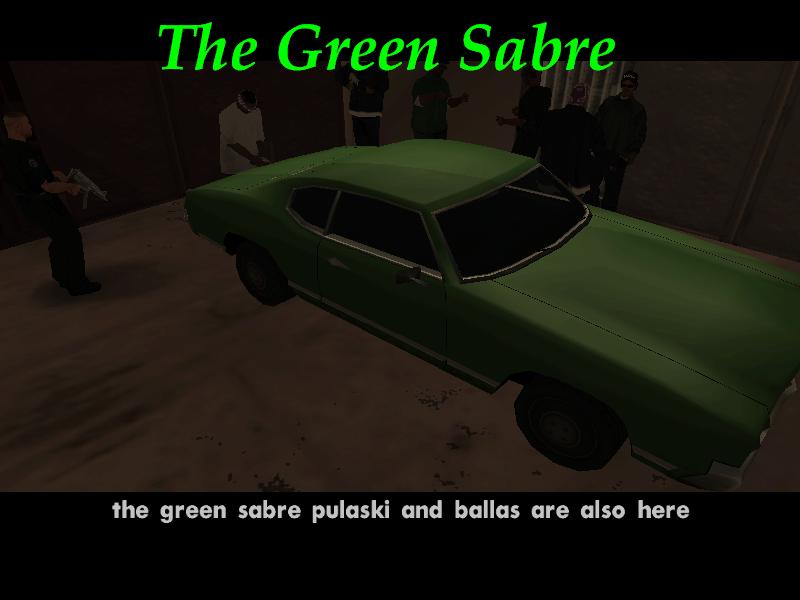
| All Dressed Up for San Fierro Complete “The Green Sabre”. | ||
Automatic story-related trophy, cannot be missed. The Green Sabre is the final story mission in Los Santos, and completing it will unlock San Fierro. Head over to meet Cesar, and after the cutscene head over to Sweet and defend him against the Ballas until the mission is over. | ||
| Not a Player Go on at least one date with every potential girlfriend. | ||
There are 6 potential girlfriends in the game that you can date. 2 of them you will start dating automatically as part of story missions, while the other 4 can be met in the world. After meeting a girl you can date her by going to one of the love hearts on the map. You can date all 6 girls simultaneously. In order to start dating a girl, CJ’s appearance and sex appeal will need to match their preferences, with some preferring high muscle and others preferring high fat. You can avoid this however by collecting all 50 Oysters, as doing this will make it so the girls will date you regardless of CJ’s appearance and sex appeal. Simply taking a girl on a date is sufficient for the trophy, it does not matter how the date ends up. The trophy will pop immediately upon starting the date with the 6th girl. For a complete list of all Potential Girlfriends, please see GTA San Andreas Potential Girlfriend Locations. | ||
| What are the Odds Win a race in Inside Track Betting. | ||
| There are 2 Inside Track Betting shops in the game, and both are on the first island. One is underneath the bridge in Downtown, Los Santos, and the other is located in the town of Montgomery, Red County. Inside these betting shops you can interact with the machine to place a bet on a horse, with betting odds between 1/2 and 1/12. Simply bet however much you like on whichever horse you like until you win. If you want to make easy money, you can save nearby, bet all your money on the horse with the highest odds, then save if you win or load if you lose. | ||
| Double or Nothin’ Put all your money or the maximum bet on red or black and win. | ||
| This can be done at any of the roulette tables in Four Dragons Casino. Bet the maximum amount for the table on either red or black, and repeat this until you win. It’s a 50/50 chance when betting all on red or black, so it shouldn’t take many attempts to get this. | ||
| Assassin Stealth kill all enemies in the mission “Madd Dogg’s Rhymes”. | ||
| Missable! Mission: Madd Dogg’s Rhymes (OG Loc) In this mission you will need to break into Madd Dogg’s mansion, steal his rhyme book and return to OG Loc. For this trophy, you must complete the mansion section of the mission without alerting any guards and killing them only with stealth. For the first half of the mansion you will need to use the knife to get stealth kills (hold while crouching and behind an enemy until CJ raises his arm, then attack), and on the way back you will be able to get a Silenced Pistol from the first guard which you can use to kill the remaining ones. If you get spotted at all you will not get this trophy, even if you manage to still get stealth kills with the knife after alerting them. There is a checkpoint the moment you enter the mansion, so if at any point you get spotted while inside, simply let them kill you to try again. The trophy will pop as soon as you leave the mansion, so if it doesn’t pop you will need to load your previous save and try it again. | ||
| Original Gangster Reach maximum respect. | ||
| Respect is a stat that can be viewed in the stat menu or by holding . You can increase your respect primarily by doing story missions and by capturing gang turfs. You likely won’t hit maximum respect just off the story missions, but you will get this while capturing all turfs necessary for Ain’t Nothing But a G Thing . | ||
| Today Was a Good Day Go 24 hours (in game) without breaking the law, being wanted, killing or harming anyone. 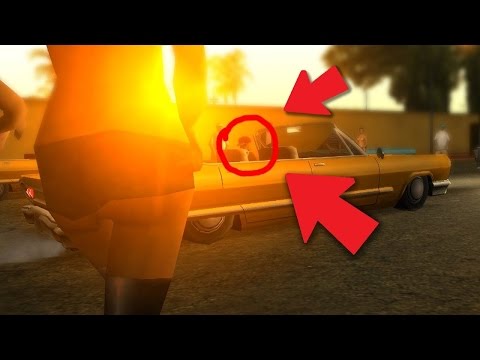 | ||
| The best way to do this is to simply wait for 24 minutes. You may get this naturally while doing other things, but it is unlikely as killing or harming anyone, stealing cars or getting a wanted level will reset the timer. | ||
| Public Enemy No. 1 Reach 6 wanted stars. | ||
| Before you are able to do this, you will need to complete the mission “Fender Ketchup” in Las Venturas, as prior to this you can only get a maximum of 5 wanted stars. The easiest way to get a 6-star wanted level is to break into Area 69 west of Las Venturas and stealing the Rhino tank. By breaking into Area 69, you will get an automatic 5-star wanted level, and with the tank you will very quickly attain a 6-star wanted level by destroying everything that attacks you. | ||
| Chick Magnet Achieve maximum sex appeal. | ||
Sex Appeal is a stat that can be viewed in the stat menu or by holding . Your sex appeal will increase based on your clothing, tattoos, haircut and vehicle you are driving. Your clothing, tattoos and haircut can give you a maximum of 50% sex appeal, whilst the car you are driving can give you the other 50% (the sex appeal from your car will still apply as long as you’re nearby the car, you don’t have to be actively driving it). Your sex appeal will increase based on your clothing, tattoos, haircut and vehicle you are driving. Your clothing, tattoos and haircut can give you a maximum of 50% sex appeal, whilst the car you are driving can give you the other 50% (the sex appeal from your car will still apply as long as you’re nearby the car, you don’t have to be actively driving it). The best way to get this is to buy the fanciest clothes and haircut you can, and then head to a tattoo parlor. Buy all the tattoos you can, and then swap between two tattoos on the same body part. Every time you put on a new tattoo it will give you an extra 1% sex appeal, so repeat this until your base sex appeal is at 50%. Once it is at 50%, you will want to get yourself a sports car like the Turismo, Cheetah or Infernus, which will grand the other 50% sex appeal immediately. | ||
| Ain’t Nothing But a G Thing Own all gang warfare turfs, properties and have $1,000,000. | ||
| Gang Warfare Turfs Note: Gang Warfare becomes available to you after completing the mission “Doberman”, but you will lose access to Gang Warfare for a significant portion of the game shortly after this, so do not waste your time capturing turfs as soon as you unlock it. In order to capture a turf, you must first kill 3 members of that gang within the colored section on the map while on foot to initiate a gang war. Once a gang war starts, there will be 3 waves of gangsters who will spawn to attack you, with weapons spanning from Pistols, Micro SMGs, SMGs and AK-47s. The darker colored gang turfs will have more gangsters defending it with better weapons, while the lighter colored gang turfs will have fewer gangsters with weaker weapons. While capturing gang turfs, the waves of gangsters will generally spawn out of your view, so you can control where they spawn by looking in the direction you don’t want them to spawn. By doing this you can force them to spawn together and funnel towards you, making them easier to kill. Some smaller gang turfs can be difficult to capture due to Ballas or Vagos not spawning in them, in which case you can lead those that spawn outside the area into it by making them hostile and luring them to the gang turf before killing them. As there are so many turfs, you can use this as a chance to level up your weapon skills to work towards Swiss Army Strife . If you don’t want to focus on leveling weapons while doing this, you can just use your best weapons alongside Molotov Cocktails, as these can burn an entire wave of gangsters with a well-placed shot (however it is recommended to have completed the Firefighter mission to become fireproof if you intend to use molotovs). Alternatively, if you have already gotten 100% completion you can use the Rhino tank that spawns under the Ganton bridge to make quick work of these gang turfs. It is worthwhile making sure you are currently dating Katie Zhan before doing the gang turfs, as dying while she is your girlfriend will allow you to keep all your weapons. Properties There are 24 Properties and 5 Hotel Suites that you can buy across the map. These will appear on the map as a green house when they are available for purchase, or a red house if it’s not yet available. Purchasing all 29 locations will cost a total of $879,000, and they will all be available for purchase after completing the mission “Learning to Fly”. Money Even with the cost of buying all properties, $1,000,000 shouldn’t be an issue to acquire. Completing all race tournaments grants $1,000,000, completing all export lists can give up to $1,444,000 and getting 100% completion gives $1,000,000, not to mention all the money you will make doing all the missions and other content. | ||
| Remastered Earn 100% completion. 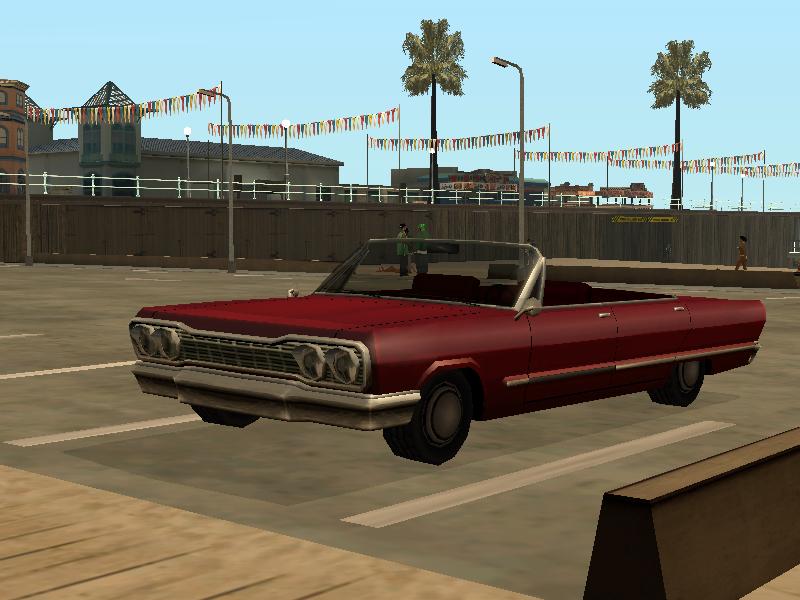 | ||
100% completion is what you’ll be working towards the whole time while playing this, and will be the majority of your playtime. Your completion percentage can be seen at any time at the bottom of the stats screen in the miscellaneous section. In order to get 100% completion, you will need to complete the following:
None of this is missable and can be done at any time and at your own leisure. Getting 100% completion will also unlock the following, which can help for some miscellaneous trophies if you haven’t done them yet:
For a complete guide towards 100%, please see GTA San Andreas Definitive Edition – 100% Completion Guide & Checklist. | ||
| …Here we go again Start a new game after getting 100% on a save file. | ||
| After getting 100% completion (see Remastered ), simply pause the game and start a new game for the trophy. You can reload your 100% save immediately after. | ||
 Fight through 4 floors of Big Smoke’s guards, before fighting Big Smoke himself. After the fight you have to fight back through the 4 floors, except with the building being on fire. Being fireproof from completing the Firefighter missions helps here. Once outside, you must follow Tenpenny in a car until Sweet drops into your car, at which point Sweet will drive and you will shoot until the end.
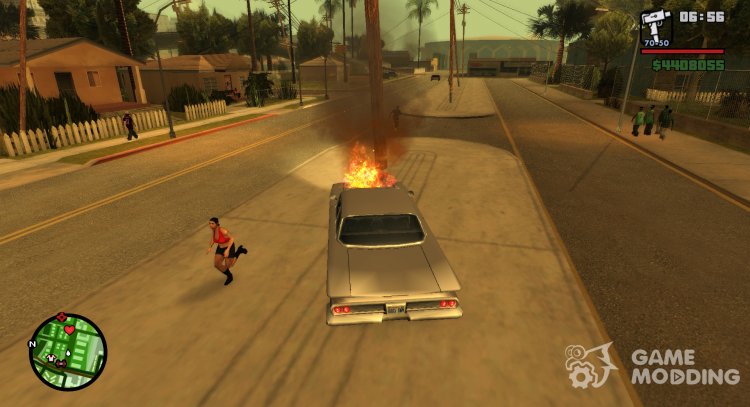 Several of these checkpoints are high in the air and will require you to launch off the halfpipe at the right angle and speed to hit them in the air.
 Given the trophy doesn’t pop until after completing it, make sure to have a manual save beforehand so you can load if it doesn’t pop.
 These vehicles will make Vigilante a joke, as the Rhino is effectively indestructible, destroys cars quickly and has a cannon, whereas the Hunter can cover ground incredibly quickly, has lock-on guns as well as rockets.
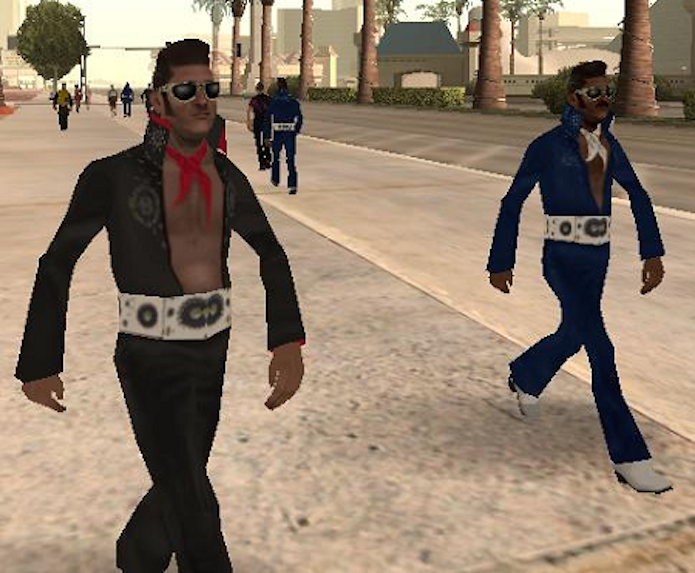

 Once you return to Los Santos and do the mission “Home Coming”, you will be able to capture turfs again but you will lose all previously held turfs. There are 53 Gang Turfs in total, and they will be held by the Ballas (Purple), Los Santos Vagos (Yellow) and Grove Street Family (Green) once you take them over.
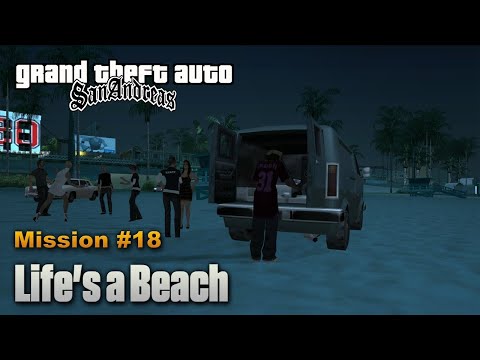 You can also utilize walls to peek around and shoot gangsters without them being able to attack you easily. Also make sure to crouch when shooting to increase your aim.
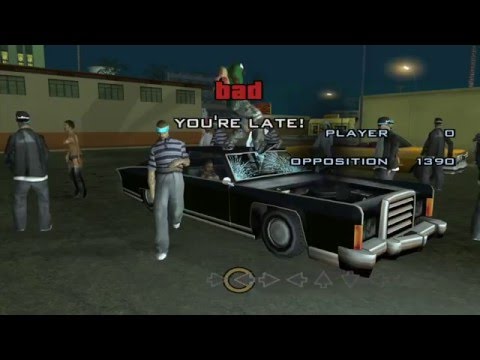
For other GTA Trilogy Guides, refer to:
GTA III Definitive Edition Trophy Guide & Roadmap
GTA Vice City: Definitive Edition Trophy Guide & Roadmap
How to complete a mission in GTA San Andreas where you have to jump in a car
In the spotlight New
Advertising 18+
Caliber is presented as a tactical team shooter, where the player will have to act as a fighter of one of the special forces and participate in secret special operations. The game has a wide arsenal of weapons, all models and their characteristics have been reproduced with realistic accuracy. The developers directly cooperate with the Kalashnikov concern. Many game locations, four specializations and three game modes Clash, Special Operation and Front.
Video Play online
. Gameblog
( 53 Votes ) In the mission about the lowrider car, people most often face the problem of jumping. There are a couple of tricks here, namely, you do not need to constantly be distracted by the score, or by talking, but concentrate on pressing the arrows when they completely enter the circle, which is located in the middle of the screen. After these simple manipulations, the task will become more complicated, and the arrows will go obliquely, for this you need to press the corresponding 2 keys. In order to pass for sure, and no longer wonder how to complete a mission in GTA San Andreas where you have to jump in a car, just listen to the music and press the arrows to the rhythm of the music.
There is also such a feature that the arrows must be pressed with a sharp push, immediately releasing them. Despite the fact that the arrows are pressed not on the main keyboard, but on the one located on the side, under the auspices of NumLock, where the numbers correspond to the arrows, and differ in their location, 2-4-6-8, respectively.
To complete this mission, there are also special trainers that make it easier to play and complete tasks. But, as you know, all trainers and add-ons affect the game file itself, and if handled carelessly, you can lose all data and saves, and possibly reinstall the game, and you will have to start all over again. Therefore, it is better to rely on your own strength and pass honestly and without external helpers.
Video walkthrough of the mission Dancing in cars
Advice to people looking for how to complete a mission in GTA San Andreas where you have to jump in a car, namely the mission with a lowrider car: carefully peer into the circle into which the arrows will enter, and not nothing more to be distracted by. Make the sound louder and just feel the rhythm, thanks to this you can easily score enough points. Even if it doesn’t work out the first time, don’t despair, because everything is subject to passing without the help of any cheats.
New articles:
- List of games for weak PCs
- How to change mailbox in World of Tanks
- How to install the zone master on the Stalker Call of Pripyat
- Tanki Online how many crystals give for titles
- How to build a fire in The Long Dark
Previous articles:
- Where to find a gun in The Long Dark
- The strangest games
- Scariest FPS
- The scariest games in the world
- The most farmed tanks in World of Tanks
next page >>
Code for dance points in gta sa
Is there a code for the mission of dancing with a girl in gta san andreas
No. so train... .or download a save. somewhere (I don’t remember where exactly) I saw a file with saves after each mission.
here, I found it: http://www.gta-gamer.ru/load/14-1-0-393
Dancing What self-respecting gentleman would not refuse to dance with a charming girlfriend. ... Then she will ask you to dance an energetic dance with her in the club and will vigilantly ensure that you score at least 3000 points, and dance ...
Why? Do you have a sense of rhythm?)
Throw off ArtMoney and hack the game for points
It's easy without a code, just look at the arrows and in a few milliseconds, when the arrow is in a circle, you press ... . It's hard at first, then you get used to it. And the most important thing there is not to miss, in my opinion, if you miss, the rhythm goes astray and they give less points until you score again.
Give me the codes for Gta SA 10000 dance points and lowriders, I saw and entered these only a long time ago and now I can’t find it and score less than 4000 points in a dance similar to the dance from the Life s Beach mission. March 9, 2006
And once again about GTA San Andreas
As I understand you have a cracked gta download another
Info GTA IV TBoGT. Cheats Codes. Transport. ... 3 Dancing. Feel free to show off your disco rocking skills! There is no girl who can't resist your body movements!
When the arrow approaches the yellow circle, press it!
Below are the numbers that you have to press on the numeric keypad.
It should show arrows corresponding to the arrows on the keyboard!
Use the numbers 4 6 8 2 on the right side of the keyboard
Arrows should appear, up, down, etc., which must be pressed when they appear in the circle.
Dark glasses are now available for sale in some stores. ... - Cheats and codes. - Easter eggs. ... A small selection of cars from the streets of Los Santos in GTA Online.
Click on the numpad)
What are the most interesting quests you remember in games?
The Witcher 1 : You need to get the trust of two boys
Tuning cars in GTA 5. How to ride on the walls in GTA 5? How to create a gang in GTA 5? ... Cheat codes GTA SA. ... February 26, 2012 01 47. Go to ..opu SAMP is fun! Without face glasses so se...
Xenus 2 save people from the paramilitares on the island
Call of Duty Modern Warn 2- ending almost cried
ME2. A fallen ship, miraculously not plunging further into the abyss.
TES IV Oblivion. Quest for the Dark Brotherhood, when you need to kill 5 people, being in the same house with them, so that they do not guess who the killer is. You feel like a killer from horror movies xD
Quest in the mobile game Dragon Village
Do not pay 4 dollars, but farm 100 crystals in six months and not break loose (just further the plot is paid or in-game currency)
CJ will carefully cut the opponent's throat. Dancing in the car. In one of the missions ... Many people fail to score the required number of points, here are some tips for ... Everyone knows that according to the plot in GTA SA there are two girls one in the first city, and ... gta chiti, gta cheats, cheats for gta san, cheats for gta san andreas, cheat codes for gta...
Cs Go Calibrate for 10 VIN!
or no no no for 20!!!
Skyrim
Kill the orphanage manager.
STALKER ZP. He burst into tears when he could not save the labeled one, re-passed and saved.
STALKER SIGEROUS. Blow up Sidorovich's bunker. Wept over Tamerlane.
Fallout new vegas
Big mountain
Infuriates this quest, but I remember it very much
Game S.T.A.L.K.E.R call of Pripyat. The quest of scientists where, with the help of the "svargok" detector, it is necessary to rescue the "spatial bubble" of the bodies of corpses from the anomaly.
СoD MW : Walk along Pripyat
And now about the code for ability points! . .. After such actions, you will receive as many ability points as you need and will be able to spend them on pumping perks in Skyrim.
In Cod-le - shooting down a helicopter with a bullet of 7.61x51 caliber. Miracles...
Cannabis fire in Far Cry.
Skyrim)))) Talk about the scroll with the greybeard dragon...
The Elder Scrolls V: Skyrim
SpellForce: The Order of Dawn
GTA SA : Dancing on the cars! Vatafak could not pass 2 years :)
And then the races passed!
Cheats for GTA-SA. ... When you press the buttons correctly, points are added to you. You can view the points scored for the last dance in the Main menu - gt Statistics - gt Achievements.
Farcry 3 : The last mission and after that ending (2 choices)
GTA:SA when it was necessary to "kill" Toreno, the bomb almost crashed the computer.
Call of Duty Modern Warfare 2 last missions
Lineage 2
Quest 7 seals
All quests in crysis 2
Attention! The text below contains spoilers! This article includes a list of all missions in GTA San Andreas. Carl Johnson. In The Beginning is the first mission and cutscene in the game. Carl Johnson arrives in Los Santos. Big Smoke.
Fucking Helicopter in GTA Vice City
Mission in GTA SA With a helicopter
Call of Duty modern warfare (I don't remember which part like 2)
In the ending where price died after 3 replays, I almost cried ....
Just dota2
Saints Row The Third: Sneak into the morningstar party and take over the penthouse. And one more: Kill Lauren (the head of the morning star).
Weapon and ammo codes in Grand Theft Auto San Andreas on PC Weapon set 1. CJ will jump much further LFGMHAL High jump After Entering this code CJ will get a clown nose with glasses... October 28, 2015
Mafia 2- where you have to kill the hero from the first part and in the first mafia there was an ending like someone killed him
The Walking Dead ending. Then he sobbed ((((
Warch dox control from a smartphone
Skyrim, when you wake up, and a woman in masks stares at you and offers to kill one of the three . ..
..
All squares in crysis and crysis 2
Then, she she will ask you to dance with her, but only an energetic dance, at the same time, she will closely monitor how you score points, you need to score at least 3000 points.0002 COD MW2 When Ghost and Roach were killed :(
Tomb Raider all quests
"Mad mind" from Skyrim "turned out. Still, the quest "Guess the name" from the second Borderlands'a was very memorable, where they should help the biologist to study a certain muzzle-spitter, and also give this animal a new name, because according to the quest giver, "muzzle-spit" sounds stupid. So we are throughout the quest we kill tons of slobbers and watch how the name of the enemy changes, becoming more and more absurd each time.0051 Well, I also liked the main quest of the Night of the Raven addon for Gothic 2, where we are ordered to unravel the cause of mysterious earthquakes in the new region "Yarkendar". The quest is so huge and intense that I don't even know what to highlight. Perhaps I will mention the chain of pirate quests. In particular, I was pleased with the moment when it was necessary to help make rum. In my opinion, Die Nacht des Raben is a prime example of what video game addons should be.
P.S. Well, I also remember the Temple of Trials from Fallout 2. But not because he is good, but because he was boring when replaying the game. Especially if you played a character with a low strength parameter, this quest could fray your nerves.
Endless summer. Deponia 1,2,3.
My little pony, quests with Princess Celestia))
Vehicle ID in GTA SA. Author. Message. Kir Yakuza Admin. Messages 24 Registration date 2011-06-27. GTA SA Car ID Theme Tue Jun 28, 2011 8 35 am. Transport name ID.
S.T.A.L.K.E.R : Call of Pripyat.
All endings!
Mario's last level
Samp RP City Battle
Friends help me go to this question
https://answer.mail.ru/question/183530794
Far-Cry 3 (Burning hemp)
Download GTA San Andreas.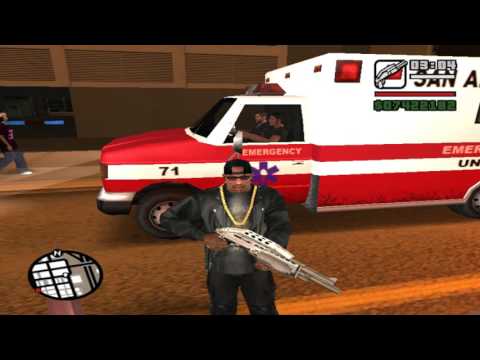 Other. ... Name Email Code Your profile. OUR RADIO!
Cannabis in far cry 3
Paz from Metal Gear Peace Walker.
GTA VC helicopter mission-_-
Gothic 2 : Get to the monastery....
When sugar was dragging.
But it's better to apply without codes!!!. The code for the passage of the mission in gta san andreas. All pun, I'm 10 years old, please help me download GTA sa multiplayer. The past is dancing, press the buttons on Num Pad 2,4,6,8 !!. November 1, 2015
I don't play "Siberia"... but in chess quests - I'm an expert... won 12000 games
Far Krai4 all quests
What are the quests?
How to complete a mission in gta san andreas at the train station where you need to dance with the help of hydraulics
Very simply press the arrow buttons as shown at the bottom of the screen, the car will jump, current click on the arrows that are on the numbers on the keyboard
GTA world news codes, mods, SAMP and MTA servers. ... which button to disable ENB Topic in Mods for GTA San Andreas , created by VbIcoTkA, Oct 17, 2011. October 17, 2011
Yes, it's easy, just press the buttons in time and that's it
Carefully watch the arrows or letters (as in some versions) when a dense arrow flies up to a transparent one (they need to be combined) then press the right direction! TRYING NOT TO MAKE MISTAKES
Just hack through artmoney glasses and you're done!
It seems like this 4 left 6 right 8 up 2 down this is a control and not a walkthrough
There are keys on the right of the keyboard, that is, the numbers num 1.2.0004
Now there are 9 missions on the server, including drift racing for points Like in NFS U2, dancing on lowriders Like in single, derby Like in MTA DD and many others. ...GTA SA-MP. which job is better.
You need to use the arrows on the NumPad, pressing in time while dancing. Everything is simple. =)
Need some kind of thread toy Where can I dance what type of turnip kulbnyaka well karoch on the keys help
GTA: San Andreas
Gta sa driving school gold gta sa buses gta sa animations from gta 4ta san andreas gta san andreas codes gta sa android gta samp gta san andreas w3bsit3-dns. com gta sa ... Star Bro 5 months ago How to raise fps in GTA. Added 11 months ... Sports. Life style. Dance.October 17, 2015
Well, go to the point
Pa-Ra-Pa Dance City
Pa-Ra-Pa Dance City what you need
Help me complete the task GTA SAN ANDREAS! What to do arrows do not appear and music does not play ((Maybe code is pass? 06/21/2011, 20 46. New gray T-shirt with dancers in the center
GTA San Andreas
Which san andarsan 1 or 4
GTA SA code for pitching. 26-08-2013, 12 31 Cheats for GTA. ... Code for pumping in GTA JYSDSOD. That's about how big CJ will become after entering the code. Good luck in the game.
Yes, yes, use the buttons
You need to press the keys (arrows on the keyboard) corresponding to the screen (I have a record of 3800)
Question about the game GTA San Andreas.
If arrows are not displayed, then there is no way to use artmoney. try skipping this mission. just download the save with this mission completed. type in the search engine "save all the missions of san andreas
The peculiarity of this glue is that? that these are dances with professional movements, also other players can see how you dance and envy you. ... Cheats for GTA 5 on PS3. Trainer GTA 5 on PC.
Regarding * not displayed - experiment with screen resolution and graphics settings.
In extreme cases - send me an email - [email protected] - save the file - I'll help with the passage.
How to dance in GTA by car
Help gta san andreas?
You should invite her to the dance, to the club.
Don't get distracted by the score or these inscriptions if you want to score enough points. ... Cheats for GTA San Andreas. ... don't go on this mission right away!! you need to enter some code to increase your success in dancing !! I already went to dance school...
It seems that you need to win the dance, that is, score more points
You could name at least what kind of bride, otherwise each has her own requirements.
My girl in gta san andreas says that you have a sense of humor? what to do she doesn't go on a date
Cheer her up.)
GTA 4 game description GTA 4 walkthrough Cheat codes for GTA 4 Liberty City for console versions GTA 4 characters GTA 4 system ... You can see the points scored for the last dance in the Main menu - gt Statistics - gt Achievements. February 6, 2011
I don't know, I'm tired of her, I took out her bazookas
When you approach her house and she comes out, she says what she wants today - dinner, skating or dancing. This is what needs to be done. In the case of dinner, icons of nearby establishments appear on the map - just take her there and then bring her back to the house. Please note that not all establishments are equally useful - some do not like, and everyone has different tastes. Just learn the right ones, they are listed on instruction sites. When she wants to ride, keep the right speed - again, everyone has their own preferences. One likes to shoot on the go from the window, the other loves racing, the third, on the contrary, is afraid of speed, etc. :). During the ride, follow the pleasure indicator and her remarks - she herself will tell you where and how best to go. Well, with dancing, everything is simple - take her to the nearest club (the icon will appear on the map) and try to impress with the points scored in the dance. Try not to get into accidents at least during a date - apart from the subsequent repair of the car, she definitely won’t like it either. There are 6 girls in total - two according to the plot, the rest are optional. They do not suspect the existence of each other, so no one bothers to meet with everyone at once :).
How to have a good time with a girl and what to give her? In the game GTA SA.
It all depends on the girls. There, each has its own taste, which she reports. Some like to relax in bars, some in clubs.
Do not immediately use the codes for GTA San Andreas, thanks to the publication of You . .. Dancing by car. In one of Sweet's missions in GTA San Andreas, you need to take a car... Many people can't score the required number of points, here are some tips on...
0051 To get to know the girls, you should approach them and start a conversation.
It will be possible to meet with them after meeting, the girl's house will be indicated on the game map with a red heart.
Requirements for Carl:
Barbara - required to be complete.
Michelle - required to be complete.
Katty - inflated muscles are required.
Helen - weak muscles are required (to lose muscle, you need to lose weight to a minimum, and then eat nothing for a long time).
RIGHT NOW I WILL WRITE YOU ALL THE FUCK IN FOUND !!!
Courting Styles:
Food
Your girlfriend will let you know what she wants, eats and doesn't mind eating at a diner or restaurant. Fear not, all restaurant locations will be marked on the map. There are four types of places where you can fill your belly: Bar, Restaurant, Fast Food and Cafe. Do not forget that every girl has a favorite place where she likes to eat, and some of the ladies open hitherto unknown restaurants for you, where, having eaten dishes, you will not gain a single gram of fat. Naturally, in other types of eating (such as cafes) establishments, the menu consists of various dishes that provide different percentages of fat. Have you eaten? Forward to run and swing!! !
Dancing
What self-respecting gentleman would not refuse to dance with a charming girlfriend. The girl will hint to you that she wants to warm up, go ahead to the nearest club, run to the dance floor and play a mini-game, did you forget the Life's a Beach mission, you also need to turn your ass and hook the girls there. You must score at least 4000 points, then the girl will allow you to take her home, and who knows ... If you are a loser and do not score 4000, then you will be refused ...
Driving
Russian, but it is also inherent in him to drive like that, even among his comrades in uniform (aka the traffic police), the radars go off scale. Your darling will cling to your shoulder and whisper softly, give me a ride, my dear. You are with fire in your eyes, oh yes, darling, of course, you get into the car, Carl understandably presses the gas to the floor, but then an indicator of pleasure appears. What is he for? ? It's simple, as soon as it fills up, hold on for a few seconds and the girl will ask you to take her home, it is possible that you will stay there until the morning. But look carefully, not all girls like to fly and feel all the bumps at high speed with their fifth point. She will yell at you for driving too fast or too slow. Determine how much she loves by the pleasure indicator.
Sex
Each of the previous types of courtship may end with an invitation to go home for a cup of "coffee". This can only happen when you collect the required percentage for "coffee". Of course, you can also refuse, refer, they say, dear, something in my head hurts. Your refusal will pass without consequences!! !
Girls in the game are a very important element of the gameplay, depending on what percentage of success you have with a girl, you get very useful bonuses.
Achieving the girl's full favor (100% success) is rather dreary, well, just like in real life: you have to look after the girl, endure her whims, and maybe, after quite a long time, the girl will invite you for a glass of coffee to her home, well, and there you are her ... (boys, well, you understand me!).
So, you have decided to embark on the difficult path of a hero-lover, well, I’ll tell you what you have to do: first, the girl must be taken to a restaurant or bar several times, and you must choose exactly the one that the girl likes, otherwise the date will be unsuccessful and the girl will get angry , and will throw food at CJ! Then she will ask you to dance an energetic dance with her in the club and will vigilantly ensure that you score at least 3000 points, and you will have to dance several times, and subsequent dances will be more difficult than the previous ones.
The friend will then ask you to take her to her favorite places at her chosen speed. Skating girls is not a difficult task, but it requires high concentration, on the right
Gta san andreas I want to find a cleo script thanks to which you can dance break dance!
CJ will gently slit the enemy's throat Dancing in a car In one of the missions, you need to take the Suite .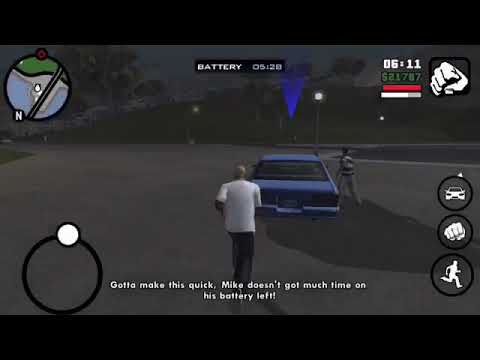 .. Many people fail to score the required number of points, here are some tips for ... If in Vice City you had to find 100 green figurines, then in GTA-SA you need to paint over ... ALWAYS kill everyone who is there, then you have to enter the code ...
GTA question: SA
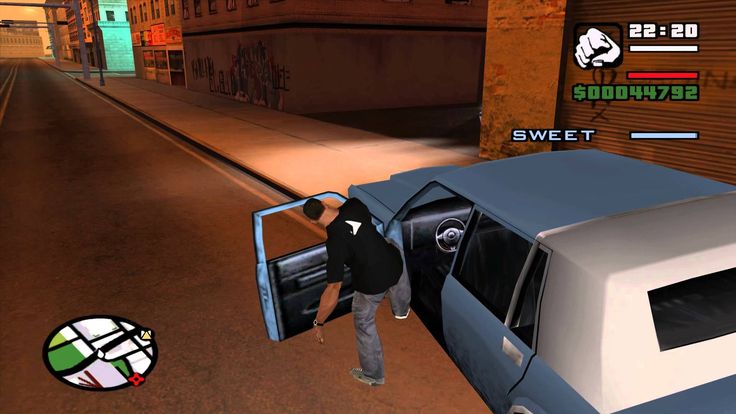
Sweet doesn't like his sister hanging out with a Mexican. He sends you to see where and how these two doves meet.
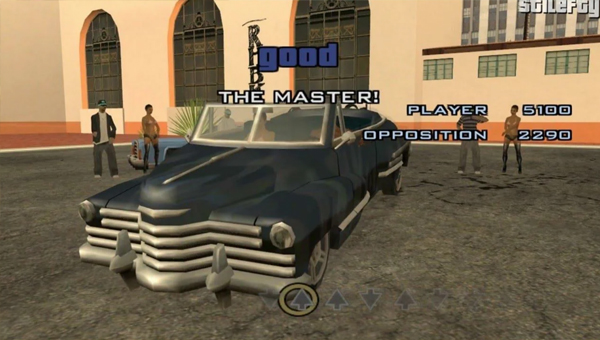
First you have to take a car, which will be provided to you by the mechanic of the garage marked on the radar. Now drive to another point where a surprise awaits you - the Car Dance Championship.
The task is quite simple, and it will not be difficult to complete it (if not on the first, then on the second attempt - for sure). Indicate the amount of money you are willing to risk and start the show.
All you have to do here is press the buttons to the beat of the music. As soon as the arrow has almost completely entered the small circle, press the corresponding button on the numeric keypad. Do not pay attention to the points and the video sequence, otherwise you will fail everything ten times in a row. Concentrate only on the running arrows at the bottom of the screen.
If at the end of the melody you score more points than your opponent, the mission will be completed.
Later there will be a small quarrel between you and the boyfriend of Sweet's sister (his name is Caesar). Fortunately, everything will end well, and you will get access to the championship.
Then she will ask you to dance an energetic dance with her in the club and will vigilantly ensure that you score at least 3000 points, and you will have to dance several ... Codes for GTA San Andreas PS2. Submarine parts map in GT ...
How to jump by car in GTA San Andres
No way
Throw off ArtMoney and hack the game for points. ... It's also easy without a code, just look at the arrows and in a few milliseconds, as the arrow is in a circle, you press ...
From a springboard or from a bridge, having accelerated). . in general, all actions of Carl can be changed in the game settings (mouse and keyboard control)
Better from the springboard ..)
Dangerous, but
I think from the springboard
The cross and up key
Information about GTA SA. Codes, cheats. ... When you finish dancing in Maisonette 9 and Hercules, you will unlock the GTA 4 achievement The Ballad Of Gay Tony Catch the Bus, which is equal to 15 points.
Jump off the bridge! jump off the trampoline!
with the mouse! jump smarter!
take your time! speed up! well, jump!
can be faster than all of you!
Secrets of gta san: Dancing in a car
In one of Sweet's missions in gta san andreas, you need to take a wheelbarrow that can bounce on the springs and go to the competition to the station. Many players fail to complete this mission. I advise you to change the keys that control jumps in the control settings. By default, these are the keys on the additional keyboard: 2, Add. 4, Add. 6, Add. 8, they are quite unusual and difficult to adapt to them. Put the jump controls on the standard cursor control keys (those with arrows), and keep an eye on the circle in the middle of the screen, as soon as the arrow enters the circle, press the same arrow on the keyboard. It's very simple. Once you complete this mission, you will be able to participate in these competitions whenever you want. Enter the red marker next to the person standing next to this place (next to the train station in Los Santos) and the competition will begin! Many people fail to score the required number of points, here are some tips for this: Modify your car, the more solid it looks, the more points they will give. Press the jump control keys a little after the arrow hits the circle. You can not look at the circle at all, but look only at the arrows, listening to the rhythm of the music and clicking on the rhythm.
A completely radical way to complete this mission in gta san: using the ArtMoney program, increase your points to 3000, wait for the end of the competition and the mission is completed!
It is possible from the springboard, but it’s better not to .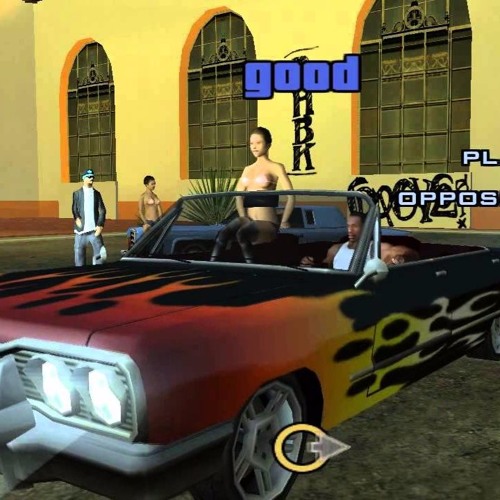 ..
..
Right digital layout) .php
http://chemax.ru/cheats/G/grand_theft_auto_2.php
http://chemax.ru/cheats/G/grand_theft_auto_1.php
Or here
http://www.playground.ru/cheats/gta_3/
But it's not clear where to jump and from where
Cheats for Grand Theft Auto Mission Pack 1 London 1969. All the secrets of GTA. ... This time, you only need 4000 to win. If you have collected the required points, after the dance, the DJ will invite you to the minibus.
Silently
You must jump sober.
You really need it.
Overclocking.
From the springboard
Clubs in GTA sa. Let's take a short excursion into the club life of San Andreas. ... You can see the points scored for the last dance in the Main menu - gt Statistics - gt Achievements.
Hydraulics!
Who plays the game GTA SAN ANDREAS, please help. I can not pass one mission.
On the arrows on the numeric keypad on the right, press the current, first press the player to agree to dance
Cheats for GTA. ... Points In Lowrider Competition activate when you start to compete with an opponent, if activated before that, then there will be no effect.
In this mission you need to dance
Dance =)) In short, I advise you to play online in GTA Sa, it's much more interesting! I have my own server, a lot of people play, well, in short, there are a lot of things, a game of life or RP, You work, buy houses, join gangs, rent out rights, etc., etc. if anything, write my icq : 552575960 or Skype: vovan__007
You talk to the woman all the time, you press the Y key when the dance starts at the bottom of the screen there will be a circle. It will be necessary to press the movement keys when the arrow enters the circle. Often there are no arrows if the game is with some kind of mod.
Who will tell you about the game gta san andreas?
This is a glitch in the game gta san andreas delux, you need to restore the normal version of the game
GTA-SA.UCOZ.RU - everything for the game gta-san-andreas. Codes, cheats, mods, patches, cracks, programs, textures, buildings, vehicles and ... You can see the points scored for the last dance in the Main menu - gt Statistics - gt Achievements.
Games in which you need to develop relationships, etc. Do you know these?
Xenus
Codes, saves and other secrets of the game. Grand Theft Auto San Andreas. ... Num 9 Infinite Points in Lowrider Rhythm Game Num 0 Infinite Dance Points ... GTA SA Part 2 10/25/2005 - San Andreas Fighting 10/19/2005... !
The Witcher
Sims and Singles
There is a game.... Life is called. Start better in it. And then someday you will understand that you are a fat bald old man with glasses and your whole life was wasted sitting at the computer
GTA s.a. grenade collected the second main Dayz platform Steam Speed city San Andreas gta 5 gta sa Counter Strike Global Offensive CLEO ... You can see the points scored for the last dance in the Main menu - gt Statistics - gt Achievements.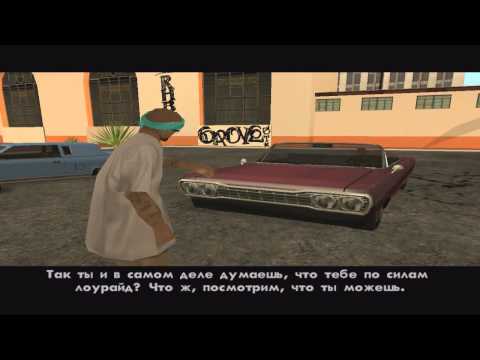
The Sims 1.2.3
Singles
Gta San Andreas
The Sims 1.2.3
Singles
Gta San Andreas
In mass effect 1 and 2 there is such
There you have to repeat after others!!!!
Table of contents All news about GTA Advance Facts Characters Maps Cheat codes Walkthrough. ... To do this, go to one of the clubs marked on the map and score less than 4,000 points in a dance similar to the dance from the Life s Beach mission.
In the same place there are arrows on them from the bottom and you press.
Hmm... do the arrows go down there? if so, then it seems like you need to repeat the numbers after the arrows ... that is, the arrow crosses the circle (->) press "6" - it is on the right (num) and so on
The arrows go from the bottom and when they go into the circle you need to press them, thereby, because of the hydraulics, you get a dance, score more points, take the cup and go home =)
Tam ne strelkami nado najimati a tsiframi s kalikuleatora t.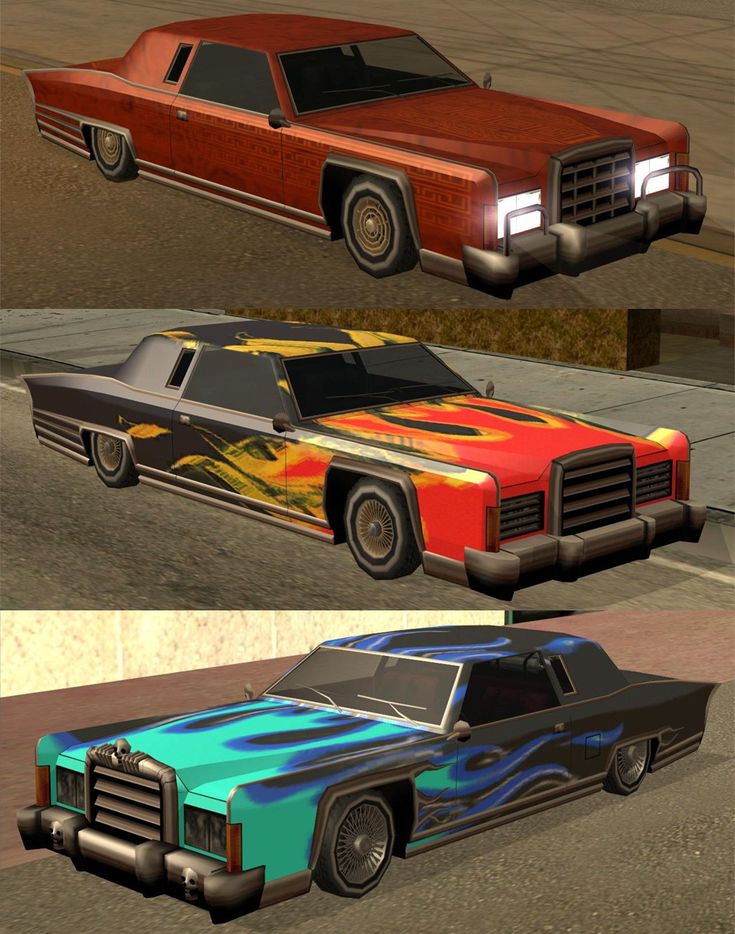 e. pravaia ciasti klaviaturi a strelki pod nomerami 2-verx, 4-vpravo, 6-vlevo, 8vniz.
In the same place at the bottom there are arrows behind them and we must repeat.
How to score enough points? Passage of the mission Dancing on lowriders' cars. ... Where can I find a parachute in gta san andreas? How to do parkour in GTA San Andreas GTA San Andreas?
It's not realistic to pass the toko for the pros
For what idea would you go to work for free?
Children. I could work for free in the orphanage.
Earn 15 points for Xbox 360 and Bronze for PlayStation 3 by doing perfect dances in Hercules and Maisonette 9. In essence, this instruction is enough to familiarize you with how to dance in GTA 4.
For the sake of saving children. and animals. DEFINITELY.
For the sake of mining gold, diamonds!! )
For the sake of an idea to launch a project that will later feed me and... It usually happens like this:)))
I would work for free only to clean up nature, for example, to collect rubbish in the forest, along the river or lake.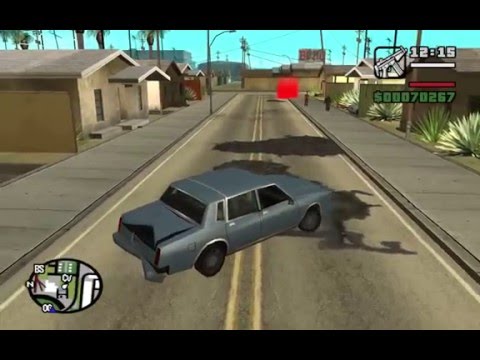
And who will feed the children, for free only in the next world
Then she will ask you to dance an energetic dance with her in the club and will vigilantly ensure that you score at least 3000 points, and you will have to dance several times, and subsequent .. Codes for GTA San Andreas PC. FAQ - question answer.
For the sake of a separate apartment in a year....Although I would be a millionaire, I helped children's resuscitation financially and sent professionals there for a decent salary
These are the very emergency situations. As a rule, when such events occur, a normal person rarely thinks about rewards.
People do not work for free, there is always a reward (at least moral satisfaction), and if there is no reward, people do not work
My answer will be the same as N.N. well, if suddenly there is an explosion, an earthquake, and a lot of things can happen, so I'm always happy to help 8)
When there were acts of terrorism in Moscow, houses were blown up, each apartment was on duty all night long in line for a month.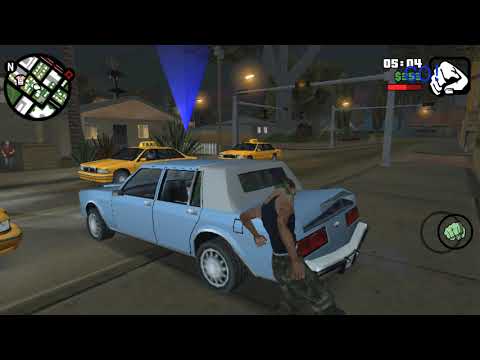 in general, I would probably like to help the old people at least go buy the same bread, but I don’t know how to bring it to life, of course they won’t believe a stranger.
On our GTA portal, you can download for free, Break Dance Mod, and without registration, like all other files on our site. ... Cheats for GTA Vice City.
I asked my loved one this. He said that for the sake of his beloved girl :)
JA BY NAVERNO OTKRYLA DVA DOMA,ODIN DETSKIJ DOM A DRUGOJ PRIJUT DLJA ZYVOTNYH I BESKORYSNO I BESPLATNO ,UHAZYVALA I ZABOTILAS O NIH!!!! VED IMENNO DETKI BROSHENYE RODITELJAMI,I ZYVOTNYE BROSHENYE BEZOTVETSTVENYMI HOZJAEVAMI NUZDAJUTSA V NASHEJ PODERZKE I NASHEJ POMOSHI!!!!
If I wanted to buy a car, a house, or something else for the family good, for example, on credit, I would go to work for free, because my salary would go to pay off this loan.
Ia dumaiu, vse liudi v bolishei or menishei stepeni rabotaiut besplatno, toliko odni eto nazivaiut rabotoi, drugie - iscustvom.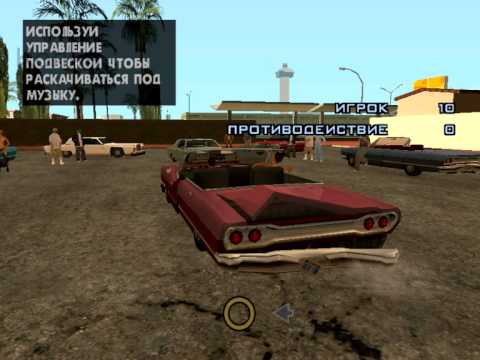 A iskustvo, kak izvestno, trebuet jertv, i iscustvom mojno nazvati liubuiu rabotu, daje samuiu, na perviy vzgliad, nepriiatnuiu.
Of course, I'm sorry, but everyone is so kind, well, where to go, but if you really touch, then probably no one will agree, there are a lot of reasons not to do this or that.
Heist Add X Dance Points Add X Lowrider Competition Points On Off ... Cheats Reset Counter and Code Usage Status Turn off all codes. ... More Take a Screenshot Kill GTA SA Process On Off Trainer.
I had to clear the rubbish in the forest near the house where I rented an apartment. Nobody paid us, we just wanted to make the world a little better, at least where our hands reached. Happen, God forbid, trouble - you need my help - I will not refuse. I drove an unfamiliar boy in my car to the emergency room, I stand at the tent - I buy apples, a boy of 10 12 years old sits, he unsuccessfully jumped from the second step of the stairs, his leg was swollen, and his grandfather forced him to put on a boot and not whine (male education) and the child turned out to have an ankle broken.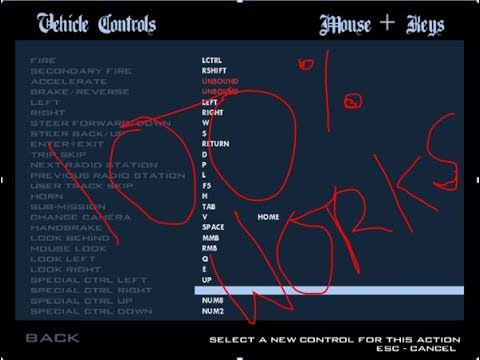 Such things are driven by one thought - do what you want to be done to you.
For the children.
I would go to work for free as a veterinarian. The fact is that I love animals very much :)
Children, homeless animals, elderly people, Orthodox shrines, environmental disasters.
For the sake of saving nature
Computer forum Chitchat.RU Game forums Grand Theft Auto Walkthrough of GTA SA. ... Gary Paffett, that is, correctly executed add points in the PLAYER section ???!!! tell me how you passed well, you need to press the arrow code ...
For the sake of the idea of universal abolition of money! :)
Any work for the glory of Christ.
Hospice. Truth in his spare time from work for money. And the idea is to stop this stupid talk about euthanasia.
For the sake of joy, I worked for free and withdrew in the light of my satisfaction, like I bachila, that those people should think to whom I don’t bait and who doesn’t baiduzhi me.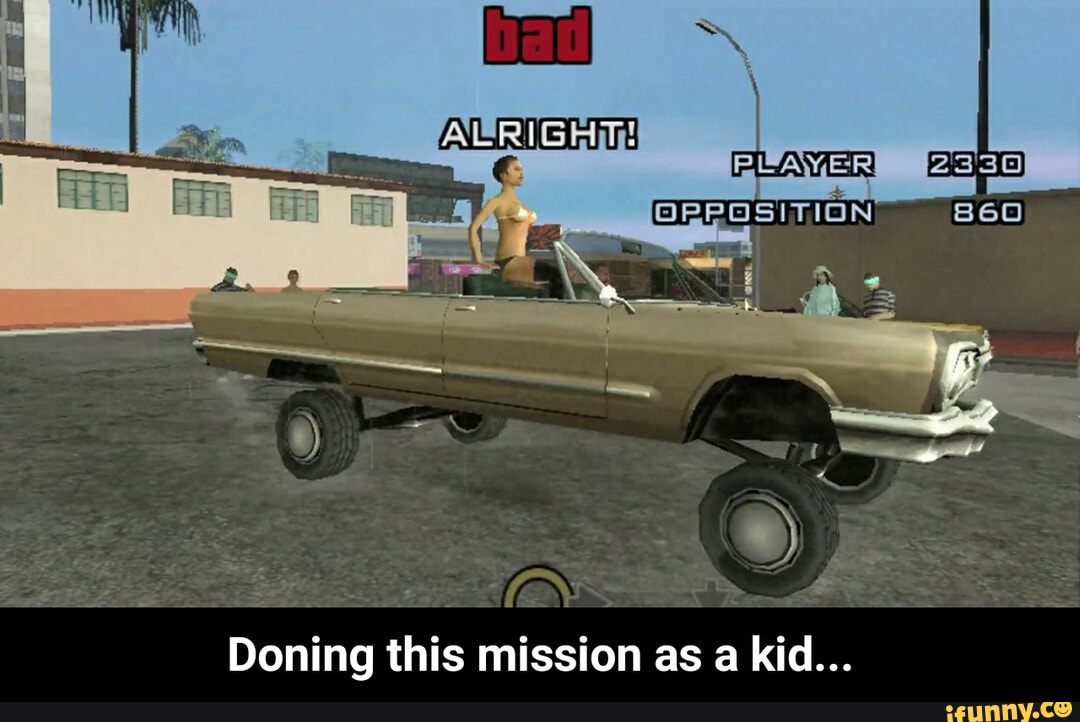
Children and charity. Of course, if there was soma to live on.
32. The Night Vision Device and Thermal Goggles are in the Mad Dog mansion. 47. Some ammunition says guns guns guns - gta3 code for weapons. If you finished the dance with a mark of GOOD - rejoice! March 22, 2009
For an idea
For a PhD
For my favorite football club, London's Arsenal. Which is exactly what I do.
For the sake of communism, if it were in the near future! But really - I do a lot of things .... :) Not always everything is measured and measured by money!
I would have worked at an animal shelter, I would have messed around with the dogs!!
GTA San Andreas. Maps, cheat codes for GTA. ... Then she will ask you to dance an energetic dance with her in the club and will vigilantly ensure that you score at least 3000 points, and you will have to dance several times, and subsequent dances will be ...
I would have worked without a cost if I had helped people who suffered in unfortunate weathers or natural hardships, in a home for orphans and disabled children.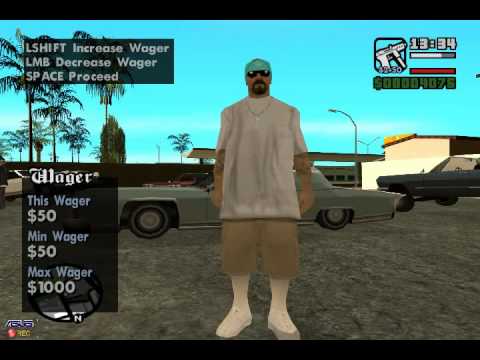
Russia - that's my idea of an idiot...:(
In my opinion, every person does something disinterestedly every day. But he will definitely be rewarded in something else, whether he wants it or not!
For society, if, of course, the husband supported
It turns out very interesting... If you look at the answers, it turns out that women are ready to selflessly work for love (for children, for animals, for nature, etc.). etc.), but men are selfless for the sake of money))) The most interesting thing is that more and more girls take the position of men in this regard. Mercantilism is simply amazing!
To activate codes in GTA SA, you should enter them right during the game, or if the moment is very tense and there is no time to write the code, you can exit the menu by pressing the ESC button and enter the code here calmly.
Make people happy! For bread, sausage, a plate of borscht and a bottle of cognac, I would sit on the street and grant wishes =) Only good ones, yes.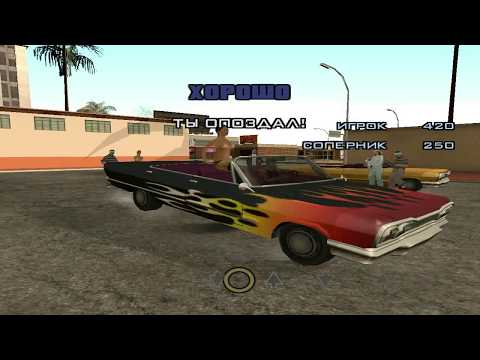
I would work for free for the grateful eyes of a small child, a beautiful girl and for .. appreciation and fame
For the sake of the fact that working for free later will bring fabulous wealth to my descendants. I think it's easier to work for free for SOMEONE than for something.
For homeless animals, the environment and the elderly.
Wrong question!!! Workers work for money. Help in a difficult situation is not a JOB! And those who do this professionally - the Ministry of Emergency Situations receive their salary. Even volunteers receive food or, in certain situations, accommodation. In short, a stupid question. I will help for free, but I will not work.
Cheats for GTA 4. ... 3 Dancing. Feel free to show off your disco rocking skills! There is no girl who can't resist your body movements!
The only thing - for the sake of housing.
They don't work for an idea, they work for money. But if you need help - naturally, I will not refuse.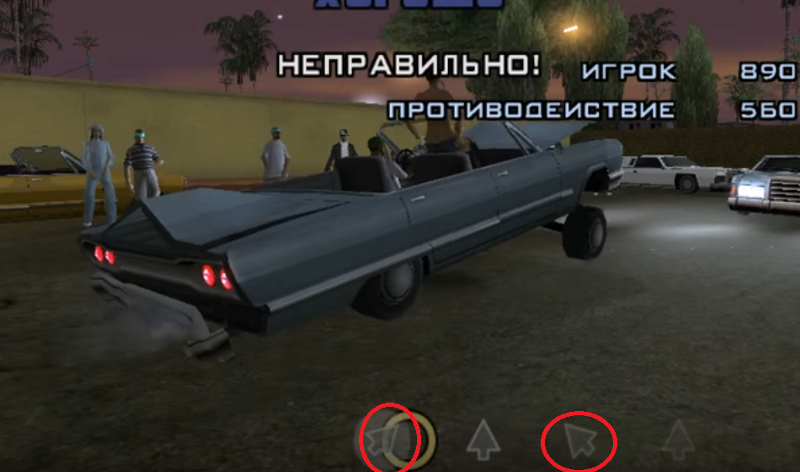 There are many situations - we must not forget that it can happen to anyone. Anyway, I'm always helping people if it's in my power to change anything.
For Putin to stay for a 3rd term
Earn a million for an idea!
Free labor is forced. And forced labor is prohibited in the Russian Federation! So if you, dear Iris, recruit people here, then you are at a very big risk ...
GTA San Andreas I collected all 100 graffiti how to get night vision glasses in GTA San Andreas GTA San Andreas collecting shells GTA San Andreas criminal Russia code for night vision goggles.
I would conduct excavations
If it's a very interesting job. Then money is secondary
Somehow there is no feeling of charity
There are a lot of ideas... . But you also have to live on something. If I didn’t have to work for money, that is, if I had a decent capital from which I could live, I would gladly devote myself to selfless service, because I can’t imagine life without work, without work, without the fruits of my labor.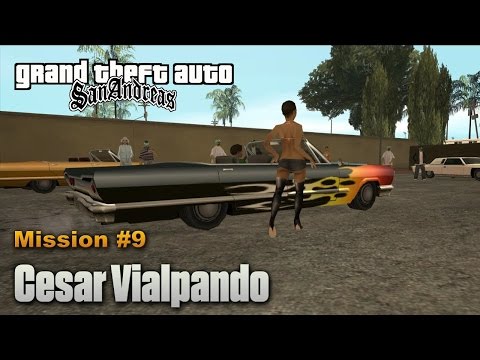 And I would find application for myself in teaching. Perhaps I would teach and educate children in an orphanage. Or work with the homeless. Or just be a teacher. Or would lead some creative circle for children. Or helped some kind fund to raise money for really useful purposes (education, treatment, education, care for the elderly, for the maintenance of abandoned animals). Your survey showed that many people are ready to help others, but since they themselves have many problems, they only have enough strength to work in order to earn money to support their families.
I'm playing Gta san andreas and I can't pass the lowrider contest. Tell me how to score more points.
Is this where the cars jump? If yes, then the arrows pass at the bottom. Press the arrows (on the right keyboard) according to the arrows at the bottom.
You should score 3000 points, and you will have to dance more than once, and subsequent dances will become more and more difficult. ... Cheats for GTA 4.