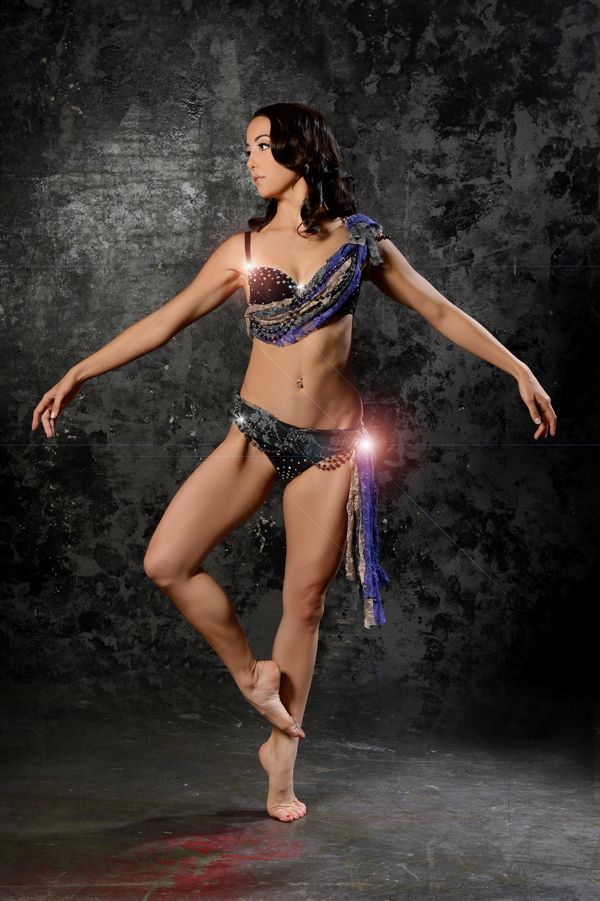
How to dance on your toes
How to Point Your Toes (Achieve a Better Arch)
Let’s have some real talk here. If you didn’t come to pole from a dance background, having “point your toes” yelled at you as if you were in boot camp is a little intimidating.
Furthermore, it feels like you’re pointing your toes, right? This just doesn’t make any sense! What does “point your toes” really mean, how do you do it properly, and what about that beautiful ballet arch?
Today you’ll learn everything you need to know for a properly pointed foot. It’s true, getting that beautiful arch doesn’t just happen in a few minutes, or even a few days, but the first step is to learn how. Like other conditioning and flexibility exercises, it takes consistent effort.
Contents
- What Does It Mean to Point Your Toes?
- Improper Technique
- Proper Technique
- Exercises to Improve Your Arch and Point
- Easing Your Foot Cramps
Despite the words, your toes have very little to do with the motion of a proper point. This is where many people get confused; they engage their toes, but nothing else.
Pointing your toes should engage the whole foot, not just the toes. In fact, you should feel it throughout the lower and mid-calf as well.
When you think about pointing your toes, think about how you would move if someone asked you to elongate, stretch, and point your hand. Would you clamp down so hard you had claws? No, typically, you’d reach out and extend your fingers out, starting with the palm and moving through the fingers. The whole hand would be engaged. Your feet are no different.
Unfortunately, unless you’ve practiced dance your whole life, you probably haven’t given your feet much of a thought before, and the bone structure of your foot will influence the shape of your point so you might not be able to curve your foot over itself to an extreme like some professional ballet dancers.
The good news is, however, is that ligaments and muscles in the lower leg and foot also plays an important role, so you can mobilize and strengthen your feet to achieve your own beautiful ballet dancer lines.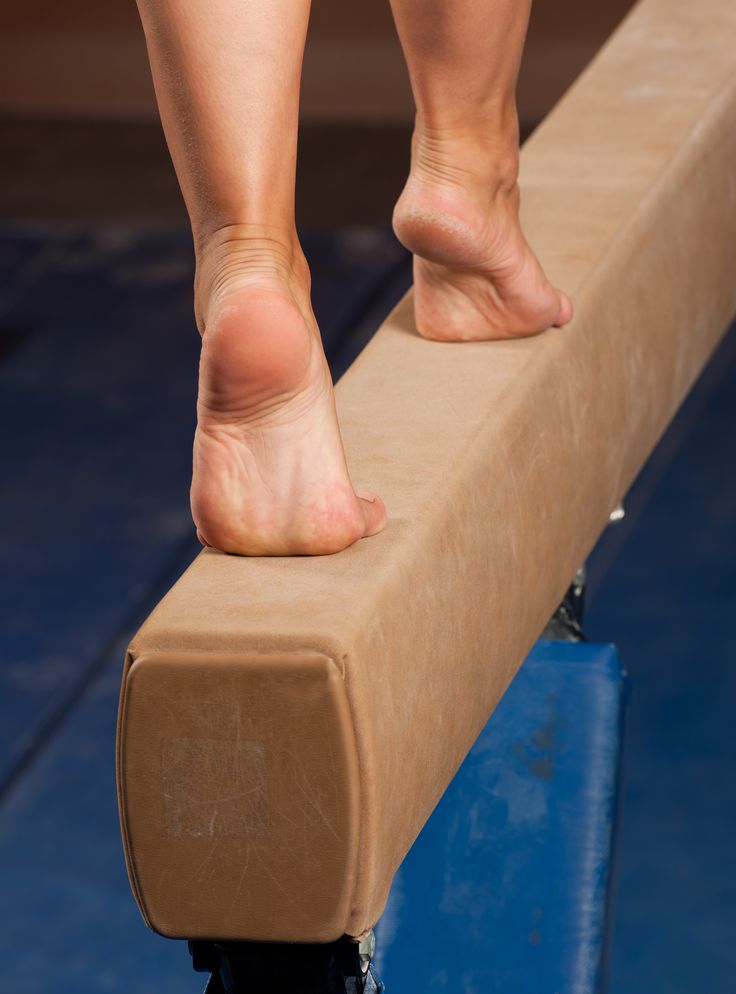
TIP: Would you be surprised to learn that not only does pointing your toes provide a stronger foundation for your body weight in general, but it also helps you grip the pole better? Sure, skin contact and various grip aids will help you stay on the pole, but your skin also grips better when the muscles underneath are actively engaged.
Improper TechniqueBelow are two examples of improper technique.
Only the ankle is engaged here.
Only the toes are engaged here.
These are not proper toe points! You’ll notice in the first image that only the ankle is engaged, but not the rest of the foot. The second image is what many of us are guilty of, where just the toes are pointed – scrunched, even – but not any other part of the foot.
Proper Technique
To achieve a properly pointed toe, start with a flexed foot.
Next, engage the ankle and the ball of the foot. Imagine you are pushing through the ball of your foot, trying to reach out and away from you, extending it as long as possible. You should notice your lower calf muscles engaging with this motion.
Next, reach out with your toes. Your toes should begin to point down with the stretch, and you’ll feel your arch muscles engage.
From here, you will be actively engaging the arch and toes to push through them. “Pointing your toes” is not a passive activity, but with time it will become easier and easier to maintain a point.
Exercises to Improve Your Arch and PointThere are several conditioning exercises to improve your arch and point.
Check out our article on toe point exercises for a full tutorial.
The Penny and Pen Arch ExerciseFor this exercise, you’ll need two props: a coin and a pen.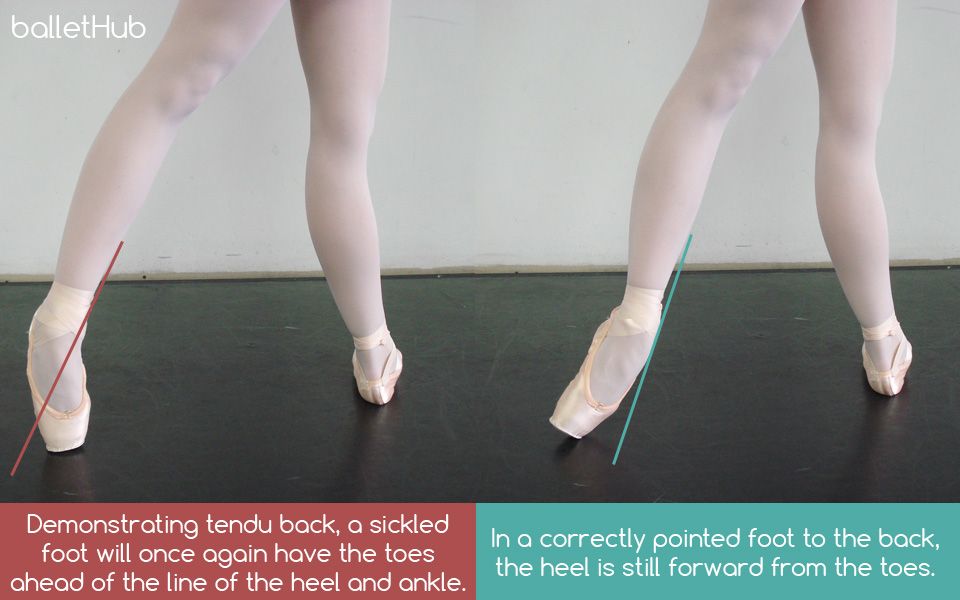
Place the coin under the ball of your foot and the pen under your arch. The goal here is to keep the ball of your foot pushing down on the coin simultaneously while you lift the arch of your foot away from the pen.
This is the same sort of motion made in a “foot bridge” exercise. Be mindful of your limits; pushing your arch too far without it being warmed up can cause a foot cramp. Over time with consistent effort, you’ll notice more dexterity and control in your arch, and your point will be better shaped.
Stretch Band Point ExerciseThis exercise is done in a seated position with your legs out in front of you.
The goal here is to go through the motions of a proper point, adding resistance for more muscle engagement.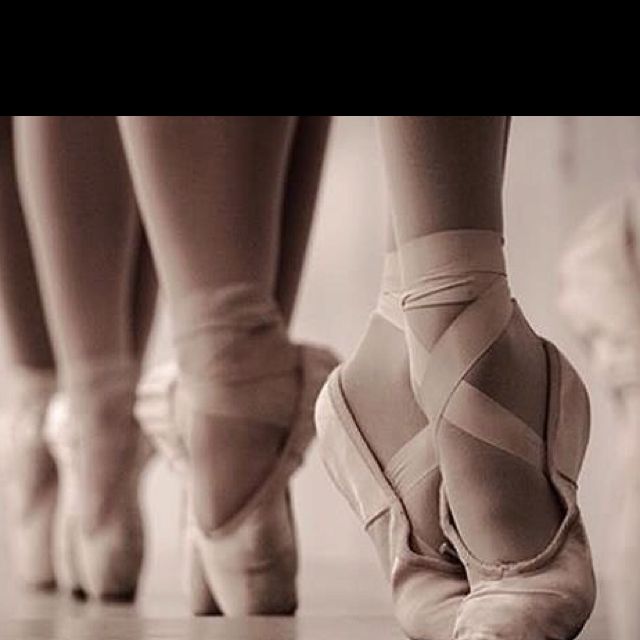
Calf raises are an excellent way to strengthen your feet, ankles, and calves. This is also an excellent exercise to condition your legs and ankles for heels.
Easing Your Foot CrampsYes, unfortunately, foot cramps are very real and can make you break routine if you point too hard, too quickly. Keep a tennis ball or foam roller handy. If you start to feel a cramp, stand and lightly roll your foot over the tennis ball in circular motions and you’ll notice the muscles relaxing after a few seconds. Focus on the surrounding muscles as well as the muscle that is cramped. In concept, the action of rolling out your foot is not much different than using a foam roller on your back to get knots and tightness out of the muscles.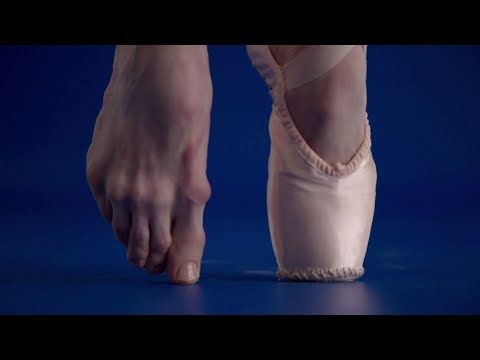 If your cramp persists, hydrate and soak your foot in warm water or stand on a heating pad.
This website uses cookies to improve your experience. To continue browsing, please accept the use of these cookies. Cookie settingsACCEPT
Exercises for Getting High on Your Toes in Dance
- Share on Facebook
If you dance barefoot or in a soft shoe, "on your toes" means on the balls of your feet. For ballet dancers who wear pointe shoes with a stiff toe box, it means literally on the tips of the toes. Whatever type of dance you do, getting high on your toes is key to improving the line of your leg, boosting your performance quality and avoiding pain and injury. Exercises that develop strength and flexibility -- in the foot and elsewhere -- can help you rise higher.
What It Means
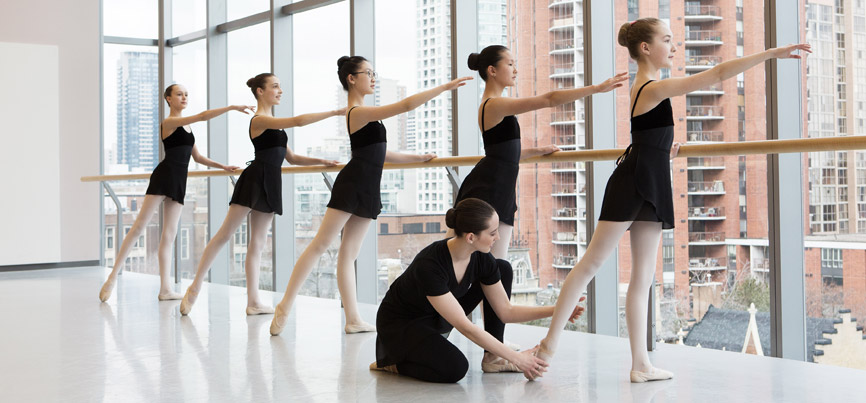
When you're high on your toes, your heels are lifted as much as possible. You have to hit that point -- and sustain it -- while maintaining your overall alignment. When you're high on your toes, the line of your leg runs from your hip, through your knee to the bony arch of your foot. If you're dancing en pointe, that line continues through your toes; the energy flows right out the platform of your shoe. To consistently get up and over your toes, you need a combination of strength and flexibility. Dance exercises performed at the barre and in the center of the room -- including plies, tendus, releves and jumps -- are designed to build strength and increase joint mobility so you can achieve and sustain a higher toe rise.
Supplemental Exercises
Dance training alone isn't always enough. Despite your dance training, you might lack range of motion in your ankle. Perhaps your weight isn't distributed properly when you rise. Maybe your core muscles -- including your abs, hips and back -- aren't pulling their weight or the tiny intrinsic muscles of your feet are weak. In each of these cases, your toe rise will likely be compromised and you'll be more susceptible to certain dance-related injuries, ranging from toe blisters and bunions to ankle sprain. If you have specific weaknesses and you know what they are, targeted exercises performed after class reinforce and supplement the work you do in the studio.
Examples
If you've isolated your problem, get to work. Boost ankle strength and mobility by "writing" the letters of the alphabet with your feet, using broad, sweeping strokes to trace every letter. Do slow releves in first and second position, articulating carefully through all parts of the foot and checking that your insteps are over your first and second toes. Use a resistance band to work your lower-leg muscles -- muscles that flex, extend, invert and evert the foot at the ankle. Use a marble-pickup or towel-scrunch exercise to develop your intrinsic foot muscles, which support your arch and control your toes in releve. Stretch your hip flexors and quads so you're free to shift far enough forward over your toes. Strengthen your core and buttock muscles -- muscles that help haul you up and over your toes -- with planks and glute bridges.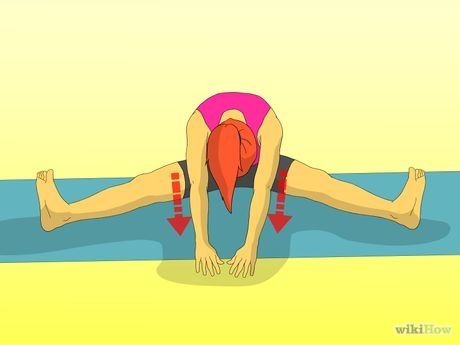
Limitations
Even supplemental exercises don't guarantee a higher rise. For some dancers, nature or certain foot and ankle conditions limit how high they can go. Dr. Thomas Novella, a podiatrist and contributor to "Dance Magazine," explains that some dancers who feel frustrated by the height of their toe rise actually have an extra bone in back of the ankle. This bone -- the os trigonum -- can cause pain behind the ankle and impede movement when you rise onto your toes. Rising high can also be difficult and painful if you have flat feet, knock knees or bunions.
Reminders and Considerations
Ideally, you'll do supplemental exercises after class, when your muscles are already warm. If not, start with a brief cardio warmup and dynamic stretches of the muscles you plan to work. Avoid clenching or clawing your toes when you rise up. Curling your toes under when you're en releve creates an unstable base of support, can cause unnecessary blistering on the toes and puts excessive stress on the joints.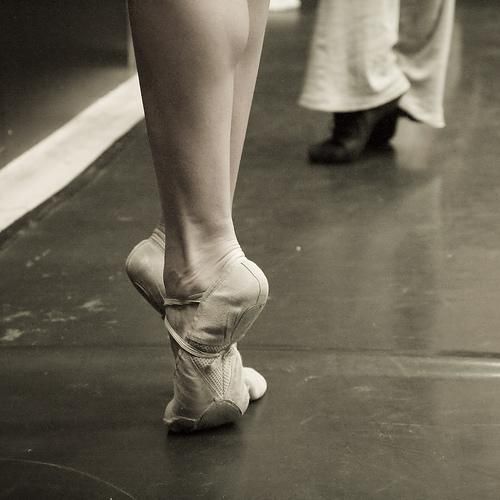 During class, don't hide your feet and ankles under bulky legwarmers; your teacher needs a clear view of your releve in order to advise you. Pain in releve can be a sign of injury; if you experience foot, ankle or leg pain when you rise onto your toes, speak to your teacher or visit your doctor for an evaluation.
References
- Dance Magazine: Centerwork -- Perfect Timing
- Russian Pointe: Essential Exercises for the Feet
- The Perfect Pointe Book: Flat Feet And Pointe Shoes -- Can They Ever Go Together?
- Pointe Magazine: Ask Amy -- Curse of the What Ifs
- Pointe Magazine: Your Best Body -- Bad Feet?
- Dance Magazine: The Seven Deadly Sins
Writer Bio
Judy Fisk has been writing professionally since 2011, specializing in fitness, recreation, culture and the arts. A certified fitness instructor with decades of dance training, she has taught older adults, teens and kids. She has written educational and fundraising material for several non-profit organizations and her work has appeared in numerous major online publications.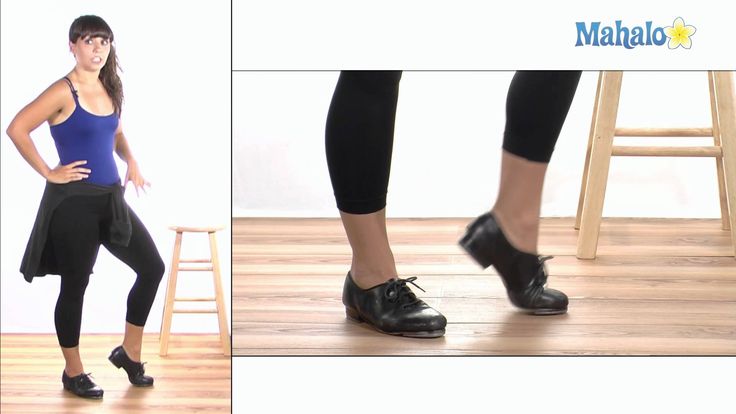 Fisk holds a Bachelor of Arts in public and international affairs from Princeton University.
Image Credit
Comstock/Comstock/Getty Images
SHARE SHARE TWEET EMAIL
More Articles
How to learn to dance shuffle - Lifehacker
December 15, 2019LikbezSports and Fitness
Master the basic movements, and then improvise and get high.
Iya Zorina
Author of Lifehacker, athlete, CCM
Share
0This dance style includes a lot of freedom and improvisation. That is why he is so good. You can master the basic movements in a couple of hours, and then complicate them to infinity and combine them with each other, create your own combinations and spy on others.
Dance in sneakers, socks or barefoot, in any outfit, anywhere.
Master the basic movements of the shuffle
In this style, you do all the basic movements with your feet, the hands most often move freely - according to the heart.
Running man
This is the most basic and essential shuffle movement. You can do it in three different ways.
Full foot
The movement begins by bending the knee and lifting one leg. Next, you need to simultaneously put both legs - supporting and raised - at a distance of one step from each other.
The raised leg is placed forward on a full foot, the standing one behind slips back on the ball of the foot and remains on it - the heel is not placed on the floor. The weight is evenly distributed between the two legs.
After that, it remains to return to the starting position. To do this, the front leg slides back, and at the same time, the back leg is pulled up. You find yourself in the starting position and repeat the cycle. The movement itself is soft and springy: do not stick into the floor, keep your legs relaxed.
Heel
This is a lighter and faster running man look that may be needed for some combinations. Here you put your foot not on the whole foot, but on the heel. At the same time, the one standing behind remains on the toe.
On pads
In this variation, the foot is placed forward on the pad. At the same time, the one standing behind also remains on the ball of the foot, and the body leans slightly back.
T‑step
In this movement, one foot constantly makes a “herringbone” - turns the heel in and out - and the second touches the floor and immediately rises back.
When the heel of the skating leg turns inward, the toe of the other leg touches the floor; when outward, the other leg rises, turning the knee inward.
It turns out two positions: closed - when the legs are wrapped with the knees inward, and one leg is raised, and open - when the legs are turned out with the knees outward, and the toe touches the floor. Practice doing the T-step in both directions: slowly at first, then with acceleration.
Rocking
You jump on one foot, and the other touches the floor in different places: on the side of the supporting leg, across, behind - anywhere you want.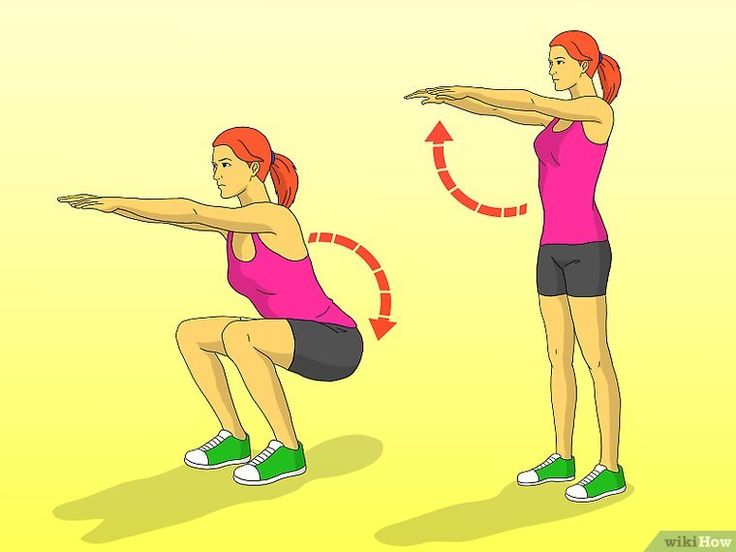 You can put your foot on the toe or on the heel - the latter is called a kick. The supporting leg can simply rise low or perform a T-step - move the heel out and in.
Charleston
To begin, you turn your knees and toes inward and lift one leg. Then turn your toes and knees outward, and put your raised leg forward crosswise. Repeat the same with the other leg.
All movement occurs on the balls of the feet, the heels do not fall to the floor. You can move both forward and backward.
Diamond
First you put your feet crosswise with your toes outward with a jump, then you also spread your legs apart with a jump.
Slides
One leg is straight, stands on the whole foot, the other is with a bent knee on the pad. Leaning on the pad, you slip the foot of a straight leg back, as if wiping the sole on the floor.
Immediately after the slip, you turn around. In the turn, the straight leg bends and goes to the pad, and the one that was on the pad, on the contrary, turns on the heel.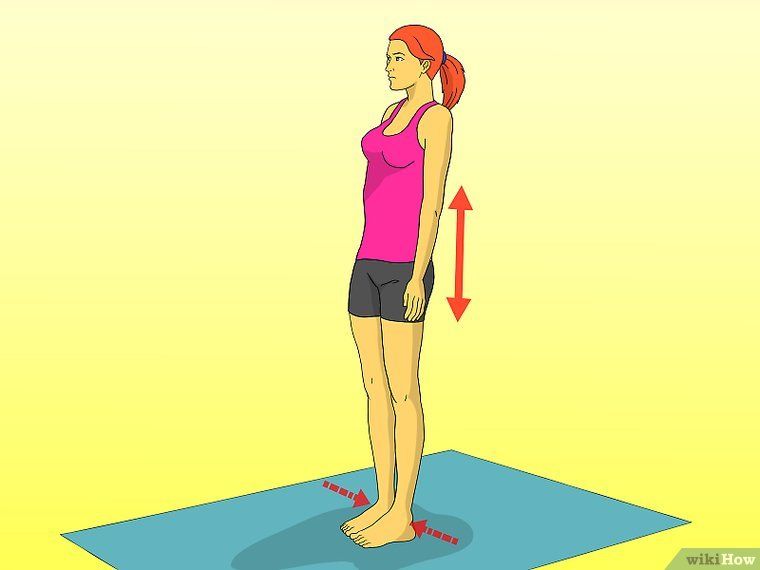 After that, it remains only to change legs and move in the same way in the other direction.
Scissors
From the starting position - standing with a raised leg, as in Running man - you turn your hips to the side with a jump and put your legs crosswise.
The front foot is on the heel, the back foot is on the ball. Then you jump back to the starting position and do the same on the other side.
Sidekick
From the starting position, you turn your hips to the side with a jump and spread your legs a step apart from each other. The standing foot in front is placed on the heel, the standing one behind remains on the pillow. Then, with a jump, you collect your legs and do the same on the other side.
Try other variations of the basic shuffle movements
You can perform the basic movements in different directions: forward and backward, turning around. This will give you more freedom to improvise.
Variations Running man
Do several times in place and then turn around. You can also try walking this way to the side. Each time the leg will need to be placed slightly crossed in order to slowly move to the side.
Variations T‑step
You can lower your foot on the toe, on the whole foot, touch the floor to the side of the supporting leg or forward and behind it.
You can also keep the other leg off the floor at all - leave it on the toe and turn the knee in and out.
Variations Diamond
Here one more element is added to the movement – the heel strike. In the starting position, you wrap the toes of the feet and knees inward, and then jump on the heels, turning the socks to the sides.
From this position, without jumping, you turn your toes and knees inward, cross your legs with a jump, turning your feet with your toes outward, and then return to the starting position.
Charleston Variations
After three turns of the Charleston, turn both toes in one direction and then in the other.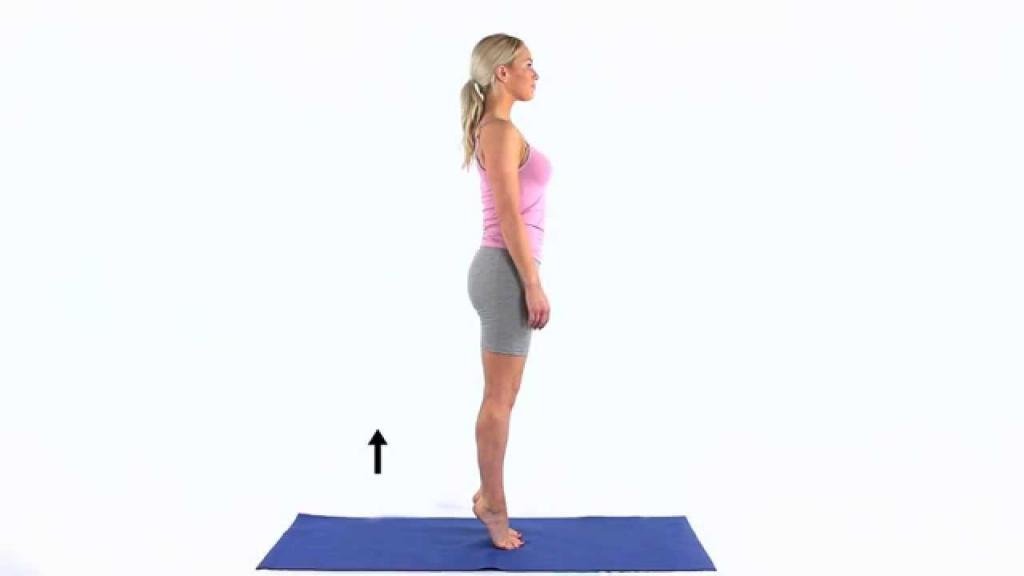 At the end, you can turn the knee to the side.
Connect familiar shuffle moves
While you lack the skills to move freely and come up with something of your own, learn a few combinations. They contain interesting movements that will replenish your dance vocabulary.
Combination 1
This is a simple combination of two basic movements - Running man and T-step. First take five Running man steps, then four T-steps to the side and repeat the same in the opposite direction.
Combination 2
Another combination of two basic movements. Here you do three Running mans, then one T‑step with a back foot touch, and two front heel touch kicks. The same on the other side.
Combination 3
There are no standard steps here, but there are already familiar Sidekick and transition from heels to toes.
Learn more difficult combinations
We will add some videos with good combinations.
1. Cool video for beginners: movements are repeated in slow motion to make it easier to dance to the music.
2. And here the combination is analyzed step by step in slow motion, dividing it into three parts. Very comfortably. Look for more on this channel, there are several such analyzes.
3. There is no slowdown here, just a great combination. But you already know almost all the movements, so you can figure it out. If something is not clear, watch the video at a speed of 0.25.
Pick up the music and improvise
Surely you have favorite songs to shuffle to. Include them and start with basic movements: just do the Running man and periodically add different elements when you want. Move in different directions, relax and have fun.
If you don't have favorite tracks, try our selection.
I must say that the shuffle is an amazing cardio workout. In just a couple of tracks, you will be out of breath and sweat, like after a run, but you will feel absolutely happy!
What's more, if you have to force yourself to keep going while running, shuffle requires you to have the willpower to stop and not dance. As a bonus - a short video from a beginner after a couple of hours of practice.
Shuffle is cool!
Read also 🕺💃🤸♀️
- Dancing as a sport: choosing the right direction
- Dance and movement therapy: how to know and change yourself through movement
- How to learn to dance: video lessons for those who are not afraid to try
- How to learn street dancing without leaving home
- Zumba is a fun way to lose weight for those who love dancing
*Activity of Meta Platforms Inc. and its social networks Facebook and Instagram are prohibited in the territory of the Russian Federation.
Why do ballerinas always stand on their toes? — Discuss
One+2
Why do ballerinas always stand on their toes? time ballerina sock
1924
185
3
Andrey Ryshkov
This technique is called pointe dance.
It is believed that for the first time pointe shoes - shoes with a hard cork lining - were put on by the great Frenchwoman Maria Taglioni in 1830, when she danced the ballet Zephyr and Flora.
Pointe shoes - satin shoes with a hard toe, without a heel, on ribbons. Previously, neither shoes nor the word "pointe" existed, but there was only a French term - to dance sur les pointes, which means - to dance on your fingertips.
When a ballerina gets on pointe shoes, the leg seems longer, more graceful, the movements are airy, as if flying.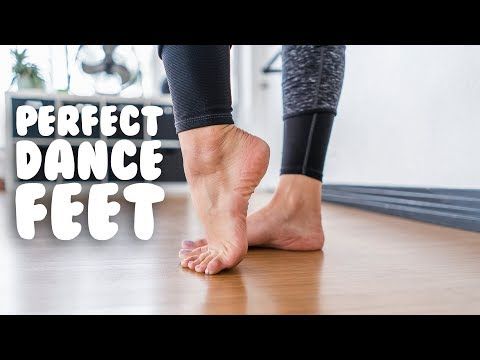
Studying the surviving lithographs, ballet experts dispute the exact date of the ballerina's raising to pointe shoes, but one thing is clear: the history of the use of such shoes dates back to the era of romantic ballet, that is, from the first third of the 19th century. At that moment, Napoleon's wife Josephine introduced the fashion for ballet flats - silk slippers with ribbons. According to legend, the legendary ballerina Maria Taglioni put hard pads for her fingers in these same ballet flats and stood on her toes without the help of a partner.
In order to “dance on pointe shoes” in ordinary shoes, ballerinas and dancers learned aplomb, that is, the ability to maintain balance in different poses, standing on the tip of the finger for two or three beats. Of course, this art was mastered for many years, and the muscles of the fingers of the ballerinas became like steel. A case is known when a robber who attacked Maria Taglioni received such a blow with the tip of her finger that he died on the spot. There are other stories in balletomaniac circles about the power of a ballet foot.
0
Vladimir Bo...
The shorter the legs - the more they try to increase their visible length. The same applies to heels. And those who are completely disabled prefer Louboutins...
0
OP
Olga Petrova
Probably, they are trying to see something distant and beautiful))) Or maybe they are just looking out if there is a pie lying around somewhere, or a crust of bread?))
0
76Am Ab2
Simferopol Ukraine???And they stand on their toes because this is only the beginning, namely, all other body positions of ballerinas in the future. ..
..
0
Gulchira Andreeva
Why do ballerinas always stand on their toes? Answer: To make the legs seem longer and thinner, and if you take the ballerina higher ...
0
Khabib Aliyev
Perhaps ballerinas stand on their toes all the time in order to look taller, genuinely legged and slimmer. ...
0
VR
Vladimir Redozubov
possible for body lengthening in dance. turning the shape of the body. well, since she is in pointe shoes, then rotational movements
0
BC
Vyacheslav Savinykh
are then lowered. The main thing at home is that they would walk as they should, on stage even on their heads.
0
SE
Svetlana Efimik (Zatsepilina)
In order not to lose the dexterity to stand in pointe shoes. And then it becomes a habit.
0
Leonid Ushakov
Pointe shoes allow you to mobilize the muscles of the legs, which is necessary for the drawing of the dance.
0
Light Temnova
want to see those in the back rows..who have the cheapest tickets..
0
Olga Toporkova
Pointe shoes, that's what they're called. Otherwise, it's not interesting to look at them.
0
Tatiana C
They show their ease in dancing in their shoes. (points)
0
Svetlana Sokolova
to see all viewers and even those who are on the last row
0
Roman Polibin
to better appreciate their figure, beauty and grace =)
0
Alexander Chlek
The elegance of the dance, and the ability to scroll in motion.
0
AB
Anastasia Bali
Pointe shoes are designed in such a way that they cannot dance otherwise
0
Varvara
probably to appear lighter and more airy
0
Sha
Humpty Dumpty
optional)
1
Varvara
what do you think?
1
Sha
Humpty Dumpty
I didn't know, but I agreed with you)
1
Varvara
well, well then))
1
Sha
Humpty Dumpty
1
Eleonora Mkrtchian
SO THE OTHER FINGERS DO NOT BRAKE WHEN TURNING
0
Sagynbek Mametov
Art, the ability to do what others can't.