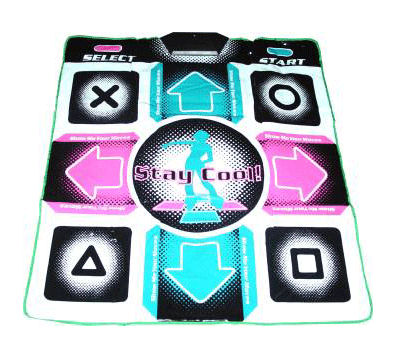
How to set up dance pad on stepmania
Better “DDR / Stepmania” Mat Controller I-PAC. – S-Config
StepMania love coming at you! This is a quasi blog and guide on how we got our dance pads to work well with StepMania thanks to the I-PAC. Just keep in mind that my solution is not the cheapest in the world. We were going for a solid solution when I moved my pads from PC to PC.
Let’s Begin!
Hardware.
Let us take a tour of all of the different hardware we used and the experiences that have occurred with it.
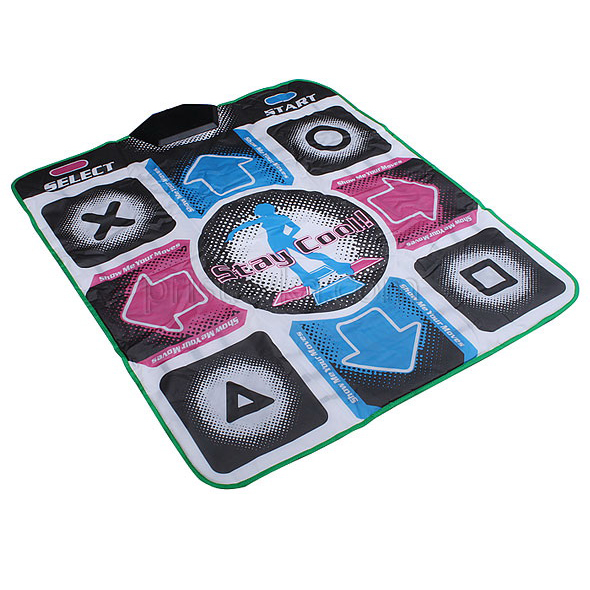
The SoftPad:
For a long-time, we got into Dance Dance Revolution and eventually Stepmania. We are not any good. The best attainable grades were B’s and A’s on heavy’s when I was doing it non-stop for months at a time. An upgrade was necessary and we didn’t want MadCatz soft-mat or the ultra-crappy OEM dance mats. People were getting injured on these mats because the mat flew out from under you during a song twisting your ankle if you didn’t tape it down! Ouch!
The Chinese hard pad:
We first bought some Chinese hard mats. BIG MISTAKE!! Pissing $150 (Plus $75 shipping and handling for how awkward they are to ship) away they were made with 1/8ths inch thick plywood with another 1/8ths-inch thick ply for the pads. And a guy like myself around 280 lbs found these pads too flimsy. If you scroll down most of these eBay sellers; There will be a disclaimer on them where it said:
These mats can hold up to 250lbs of pressure!
– China hard-mat eBay seller.
Turns out that a 70lbs child can max out the pad as it’s your weight times three would be the pressure of the pad. Needless to say, these pads only took a total of a few months of abuse and i had to open them repetitively because the aluminum tape was sticking to the sensor PCB. It was a giant waste of money and time.
A legitimate hard pad:
Moving onward to the Cobalt Flux for $300 per pad with the arcade riser kit as shown in the picture. It was a godsend! The only thing that would be better than this would be the actual Arcade Pads ripped right off of a machine. Arcade parts do go on sale but every time they are listed they can cost up to $700 per pad (so if I wanted doubles. I minus well buy the whole damn arcade machine!). With giant holes burned into our pockets at the point of the game, it simply was not worth it. And these things still work to this day (my pads acrylic is all scuffed to hell! but otherwise perfect!)
The Chinese PlayStation 2 to USB adapter:
Getting bored withPS2 DDR it was time to hook the Cobalt flux Pads up to my PC. From the soft-mat days, we had this adapter. It’s a PlayStation to PC adapter that China makes for anywhere from $5-$15 dollars. We first tested this adapter by hooking PlayStation controllers to there were no perceivable problems. However, the weird thing that was encountered depending on the USB chip-set is latency. On some chip-sets latency is virtually non-existent. On others, however (mostly laptops) there was a quarter-second lag. With the quarter-second lag it’s enough to mess up just about any score in StepMania and as a result, was not a consistent solution for game-play.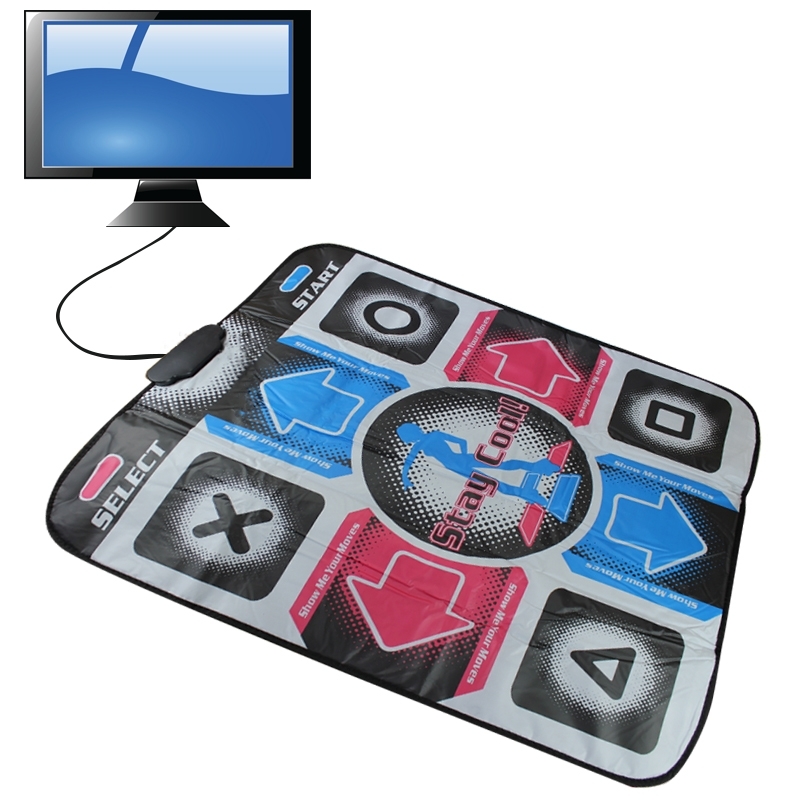 Well! Mark this as strike two from china! Let us find the fastest converter in the world for my cobalt flux pads. going through some MAME forums I found this bad boy.
Enter the I-Pac ve controller:
Enter the I-PAC controller (Website here). The I-PAC is more than acceptable for the feeling of the hard-core gamer. Even though it emulates a keyboard via USB it has an interrupt per key instead of sharing or ‘ghosting’ the interrupts. This means you can hold all 32 keys down at the same time and they would register at the exact time as just pressing down one. My Cobalt Flux just has pin-outs with a common ground. Thus, I can bypass the OEM Cobalt Flux PlayStation controller brick and pipe all of the wiring right into this unit.
The image pictured above is actually the I-PAC VE controller which is cheaper and had free shipping at the time I got it (around $32 US) and the only thing that separated this from the regular I-PAC is this one only had USB and this one resets it’s configuration to a default MAME mapping every-time you power it off (no problem I can re-configure the mapping in StepMania) So outside of lack of non-volatile memory according to Ultimarc the programming is incidental between the I-PAC and I-PAC VE. I-PAC states that the VE series is exactly like their original series in every way except for the non-volatile ram. Really? We re-added the PS2 keyboard connectors and it would work? The answer is YES! If you re-solder some PS2 keyboard connectors onto your I-PAC VE it works (Note: I only had one PC where it wouldn’t power itself on with the PS2 mod. 8 other PC’s I tried it with worked flawlessly)
Enclosure used for my new dance pad controller:
The next order of business is an enclosure to put everything together. It so happens in our inventory there is an ancient KVM switch that was purely mechanical. These types of KVM switches were stupidly dangerous! In respect that switching with a mechanical switch could blow up video cards and keyboards, which is why I never used the thing! So if I ripped it apart I wouldn’t feel overly bad about it.
It’s wiring time!
After about an hour of stripping wire and plugging everything in. We now Have my I-PAC VE controller inside of this KVM switch.![]() The whole bottom is lined with electrical tape so that the I-PAC cannot ground out and then added some Velcro tape to the base and the board so the I-PAC wouldn’t move around at all. As you can see, the green wires are soldered right onto the I-PAC VE board (Just to let you know this will totally void your warranty with Ultimarc!) where’s the Orange (Player 1 PAD) and Yellow (Player 2 PAD) are plugged into the sockets onto the I-PAC itself. Now you’ll probably notice a few more connectors going on here.
The whole bottom is lined with electrical tape so that the I-PAC cannot ground out and then added some Velcro tape to the base and the board so the I-PAC wouldn’t move around at all. As you can see, the green wires are soldered right onto the I-PAC VE board (Just to let you know this will totally void your warranty with Ultimarc!) where’s the Orange (Player 1 PAD) and Yellow (Player 2 PAD) are plugged into the sockets onto the I-PAC itself. Now you’ll probably notice a few more connectors going on here.
4 DB9 Male connectors were added. Why you may ask? Well, out of the sake of it being multi-functional I decided to mod this into almost a 4-player C=64 joystick adapter (Which is useful for Amiga Emulation when playing DynaBlasters). and made the holes that used to be for keyboards only with a Dremmel. The DB-9 connectors also serve as a selection box in the event I want to set one up. Instead, it pressing those tiny buttons on the Cobalt Flux you can simply hit a plunger.
It receives its data and power from the USB connector in the upper left (using a male to male A connector just to be obnoxious ) OR I can hook up via the PS/2 connectors and get data and power that way. Where it’s marked “A” is the player 1 port for DDR. Below it would be DB9 Player 1 and 2 Where it’s marked “B” is the player 2 port for the DDR. Below would be DB9 Player 3 and 4 I found this configuration gives maximum usage out of the hardware as well as makes it easy to make MAME joysticks in the future. People were concerned if the length of the DB-15 connector would be a problem with the I-PAC. Actually, the signal strength is -really- good even routing around a dance pad which on top of the 6 foot of VGA cable there are another 6-10 feet of wire inside.
Here is the pin-out system used in this setup in case anyone wants to replicate it. All of the DB15 connectors are Part “A” and the DB9s are either Port “1” or “2”
I-Pac wiring pin-outs on the back of my enclosure:
| Input | Preset Key | DB15 - DDR | DB9 - C64 |
|---|---|---|---|
| 1B | Enter | N/C | 2 Pin5 |
| 1A | P | N/C | 2 Pin9 |
| 1Coin | 5 | A Pin12 | 2 Pin7 |
| 1Start | 1 | A Pin11 | 1 Pin7 |
| 1SW8 | V | A Pin15 | 2 Pin6 |
| 1SW7 | C | A Pin14 | 2 Pin2 |
| 1SW6 | X | A Pin7 | 2 Pin1 |
| 1SW5 | Z | A Pin6 | 2 Pin3 |
| 1SW4 | L-Shift | A Pin13 | 2 Pin4 |
| 1SW3 | Space | A Pin8 | 1 Pin5 |
| 1SW2 | L-Alt | A Pin9 | 1 Pin9 |
| 1SW1 | L-Ctrl | A Pin10 | 1 Pin6 |
| 1Down | D Arrow | A Pin3 | 1 Pin2 |
| 1Up | U Arrow | A Pin2 | 1 Pin1 |
| 1Left | L Arrow | A Pin4 | 1 Pin3 |
| 1Right | R Arrow | A Pin5 | 1 Pin4 |
| GND | GND | A Pin1 | 1&2 Pin8 |
For The other column it’s pretty much a mirror of the first, DB15 is port “B” and DB9 connectors are ports “3” and “4”
| Input | Preset Key | DB15-DDR | DB9-C64 |
|---|---|---|---|
| 2B | Enter | N/C | 4 Pin5 |
| 2A | P | N/C | 4 Pin9 |
| 2Coin | 5 | B Pin12 | 4 Pin7 |
| 2Start | 1 | B Pin11 | 3 Pin7 |
| 2SW8 | V | B Pin15 | 4 Pin6 |
| 2SW7 | C | B Pin14 | 4 Pin2 |
| 2SW6 | X | B Pin7 | 4 Pin1 |
| 2SW5 | Z | B Pin6 | 4 Pin3 |
| 2SW4 | L-Shift | B Pin13 | 4 Pin4 |
| 2SW3 | Space | B Pin8 | 3 Pin5 |
| 2SW2 | L-Alt | B Pin9 | 3 Pin9 |
| 2SW1 | L-Ctrl | B Pin10 | 3 Pin6 |
| 2Down | D Arrow | B Pin3 | 3 Pin2 |
| 2Up | U Arrow | B Pin2 | 3 Pin1 |
| 2Left | L Arrow | B Pin4 | 3 Pin3 |
| 2Right | R Arrow | B Pin5 | 3 Pin4 |
| GND | GND | B Pin1 | 3&4 Pin8 |
DB9 Connector for C=64/Amiga/Atari joysticks:
Explanation of the way I wired DB9
This is the pinouts for a DB9 Facing you.
| Pin Number | Action |
|---|---|
| 1 | Forward |
| 2 | Back |
| 3 | Left |
| 4 | Right |
| 5 | Button3 / Pot-Y |
| 6 | Button1 |
| 7 | 5vdc |
| 8 | GND |
| 9 | Button 2 / Pot-X |
It is noted that Pin 7 is usually +5v power, and thus you shouldn’t wire a MAME or DDR pads to ever go to Pin7 Just in case you DO hook it up to a retro PC. The only reason why I hook to Pin7 is to get an extra button out of it for my 4 player setup for (start, select) buttons. However, If I wanted to hook up a retro joystick such as an atari or an amiga joystick, pin7 is harmless. Also, Sega Genesis joysticks will have limited usage of its buttons because they used a shift register circuitry to sort of ‘MUX’ more buttons down one line.
Cobalt Flux DB15 pin-out:
DB15 female connector used on the Cobalt Flux
| Pin Number | Action | PS2 Action |
|---|---|---|
| 15 | N/C | Right Rear Button2 |
| 14 | N/C | Left Rear Button 2 |
| 13 | N/C | Right Rear Button 1 |
| 12 | Select | Select |
| 11 | Start | Start |
| 10 | Center | L-Analog Stick |
| 09 | Down-Right | Square Button |
| 08 | Down-Left | Triangle Button |
| 07 | Up-Right | Circle Button |
| 06 | Up-Left | X Button |
| 05 | Right | D-Pad Right |
| 04 | Left | D-Pad Left |
| 03 | Down | D-Pad Down |
| 02 | Up | D-Pad Up |
| 01 | GND | GND |
In this wiring I added pins 13-15 to the wiring system, Allowing us to hook up MAME style joysticks if we so desire for fighting arcade games or whatever else I want.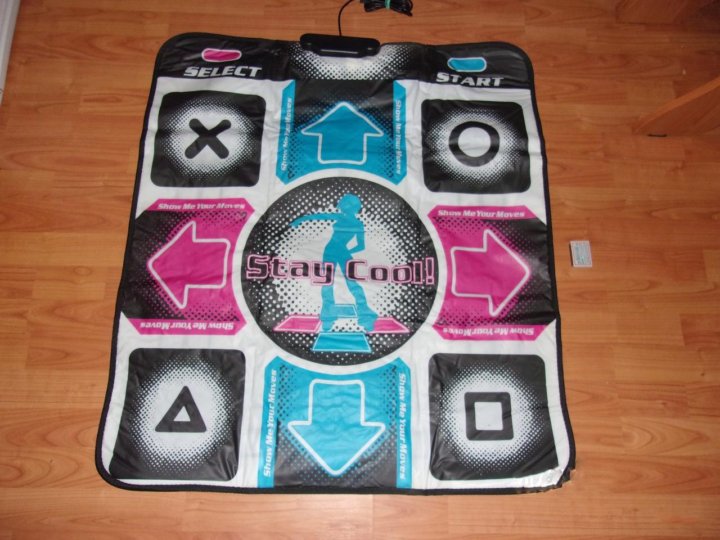 Also, Note that R-Analog and L-Analog only reflect the buttons when you push down on the analog stick. the I-PAC controller is not capable of reading analog signals.
Also when using this setup you will need some FULL VGA cables with all of the pins going from one side to the other. if the cable looks thin then chances are all of the ground pins are wired together in a VGA analog setup which case that will not work! To test this always perform a continuity check with your voltmeter.
6-Button China HardPad DB15 pin-out:
The exact name that china originally sold these under is “tournament hard pad dance” Since we had one of these in our possession at one point we did find the old pin-out paperwork for those who still have one of these in an operational state.
| Pin Number | Action |
|---|---|
| 15 | Up left |
| 14 | Up Right |
| 13 | N/C |
| 12 | N/C |
| 11 | N/C |
| 10 | Right |
| 9 | Left |
| 8 | Down |
| 7 | Up |
| 6 | N/C |
| 5 | Ground |
| 4 | N/C |
| 3 | N/C |
| 2 | N/C |
| 1 | N/C |
8-Button China HardPad DB15 Pinout.
This pad was a little rare to find as there wasn’t much use for an 8-button DDR hard pad. Since there was no center button you couldn’t even activate the center button for Pump-It-Up like the Cobalt flux pads could.
| Pin Number | Action |
|---|---|
| 15 | Ground |
| 14 | Up |
| 13 | Down |
| 12 | Left |
| 11 | Right |
| 10 | N/C |
| 9 | Down-Left |
| 8 | N/C |
| 7 | N/C |
| 6 | N/C |
| 5 | Down-Right |
| 4 | Up-Right |
| 3 | Ground |
| 2 | Up-Left |
| 1 | N/C |
Note: Ground appears twice because for reasons beyond explanation pins 2 and 4 go to ground pin 3 and everything else goes to ground pin 15.
Update 3/12/2013
We just got some e-mails about the design of the Cobalt Flux and how there were actually two versions of my pad that were released. Version 1 Cobalt Flux pads supported a DB9 connector going to the controller and apparently only had 6 buttons (up, down, left, right,upper-left-corner, upper-right-corner) we, unfortunately, do not have any info on how the DB9 connectors are set up on the Version 1 model of the Cobalt Flux pads. It most certainly does not follow the design mentioned in my document and the ground pin may be on pin 1 rather than pin 8 like how it is on Atari/C=64/Amiga joystick configurations.
Reading through a lot of old DDR forums it appears a lot of the first generation Cobalt Flux V1 control boxes had a tendency of failing. Although the pad itself is perfectly fine either the wiring harness or control box simply stopped working on their Playstation 2. Since I do not know the pin-outs my best suggestion is to grab a voltmeter and find the ground pin (If it is anything like the version 2 Cobalt Flux ground pin will be pin 1) map out your buttons and arrows and simply adjust your DB9 connectors accordingly to a new control box such as an I-PAC series controller.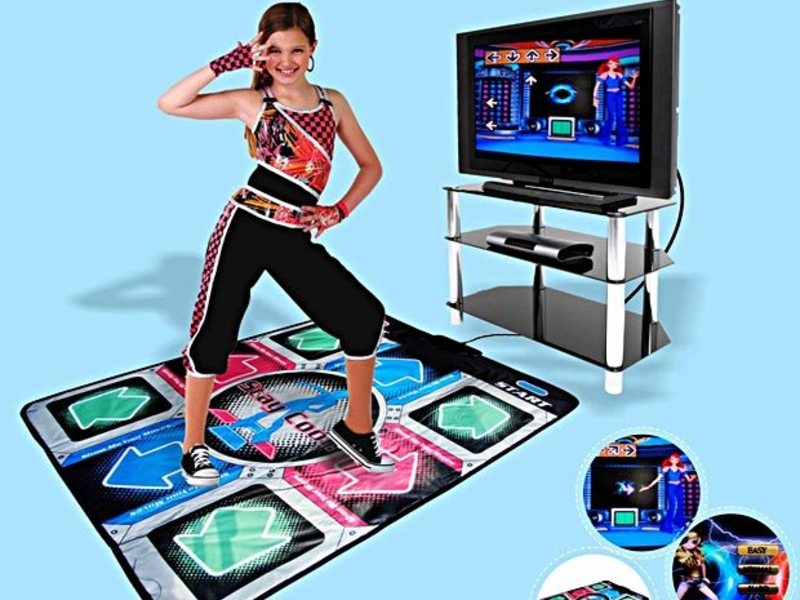 If anyone has the pin-outs for the generation 1 cobalt flux pads which have a DB9 connector on them please contact me or reply to this blog and we’ll be sure to put it up for everyone to see.
Final thoughts.
I can’t complain really! My StepMania now runs flawlessly with response times (Just wish I could say that about my dancing skill!) On a side note, we are able to test out all of my C=64 joysticks which we actually found out some of the copper wirings had failed on a lot of my 15+-year-old sticks which I was able to see using the I-PAC diagnostics tool. The I-PAC controller is pricey. And with adapters for game consoles, it can make it even more pricey (Almost $100 for just controller action). To us, the I-PAC is well worth it because if it’s solder-less connectors and rock-solid diagnostics software. You could even spend a little more money to get past the ‘I-PAC-ve’ series and pre-program your keystrokes so you don’t have to reconfigure your keyboard commands in StepMania. WE do hope you have fun keeping alive your old gear and until then. END OF LINE+++
PC Stepmania Dance Game|DDR Premium Energy Nonslip/Super Deluxe|Tough/HD Super Deluxe|iON Metal/iON Master Arcade Metal Dance Pads|USB PC Adapters & Converters|
| ||||||||||||||||||||||||||||||||||||||||||||||||||||||||||||||||||||||||||||||||||||||||||||||||||||||||||||||||||||||||||||||||||||||||||||||||||||||||||||||||
| ||||||||||||||||||||||||||||||||||||||||||||||||||||||||||||||||||||||||||||||||||||||||||||||||||||||||||||||||||||||||||||||||||||||||||||||||||||||||||||||||
 99
99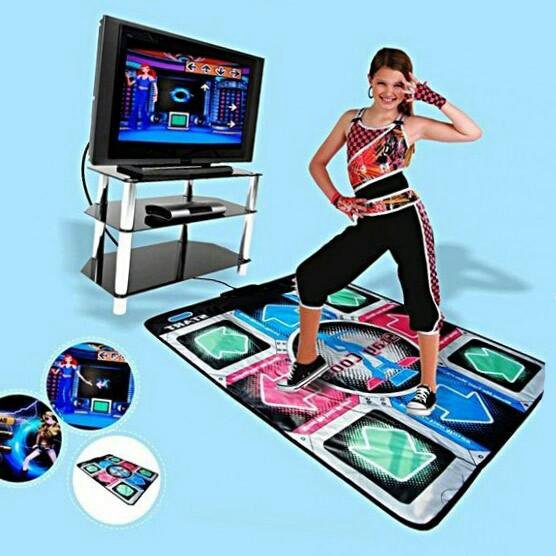 99
99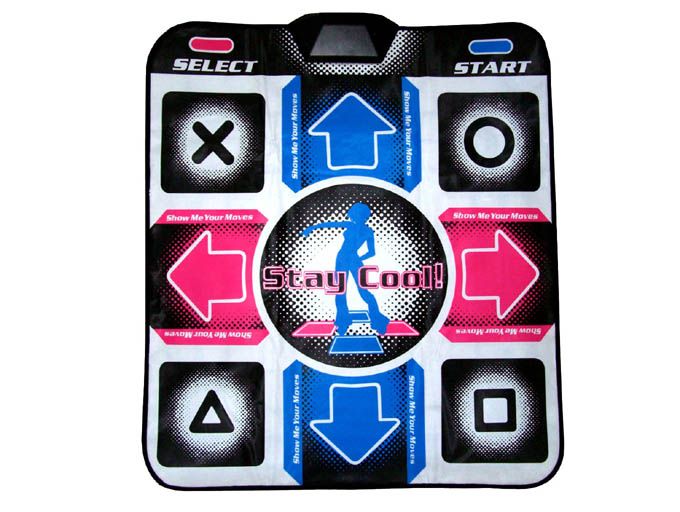 99
99 99
99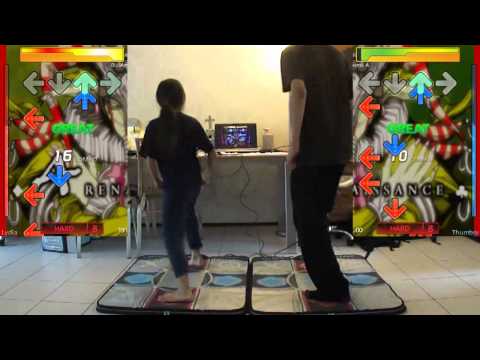 99
99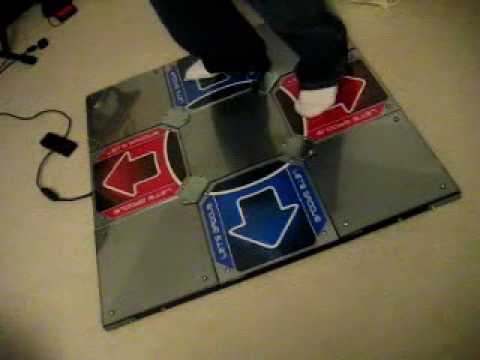 99
99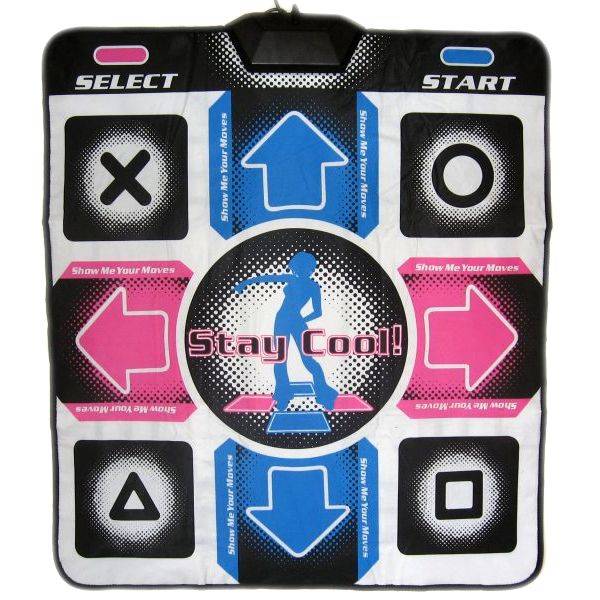 99
99Connecting a dance mat, installing and running Stepmania
In this article we will tell you in detail what to do with a dance mat (also called a dancepad) or a dance platform (metalpad).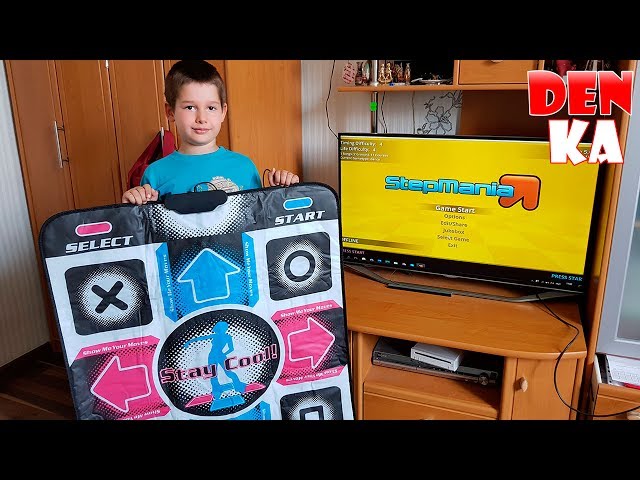 In addition to connecting and testing, you need to know how to install and run the Stepmania program, which simulates the dance machine of the Dance Dance Revolution and Pump It Up systems.
CONTENTS:
Step 1: Connecting the mat.
Step 2: Testing the performance of the pad. nine0007 Step 3: Install STEPMANIA.
Step 4: Starting STEPMANIA for the first time and setting up the control keys.
Step 5: Dance.
Steps 1-4 on video
Step 1: Connecting the mat.
Connecting to a computer
Connect the mat to an available USB port on your computer. Windows will detect the new device and install all the necessary drivers on its own:
Windows has detected a rug (Part 1)
Windows has detected a rug (Part 2)
Windows has installed the drivers and the pad is ready to use
Step 2: Check if the pad is working.

It is recommended to check the properties of the connected mat. To do this, you should enter CONTROL PANEL and find GAMING DEVICES :
Press START and select CONTROL PANEL...
In the control panel, select PRINTERS AND OTHER EQUIPMENT...
... and select GAME DEVICES
The Connected Gaming Devices window opens. The connected pad will appear in the list as a USB GAMEPAD. Select it from the list and press the 9 key0034 PROPERTIES .
List of connected gaming devices
You will see a window with the properties of the mat. It will look like this:
Pad properties
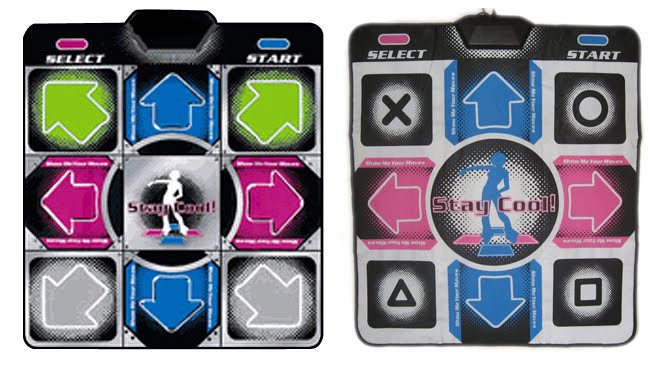
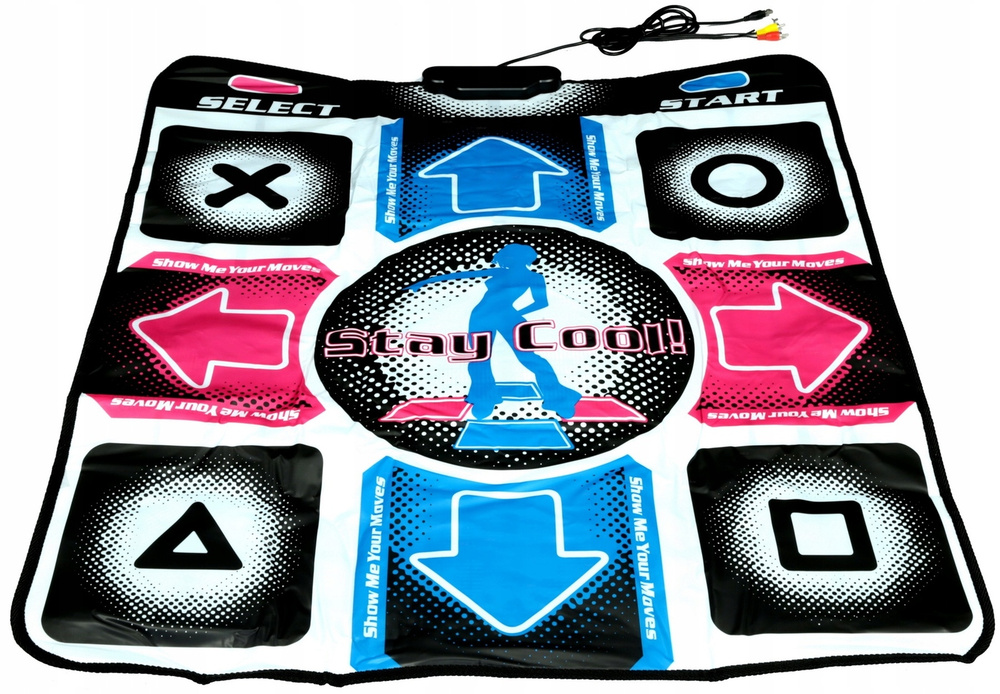
This figure shows the properties of the connected BASE-8 pad. It can be seen that the rug has 10 buttons: 8 arrows + START and SELECT. Depending on the model, the number of buttons will be different.
Now you can test all keys by stepping on them. The numbers of the pressed buttons will be highlighted (in the figure, key No. 4 is pressed). nine0003
Step 3: Install the Stepmania software.
Insert the supplied CD into your CD-ROM drive, the installation will start automatically. Follow the prompts on the screen and complete the installation.
Welcome screen of the installer. Click NEXT to continue.
Select the installation folder. For a full installation, you will need about 700 megabytes of free space. Click NEXT to continue.
Select the installation type. We highly recommend a full installation. The compact and minimal installation should only be used when space is limited. Click NEXT to continue. nine0003
Specify the name of the folder created in the START button menu. In most cases, you don't need to change the suggested name. Click NEXT to continue.
Select whether you want a quick launch icon on your desktop. If needed, check the box. We recommend checking the box. Click NEXT to continue.
This is an information screen that displays the installation options you have selected.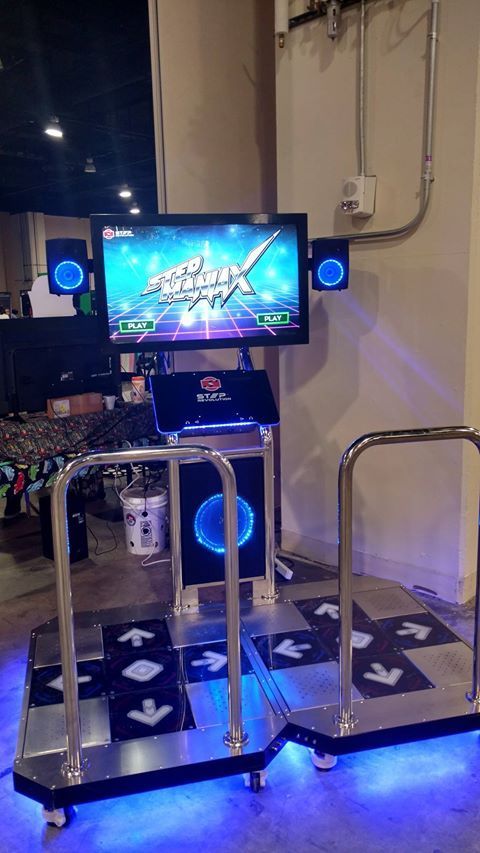 To change them, you can return to the respective screens with the BACK button. Click INSTALL to continue installation. nine0003
Files are being copied. It remains to wait for the installation to complete.
Step 4: Starting STEPMANIA for the first time and setting up the control keys.
To launch the game, click on it in the START menu or launch it from the desktop icon (if you created one during installation).
This is what the Stepmania icon looks like on the desktop. Please note that it will only be visible if you checked the appropriate box during installation.
By default, the game is installed here. nine0003
At the first start, Stepmania looks through the installed songs, collects data about them and forms a database. This process may take several minutes. The second and subsequent launches will be much faster.
Loading - Stepmania is compiling a catalog of songs.
After downloading all the songs, the program will expand to full screen and you will see the splash screen. If you do not press any keys for a while, you will see a tutorial screen, a demo, and set records. nine0003
The very first splash screen.
IMPORTANT: Adjusting the mat.
Once you have started your program, you will need to set up the dance mat. Don't worry! This will only need to be done once, not on every launch. To do this, enter the program's SETTINGS MENU by pressing the M key. Move the cursor over it using the UP or DOWN keys on the keyboard and press ENTER. After that, the key settings screen will open in front of you. nine0003
Keys setup screen
On the left side of the screen are the control keys of the first player, on the right side of the second. To assign a control key, you should use the cursor keys to select the desired cell, press ENTER, and then press the selected key on the keyboard or on the rug.
Let's look at an example. Assign the LEFT key to PLAYER #1:
- Use the cursor keys to select the cell labeled LEFT for player #1.
 As you can see, this is the top left cell (we circled it in red in the figure). nine0111
 - Press the ENTER key.
- Press the LEFT key on the first player's dance mat (or any other key we choose).
As you may have noticed, there are three spaces for the first player's LEFT key. This means that we can independently assign TWO different keys - for example, on the keyboard and on the pad. The third cell is filled in automatically.
To delete a key, you simply hover over the desired cell and press the DEL (DELETE) key. nine0003
We do not recommend that you assign the following keys yourself:
- cursor keys on the keyboard LEFT, RIGHT, UP and DOWN>;
- keys of the small numeric keypad;
- ENTER, ESCAPE, TAB and DELETE keys;
- M keys (both Russian and English).
We recommend that you set the CANCEL function to the SELECT button of the mat.
After setting all the keys you need, return to the main menu by pressing ESCAPE several times.![]()
Step 5: Let's dance.
So, all the difficulties are over and it's time to start the gameplay.
Press START (let's agree that START is either ENTER on the keyboard, or START on the mat - that is, exactly the key to which you assigned the START function). So, by pressing START you will be taken to the introductory screen.
Welcome screen
Press START again and you will be taken to the game mode selection screen.
Game Mode Selection Screen
You can select from five game modes. Depending on how many dance mats the START buttons are pressed, different game modes will be available:
Single mat modes:
- SINGLE - standard game mode. One person plays on one mat. It uses four buttons: up, down, left and right.
- SOLO - extended mode for one person. In addition to the four main buttons, two more keys are used: "right forward" and "left forward".
Modes for two mats:
To activate these modes, on the second mat, you must also press the START button.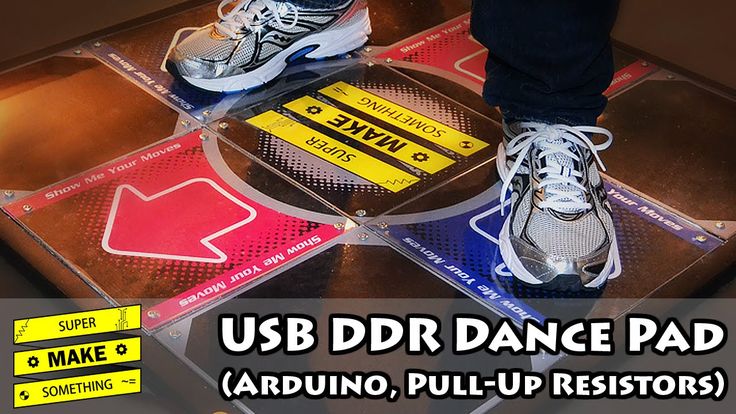 nine0003
- SPORR - mode for two mats. Two people are playing at the same time. They dance to the chosen song and their steps are exactly the same. Ideal mode for competitions and championships.
- PAIR - again for two rugs, but unlike VERSUS, they don't dance the same way. It uses a special sequence of arrows designed for doubles. If such a sequence is not provided by the authors, then the game itself will generate it.
- Trickster - game on two mats for one person. Here you already have to run on the rugs. The most difficult version of the game for one. nine0111
After selecting the game mode you want, press START to move on to the difficulty level.
Difficulty selection screen
All songs can be played at different difficulty levels. Depending on the level of difficulty, movements, their frequency and complexity of execution change. The more difficult the level, the more difficult it is to follow what is happening on the screen and turn it into movement.
Standard difficulty levels
- BEGINNER - Rare and simple movements. This level is recommended for those who first encountered the game.
- EASY - Here the movements are more active, but generally quite simple.
- EXPERIENCED - Beginners will have a hard time. The frequency of steps is growing, there is less and less time for a break, and more and more complex frequent steps.
- DIFFICULT - A lot of frequent movements. There is definitely no time to look at the rug here.
Expert difficulty levels
These levels are located to the right of the "hard" level, on the second screen. Be careful. They are really very complex. For best results, a metal mat is recommended here.
- WITHOUT PAUSES - several songs follow one another.
- CALL - the same as WITHOUT PAUSE, but you must press all the arrows in time, without the slightest delay. You must dance on "great", "very good" and "good".
 All other options are considered an error. Loss comes after four mistakes. nine0111
 - ETERNAL GAME - Endless game. The songs from the selected collection go one after another until you lose. And if you are a good dancer, you will play endlessly.
- MAGIC DANCE - Dance battle. Who will out-dance whom. The better you dance, the harder it will be for your opponent.
So, after you decide on the level, press the START key and go to the next menu - to select a collection.
Collection screen
All songs in the game are collected in collections. When you select a collection, you can view its cover art and the titles of the songs in it. If you do not know which collection to choose, select the first item in the list ALL MUSIC (all music) to see all the songs at once and choose from the full list.
Initially, only one collection of 21 songs is available to you. In order to gain access to other collections, you must collect hidden points.
Hidden points are awarded for each successfully completed song. As soon as you score a certain number of points, one or another collection becomes available to you. By the way, it is impossible to view the number of hidden points you have collected. That is why they are called hidden. nine0003
Select the collection of songs you need and press START. The next screen is the most interesting - song selection.
Song selection screen
Look carefully at the song selection screen. It has a lot of useful information on it. On the right side of the screen there is a list of songs, on the left side there is information about the selected song.
Use the LEFT and RIGHT keys to scroll through the song list. Lingering a little on the song, you will hear its fragment.
Also included in the song list, two additional options:
- RANDOM (randomly) - completely impartially selects a random song from the collection.
- ROULETTE (roulette) - spins the wheel with songs and you just have to press START to stop it.
 Roulette is interesting in that you can even come across a hidden song.
Once you have selected a song, press START.
If you immediately press START again after starting the song, then the song settings menu will open - this is a rather complicated menu and only experienced users are recommended to "tinker" in it. If you accidentally got into this menu, then press the START key several times. nine0003
The dance itself is finally starting...
The game screen
The game screen consists of moving arrows and a walking zone. STEP AREA is a line of translucent arrows at the top of the screen. When music is playing, arrows run across the screen from bottom to top. When an arrow crosses the step zone, the player must step on that arrow.
In the upper part of the screen there is also a DENSMETER - a scale in the form of a snake. At the beginning of the game, it is half full. If you step on the arrows correctly and on time, then it charges.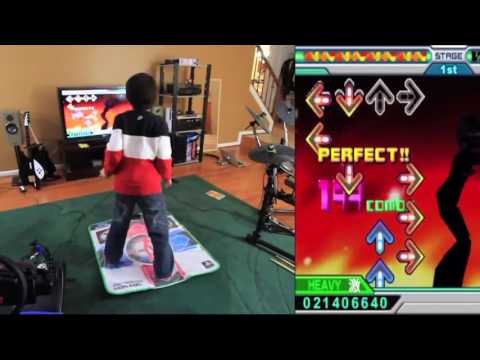 If you make mistakes, the densmeter runs out of power. Loss occurs if the densmeter is completely discharged. nine0003
The bottom of the screen shows the currently played difficulty level and the points scored.
In the center of the screen you will see the words that appear when you click on the arrow:
- GREAT and VERY GOOD: you clicked on the arrow at the right time.
- GOOD and NOT BAD: you stepped at the wrong time, but the arrow is counted.
- BAD: You had a hard time keeping up with the arrow.
- SKIP: You missed an arrow. nine0110 OK: Appears when you hold FREEZE correctly
- FU-U: Freeze not performed.
If you do GREAT, VERY GOOD or GOOD in a row, you earn extra points.
At the end of the dance, you get points and a rating. You will get the highest rating if all of your clicks happened at the perfect moment (it was always GREAT). Pressing should not even be “a little earlier” and “a little later”. nine0003
Results screen
Rating - the main indicator of your skill - varies from AAA (the best) to (E - the worst). Worse than E can only be an option when you lose before reaching the end of the song.
Loss counts if your DANCE METER drops to zero. There is nothing left but to try again. Tip: listen to music and exercise more.
Lose
By the way, in the BEGINNER difficulty mode - the first stage cannot be lost, and in any case the second and subsequent stages can be played until the end of the song. nine0003
In one game you have to overcome four stages. With each subsequent stage, the game becomes more difficult: the requirements for the accuracy of pressing the arrows increase, and in case of errors, the densmeter discharges much faster.
At the end of the last stage, Stepmania sums up the entire game. And if you set another record for points, then you will be prompted to enter your name in the table of records.
Enter player name
Add songs to Stepmania
Want Dance Dance Revolution on your computer? Try StepMania
Forget the names of karaoke or games like "Just Dance" is the best way to play pranks on yourself and exercises have always been played in "Dance Dance Revolution". If you're one of those who are crazy about it, then it can be a bummer that it's hard to install a genuine setup in your own home. However, it can be a lot easier than you think with StepMania, especially if you already have a dance floor.
StepMania is an open source rhythm game similar to Dance Dance Revolution in which you try to match one of four different steps to the beat of a song. Due to its open source nature, it is available on all platforms. The best part of the game is not just the mechanics or design, but the number of inputs it supports. With StepMania, you can use keyboard, joystick, and rhythm game input devices, including dance floors (and possibly toy guitars) with a PC-compatible connector such as USB. nine0003
Installation and songs
StepMania is easy to download from their website for Windows and Mac OS X users, Ubuntu users can install it from the PlayDeb repository, and all other Linux users will need to compile the game. Once downloaded, you will also want to download some songs from their website so that they can play.
Adding just a song (in .ogg format, for which you might be interested in an OGG converter) isn' Good enough because the game doesn't automatically generate the steps but reads them from another file. This is also necessary because the game has several difficulty levels with different number of steps, respectively. nine0003
All songs you can upload must be in .smzip format, which is essentially a StepMania zip folder that contains the song, the StepMania data file, and various images that will show up when searching for songs to try.
The best place to find songs is the StepMania collection. The collection is great because each song also offers a stripped-down online demo of the song so you can roughly see what to expect from that song. Songs can be installed by following these instructions. nine0003
Modes
When you start a song, you have several modes to choose from. They include the regular "rave" mode which is a two-player "advanced" mode where it plays multiple songs in succession before finally giving you a break, the mysterious "they" mode which is designed to test your skills , and an endless mode for never ending fun. Once you have chosen one, you can choose which song you want to use, where hovering over each song will play a snippet of code. nine0003
settings
The game offers many settings that you can mess with so it can fit your needs. In addition to supporting many different input devices, you can customize just about anything you might want. This is especially useful for you to customize which keys or buttons should be shown, as every serious gamer will have their own preferences. Just to give you an idea, some preference categories include: sound sync calibration, game selection, key/joy settings, test input, input options, song/course reloads, arcade options, appearance options, theme options, graphics/sound options , profiles, network settings, user interface settings, and advanced settings.