How to make ribbon sticks for dance
EASY DIY Ribbon Wands (Ready In 5 Mins)
Author: Creative Team
This post may contain affiliate links. Read our disclosure policy.
Here is a simple and easy tutorial on how to make ribbon wands that your kids are sure to love! These are perfect for a princess party or a fun project to make with your kids. These ribbon wands will bring hours of fun any day of the week!
Easy DIY Ribbon Wands
If you’re looking for a simple, affordable, FUN spring craft that your kids will love- this one is for you! I recently made one of these ribbon wands for each of my 4 kids. They literally spent over an hour running around in our backyard playing with them! I love when something so simple is so much fun!
My oldest daughter loved pretending to be Elsa from Frozen and she used the ribbons as make believe snow and ice coming from her hands- she thought it was pretty amazing!
Ribbon wands are super simple to make, and after watching how much fun my kids had with them, I knew this craft was a winner! Here’s a video that walks you through exactly how to make these ribbon wands. As you can see, it’s super simple to do and can be done in about 5 minutes or less.
- Popsicle Stick Flower Pots
- Water Gun Painting
- How To Make The Best Puffy Paint
- How To Make Slime
How to Make Ribbon Wands
Materials You’ll Need To Make Ribbon Wands:
- Wooden dowels (you can buy a pack of 10 or 12 at Walmart for around $2!)
- Various colorful ribbon (I prefer to use satin ribbon)
- Scissors
- Hot glue
- Matches or a lighter, optional
DIY Ribbon Wands Directions:
- Cut the ribbon to your desired lengths.
- Optional: Burn the edges of the ribbon to keep them from fraying.
- Tie one ribbon at a time to the end of the dowel. Secure it from sliding or coming undone with some hot glue, and let it dry completely.
- Once dry, hand one ribbon wand to each kid and let them run around outside on a pretty spring day!
They are seriously going to have so much fun with their new wands!
I love making simple crafts that my kids can have fun with.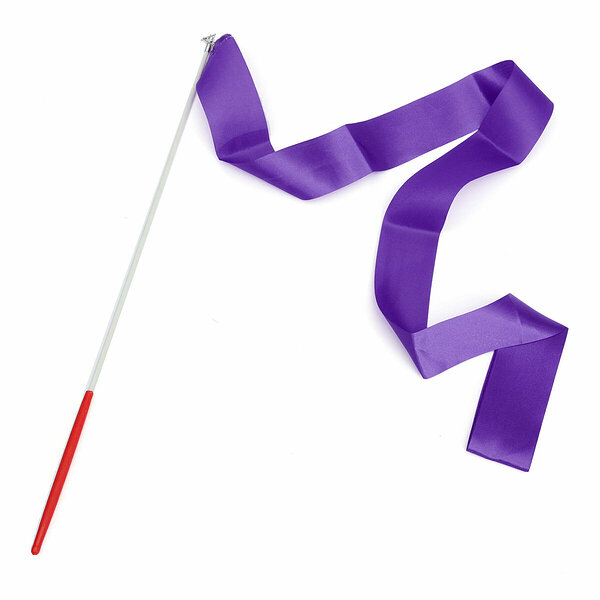
The colors are seriously so fun, and the kids loved them! Even the boys!
Print Pin3.88 from 25 votes
How to Make Ribbon Wands
These ribbon wands are easy to put together and so much fun to play with!
Prep Time 1 minute
Cook Time 4 minutes
Total Time 5 minutes
Servings 24 Wands
Cost $10
scissors
Hot glue gun
Matches or a lighter, optional
- 12 Wood dowels
- Rolls Satin ribbon any color
Cut the ribbon to your desired lengths.
Optional: Burn the edges of the ribbon to keep them from fraying.
Tie one ribbon at a time to the end of the dowel. Secure it from sliding or coming undone with some hot glue, and let it dry completely.
Once dry, hand one ribbon wand to each kid and let them run around outside on a pretty spring day!
Best Mom Ever Award goes to… ME!
Busy moms, this one is for YOU!
Our weekly newsletter grants exclusive access to our favorite projects, recipes, free printables, and more!
Subscribe
Dancing Ribbon Wands - Super Simple
It’s time for a dance party! These dancing ribbon wands will elevate your dance party to new heights! They are so much fun to play with and are simple to make – no fancy hardware needed and no mess! We also designed these wands to be safer for little ones with shorter ribbon stands so they don’t get tangled up and are easier for little hands to twirl.
What to do with your Dancing Ribbon Wands?
- Put on our Super Simple Dance playlist and dance!
- Twirl your ribbon wand and then freeze with Red Light, Green Light.
- Try twirling your ribbon fast and slow with Open Shut Them.
- Take your wands to a sports game or celebration and use them like pom poms to cheer! You can even make your ribbons the same colors as your favorite team.
- They make great party favors!
- Review colors with the ribbon colors.
- Draw different shapes in the air with your wand for shapes review.
- Have your little ones or class put on a show using their dancing ribbon wands!
Here’s how you can make your own!
Things you’ll need
- Small zip tie or cable tie
- 6 to 8 lengths of ribbon. Best ribbon to use is 1/4“ to 1/2” wide and 3 to 4 feet long
- Wooden dowel 12”long x 3/8” in width
- Decorative tape – we like using different kinds of washi tape!
- Glue gun
- Scissors
To decorate our wand we used different colors of decorative tape, like washi tape, to make a spiralized pattern around the wand. To make this look, hold two colors of tape side by side and wrap them around the wooden dowel on a 45 degree angle. Slowly twist around the dowel until you reach the end and trim off any excess tape. You can also paint your dowel your favorite color, or leave it plain!
Cut your ribbons to be 3 to 4 feet in length. You’ll want to have 6 to 8 lengths of ribbon. Use whatever colors you like – try making a dancing ribbon wand using the colors from your favorite sports team for a fun way to cheer them on!
To assemble, make a loop with your zip tie (we’ll be closing the loop later) and tape the ends to the table. This will help hold the loop in place while you tie your ribbon onto the loop making it a bit easier!
Now we are going to attach the ribbon to the zip tie loop using a simple knot called a Lark’s Knot. Start by taking each length of ribbon and folding it in half, doubling it back onto itself. Then, one ribbon at a time, take both cut ends of the ribbon through the loop of the zip tie, and back through the folded end of the ribbon.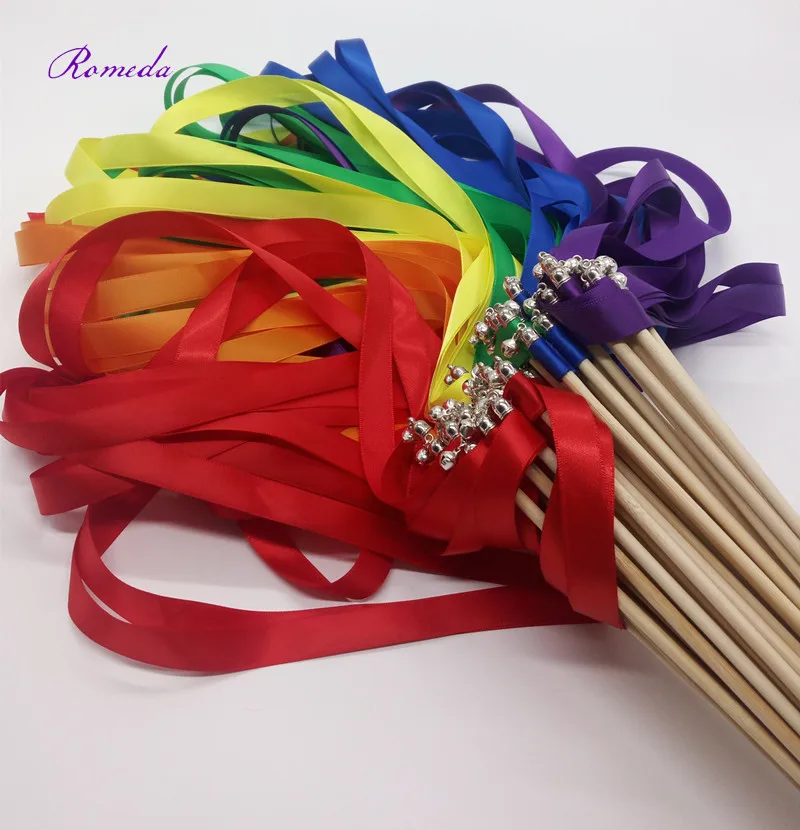 Pull the ends of the ribbon to secure the knot.
Continue with the rest of the ribbon until all your lengths of ribbon are tied around the loop of the zip tie.
Remove the tape from the zip tie – a few final moves and you’ll be ready to dance! Give the ends of each ribbon a final pull to fully tighten their knots. Then tighten the loop of the zip tie to make a smaller loop, but don’t close it completely.
Insert your wooden dowel about half an inch into the loop of the zip tie and tighten the zip tie tightly around the dowel.
Trim off the ends of the zip tie.
Add a few small dabs of hot glue just below the ribbon knots towards the end of the wand and attach the ribbon to the dowel.
This gives it some extra security, and also hides the zip tie for a polished look.
Now you are ready to dance with your dancing ribbon wand!
Play some of your favorite Super Simple Songs dance songs and twirl away!
For more fun dance activities, crafts, and videos, check out our Super Simple Dance Party theme page!
Don’t forget to follow us on Twitter, Instagram, Pinterest, and Facebook!
Original content © 2021 Super Simple. Not to be reprinted without express written permission. Terms of Service.
See more content about:
- Dance Party!
More fun Stuff
How to make ribbon sticks for greeting newlyweds
26.11.2010 15:52 Administrator
Views 18329
Do you remember how the guests of the newlyweds usually greet the newlyweds who just got married and leave the registry office? That's right, they are sprinkled with rose petals, sweets, small coins, rice - all in order to express their joy at the marriage and wish a happy and full life to the young. But, some registry offices do not allow leaving garbage, and bridesmaids in elegant dresses have no time to clean up all these petals and rice.
Dear my readers!
The site provides only introductory information for creating an original and beautiful wedding celebration. I don't sell anything ;)
Where to buy? You can find and purchase the accessories for the celebration described in the articles in Special online stores where is delivery throughout Russia
Source : www. prosvadby.com
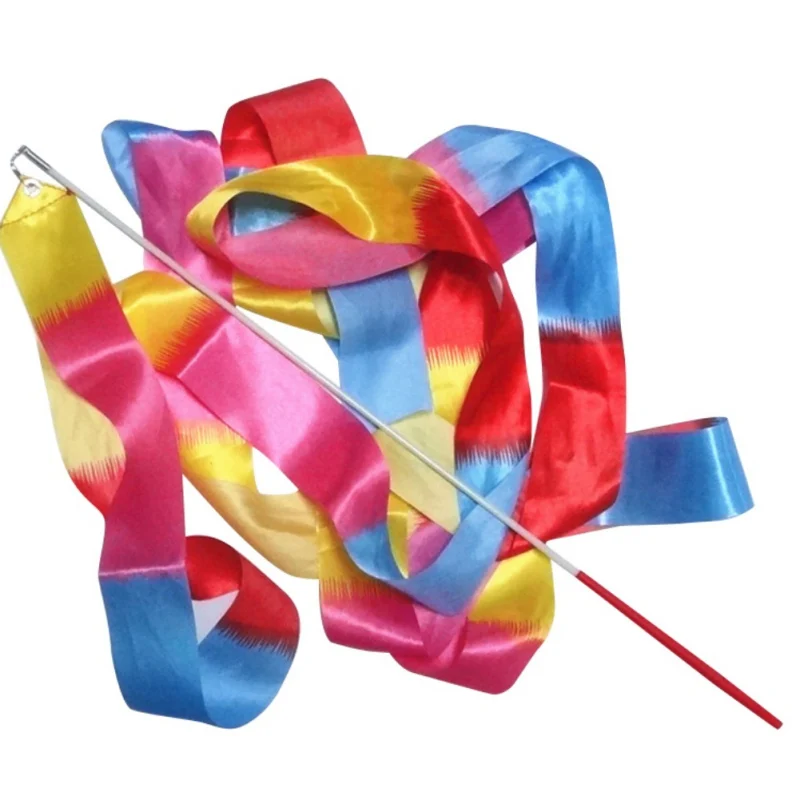
Ribbon sticks are an excellent replacement for all the above points, guests will wave them towards you in greeting, the ribbons flutter beautifully in the wind, and the photos are very lively and bright. Ribbon sticks are very similar to gymnastic ribbons, only smaller in size. We are reading a master class on making such ribbon sticks for our wedding. It is very easy to make, so even a beginner can make such nice little things for themselves.
What we need:
- Wooden sticks, 30 cm long. You can take Chinese noodle sticks, they are already peeled and just the shape we need
- Acrylic paint, or car paint in a can
- Hot gun and glue sticks to it
- Ribbons, 24 mm wide, in three different colors (27 meters of each ribbon is enough for 65 ribbon sticks)
How to do it:
1. Paint the sticks with acrylic paint or spray with auto-paint, it dries very quickly . Choose a neutral color.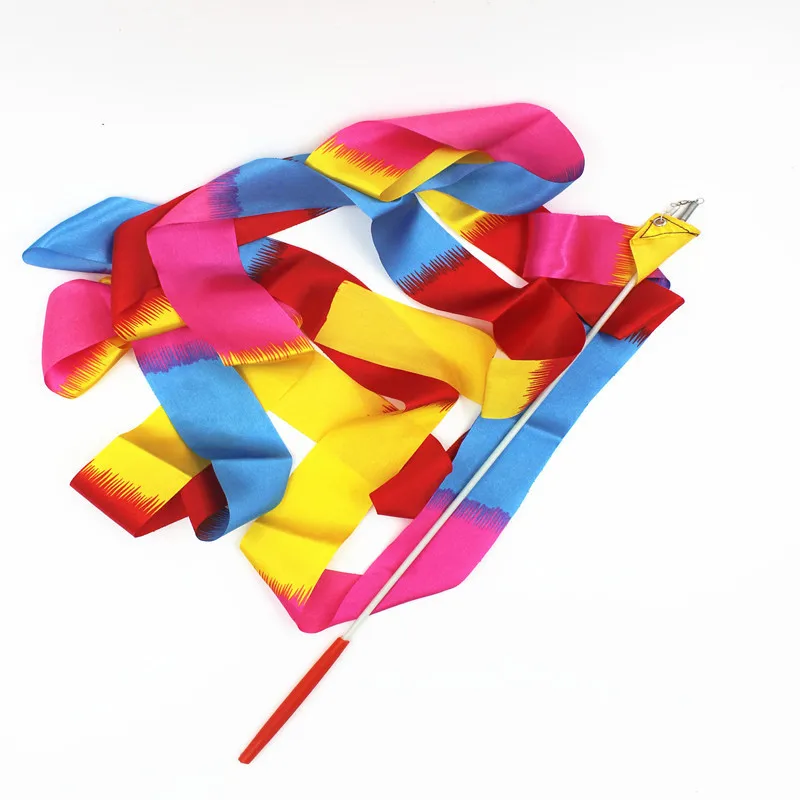
2. Cut into strips 40 cm long.
3. Take one strip of each color and use a hot gun to glue the ends on one side.
4. Squeeze hot glue onto the sticks to the width of the tape and stick the tapes to the stick.
5. This is what your blank should look like.
6. Now for the final touches: you need to burn the ends of the ribbons on the candle so that they do not fray. Be careful, the ends of the tape do not need to be set on fire on a candle, just bring it at a certain distance, the heat of the candle will do its job.
For a glamorous finishing touch, attach a strasse to the top end of a wooden stick. Your ribbon decoration is ready.
It should be noted that the color of the ribbons will depend on your wedding color palette, the possibilities are endless, try it.
In the West, there is a service for printing text and designs on ribbon, so you can personalize your ribbon sticks and make your wedding more individual.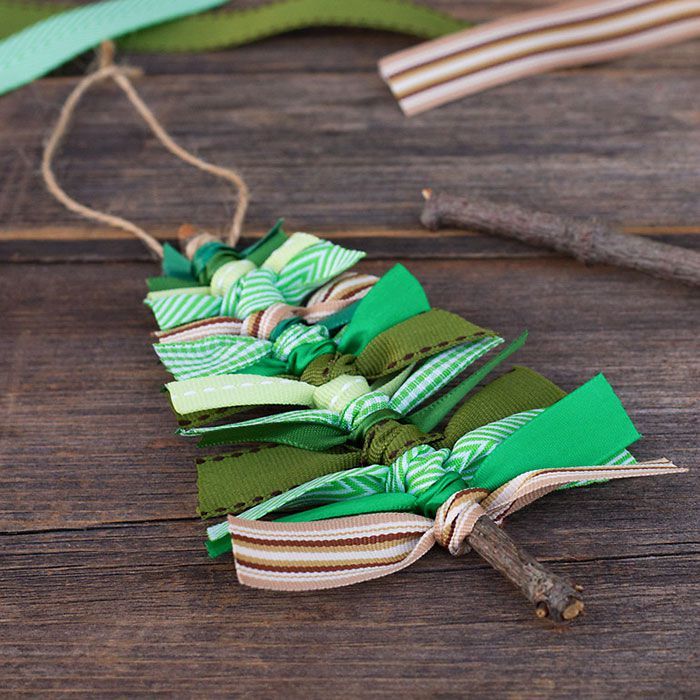
See examples of how beautiful ribbon sticks look at weddings.
Guests welcome the newlyweds. In this case, a white-pink palette is chosen.
Only white ribbons look good too.
And this wedding is completely based on the ribbon theme. Bright orange positive color creates an even more cheerful mood.
Of course, no one cancels the traditional rose petals, they also look very beautiful and romantic, but you can try something new, right?
Luminous costume dance ideas
New neon night lights
New neon night lights
We have worked hard and made a new line of handmade neon night lights. If you don't know what to give as a present - give such a night light. It will be unusual and in the truest sense of the word - bright!
Our neon lights up in the video!
Our neon lights up in the video!
It's always nice to see the results of your work in life.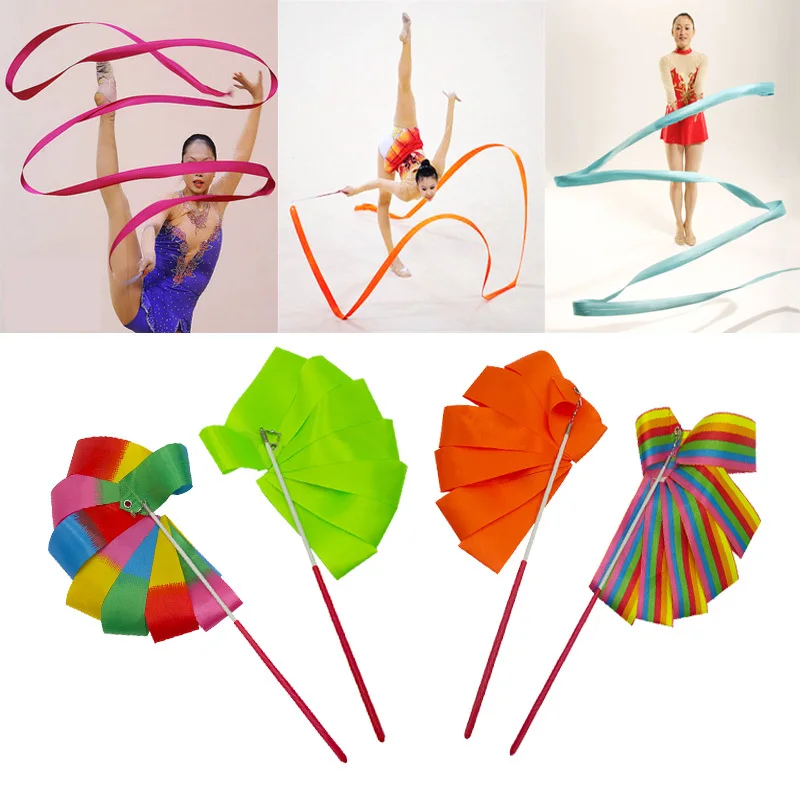 At such moments, you realize that this is all "not just trade." You help, advise, find new ways to use products, and thanks to them, store guests can realize their fantasies.
Drawing in a black notebook!
Drawing in a black notebook!
Drawing in a notebook with black pages looks completely different, and sometimes even the simplest sketch is perceived as a small masterpiece.
Notebooks made of felt, wood, with black pages and other novelties
Notebooks made of felt, wood, with black pages and other novelties
We have received a new shipment of notebooks. Models made of felt (to the touch, like felt boots), notebooks with black pages, in a wooden cover and other interesting things. We meet!
Candle lanterns Part 2
Candle lanterns Part 2
The second part of the video presentation of the new delivery of candle lanterns. Models made of wood, metal, glass and stained glass.
Candle lanterns Part 1
Candle lanterns Part 1
Candle lanterns have arrived! The variety of designs is dizzying, so we've split the video presentation into two parts.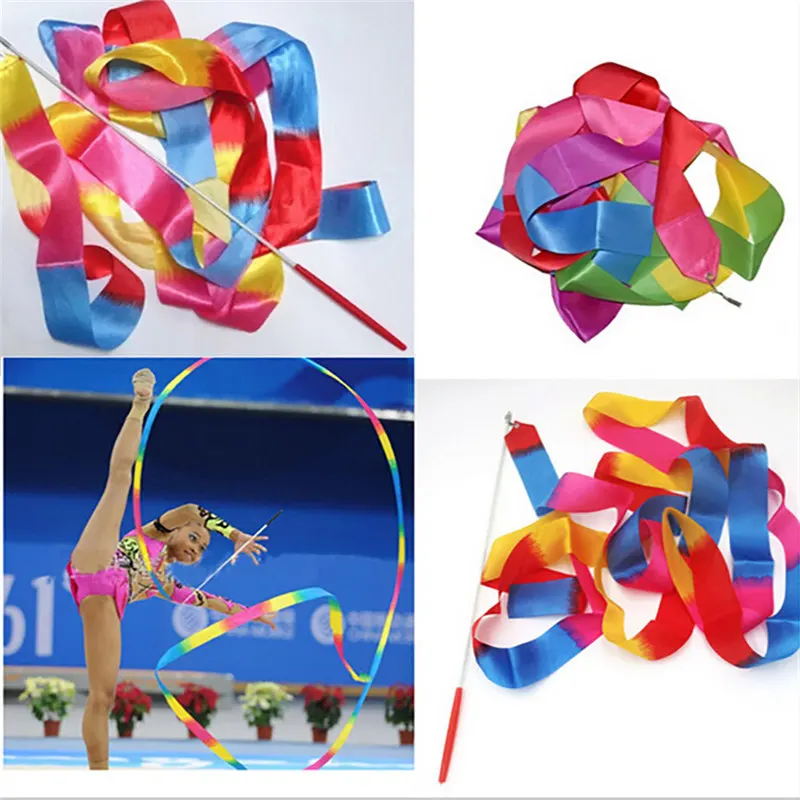 We present to you the first part.
Another composition in the florarium
Another composition in the Florarium
The Internet does not yet allow you to feel the product, but we try to shoot so that every detail is visible. Here are several models of florariums for flowers and a small example of use.
Rechargeable candle from our workshop
Rechargeable candle from our workshop
A candle that does not need to be changed batteries, that does not spoil the interior with its Chinese look, was developed in our workshop. More in this video.
The history of one backpack
The history of one backpack
Once upon a time there was a backpack. He loved his master very much. And one day they decided together to enjoy the beautiful view and drink a cup of tea in pleasant solitude.
Master class on florariums from Tanya Verba
Master class on florariums from Tanya Verba
As promised, we are posting a full master class on florariums from Tanya Verba.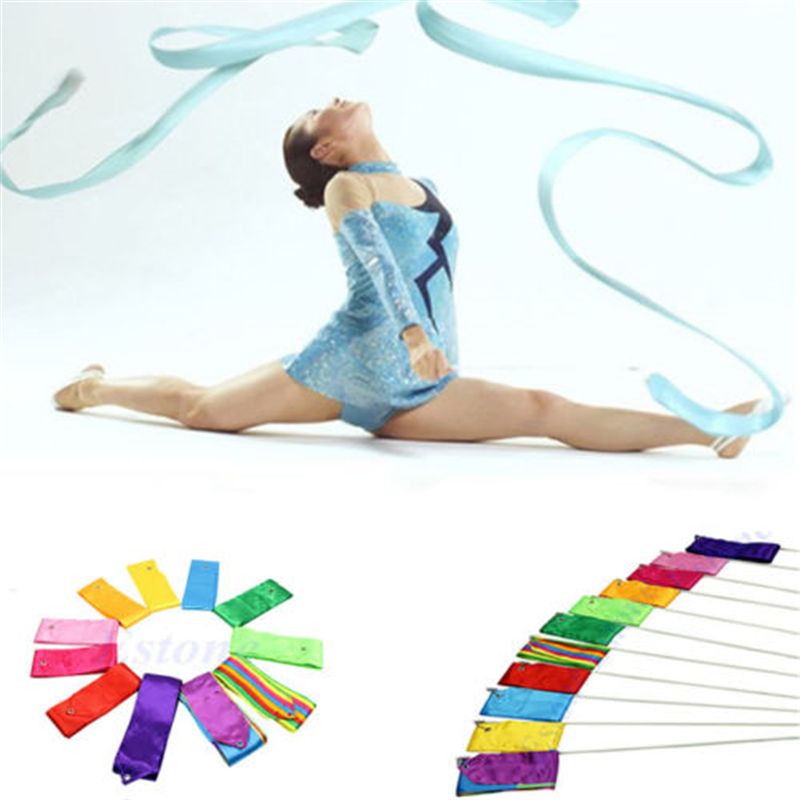 In it, we will tell you how to make a beautiful composition of plants, as well as how to use the florarium as a box for rings.
Florariums for rings and plants
Florariums for rings and plants
Charming florariums for rings and plants have arrived. We immediately tried to make something interesting out of them. We present to you what we have achieved! p.s. Very soon a full-fledged video lesson on florariums will be released on our channel.
Genuine leather notebooks
Genuine leather notebooks
Collection of cool notebooks made of genuine leather, wood, craft paper.
Do-it-yourself glowing letter from a garland
Do-it-yourself glowing letter from a garland
Today we will tell you how to make a beautiful glowing letter based on a garland with your own hands. This method is ideal when you want to make a luminous three-dimensional structure at minimal cost.
Wine coaster collection
Wine coaster collection
Several handmade wine coasters.