How to hoop dance
How to Hoop Dance for Beginners – The Spinsterz
Hula Hoop Dance is a dynamically evolving genre, adaptable to any style of music, approachable for the solo dancer, duet or ensemble, and accessible to all generations and body types. Some styles of hula hoop dance keep the hoop rotating on the core body, as the dancer focuses on footwork and the movement of the arms around the hoop. Other styles keep the hula hoop off of the body the entire time, manipulating any number of hula hoops to move in the space surrounding the dancer. Still, other styles move the hula hoop between planes, core hooping, and off body hooping. Sometimes the hula hoop rotates around a body part, rolls along a path, or doesn’t rotate at all.
If you are just entering into the world of hoop dance, there are two pieces you need to focus on:
• Exploring the movement of your own body and
• Learning to communicate with your hula hoop.
After working with these fundamental skill sets, your own personal hoop dance will begin to morph into a style that feels right to you. Please note that I could spend an entire weekend nerding out and elaborating on the building blocks of hoop dance, but in the context of this moment, I hope to give you the first stepping stones to welcome you onto your own personal path of discovery.
Step One: On Body Hula Hooping aka “Body Rocking Hoop Dance”
Each of the following On Body Hula Hooping topics will begin by explaining the foundational movements. While each of these building blocks is described for the absolute beginner, it can be helpful for even the experience hula hooper to revisit these fundamentals. Even if dancing with the hoop of your body is your goal, these “Body Rocking” exercises will help you open up ways to move your body in dance that can be applied to off body hooping later on.
Each topic will end with exercises to convert the foundational movement into dance.
Waist Hooping Foot Work
Whether you are picking up your hula hoop for the first time or have already been loving on your hula hoop for a year, take it back to that first push of the hula hoop around your waist. Note that the diameter of the hula hoop will determine the speed your body has to move. For more information on how to pick your hula hoop, take a moment to review “What hula hoop size do I need.”
Place the hula hoop on the small of your back. If you lean a little into a back arch you will feel that spot that your body starts to hug the hula hoop. Take one step forward so you have one foot in front of the other. It doesn’t matter which foot you use, just pick the one that feels most natural to start. Keeping the hula hoop parallel to the ground, give it a strong push with your hand in toward your tummy so that the hula hoop can rotate around your body a few times without you even having to move your body. Learning the control of this first push can make or break the ease of your hula hoop practice. Try this same thing with the other foot in front or while pushing with the other arm and get used to both sides.
Once the hula hoop is spinning around your waist, move your body in a straight line so that your belly button is drawing a line between your toes. Keep your heels on the ground and your knees soft as your body finds the tempo of your hula hoop.
Keeping the idea of your belly button moving in a direct line between your toes, try these three-foot positions:
1. Right foot forward – Body moves front to back
2. Left foot forward – Body moves front to back
3. Feet side by side (2 feet apart) – Body moves side to side
In each of those positions practice pushing the hoop in either direction so that you can do each foot position with the hoop spinning right or left. Then try changing foot positions without letting the hula hoop drop.
The Dance
Start by putting on your favorite song. Practice changing your foot positions so that you are placing your foot into the next position with key moments of the song like the beginning of a new line or a strong beat. As you get further into the song, try changing the foot position more often or repeating patterns of movements. As you gain confidence, experiment with other foot movements like a grapevine, a box step or a cha-cha. Put on different styles of music and see how the style of music changes how you want to move your feet.
This is a core foundation of Hula Hoop Dance footwork. The more you play with this concept the more comfortable your body will become, separating the movement of your hips from the movement of your feet. You will find that while your feet will change speeds with the steps and the music, the rotation of your hula hoop will stay consistent. It is natural to feel frustrated at first, so it can help to try a hula hoop with a larger diameter than you would usually use when trying new footwork.
Turning Your Body
Turning or spinning your body while hula hooping has many purposes.
1. Adds a contrasting movement and allows you to face in any direction
2. Changes the speed of the hula hoop in relation to your body
3. Can make learning new tricks and movements easier
4. Assists in catching a hula hoop that is starting to fall
5. Disguise or smooth out transitions into other parts of a dance
Turning the same direction that the hula hoop is spinning will make the hula hoop’s rotation feel slower in relation to your body. Turning the opposite direction will increase the speed of the hula hoop in relation to your body so that you will have to move faster as well. For the purposes of beginner hoop dance, we can focus on turning the body in the same direction that the hula hoop is spinning.
A compass turn is a solid building block and starting place for beginners. Pick an anchor foot based on which way the hula hoop is spinning. If the hula hoop is spinning to your left, make your left foot the anchor. If the hula hoop is spinning to your right, have your right foot be the anchor. Place your feet side to side and find a comfortable stance to hula hoop with your hips moving side to side. While your anchor foot pivots in place, use your other foot to push your body in a small 45-90 degree turn. Once you place your foot back down, take a moment to make sure your waist still has control of the hula hoop before making your next turn.
A float turn uses a similar concept as the compass but turns your body a full 360 degrees and turns your body the same speed as the hula hoop for one rotation. This gives the illusion that the hula hoop is floating during your spin. Start with your anchor foot in a forward position and push off with your other foot, using enough force to spin yourself in a full circle. When you complete the spin place your lifted foot back down and continue waist hooping. Be sure to spin your body the same direction that the hula hoop is spinning and to restart your waist hooping movement as soon as your foot hits the ground. Remember to practice these turns in both directions!
The Dance
The use of an anchor foot helps keep a dancer grounded when learning how to turn, but finding freedom from the ground will help release the body into the flow of dance.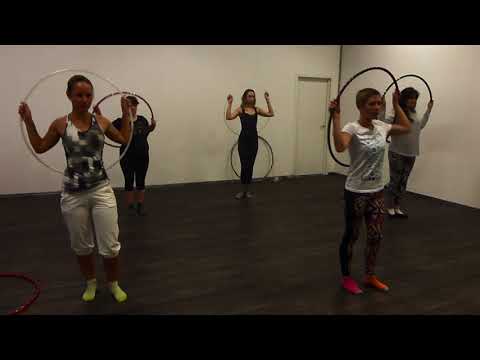 Start practicing free form turns by moving one foot at a time, remembering from the waist hooping exercises that where ever your feet land, you can regain control of the hoop by thinking about moving your core with the line between your feet.
Put on some music and incorporate your turns into your foot work practice. Since turning with the hula hoop changes the speed of the hoop in relation to your body, you can use your turns to fit your steps and your movements closer to the speed and feel of the music. Try adding a float turn to accent a moment of the music or switch between facing a single direction and slow turns to reflect the lyrics.
Where Do the Hands Go?!
One of the most common thing's arms will do when learning how to hula hoop is to imitate a t-rex. These t-rex arms or chicken wings do well for keeping our arms out of the way of the hula hoop, but will not be your first choice when dancing with the hula hoop. The first way to approach hand and arm movements is to start paying attention to where they are and let them do anything other than the t-rex. Think of it as a three-part process with your shoulders, your hands, and your arms dancing between them.
Start by relaxing and positioning your shoulders. Roll your shoulders forward, up, back, and down a few times, and end with the back and down, an exhale, and imagine your shoulder blades melting down either side of your spine.
Next, think about different places for your hands to be. Extend them out to either side, reach them in front of you, place them behind your head, or hold them on your heart. Your hands could be mirrors of each or each could be doing a separate thing. Experiment with the direction of the palms and the position of your fingers as if each of your hands are their own unique and relaxed sculpture.
Finally, bring your focus to your arms. Stretch your arms wide or let the elbows be soft and gently bent. Your arms might create strong lines, or curve into circles. Find different paths for your arms to take as you switch your hands to new positions.
The Dance
So much of the dance happens in the spaces where your arms are moving to a new position. Ground your feet and start your hula hoop in your dominant direction so that your focus can be on your arms while your body keeps the hula hoop moving. Turn on some music and with every line, move one of your arms. You might move your right hand to 4 different positions before moving your left, or you might switch arms each time. Try leading the movement with your hand, your shoulder, or your elbow and let the rest of the arm follow. Different ways of moving your arm will fit different styles of movement. In the beginning, just find the movements that feel good in your body.
As you get used to having your arms and hands dancing in the air above your hoop, start moving your feet again. Turn with your hoop and use your hands to make circles in front of you as they mirror your hoops movement. Then try to use these movements following the hoop to transition between a different arm and hand positions that you liked. Incorporate arm movements into your float turns by starting and ending with your arms wide, and bringing your hands toward your chest during the spin. Just like before, play different styles of music and try to change the movement of your arms to reflect what you hear.
Don’t forget to practice spinning the hula hoop in the other direction, and see how that changes the way your arms want to move!
Step Two: Empty Space and Outer Space
Getting to know the empty space in and around your hoop gives your whole body a new place to dance. At the same time, dancing within this empty space prepares us for other tricks like breaks, paddles, lifts, and other transitions.
Inside Windows aka Inner space
If you look down at the hula hoop spinning around your waist, there is a moving window of space between the circle of the hula hoop and your body. The same thing can be said of a hula hoop rotating around your legs, neck, hands, feet or any other part of your body. The empty space between the hula hoop and your body is the inside window.
To start exploring the space while waist hooping, start by trying to dip either hand into that window and pull it out again without touching the hula hoop. If your hula hoop is spinning to your left, start by dipping your left hand into the window when it appears in front of your body. If you hoop is spinning to your right, use your right hand in front. Once you dip this hand into the hoop, you can follow the window to the back of your body before you pull your hand out of the way. Where the first hand exits the hoop behind the body, the second hand can enter and follow the window back to the front of the body. With this technique, you can utilize the full window of space around your body without ever making contact between your arm and the hula hoop.
The Dance
Remember how spinning the same direction as the hula hoop slowed the hula hoop down in relation to your body? Incorporating turns gives your hands more time to dance in and out of the windows. As you listen to different songs, start dipping your hands into the windows and following the movement of the hula hoop. When bringing your hands back out try to reach out to one of your favorite positions from the previous exercise and resist the urge to sit in the t-rex position. When in doubt, just let your hands and arms follow circular motions in time with the music.
As you play with the windows your body will become more comfortable crossing the line previously held by the hula hoop. You might want to try keeping your arm inside the window and close to your body so that the hula hoop rolls over it for one rotation before bringing it back out. These switches will also help prepare you for shoulder hooping and other transitions.
Outside Windows aka Outer Space
Outer Space refers to all of the space on the other side of the hula hoop from your body. It may seem far away, but at any point when the hoop is in contact with your body, outer space is an inch away. A great way to get used to playing with your outside windows is to try to touch your leg by reaching to the outside of the hula hoop and swinging your arm down and through the window to outer space. This movement is very similar to playing within the inside windows, only now your arm follows the place where the hula hoop is touching your body instead of following the point that is furthest away.
The Dance
Once you have a grasp on where your hands and arms fit into outer space, you can start playing between the inside and outside windows. Explore the space above, below, and within the flow of the hula hoop and imagine your hands making spirals and circles following the direction the hula hoop is moving. Your hands are dancing through the empty space and your body is familiarizing itself with the movement and every changing location of the hula hoop around you.
Step Three: Style
Like every form of communication, the more you practice your dialogue with your hula hoop the smoother and more natural it will become. The same goes for the movement of your body. At this point do not be worried about if your movements are beautiful or if your transitions are graceful. Regardless of what your movements are, the more comfortable you become making them, the more naturally graceful and beautiful they will appear.
As you find favorite styles of music to hula hoop to, take a moment to watch a couple videos of professional dancers performing to that style of music without props. You don’t need to make any attempts to look like those videos, but see what type of inspiration you can draw from their movements. Explore ways of using your feet and your upper body to imitate styles that you like. Then put on some good tunes and let it flow. If the space allows, put on a blindfold or close your eyes. It is in these moments between you and your hula hoop that your own individual style will start to introduce itself to you.
The Next Steps
From these foundations, you can go in any direction depending on what you want to focus on. Here are some ideas for your next stepping stones:
1. For more “Body Rocking” core hoop dance, start learning chest, shoulder, waist and leg hooping
2. Keep the hoop around your waist but start exploring angled hooping and barrel rolls
3. Learn a lift or pizza toss to transition into off body hooping
4. Practice breaks and paddles to change the direction and momentum of the hula hoop
Search for a local instructor, a regional hoop jam, ongoing classes, or traveling workshops to learn from other hula hoopers and join the growing community. Keep an eye out for new tutorials and online classes from The Spinsterz if you are learning from home.
Ready to get hooping? Check out a great hoop for beginners below!
12 Weeks to Hoop Dance Flow - Beginners Flow Sessions - Learn How to Hula Hoop | Hula Hoop Dance Videos and Tutorials
Totally excited to share the first Flow Sessions downloadable series with you.
Thanks to your feedback we have crafted a super fun package to ignite your hoop dance flow. Not only will you get a downloadable video collection of 12 unique hoop dance sequences but we have also added a few extra special bonuses. You can get yours here!
The whole series is a collection of 12 hoop dance sequences + a Flo Mo video + a “Making your own Flow Sessions” video PLUS a 12 week Flow Session plan with some extra juicy hoop loving.
Each session has a unique combination of tricks, transitions and techniques that are designed to improve your hoop dance skill, coordination and fitness.
http://www.youtube.com/watch?feature=player_embedded&v=WeZchjGm7ZY
I highly recommend using the Flow Sessions download as a 12 week series. Choose one hoop dance sequence for each week and spend your weekly hoop practice and workout time diving into the tricks, transitions and techniques of each session. After a week of focus on the sequence you will see your flow soaring, your skills strengthening and your hoop dance creativity blossoming.
To help you with the 12 week progression I have whipped up an example action plan for you to stay on track and keep you in the spin.
Scheduling these weekly action steps are going to help you to make them real and achievable. The best way is to actually schedule the action steps on your calendar or diary. I like to use Google Calendar to set aside time for Flow Session focus.
Here is an example of what your week might look like:
Week 1
Monday: Choose your focus flow session and play with it 5 times (30 mins)
Tuesday: Focus on some of the moves that are more challenging, drill those tricks and transitions with patience and persistence knowing that in a very short time they will come easily to you with strength. Set a timer for 30 minutes and don’t be surprised if you double that to one hour. Let the practice of challenges be fun – IT IS A HULA HOOP!
Wednesday: Invite a friend to work on the Flow Session with on to motivate and inspire each other.
Thursday: Warm up by spinning through the Flow Session about 3 times then video your flow session and enjoy watching your skills improve with each play time.
Friday: Make time for a 15 – 30 minute hoop jam with yourself.
Saturday: Run through this week’s Flow Session with the goal of adding 4 – 8 extra tricks to the beginning, middle or end of the sequence. Make the Flow Session your own, your style and energy.
Sunday: Choose 3 of your favourite songs and hoop dance to them in continuous flow with the intention of purely having some fun. Take yourself on a hoop adventure to the park or some place new for variety.
Have a blast mapping out 12 weeks to your hoop dance success. Keep a journal to record shifts in your skills, body, emotions, creativity, strength, weight, lifestyle habits and hoop dance flow.
>> Download the flow sessions now
Artistic movement: from dance to high performance sport
Pavel Goncharov's collage. Gymnastics. Kharkov Institute of Physical Education. 1950s Robert Diament/MAMM/MDF/russianphoto.ruRhythmic gymnastics is one of the most successful sports in Russia: over the past 20 years, Russian athletes have become leaders in all international competitions. It is noteworthy that this elegant sport owes its existence to the efforts of the Russian and Soviet schools. Since the beginning of the 20th century and for six decades, coaches and athletes have made great efforts to bring rhythmic gymnastics to the world level. Now Russian gymnasts continue to develop traditions and increase the complexity of programs every year. We tell how it all began and how rhythmic gymnastics went from dance classes in St. Petersburg schools to the halls of Olympic palaces around the world.
Origins: the French School and Isadora Duncan
Lesson of plastic arts according to the system of Isadora Duncan, 1901. Ella Knipper-Rabenek, teacher. Museum of the Moscow Art Theater/russianphoto.ru
 In the middle of the 19th century, the foundations of the basic movements of gymnastics were laid by the French teacher and theater theorist Francois Delsarte. He created a system of "expressive gymnastics" for actors and dancers, which was based on the Greek art of dance and expression of emotions through gestures. In Delsarte's classification only for the hands, there were almost 250 varieties of movements, and the main principle that the master taught the artists was not just to perform a dance, but to fill each movement with meaning.
Another French teacher and physiologist Georges Demeny made his contribution to the formation of the basic movements of gymnastics. He developed the author's system of physical education, aimed at developing grace, flexibility and dexterity. During the classes in Demenya's class, the girls performed rhythmic and dance exercises with maces, sticks, and wreaths to classical music. Now, in addition to clubs, athletes perform with a hoop, ball and ribbon, and the Demeny gymnastic system itself also formed the basis of rhythmic gymnastics.
American dancer and founder of free dance, Isadora Duncan, influenced the development of not only Russian ballet, but also future rhythmic gymnastics. Irina Viner-Usmanova in the book "Rhythmic Gymnastics: History, State and Prospects of Development" notes:
"Isadora Duncan's work also had a significant impact on the development of rhythmic gymnastics. Athletes are required to individually interpret the music and its full relationship with movements to create a memorable image. The basic movements of rhythmic gymnastics are waves, spring movements and their combinations, movements of the arms and torso, various types of running, walking and jumping.
Creation of a new sport in Russia and the USSR
The ideas of expressive, rhythmic and dance gymnastics were embodied in the creation of studios of plastic art and theatrical art in St. Petersburg and Moscow at the end of the 19th century. In the 1910s, dance schools were opened one after another in St. Petersburg, where students of Isadora Duncan taught among them. Among them, E.I. Rambek, with whom Elena Gorlova studied at the plastics studio, who later became one of the founders of a new sport.
Subsequently, many of the founders of dance studios, along with the leading choreographers of the Mariinsky Theater, began to teach general and rhythmic gymnastics, plastique, acrobatics and character dance at the Zinaida Verbova State Art School, which opened in 1923. The first teachers of the Higher School were Elena Gorlova, Roza Varshavskaya, Anastasia Nevinskaya, Alexandra Semenova-Naypak. Together with the students of the first courses - Anna Larionova, Yulia Shishkareva, Tatyana Varakina, Tatyana Markova, Lidia Kudryashova, Ariadna Bashnina, Sofia Nechaeva, Galina Bobrova - they laid the foundations of a new sport for women.
In the 1920s, Elena Gorlova, one of the first teachers at the Higher School of Gymnastics, used exercises with a hoop, a ball and a rope in her classes with a children's group. Subsequently, these items became the official types of rhythmic gymnastics.
And the idea of the ribbon dance belongs to the dancer and teacher of classical dance, People's Artist of the USSR Asaf Messerer. He first used the ribbon in Reinhold Gliere's The Red Poppy in 1927. In the book "Dance. Thought. Time" Messerer recalled:
“When the rehearsals were going on, I gave Kurilko (the production designer M. I. Kurilko. — Ed. note) the idea of staging an elegant dance with a ribbon. Those wandering Chinese magicians lived in my memory, which once so struck my childish imagination. At the A.V. Lunacharsky Choreographic College, I staged a stylized Chinese dance for one of my students, which she performed either with a fan or with an umbrella, then she took out a stick with a long chiffon ribbon and it flew smoothly.
An important step in the way of gymnastics from dance to sport was the inclusion in 1932 of this discipline in the program of the Lesgaft Institute of Physical Culture, which is now the main sports university in Russia. It is symbolic that the Institute is located next to the Mariinsky Theater and the Rimsky-Korsakov Conservatory. As a sport, rhythmic gymnastics was formed there. In 1934, on the basis of the Lesgaft Institute, the Higher School of the Artistic Movement was opened. This date is considered the moment of the official birth of rhythmic gymnastics as a sport.
From the first tournaments to the Olympics
Physical culture parade. Gymnast girls. 1940 Vladislav Mikosha/MAMM/MDF/russianphoto.ru The world's first rhythmic gymnastics competition, held in 1939 in Leningrad, was timed to coincide with International Women's Day. Athletes performed only in the individual championship in a free program. Two years later, on March 8, 1941, the second tournament was held in the individual and team championship for adults and juniors. Gymnasts performed compulsory and free exercises. At the same time, the evaluation criteria were laid down: in the compulsory exercise, the judges paid attention to the technique of performance, musicality and expressiveness of the movement, and in the free exercise, in addition to technique, to the composition of the exercise, the variety of elements and the quality of the interpretation of the work.
In the post-war years, competitions became annual and more massive. In 1946, 80 gymnasts participated in them, and this number grew every year. The spread of rhythmic gymnastics around the world began with the countries of the socialist camp: Bulgaria, Hungary, Romania, Czechoslovakia and Poland. Representatives of these countries began to come to competitions in Leningrad and attend classes at the Lesgaft Institute. Already in 1947, the USSR held the first match meeting with the teams of these countries.
Rhythmic gymnastics entered the world stage only 10 years later, when at 19In 57, at the III World Congress on the Physical Education of Girls and Women in London, Honored Coach of the USSR Yulia Shishkareva made a report on a new sport. A year later, at the congress
of the International Gymnastics Federation (FIG)
Federation Internationale de Gymnastique was founded in 1881 as a federation of artistic gymnastics. Now, in addition to gymnastics and rhythmic gymnastics, the FIG includes sports aerobics, sports acrobatics and trampolining.
in Moscow, the best Soviet athletes held a demonstration lesson. Subsequently, representatives of the FIG visited the USSR championship and training, and at the Gymnastrada gymnastics festival in Stuttgart in 1961, Soviet athletes again came out with demonstration performances.
Pavel Goncharov's collageOver the almost 90-year history of gymnastics, the items that athletes use have changed more than once. Initially, gymnasts performed with a shawl or silk fabric, then the fabric began to be attached to a stick - a kind of prototype of a pennant turned out. Types of exercises in rhythmic gymnastics - hoop, ball, ribbon and rope - were approved at the international level in 1960s.
Maces existed in Soviet gymnastics since 1950, but then they were replaced by pennants. They returned to this species again in the 70s - already at the international level. Clubs and hoops are still considered the most traumatic items: in Soviet times they were made of wood and aluminum, now they are made of rubber and plastic, which still does not exclude injury. The jump rope is now preserved only among juniors - in the 2000s, this type was removed at the request of the NBC television company due to the fact that the item is hard to see on the TV screen.
The first official rhythmic gymnastics competition under the auspices of the FIG took place in 1963 in Budapest. Initially, the tournament was supposed to be called the European Cup, but representatives of not only European countries submitted applications for participation. So unexpectedly, the first world championship took place, which was held according to the rules developed in the USSR. 28 athletes from ten countries participated in the championship, and the Soviet gymnast Lyudmila Savinkova became the winner.
Competitions among gymnasts of sports unions and sports clubs of the country. Speech by L. Shubina (sports club "Chelyabinsk"). 1966. E. Dreishner/MAMM/MDF/russianphoto.ru The world championship in team competitions in rhythmic gymnastics, when five athletes perform with a common number, was held in 1967 in Copenhagen, from where Soviet girls left with gold medals. In subsequent years, the number of participants in the individual and team events grew and the sport gained popularity in more and more countries. The European and World Championships were held every two years - for even and odd years
World and European Championships have become annual since 1992 years old
respectively.
Unknown author. 1990s MAMM/MDF/russianphoto.ruUntil the mid-80s, live piano music served as musical accompaniment for performances in rhythmic gymnastics. With the advent of tape recorders, they began to use a phonogram. Since 2012, gymnasts have been allowed to use music with words for programs, but not more than in two out of four types.
For the young sport, there was one more important unconquered milestone - inclusion in the Olympic program. This happened 50 years after the birth of rhythmic gymnastics in Leningrad - at 1984 at the Summer Olympics in Los Angeles.
Rhythmic gymnastics was recognized as an Olympic sport only half a century after its inception in Leningrad.
Russian hula hoop "DANCE ENERGY"
"DANCE ENERGY"
Equipment: hoop, manufacturer's information, packaging.
Free delivery of 1 or 2 hoops to any point in Russia where there is a branch of the Russian Post company VIEW.
Free delivery of 1 or 2 hoops by courier "to the door" VIEW.
Pickup points "RUSSIAN HOOPS" VIEW.
The hoop was invented in Russia.
WARRANTY 2 years!
The special "hard-light" massage hoop is mainly aimed at reducing volume in a natural way in ALL parts of the body.
The top of the hoop is equipped with a unique seamless fabric with a thermal and micro-massage effect.
All modifications have a one-piece durable frame.
The hoop is designed to rotate and break fat deposits on all parts of the body.
Model range 11 pieces.
Massage slimming hoop "DANCE ENERGY" - has a solid frame, covered with a seamless shell with a thermal and micro massage effect. The range of hoops (hula hoops) is designed to be able to rotate the hoop on all parts of the body. This nuance must be excellently used. When practicing with a hoop, we recommend turning on your favorite energetic song. Combine (accompany), training with an arbitrary dance. The workout will fly by unnoticed with huge positive energy that will give you a charge for the whole day!
Hula hoop "DANCE ENERGY" is mainly aimed at reducing the volume in a natural way of ALL parts of the body.
Your body has fat layers on the legs, arms, thighs, buttocks, waist!
Skin elasticity not satisfied?!
Therefore, this hoop is just for you.
Version No. 1
Weight 0.5 kg
Diameter 80 cm
Thickness 30mm
Hoop (hula-hoop) has a solid frame made of polyethylene. On top is a single shell made of special jersey with micro massage and thermal effect.
Version No. 2
Weight 0.5 kg
Diameter 60 cm
Thickness 40mm
Hoop (hula-hoop) has a PURE frame made of polyethylene. On top is a single shell made of special jersey with micro massage and thermal effect.
Version No. 3
Weight 0.75kg
Diameter 95 cm
Thickness 30mm
Hoop (hula-hoop) has a PURE frame made of polyethylene. Over a single shell made of special jersey with micro massage and thermal effect.
Version No. 4
Weight 0.75kg
Diameter 80 cm
Thickness 40mm
Hoop (hula-hoop) has a PURE frame made of polyethylene. Over a single shell made of special jersey with micro massage and thermal effect.
Modification No. 5
Weight 1kg
Diameter 90 cm
Thickness 40mm
Hoop (hula-hoop) has a PURE frame made of polyethylene. Over a single shell made of special jersey with micro massage and thermal effect.
Version No. 6
Weight 1.5kg
Diameter 70 cm
Thickness 30mm
Hoop (hula-hoop) has a SOLID frame made of polyethylene filled with sand. Over a single shell made of special jersey with micro massage and thermal effect.
Version No. 7
Weight 2kg
Diameter 80 cm
Thickness 30mm
Hoop (hula-hoop) has a SOLID frame made of polyethylene filled with sand. Over the shell of a special jersey with micro massage and thermal effect.
Version No. 8
Weight 2.5 kg
Diameter 85 cm
Thickness 30mm
Hoop (hula-hoop) has a SOLID frame made of polyethylene filled with sand. Over a single shell made of special jersey with micro massage and thermal effect.
Modification No. 9
Weight 3kg
Diameter 70 cm
Thickness 40mm
Hoop (hula-hoop) has a SOLID frame made of polyethylene filled with sand.