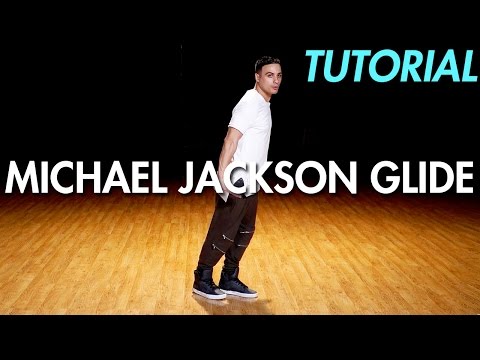
How to glide dance for beginners
Learn the Glide
J
ustin does it. So do Usher and Missy. Nearly every time you flip on MTV you can see an R&B star shifting seamlessly between toe and heel, sliding over the floor’s surface in an effortless glide. It looks easy, but it takes skill and time to master the illusion of floating across the stage. A variation on the glide made history when Michael Jackson moonwalked, and now the original is turning up in hip-hop choreography—and commercial dancers are expected to know how to do it. Here,
DS gives you tips to perfect this elusive move, starting with a prep exercise, then breaking it down step by step.
Break It Down
The glide is difficult to master because it features the continuous flow of seemingly inseparable components. However, “it’s really a series of subtle and tense weight shifts,” says hip-hop choreographer, teacher and dancer Rhapsody. So, to understand the move as a whole, break it into digestible parts.
Side-to-side preparation exercise:
- Begin with feet parallel in sixth position. Your shoulders should be back and weight should be in the middle of your feet.
- Move weight to the balls of your feet, expand your chest like you’re blowing up a balloon and move your arms straight back. Slide your right foot forward in an S-curve to the right until you’re in a standing lunge position. Your chest should be puffed forward, with your neck slightly jutting in that direction as well. Arms are up to you; we’ve shown the right arm going out with the foot. Your right foot will be in a forced arch, giving the illusion of leaning forward; the left foot acts as your anchor.
- To return to center, contract your stomach and slide your right foot back to parallel while bringing your arms to your sides. Repeat with the left foot.
Continuous Direction Glide:
- Start with feet parallel in sixth position.
 For a glide that moves toward the left, dig your right toe into the floor.
- Push your left foot away, letting it slide along the floor. “You should be in a deep forced-arch lunge,” says Laya Barak, hip-hop teacher at Steps on Broadway and Dance New Amsterdam.
- Rotate your right foot inward, pigeon-toed, lifting your toe up. At the same time, shift your left foot so that it faces left, toe digging into the floor, mirroring the initial position of your right foot. You should be in a locked toe-heel position—weight on the left toe and right heel.
- Slide your right foot in toward your left toe. Switch heels quickly: Your left heel returns to the floor in parallel while your right foot rotates back out and pops onto a forced arch. Dig into your right toe and slide the left foot back to begin again.
Watch Your Weight
“The glide’s most important component is definitely an understanding of weight shift,” says Rhapsody. “You have to drive forward with your toe to give the illusion of moving [smoothly] through space. There should be a swell of energy like a pendulum, a hover at the top of the move when you reach one side. That makes the glide dynamic.” Throughout, your chest should move fluidly in the direction of each digged toe.
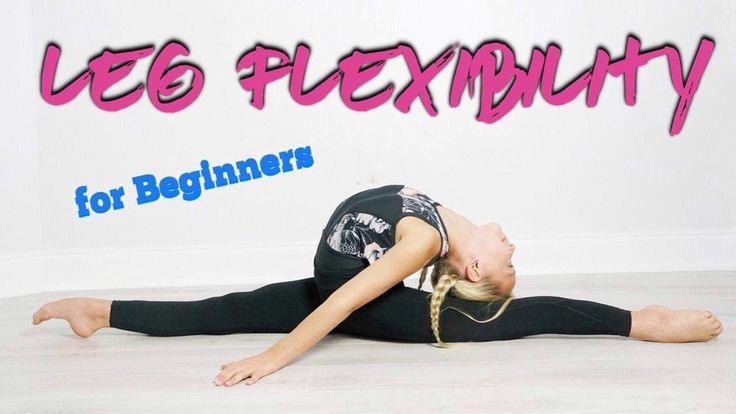
Feel the Stretch
While Barak agrees that the shift is important, she also stresses understanding tension. “The best glides feel like you have an invisible rubber band from your right shoulder to your left foot that stretches as you slide your left foot away and resists as your feet come back together,” she says. This tension creates fluidity and strength. And when you’re switching heel pops just before a new section of your glide, that tension maintains the flow.
Try It!
- To cultivate a cleaner line, practice digging your toe in and finding a deep forward lunge before adding it into the glide.
- Master the side-to-side glide exercise before moving on to the continuous direction glide. The motion and intention is the same.
- Experiment with the step. Add your own personality with neck swivels and chest isolations to make the glide look more robotic. Or, add hard shoulder locks to make the glide tough and staccato.
- Try moving your glide in a circle. Extend the lunging leg to the back open diagonal, and as you shift your weight back toward sixth position, rotate your hips 90 degrees until you’re facing the side of the room. Repeat to face back, then the side, then front again to complete the circle.
Lauren Kay is a writer, dancer, and dramaturge based in New York City.
Online Hip Hop Dance Lesson Video: Back Glide Moonwalk
Online Hip Hop Dance Lesson Video: Back Glide MoonwalkSign In | Sign Up
Dance Lesson Packs Dance Lessons Instructors Dance Styles Access Passes & Subscriptions Send a Gift
- Lesson Preview
- Full Lesson
Hold your horses! You can't watch the full lesson quite yet.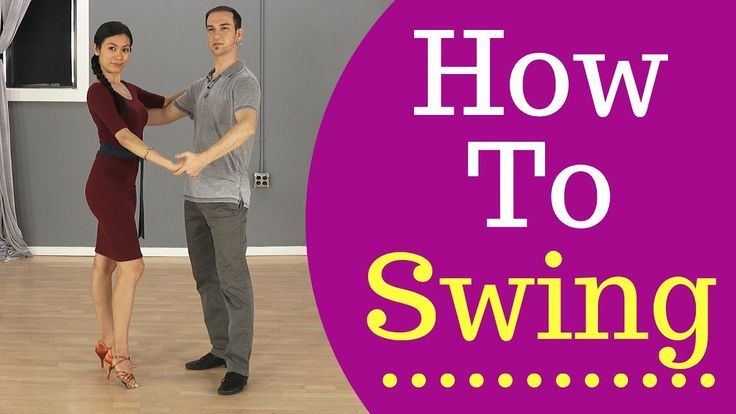 First you'll need to Sign In or Register then you'll need to pick up a Subscription or an Access Pass or buy the lesson individually.
Sign in to not see ads. It's free!
Get the whole Pack and save 15%
Instead of just the "Back Glide Moonwalk" lesson, grab a whole Lesson Pack that it's part of at a 15% discount:
5 Lessons
Glides
Hip Hop Lesson Pack
Levels 1, 2, 4
Members Also Bought These Lessons
Tornado
Lindy Hop level 3
Permutations Of Lindy
Lindy Hop level 3
20's Charleston Basic
Vintage Dances level 2
French Fry And Barrel Roll Jam
Jazz (vernacular) level 4
Collegiate Shag Basic
Collegiate Shag level 1
Masters Of Musicality Part 1
Lindy Hop level 2
Breakaway Charleston
Partner Charleston level 3
Liberating Your Swing Out
Lindy Hop level 3
A Perfect Sugar Push
Lindy Hop level 3
Popular Lesson Packs By Ilon Dromi
14 Lessons
Beginner Freestyle Hip Hop
Hip Hop Lesson Pack
Levels 1, 2
6 Lessons
Beginner Hip Hop Combos
Hip Hop Lesson Pack
Levels 1, 2
5 Lessons
Glides
Hip Hop Lesson Pack
Levels 1, 2, 4
4 Lessons
Locking
Hip Hop Lesson Pack
Levels 1, 3
8 Lessons
Intermediate Hip Hop Combos
Hip Hop Lesson Pack
Levels 2, 3
6 Lessons
Advanced Hip Hop Combos
Hip Hop Lesson Pack
Level 4
Popular Lessons By Ilon Dromi
Back Glide Moonwalk
Hip Hop level 2
Body Wave
Hip Hop level 2
Scoobot Up-down Double Lock
Hip Hop level 3
Snake Charmer
Hip Hop level 3
Tilt And Drop
Hip Hop level 4
Scoop
Hip Hop level 2
Wave Through Arms
Hip Hop level 2
Robotic Turn
Hip Hop level 2
More Hip Hop Lessons Packs
14 Lessons
Beginner Freestyle Hip Hop
Hip Hop Lesson Pack
Levels 1, 2
20 Lessons
House
Hip Hop Lesson Pack
Levels 1, 2, 4
6 Lessons
Beginner Hip Hop Combos
Hip Hop Lesson Pack
Levels 1, 2
4 Lessons
Popping
Hip Hop Lesson Pack
Levels 1, 4
5 Lessons
Glides
Hip Hop Lesson Pack
Levels 1, 2, 4
7 Lessons
Booty Shakin'
Hip Hop Lesson Pack
Levels 1, 2, 3
4 Lessons
Locking
Hip Hop Lesson Pack
Levels 1, 3
2 Lessons
Intermediate/advanced Freestyle Hip Hop
Hip Hop Lesson Pack
Levels 3, 4
Contact FAQ Teach With Us Privacy
site by PixelEarth Web Development
How to learn to dance shuffle - Lifehacker
December 15, 2019 Likbez Sports and fitness
Master the basic moves, then improvise and have fun.
Iya Zorina
Author of Lifehacker, athlete, CCM
This dance style includes a lot of freedom and improvisation. That is why he is so good. You can master the basic movements in a couple of hours, and then complicate them to infinity and combine them with each other, create your own combinations and spy on others. nine0003
Dance in sneakers, socks or barefoot, in any outfit, anywhere.
Master the basic movements of the shuffle
In this style, you do all the basic movements with your feet, the hands most often move freely - according to the heart.
Running man
This is the most basic and essential shuffle movement. You can do it in three different ways.
Full foot
The movement begins by bending your knee and lifting one leg. Next, you need to simultaneously put both legs - supporting and raised - at a distance of one step from each other. nine0003
The raised leg is placed forward on a full foot, the standing one behind slips back on the ball of the foot and remains on it - the heel is not placed on the floor. The weight is evenly distributed between the two legs.
After that, it remains to return to the starting position. To do this, the front leg slides back, and at the same time, the back leg is pulled up. You find yourself in the starting position and repeat the cycle. The movement itself is soft and springy: do not stick into the floor, keep your legs relaxed. nine0003
Heel
This is a lighter and faster running man look that may be needed for some combinations. Here you put your foot not on the whole foot, but on the heel. At the same time, the one standing behind remains on the toe.
On pads
In this variation, the foot is placed forward on the pad. At the same time, the one standing behind also remains on the ball of the foot, and the body leans slightly back.
T‑step
In this movement, one foot constantly makes a “herringbone” - turns the heel in and out - and the second touches the floor and immediately rises back. nine0003
When the heel of the skating leg turns inward, the toe of the other leg touches the floor; when outward, the other leg rises, turning the knee inward.
It turns out two positions: closed - when the legs are wrapped with the knees inward, and one leg is raised, and open - when the legs are turned out with the knees outward, and the toe touches the floor. Practice doing the T-step in both directions: slowly at first, then with acceleration.
Rocking
You jump on one foot while the other touches the floor in different places: on the side of the supporting leg, across, behind - anywhere you want. You can put your foot on the toe or on the heel - the latter is called a kick. The supporting leg can simply rise low or perform a T-step - move the heel out and in. nine0003
Charleston
To begin, you turn your knees and toes inward and lift one leg. Then turn your toes and knees outward, and put your raised leg forward crosswise. Repeat the same with the other leg.
All movement occurs on the balls of the feet, the heels do not fall to the floor. You can move both forward and backward.
Diamond
First, with a jump, you put your feet crosswise with your toes out, then you also spread your legs to the sides with a jump. nine0003
Slides
One leg is straight, stands on the whole foot, the other is with a bent knee on the pad. Leaning on the pad, you slip the foot of a straight leg back, as if wiping the sole on the floor.
Immediately after the slip, you turn around. In the turn, the straight leg bends and goes to the pad, and the one that was on the pad, on the contrary, turns on the heel. After that, it remains only to change legs and move in the same way in the other direction.
Scissors
From the starting position - standing with a raised leg, as in Running man - you turn your hips to the side with a jump and put your legs crosswise.
The front foot is on the heel, the back foot is on the ball.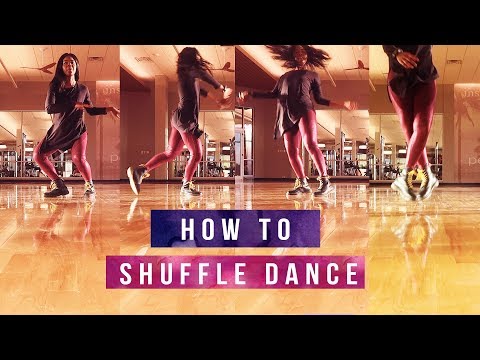 Then you jump back to the starting position and do the same on the other side.
Sidekick
From the starting position, you turn your hips to the side with a jump and spread your legs a step apart from each other. The standing foot in front is placed on the heel, the standing one behind remains on the pillow. Then, with a jump, you collect your legs and do the same on the other side. nine0003
Try other variations of the basic shuffle movements
You can perform basic movements in different directions: forward and backward, turning around. This will give you more freedom to improvise.
Variations Running man
Do several times in place and then turn around. You can also try walking this way to the side. Each time the leg will need to be placed slightly crossed in order to slowly move to the side.
Variations T‑step
You can lower your foot on the toe, on the whole foot, touch the floor to the side of the supporting leg or forward and behind it.
You can also keep the other leg on the floor at all - leave it on the toe and turn the knee in and out.
Variations Diamond
Here one more element is added to the movement – the heel strike. In the starting position, you wrap the toes of the feet and knees inward, and then jump on the heels, turning the socks to the sides.
From this position, without jumping, you turn your toes and knees inward, cross your legs with a jump, turning your feet with your toes outward, and then return to the starting position. nine0003
Charleston Variations
After three turns of the Charleston, turn both toes in one direction and then in the other. At the end, you can turn the knee to the side.
Combine familiar shuffle moves
While you lack the skills to move freely and come up with something of your own, learn a few combinations. They contain interesting movements that will replenish your dance vocabulary.
Combination 1
This is a simple combination of two basic movements - Running man and T-step. First take five Running man steps, then four T-steps to the side and repeat the same in the opposite direction. nine0057
Combination 2
Another combination of two basic movements. Here you do three Running mans, then one T‑step with a back foot touch, and two front heel touch kicks. The same on the other side.
Combination 3
There are no standard steps here, but there are already familiar Sidekick and transition from heels to toes.
Learn more difficult combinations
We will add some videos with good combinations.
1. Cool video for beginners: movements are repeated in slow motion to make it easier to dance to the music. nine0003
2. And here the combination is analyzed step by step in slow motion, dividing it into three parts. Very comfortably. Look for more on this channel, there are several such analyzes.
3. No slowdown here, just a great combination. But you already know almost all the movements, so you can figure it out. If something is not clear, watch the video at a speed of 0.25.
Pick the music and improvise
You probably have a favorite song to shuffle to. Include them and start with basic movements: just do the Running man and periodically add different elements when you want. Move in different directions, relax and have fun. nine0003
If you don't have favorite tracks, try our selection.
I must say that the shuffle is an amazing cardio workout. In just a couple of tracks, you will be out of breath and sweat, like after a run, but you will feel absolutely happy!
What's more, if you have to force yourself to keep going while running, shuffle requires you to have the willpower to stop and not dance.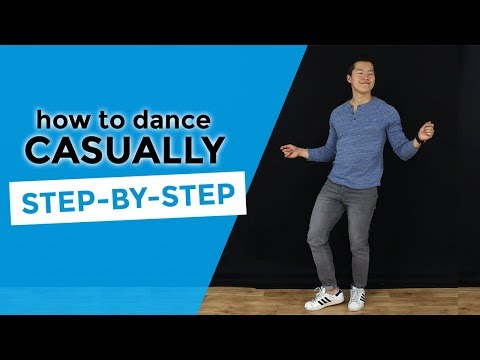 As a bonus - a short video from a beginner after a couple of hours of practice. nine0003
Shuffle is cool!
Read also 🕺💃🤸♀️
- Dancing as a sport: choosing the right direction
- Dance and movement therapy: how to know and change yourself through movement
- How to learn to dance: video lessons for those who are not afraid to try
- How to learn street dancing without leaving home
- Zumba is a fun way to lose weight for those who love dancing
*Activity of Meta Platforms Inc. and its social networks Facebook and Instagram are prohibited in the territory of the Russian Federation.
Learning to dance - 8 tips for beginner dancers
It's not easy being a beginner in anything. You have to learn, adapt to unusual conditions for yourself, step by step to get used to a new business. It’s the same with dancing: when deciding to start practicing, you need to be prepared, which at first can be difficult. But, often these are just temporary difficulties. To make it much easier for you and to join the art of dance as quickly as possible, listen to a few tips. nine0003
Choose the right clothes and shoes
When you have completed the stage of choosing a dance school and decided to attend your first training, prepare your clothes and shoes. In many ways, the selection of a form for classes depends on what dance style you will master . It is necessary that you not only feel comfortable in the outfit (to be fully focused on the dance, and not any irritants), but also that it is appropriate.
For example, leggings, leggings, T-shirts, tops, T-shirts are best suited for sports dancing and fitness. For pole dancing needs more revealing clothing - shorts, crop tops and tank tops. And the point is not at all the existing prejudices regarding this style of dance. Such choreography has a certain specificity. To perform tricks on the pole, you need to provide friction of the skin with the surface of the pole. Simply put, if you choose a heavily covered outfit, the fabric will slip and the desired techniques will not work properly. For ballroom dancing choose dresses, skirts, leggings, tops, for directions like contemporary or ballet - leotards, leggings, overalls.
As for the choice of shoes, again everything depends on the style of dance. You can practice in Czech shoes, sneakers, jazz shoes, sandals with heels, strips. In general, consider what direction you are going to study. And it’s better if you check with the teacher before the first lesson how to dress and put on shoes.
And another recommendation that is not mandatory, but highly desirable. It is better for girls to go to training with a minimum of cosmetics . It is necessary that the skin breathes, as you have to sweat a lot. And don't use too much perfume. Let yourself and other dancers breathe freely.
Take water with you
The question often arises: is it possible to drink water during training.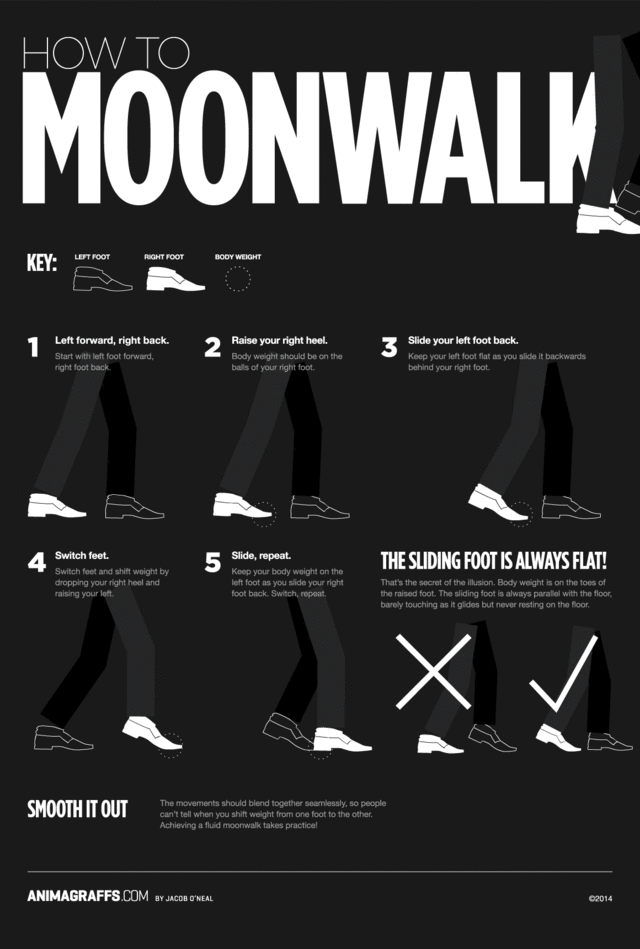 There are so many conflicting opinions on this subject that it provokes a lot of controversy. During any intense physical activity, you need to consume fluid to maintain optimal water balance. But note that drink little by little and not too often - every 10-15 minutes . If you are primarily aimed at losing weight, then you need to be especially attentive to the amount of water consumed. It should be shortened. It is enough to periodically take a couple of sips.
Also often asked questions about whether to eat before dancing and after training? In order for the lesson to be useful, it was not difficult for you to perform the necessary movements, try to eat 2 hours before it. It is better if these are complex carbohydrates (some types of cereals, wholemeal bread, vegetables, etc.) that provide a lot of slowly released energy. nine0178 If you do not have time to eat, then eat some fruit 45-60 minutes before training . It’s not worth dancing actively when you are completely hungry: it can become bad. After class, do not eat for at least 1 hour. After that, you can afford light, non-caloric food.
Be patient
Don't quit if you don't do well at first . Coming to already formed groups, many note that everyone else dances much better than they do. And even if the others do not have much experience, it can still seem that they are moving more smoothly and harmoniously. We hasten to reassure you: almost all beginners go through this stage and there is nothing wrong with that. Soon you will start noticing that you are getting better and better. But, if for some reason you still don’t want to dance in groups (for example, due to excessive embarrassment, fear of failure, or an inconvenient class schedule for you), you can consider the option of individual training. With the support of a professional who gives personal lessons, you can feel as confident as possible. nine0003
The Guinness Book of Records has recorded the world-famous achievement of 37-year-old Kalamandalam Hemalente from India.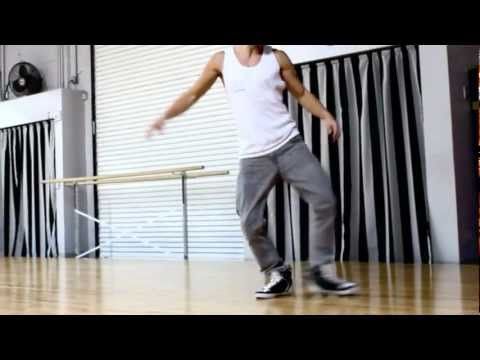 She performed a folk dance for 123 hours and 15 minutes. According to the dancer herself, she decided in this way to draw the attention of the general public to her national dance and point out its place in world culture.
Learn to have fun
Don't take classes solely as exhausting workouts , allowing you to hone your motor skills and physical form. Get the most out of each lesson, including positive emotions. Once you've learned the basic moves, transitions, and dance sequences, let yourself relax and just enjoy every step . Let at first there will be some shortcomings in the execution. Everything is in order, few people succeed perfectly the first time. Over time, they will become less and less. But start enjoying the choreographic process from the very first lesson. nine0003
Don't be lazy during the warm-up
Any dance class starts with a warm-up. Even if it seems boring to you, and you want to move directly to honing your dancing skills as soon as possible, take your time. Handle the warm-up phase responsibly . Repeat the movements of the coach, follow his recommendations. This is very important, since the subsequent serious load on unprepared muscles is fraught with injuries. nine0003
Practice regularly
Try to skip classes as little as possible, especially if you dance in a group . Let training become a habit. An effective regimen that allows you to achieve very successful results is about 3-4 classes per week for an hour and a half. Going to school 6-7 times a week is not worth it. The body should be given rest. Of course, if you decide to become a professional dancer, then sometimes such intense loads cannot be avoided. nine0003
Don't plan to conquer the "dance Olympus". Still, try to attend training regularly. Infrequent and unsystematic "raids" do not provide enough benefit .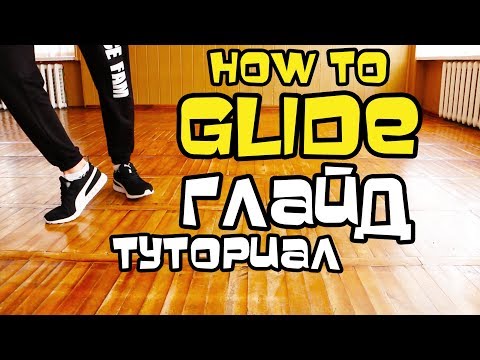 Stick to the golden mean.
Record workouts on video
Video recording of classes is done so that each student has the opportunity to learn dances at a convenient time for him, watching their movements, transitions, ligaments. You can also see what mistakes you make, remember the music and its beat. This practice will greatly help you to navigate faster in the next classes and dance even better. nine0003
Dance wherever you are!
Of course, we are not talking about you dancing in a store or on the street. You can even work out the movements mentally, scrolling through them in your head . Maybe this is an unusual, but quite effective way. In the meantime, no one sees, repeat the choreographic elements studied in the lessons. You will not even notice how your body will get used to performing the necessary steps and it will be much easier for you to learn not only those dances that you are currently working on, but also all subsequent ones.