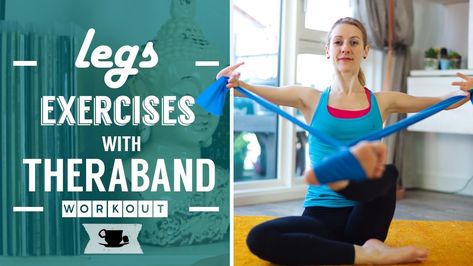
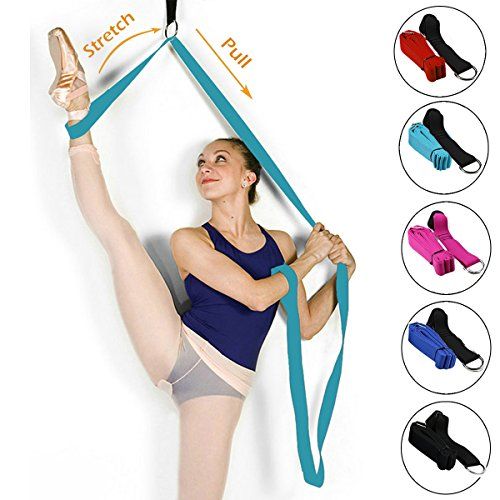
How to use a dance stretch band
7 Resistance Band Exercises for Dancers
Dancing requires strength, mobility, power, cardiovascular endurance, and muscular endurance. Your muscles quickly adapt to movements that are performed often in dance. Which is why adding resistance to every workout helps prevent plateaus and continuously challenges your muscles!
TheraBand Resistance Bands allow dancers to move more freely and achieve a greater range of motion by creating resistance from all directions. The dancer can adjust the angle of movement and combine several exercises, continuously working towards greater extension and flexibility. It’s also important that dancers protect their muscles and joints from potential injury.
Looking to strengthen your hips and core? We’ve come up with a variety of exercises to get you started!
Jump to 6 TheraBand Resistance Band Exercises!
4 Benefits to Using Resistance Bands 1. Great for Injury RehabilitationWhen recovering from an injury, it's important to practice safe rehabilitation exercises that won’t put excessive strain or weight on the injured area. Resistance training offers dancers a gradual reintroduction of strength-based movement and exercises. The bands also help build stability and better posture, helping prevent strain on weak muscles and joints.
Resistance bands allow users to increase gradually the amount of the resistance during an exercise. This occurs when the amount of tension in the band increases as the ends are stretched further apart. Variable resistance leads to an increase in the number of muscle fibers being used in the working muscles. Which then leads to improved strength and muscular endurance.
3. Adaptable to All Fitness LevelsWith a color-coded resistance system, TheraBand makes it easy to find your perfect fit and ensures you get the same level of resistance every time. These elastic bands are a great choice for progressive resistance training because the first six levels all increase 25% in resistance from the previous level at 100% elongation. Start with a lightweight band and as your strength and flexibility improves, move up to heavier weight. TheraBand also offers High Resistance Bands. It expands the resistance range and offers higher levels for advanced rehabilitation, elite athletes, and people looking for a tougher workout.
- More FAQ on TheraBand Resistance Bands
Improving the height of kicks and leaps requires strength and flexibility throughout the lower back, hamstrings, groin, and quads. The major muscles that contribute to the actual height of a kick are the hip flexors and quads, which can be strengthened each time you lift your legs using a resistance band. In addition, proper stretching with the bands will improve a dancer’s form and technique.
Is hip pain limiting the height of your leg lifts? Is foot pain making it difficult to go into a plie? After dancing, some muscle soreness for 24-48 hours is normal. However, if you begin to experience any pain, you may have suffered a more severe injury.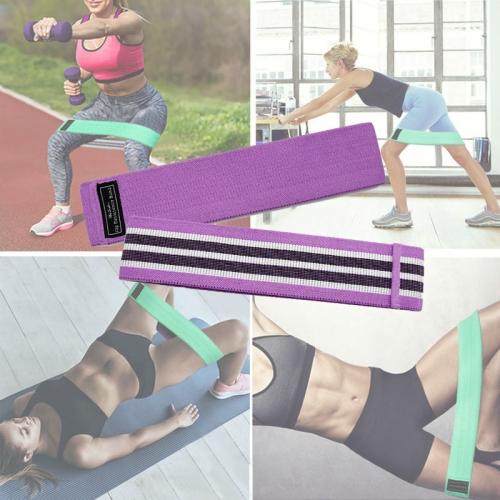 Talk to your doctor, physical therapist, athletic trainer, or medical professional about your pain relief options.
Perform these movements as a circuit (2-3 times each with one minute of rest between rounds) three times a week.
For assistance when tying the resistance band, hold the band with one end in each hand. Wrap one section around the other, then cross over again and bring one end through the loop that forms. Pull tight to form the first knot. Repeat so the band is double knotted securely. Before each use, make sure the knot is still tight and that it is not wearing/fraying. Or use a Loop Band!
Pointe-and-Flex- Sit on the floor with your legs straight out in front of you
- Flex your right foot and loop the resistance band around your foot. Focus on pressing slowly through the ankle, ball, toe, and then back through the toe, ball, ankle
- Keep your working heel on the ground.
 Repeat this exercise 8-10 times and switch to stretch the left foot
- Place the band across your back and feed the ends under your armpits, holding one end in each hand
- Start with your hands by your shoulders, then press straight forward as though you were performing a push-up
- Slowly return to the starting position. Repeat 8-10 times
- Loop your resistance band over the barre
- Lay on the floor perpendicular to the barre. Bend your legs and place your feet firmly on the ground to stabilize your lower body
- Hold one end of the band in each hand and keep your arms extended beside your hips
- Curl your upper body all the way up toward your knees and hold for 2-3 seconds
- Slowly lower back down to the ground and repeat 8-10 times
- Lie flat on your back and bend your knees in toward your chest with your heels together
- Place the resistance band across the balls of the feet and grip it near the knees
- Keep the head down and use the abs to curl the upper body off the floor.
 The chest and shoulders should remain wide
 - On inhale, extend the legs toward the ceiling. Flex the feet, like a plié, in first position
- Starting at 90 degrees, progressively bend the legs down into a diamond shape. Do not drop the knees or push the stretching limit
- Repeat this exercise 8-10 times
- Tie the band in a loop around your wrists so there is resistance when your hands are shoulder-distance apart
- Come to plank position. Plant your hands directly under shoulders (slightly wider than shoulder-width) like you’re about to do a push-up
- Ground toes into the floor and squeeze the glutes to stabilize your body
- Walk around, moving the arms and legs together, going forward, backward or even sideways
- Lie on your right side and tie a resistance around your thighs.
 Stack your feet and hips, with your knees bent at a 90-degree angle and your head resting in your right hand
 - Draw your knees in toward your body until your feet in are in line with your butt. Place your left hand on your hip to ensure it doesn’t tilt backwards. This is your starting position
- Keeping your abs engaged and your feet together, raise your left knee as far as you can without rotating your hip or lifting your right knee off the floor
- Hold for 2-3 seconds, squeezing your glutes at the top and then slowly return to the starting position. Do this 8-10 times
- Stand with your arms extended forward at chest height, holding one end of the band in each hand
- Step your left foot back, and lower into a lunge
- Twist your torso over your right leg, and pull your hands farther apart, stretching the band
- Return to the starting position and repeat on the opposite side.
 Do this 5 times on each side
For further instructions on resistance band exercises for pointework, watch this video.
Looking for something to read next? Learn more in this article, Exercises for Ballet Dancers: Improve Your Turnout.
References
- Anonymous. (2016). TheraBand Exercises for the Dancer. A Dancer’s Life. Retrieved from https://bit.ly/3mLfNkQ
- Lee, Josephine. (2018). 5 Resistance Band Exercises for Stronger Pointework. Pointe. Retrieved from https://bit.ly/3h5rktY
Medical Disclaimer: The information provided on this site, including text, graphics, images and other material, are for informational purposes only and are not intended to substitute for professional medical advice, diagnosis or treatment. Always seek the advice of your physician or other healthcare professional with any questions or concerns you may have regarding your condition.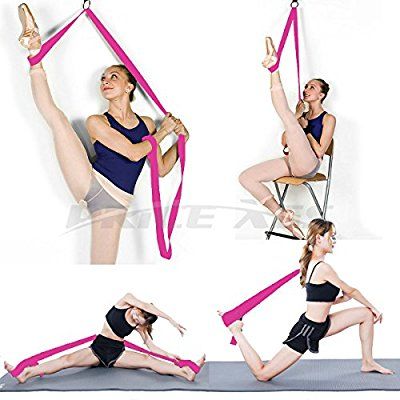
Recent Posts
Categories
Popular Posts
Subscribe toPerformance Health
Want to receive the latest education, articles, and promotions from Performance Health? Sign up now!
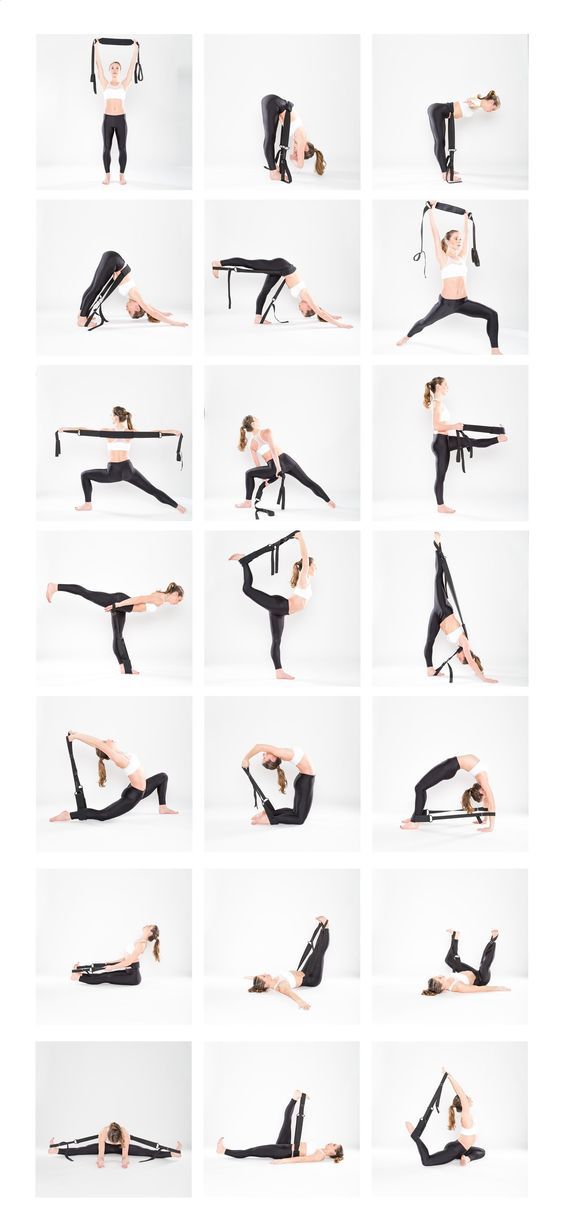
Stretches for PlumBand | Dance With Plum
For such a simple and compact item, the PlumBand enables a surprising breadth and depth of stretch and strength training. The stretches below will give you a start, but really the limit is your own ingenuity. Let us know how these stretches work for you. And if you invent your own, tell us about it using the hashtag #dancewithplum.
Stretch #1: Seated Leg
Sit with both legs straight in front of you, loop your PlumBand around your body and through itself (A), then make the band snug around your waist. Bend the knee of the leg you are stretching and place the loose end of the band around the arch of that foot. Extend the leg until straight and lift it up while leaning back and supporting yourself with your arms.
Stretch #2: Seated Leg
Prepare and position yourself as you would for Seated Leg (stretch no. 1), then continue lying back with your leg straight up in front of you. Allow your PlumBand to pull your leg back and down to stretch and hold for 10–15 seconds. To increase the stretch, grasp the band with your hands and gently pull towards your chest.
Stretch #3: Foot
Sit on the floor with your legs in the butterfly position. Place your PlumBand against the flat of your back and then loop each of its ends around the balls of your feet. Extend the leg of the foot you intend to stretch until the leg is straight. Then, using the hand on your stretching side, grasp your band firmly and pull to stretch the foot.
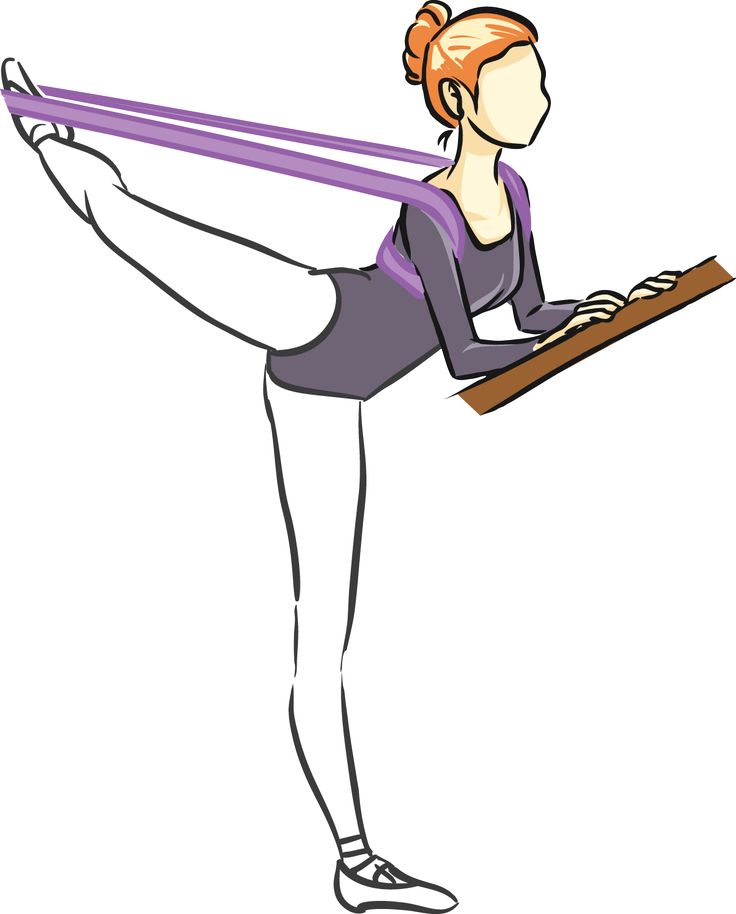
Stretch #4: Quad
Tie your PlumBand into an overhand knot (A). Then, while kneeling, place the loop around the bridge of the foot on the leg you want to stretch. Grip the band over your shoulder using the hand opposite the stretching leg, and pull up as you lean forward and raise your opposite knee in front of you.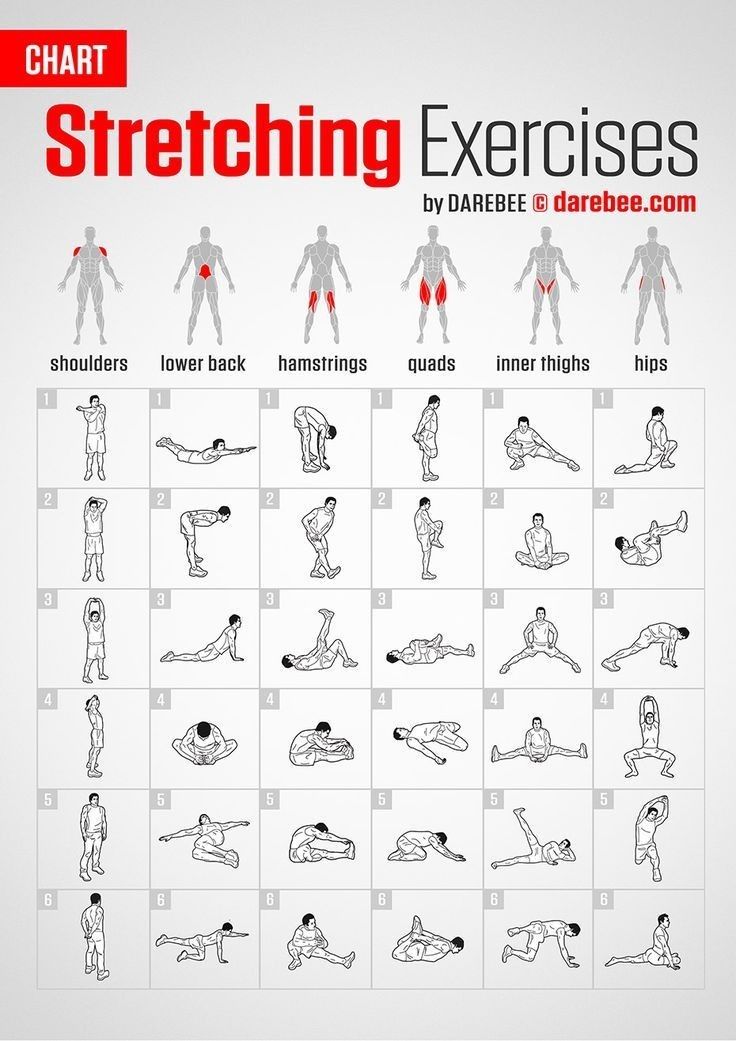 Keep resistance on the stretching leg as it moves up and down. Repeat several times with each leg.
Stretch #5: Back
Tie your PlumBand into an overhand knot (A). While lying on your stomach, put the large loop of the knot around both of your feet. Reach back and grab an end of the band with each of your hands. Pull slowly to bring your head and feet together and gently rock back and forth to stretch your back.
Stretch #6: Advanced Back
Prepare and position yourself as you would for Back (stretch no. 5), then extend your legs to pull your upper body back and increase the stretch of your back. At the full extent of the stretch, your legs will be fully straight. When releasing the stretch, slowly relax your back. This is an advanced stretch that is not for everyone. Know your limits, and remember to never continue a stretch to the point of discomfort or pain.
Stretch #7: Middle Split
While sitting on the floor with your legs in the butterfly position, loop one end of your PlumBand around the arch of one of your feet.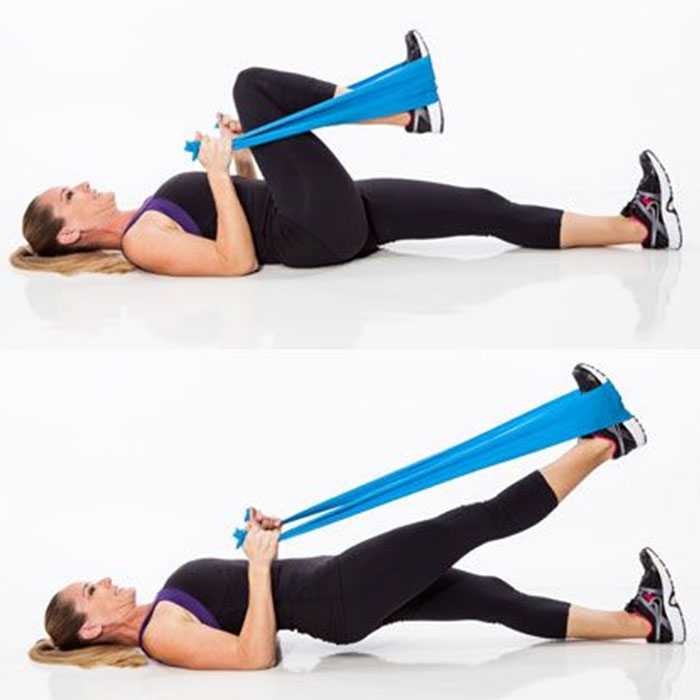 Then pull the band around your back and loop the other end around the arch of your other foot. Slowly extend your legs forward until straight, and then move them out to the sides into the middle split position. Point your toes for an additional stretch.
Stretch #8: Middle Split
Prepare and position yourself as you would for Middle Split (stretch no. 7), then with your legs in the middle split position, lean forward onto your stomach while pushing your hips towards the ground. Flex your feet and point your toes for an additional stretch.
Stretch #9: Middle Split
Prepare and position yourself as you would for Middle Split (stretch no. 7), then with your legs in the middle split position, lean backwards to lie flat on your back while keeping your legs in the split position. Flex your feet and point your toes for an additional stretch.
Stretch #10: Middle Split
Prepare and position yourself as you would for Middle Split (stretch no. 9), then while lying on your back with your legs in the split position, slowly raise your legs to point straight up and then return them down to the split position. Repeat to strengthen your stomach, groin and core muscles.
Stretch #11: Side
While standing near a barre or chair for support, step onto your PlumBand with a foot and wrap the band once around its arch and bridge. Grasp the other end of the band using the hand opposite the leg you are stretching, then slowly lift your leg up and to the side as you pull. Raise your leg as high as you can without pain, hold for a moment, and then return it to the ground.
Stretch #12: Side
Prepare and position yourself as you would for Side Split (stretch no. 11). Grasp the end of the band using the hand opposite the leg you are stretching, then slowly lift your leg up and to the side as you pull. Continue to pull your leg up and over towards the opposite side of your body. Raise your leg as high as you can without pain, hold for a moment, and then return it to the ground.
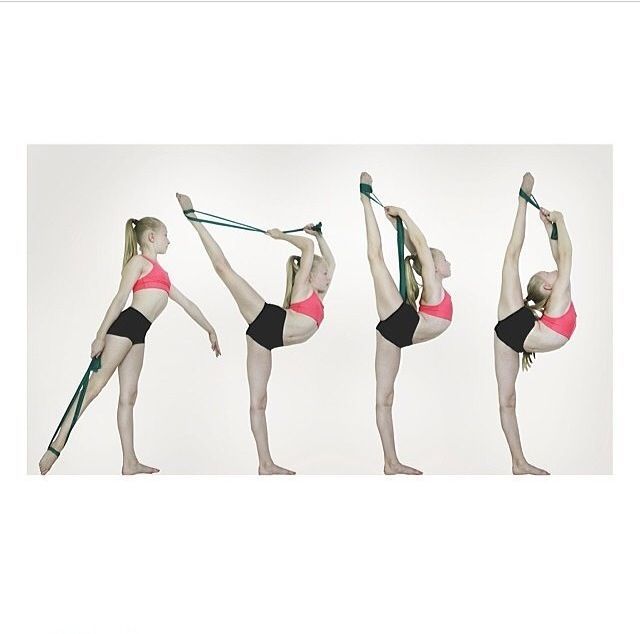
Stretch #13: Arabesque
Step into the circle of your PlumBand and flip the forward portion up and over your head, tucking the band under your arms and across your upper back.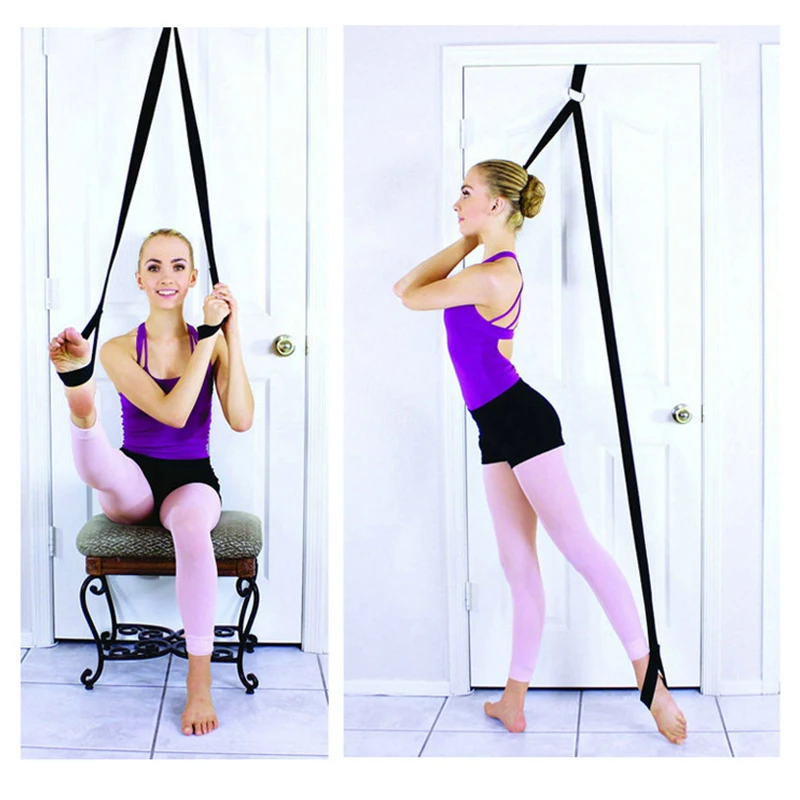 While using a barre or chair for support, bend a leg behind you, then place the end of the band over the bridge of that leg’s foot. Carefully extend your leg up into an arabesque position. From this stretch position, you can easily move between arabesque, attitude, and penché positions.
Stretch #14: Attitude
Prepare and position yourself as you would for Arabesque (stretch no. 13). While using a barre or chair for support, bend a leg behind you, then place the end of the band over the bridge of that leg’s foot. Carefully extend your leg up into an attitude position. From this stretch position, you can easily move between attitude, arabesque, and penché positions.
Stretch #15: Penché
Prepare and position yourself as you would for Arabesque (stretch no. 13). While using a barre or chair for support, bend a leg behind you, then place the end of the band over the bridge of that leg’s foot. Extend your leg up into first an attitude or arabesque position, then lean forward into a penché position.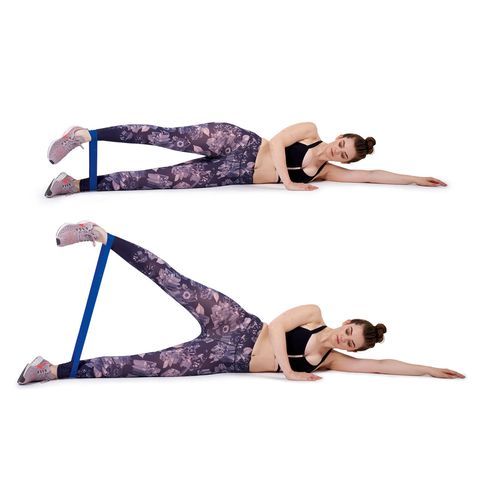 From this stretch position, you can easily move between penché, attitude, and arabesque positions.
The instructions above reference two different knots with your PlumBand. (A) is on the left, and (B) is on the right.
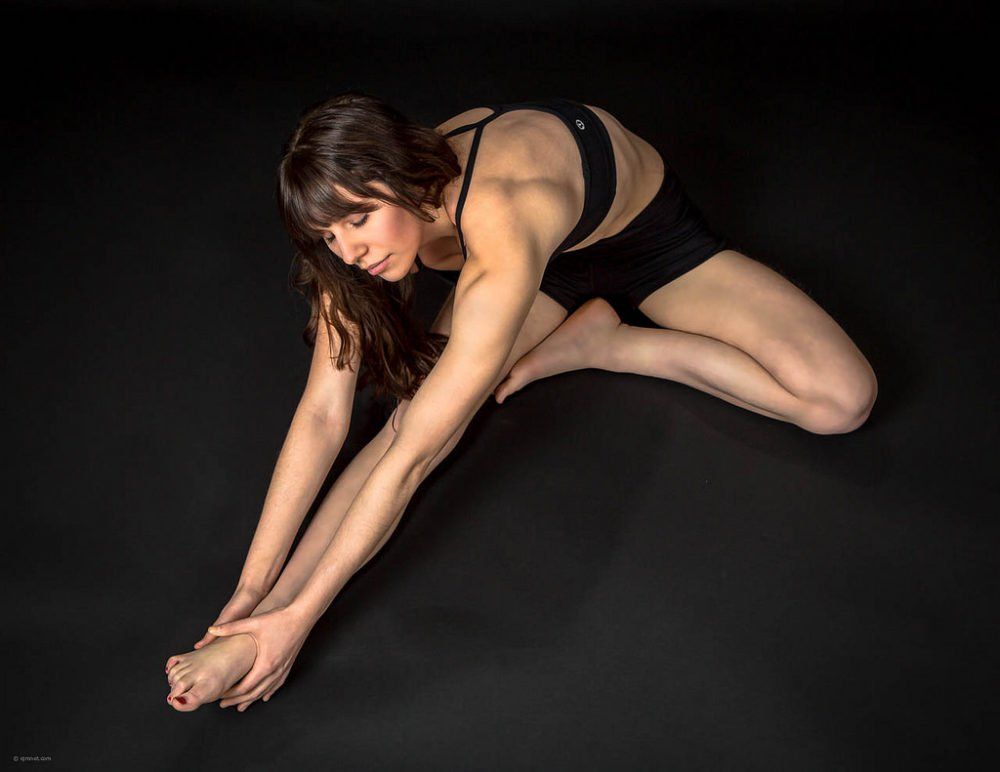
Stretching for dancers
- Legs and back preheat!
- slopes to the floor. Stand up straight and spread your legs, slowly bend to one leg, the second and to the middle. Try to reach the floor and hold for a few seconds
- Folds for longitudinal and transverse splits (with open legs)
- Deep forward lunges and their varieties (Runner). Hind leg straight straight line from hip. Front leg angle 90 degrees.
- Deep lunge with catching and raising the shin of the back leg. The back is straight, the body is even.
- Lunge and knee stance of the back leg and straight front leg. Smooth exit.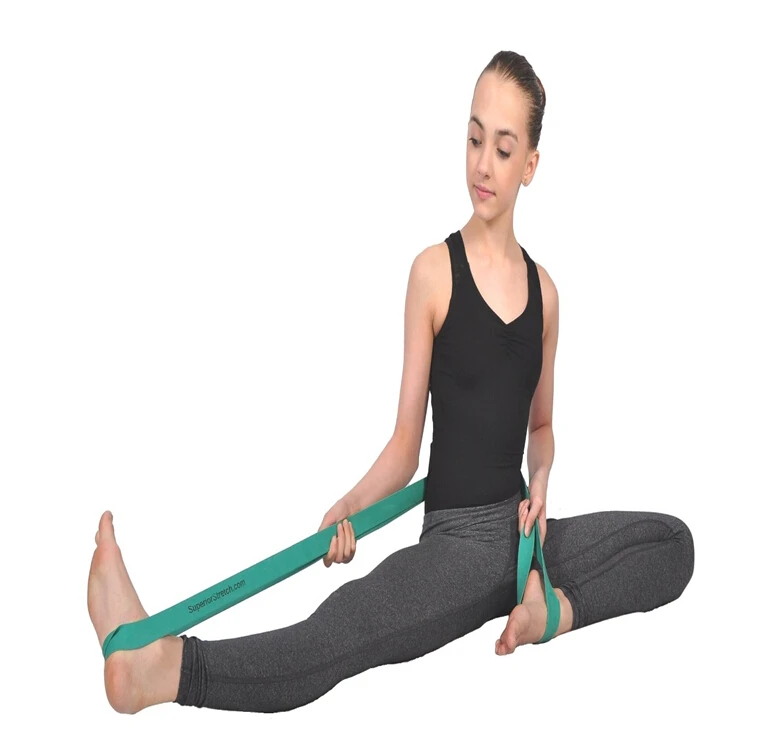
- Butterfly. Knee swings. Leaning forward.
- Single leg split.
- Sitting legs apart. Tilts to each leg.
- Horizontal stretch and on the floor. Rubber bands may be used. Variation on the back and on the side. Gently pull your leg up, gradually straightening. If you can, straighten your leg and pull it as high as you can. Change sides, repeat the exercise. You can use rubber bands.
- Power stretching in a standing position with a leg grip.
- Vertical twine. Wall workout.
- Classical stretching of the longitudinal and transverse twine.
Link on stretching 1
Providing exercises for longitudinal twine:
- We pull the legs to the legs in the standing position , stretch the popliteous tendons
- in the position of standing with our hands, we take the pelvis with the knee with the knee forward .
- Pull the rear leg in a lunge towards you
- Lunge forward (90 degree angle) + 2 elbows on the floor or hands
- fold with legs forward 40 sec.
- we catch the leg - one handle under the foot, the back is even. Next, without hands, hold with muscles
- wrap one leg in half twine and fold for 40 seconds.
- prone swings on 8 we catch
- standing tilt in the warehouse and do intensive back swings. At 8 we were detained and kept in a candle.
- lunge, the back is even, the knee does not go over the heel. Lunge and bend back leg.
- standing swings 3 sets of 8 reps
- get on 2 knees , back straight, bring one leg forward, tilt towards it, stretch the hamstring, then slowly move apart, shoulders are even, the heel of the back leg is looking at the ceiling! Two shoulders and two hips look straight at the front leg. Next, bend the back leg.
Lead up exercises for the splits:
- bow tie, bow tie
- 6th position pleat + shortened feet. Fold with a straight back to straightened legs. Crease with the foot in the pass and a twist in the body.
- legs to the sides, stepping forward with hands and fold forward, bending to the legs, then bending sideways
- wrap one leg behind us and lie down forward
- frog (legs form an even rhombus). Sit on your knees and spread your legs apart as far as you can. Resting your hands on the floor and keeping your back straight, bend over and stretch your arms forward. Lower your head and stay in this position for a few seconds. Rolls forward and backward.
- Side lunges. Lunges and going up without fixation and with fixation to the side with a deep stretch
- Stretching the legs to the sides while lying on your back.
- swing forward to the side (cross exercise)
- hands on the floor, slowly open your arms to the sides, sit on the twine. DO NOT turn the toes forward and knees, the back is straight, the legs form one straight line.
Tilt (water split):
- lying leg up to the side, change legs (8-10 times 3 sets)
- lying legs up, open legs to the sides for 8 counts
- lying legs in a butterfly, open in a transverse sword
- lying watch - one leg up - to the side - down, the second down, to the side, up (tighten the fingers!)
- standing the leg inverted, throw the leg into the transverse twine, grab it with your hand (The leg looks clearly at the ceiling! If it falls forward, this is a fold). Next, we try to remove the hand from the leg. Further, the output through the devlope of the leg without the help of the hand
- A difficult version of the arm to the sides, the body is tilted, we bring the leg up into a split in the air
- On the splits, we stretch to the legs with the opposite hand
- On the floor, lying down, we pull the leg in the knee towards us
- leg swing to the side in support of the hands in the stalls
- on the floor, leg swing and catch the leg with the hand while lying
types of flexibility and basic stretching exercises
Contents
A flexible body, elastic muscles and mobile joints are the key to beauty and health at any age. Flexibility is not only innate, but also an acquired quality. Without a doubt, every dancer should have it.
What is flexibility
Flexibility is the ability of the body, namely muscles, ligaments and joints, to give maximum amplitude in various movements and physical exercises.
Flexibility of the body depends on genetics, structural features of the joints, elasticity of the tendons. This indicator is also related:
- with age. Children and adolescents tend to be more flexible than adults;
- with floor. Women are naturally more flexible than men;
- with the level of physical fitness and fitness.
Types of flexibility as it is
There are several varieties:
- Dynamic flexibility is the maximum possible range of motion in a joint without any outside help. For example, standing against a wall, the athlete raises the leg to the highest possible level and holds it for several seconds.
 Also, the dynamic view is fixed when performing exercises, for example, with swings;
 - Passive (static) flexibility always exceeds active dynamic. It is achieved with an external impact on the joint. For example, the athlete or his partner holds the raised leg with the hand in maximum amplitude;
- Special refers to the mobility of specific joints. Different sports and dances require different levels of joint mobility;
- Anatomical. Habitual daily movements in terms of joint mobility are very limited. Use of the reserve of pledged flexibility up to 95% occurs only during special classes;
- Excessive flexibility is dangerous, as the stability of the joint is lost and the maximum stretching of muscles and ligaments is reached. This is fraught with injuries (dislocation, rupture, sprain).
Sign up for a trial lesson
Why flexibility is important for dancers
Good flexibility is the key to beautiful amplitude movements and speed of changing positions
A flexible body is more responsive, flexible and enduring.
Good amplitude in the work of all joints gives excellent coordination between all parts of the body.
The listed motor indicators are extremely important in dance. Movable joints and stretch-responsive muscles make the body supple, able to quickly perform complex movements and ligaments.
Flexibility can be improved by regular stretching.
What exercises help to develop flexibility
Stretching (from the English "stretching") always begin with a quality warm-up of the whole body. Pulling muscles and ligaments is possible only in a heated state. To do this, it is enough to perform a warm-up of 2-3 dynamic exercises, involving all the main joints.
Flexibility exercises:
- Neck . Grab your head with your right hand and press your ear against your right shoulder, stretching the left side of your neck. Lock the position for 30 seconds. Repeat with your left hand.
- Spine, thoracic .
 Starting position on all fours. Bend your back down and lift your head up, remaining in position for 10-15 seconds. Arch your back up, lowering your head down. Hold the position for another 15 seconds. Repeat several times at a slow pace.
 - Spine, posterior thighs . An exercise from the arsenal of yoga "Downward Dog". Place your feet and hands on the floor shoulder-width apart and bring them closer until you reach the body in an inverted V. The foot is completely on the floor, legs are straight. For greater effect in the position, you can sway slightly, creating a arch in the back.
- Spine, core muscles . Lying on your stomach, bend your knees, bring your feet to your buttocks. Wrap your arms around your feet and pull your legs back and up. The thoracic spine takes the maximum deflection. The position is fixed for 20-30 seconds.
- Hip extension .
 Lunge forward with your right foot and shift your weight onto it. Tilt your body forward and lean on your elbows. Maintain the position for up to 30 seconds. Repeat with the other leg.
 - Lateral Thigh Extension . Sitting on the floor, spread your legs as wide as possible. Place your body and arms on the floor as far as possible. Stay in position for up to 30 seconds.
Tips from experienced choreographers for stretching
Flexibility exercises are performed at a calm pace, the muscles are stretched until a slight tolerable pain appears. In each position, you should stay up to 20-30 seconds, holding the maximum amplitude of the stretch.
For general flexibility development, it is enough to stretch 1-2 sessions per week as a small addition to the main workout. The presented set of flexibility exercises is one of the possible options for this form of training.
If increasing the flexibility of the body is the main task, then it is worth doing stretching in the format of a full-fledged lesson.