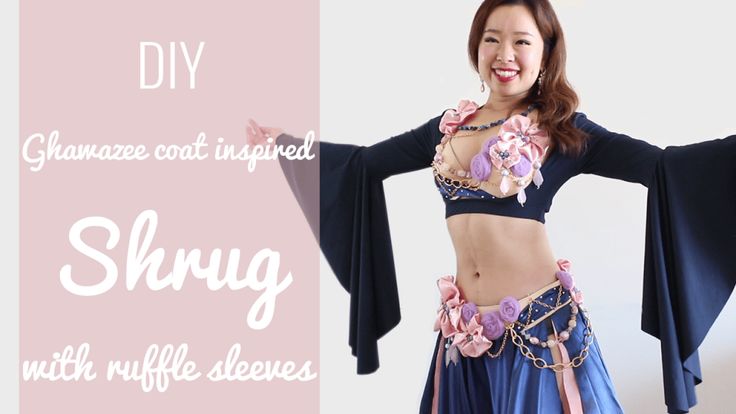
How to tie a belly dance hip scarf
24 Ways to Wear a Hip Scarf - belly dance easy costuming!
by Mao on in DIY Belly Dance Costume Blog, Uncategorized • 9 Comments
Every belly dancer has a hip scarf…. or two…. or 100 🙂
So I thought it would be really awesome if we can make more out of all these hip scarves we own!
As I was brainstorming how a belly dancer could wear a hip scarf, I realized something amazing….
A hip scarf can become not only a pretty layer around the hips, but a bra cover, belly drape, hood… and an instant shrug!
Have a look in this video 🙂 (and welcome to my living room!)
Want to make the bra and skirt I’m wearing in this video?
How to make the same bra 🙂
How to make the same skirt (scroll down the page to see the style options) 🙂
You can find a similar hip scarf here and here (affiliate links – if you purchase using these links, the store will pay me a small commission for referral. But no pressure 🙂 )
Or make your own hip scarf – check out my DIY hip scarf tutorial 🙂
24 Ways to Wear a Hip Scarf for Belly Dancing
#1. regular hip scarf
Wrap the hip scarf around your hips and tie in the front.
#2. layered hip scarf
Wear a belt or another scarf over #1.
#3. back drape
Tuck the hip scarf at sides of your skirt waistband and make it drape around your buttocks.
#4. front drape
Same as #3 except the drape is on your front side.
#5. side drape
Tuck the centre of the hip scarf at the back of your waistband, and tuck the ends at the front centre.
#6. side drape + belt
Wear a belt over #5.
#7. twist belt
Twist the hip scarf and wrap it around your hips.
#8. instant shrug
Drape the hip scarf around your shoulders, and tie the ends at the back.
#9. bra drape 1
Pull one end through at the back of the halterneck straps, drape the hip scarf over one wide of your bra, and pull the other end through at the back of the side straps.
#10. bra drape 2
Pull each end of the hip scarf through the shoulder straps at each side, adjust the length of the hip scarf to cover the bra, and tie the excess ends at the back.
#11. drape over belly 1
Pull each end of the hip scarf through the shoulder straps at each side, adjust the length, and tie the excess ends at the back of your neck.
#12. drape over belly 2
Pull one end through a shoulder strap, and tuck the hip scarf at the sides of the skirt waistband. Keep the hip scarf loose so it drapes nicely over your torso.
#13. drape over belly 3
Pull one end through a shoulder strap, and pull the rest through the other shoulder strap. Make the rest of the hip scarf drape over your torso, and tuck the end at the back centre of your skirt waistband.
#14. drape over belly 4
Tie one end at a shoulder strap, let the hip scarf drape over your torso, and tuck the other end at the back centre of your skirt waistband.
#15.
 instant top
Tie ends at the back of your neck and drape the rest over your chest.
#16. drape sleeves
Tuck the centre of the hip scarf at the centre of your bra. Twist one side and pull it through a shoulder strap. Take the rest around your arm and tuck the end at the back of your side straps. Repeat for the other side.
#17. torso drape + sleeve
Tuck one end of the hip scarf at the side of your waistband and tuck the centre corner of the hip scarf at the other side of your waistband. Pull the other end through the shoulder strap and drape the rest over your arm.
#18. arm drape
Wear 2 stretch armbands on your arm, and put ends of the hip scarf through them so it drapes in the middle.
#19. whimsical back drape
Pull hip scarf through the back of the halterneck straps about half way. Drape each end over your arm and tie the ends at the shoulder straps.
#20. tail
Tuck the centre part of the hip scarf at the back of your skirt waistband.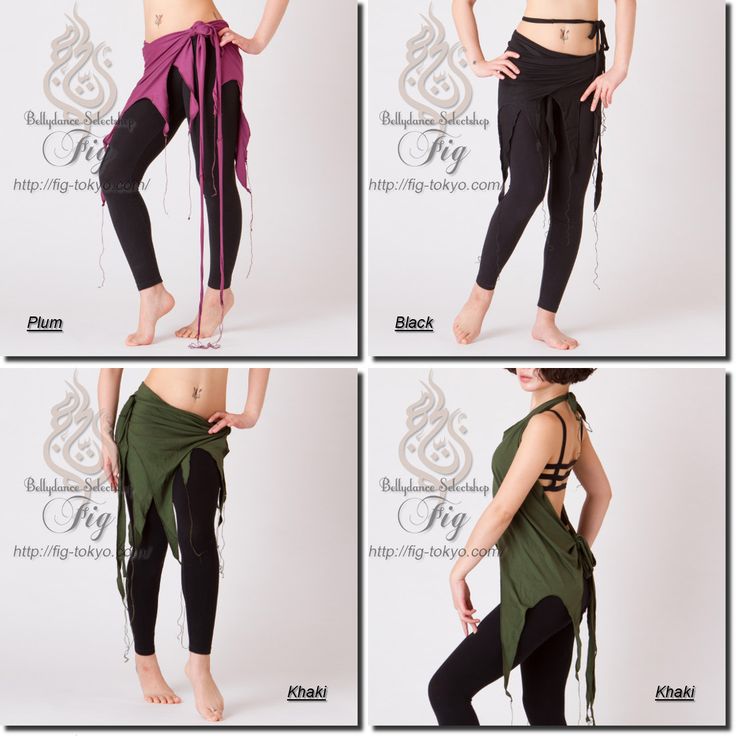 Adjust length and secure it with a couple of safety pins.
#21. headband
Twist the hip scarf and tie it around your head.
#22. head veil
Drape the hip scarf over your head.
#23. hood
Drape the hip scarf over your head like #22, then tie the ends at the front and throw the ends over your shoulders.
#24. modesty panel
Take the centre of the hip scarf and pull it through the slit of your skirt. Adjust length, and secure it to the inside of your skirt with a couple of safety pins.
Isn’t it amazing how many looks you can create out of 1 hip scarf?
You can also combine a few of these with matching hip scarves or even a simply piece of fabric!
If you want to quickly spice up your costume or have a uniform look for your troupe members or have a bit more coverage… I think hip scarves will be your best friend! 🙂
Got more ways to wear a hip scarf? Share in the comment below!
Want to make the bra and skirt I was wearing in above photos?
Here’s how to make the same bra 🙂
Here’s how to make the same skirt (scroll down the page to see the style options) 🙂
Speaking of coverage, in my next post, I’ll share with you DIY ghawazee coat inspired shrug! If you’re curious, be sure to sign up for my newsletter so I can let you know when it’s ready!
Click here to sign up and hear about the DIY shrug!
Oh, and if you’re new to costume making but curious to learn, get introduced to belly dance costume making and find easy ideas in my free course, Belly Dance Costume Making 101 🙂 Learn more here!
Thanks for reading, and keep sparkling! 🙂
P.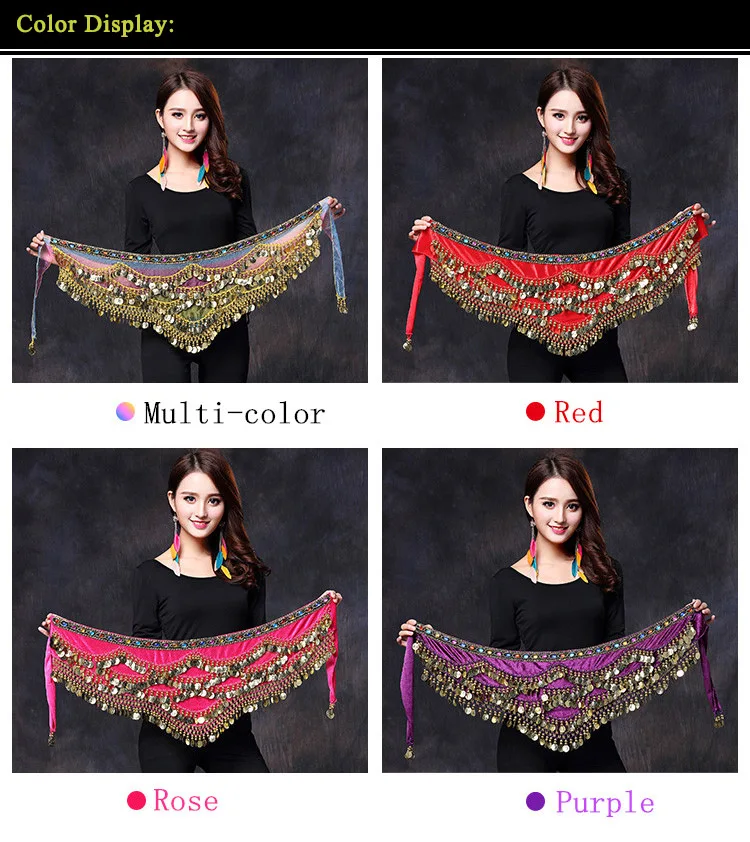 S. Pin & share this image for your next costuming ideas 🙂
Like what you read? Want to make more costuming bits yourself?
Sign up for my newsletter here and get my free email course, Belly Dance Costume Making 101!
|
Ask the Costume Goddess:by Dina Lydia
The QuestionDear Costume Goddess: I bought this lovely coin/beaded triangle belt. --Clueless On Coins
The Costume Goddess RespondsDear Clueless, You're right. Tying a beaded hip scarf risks damaging the scarf and produces an unattractive golf-ball-sized knot that doesn't hold securely anyway.
--The Costume Goddess
About the Costume Goddess
Costume Goddess PhotosTo view a photo gallery featuring pictures of Dina, costumes she has designed, and her friends, either click on the choices below or visit her web site:
The contents of this page are copyrighted 2009 by Dina Lydia. All rights reserved. Unauthorized duplication is forbidden.
Copyright NoticeThis entire web site is copyrighted. All rights reserved. All articles, images, forms, scripts, directories, and product reviews on this web site are the property of Shira unless a different author/artist is identified. Academic papers for school purposes may use information from this site only if the paper properly identifies the original article on Shira.net using appropriate citations (footnotes, end notes, etc.) and bibliography. Consult your instructor for instructions on how to do this. If you wish to translate articles from Shira.net into a language other than English, Shira will be happy to post your translation here on Shira.net along with a note identifying you as the translator. This could include your photo and biography if you want it to. Contact Shira for more information. You may not post translations of Shira's articles on anybody else's web site, not even your own. If you are a teacher, performer, or student of Middle Eastern dance, you may link directly to any page on this web site from either your blog or your own web site without first obtaining Shira's permission.
|
 But it's heavy
and it keeps sliding down my hips. I hate to tie it — that pulls
some of the beads and coins into the knot and I'm afraid they
will pull off. Help! Is there some way to keep it from slipping
without hurting the bead / coin work?
But it's heavy
and it keeps sliding down my hips. I hate to tie it — that pulls
some of the beads and coins into the knot and I'm afraid they
will pull off. Help! Is there some way to keep it from slipping
without hurting the bead / coin work?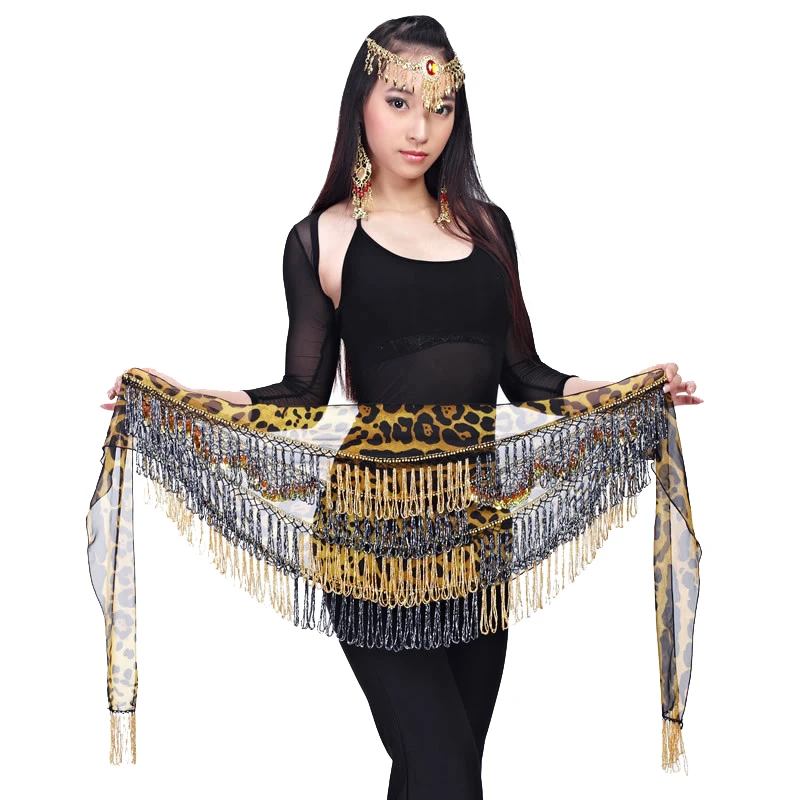 Using
this method, the scarf can't slip down and it looks much nicer
too.
Using
this method, the scarf can't slip down and it looks much nicer
too. She's
become expert as well in altering those troublesome ready-made
Egyptian costumes, and modifying designs to flatter individual
figures.
She's
become expert as well in altering those troublesome ready-made
Egyptian costumes, and modifying designs to flatter individual
figures.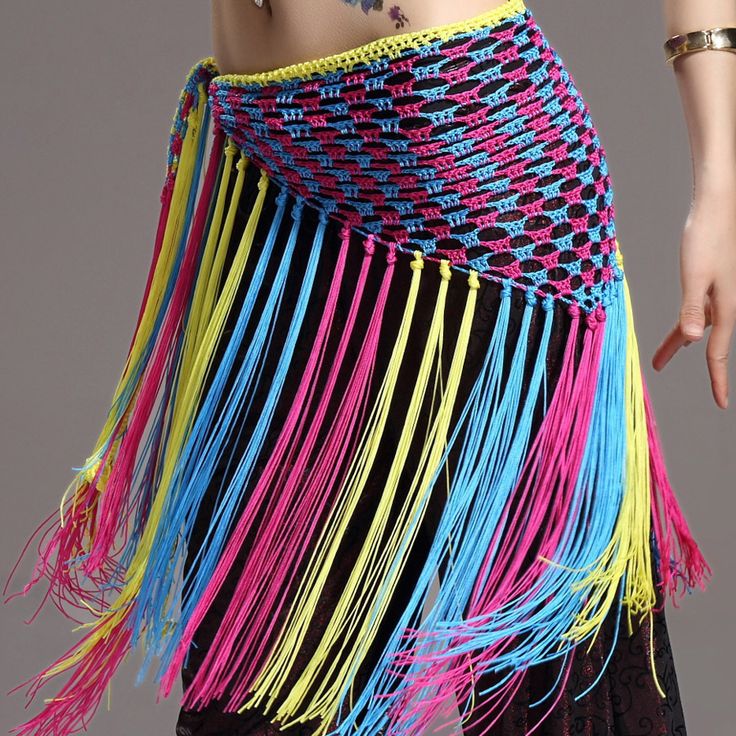 Advice on designing a belly
dance costume that will look flattering for your figure type.
Advice on designing a belly
dance costume that will look flattering for your figure type. 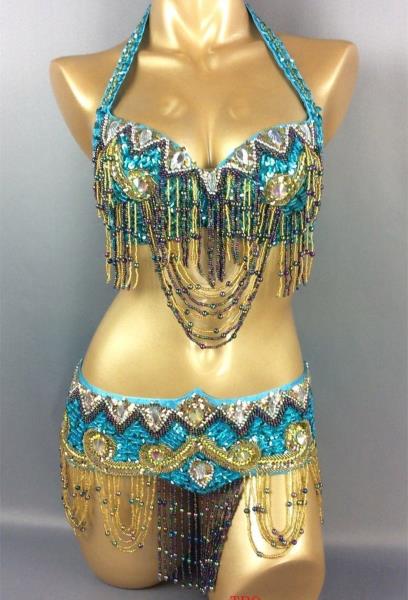
 Material from this web site may not be posted on any other web site unless permission is first obtained from Shira.
 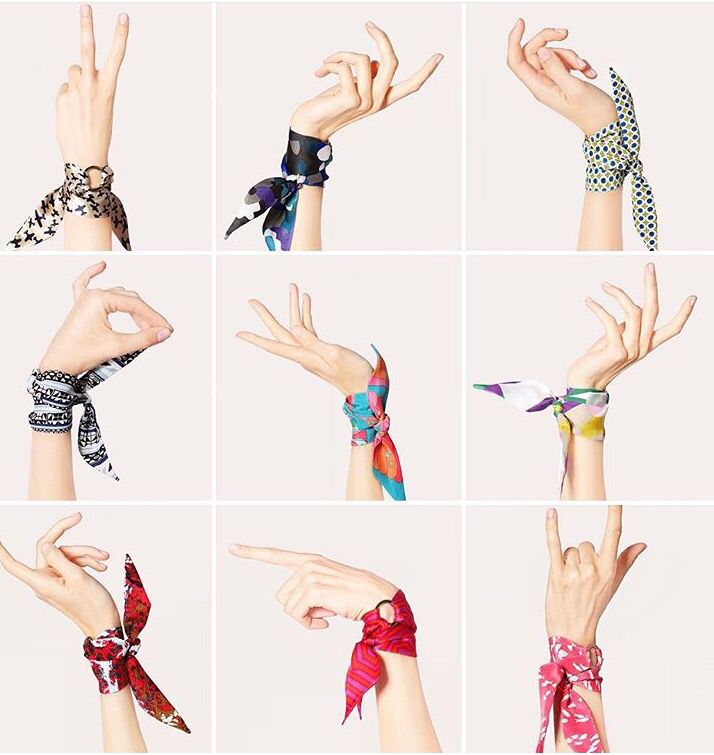 Click here for link buttons and other information on how to link.
do it yourself for belly dancing
Views: 11474
Belly dance is a beautiful act that not only fascinates, but also takes you to oriental fairy tales, with majestic palaces, fluffy carpets and enchanting music. Dancers with skillful movements of the hips, with a mysterious look and the most beautiful outfit, create these miracles.
Currently, oriental dances have conquered the female half of humanity so much that in dance schools and studios, you can meet representatives of various age categories. We, in our article, will tell you how to make your dance lessons beautiful and charming with the help of a handmade oriental dance scarf. nine0003
Openwork loincloth for oriental dances
Hip scarf, for oriental dances, is considered an integral part of the dance costume, without which the image of the dancer will not be complete.![]() A step-by-step description and a diagram will help you cope with the manufacture of an openwork accessory for classes, with your own hands. By the way, a knitted openwork scarf is not only an element of a dance costume, but it can also be added to a woman's wardrobe.
A step-by-step description and a diagram will help you cope with the manufacture of an openwork accessory for classes, with your own hands. By the way, a knitted openwork scarf is not only an element of a dance costume, but it can also be added to a woman's wardrobe.
We knit with our own hands nine0017
What could be more beautiful and sweeter than something that is made by one's own hands. Moreover, in independent creative activity there are no restrictions in the flight of fancy and all kinds of inventions. Buying such an accessory is not easy, but knitting it yourself is quite easy and affordable. They will help in the creative embodiment of the accessory: a hook, a diagram and a description for them.
To make an openwork accessory with our own hands, we need:
- Fine cotton yarn - 100 gr.;
- Hook - according to the size of the thread;
- Decor - golden beads;
- Matching threads and fine needle for sewing on beads.
Step-by-step instructions:
Abbreviations:
- VP - air loop;
- runway - air lifting loop;
- RLS - single crochet;
- CCH - double crochet.
There are two ways to knit a thigh triangle, decreasing or adding loops. nine0003
In our master class, the description is given in addition, firstly, it is much more convenient to knit in this way, secondly, you can’t go wrong with the size of the finished product, thirdly, the edges look more beautiful.
1 rub.; We collect 3VP and in 1PP we knit 5SN.
2 rubles; 3 runway and in the first loop of the base we knit 4 dc, in total together with the VP, we get 5 dc, sc in 3 dc of the previous row, 5 dc in the last loop of the first row.
3 rubles; 3runway, 4dc in the first loop of the base, sc in 3dc of the previous row, 5ch, sc in 3dc of the previous row, 5dc in the last loop of the second row. nine0003
4 rubles; 3 runway, 4 dc in the first loop of the base, sc in 3 dc of the previous row, 5 ch, sc in the arch of the previous row, 5 ch, sc in 3 dc of the previous row, 5 dc in the last loop of the third row.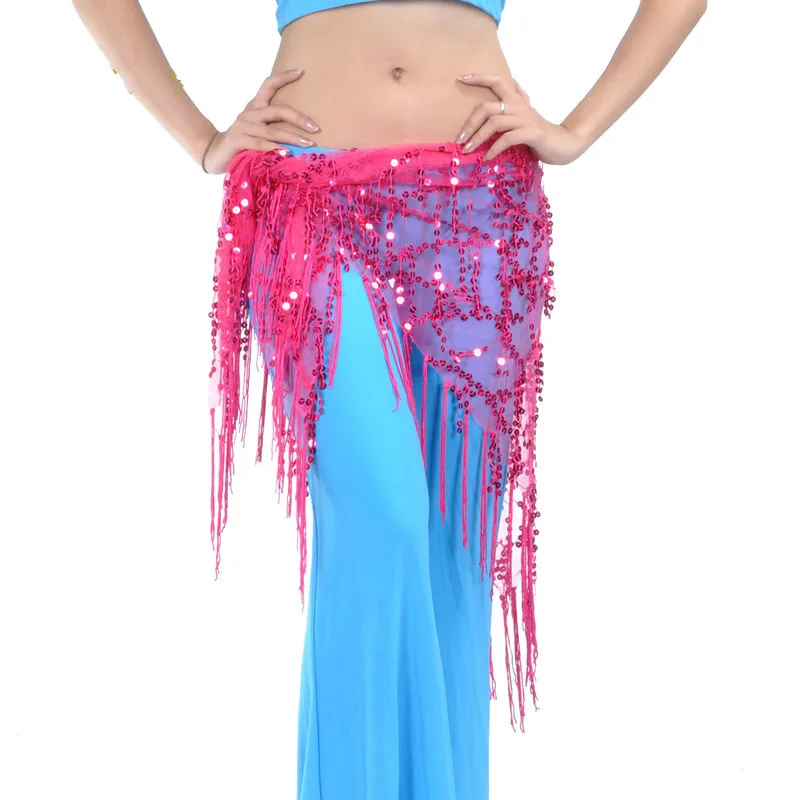
Next, we knit according to the scheme, do not forget to do 5 dc on the sides to expand the triangle.
We knit until the scarf reaches the desired size, for this it will be necessary to try on several times.
After the product has been tied to the desired size, it must be tied. nine0003
We tie the short sides of the scarf according to scheme No. 2, the long side - No. 3.
Description of tying a scarf according to scheme No. 2
1 rub.; for the basis of the pattern, as well as smoothing the edge of the product, it is necessary to tie the RLS on all three sides of the product.
2 rubles; RLS in the first loop of the previous row, in 4P before. row we knit 7SSN, * in 4P before. RLS row, in 4P before. row we knit 7СН *, repeat from * to * to the end of the row.
3 rubles; CCH in the first loop of the previous row, 3VP in 4P before. row we knit 7SSN, *SSN in RLS before. row, 3VP in 4P before. row we knit RLS, 3VP *, repeat from 8 to * to the end of the row. nine0003
Description of tying a scarf according to scheme No. 3
1 rub.; knit completely RLS.
2 rubles; 2VP, in the second column from the beginning of the row we knit * RLS, 3VP, RLS, skip one loop before. row *, then knit from * to * to the end of the row.
The pattern will be dense, but beautiful, the binding is necessary so that the thread of the product does not stretch or deform.
Sew beads around the edges of the loincloth for decoration.
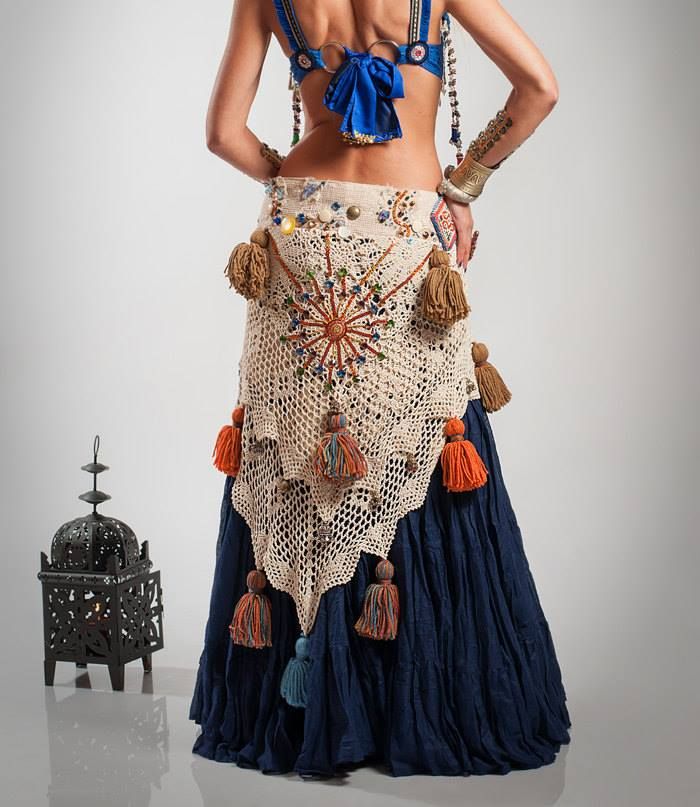
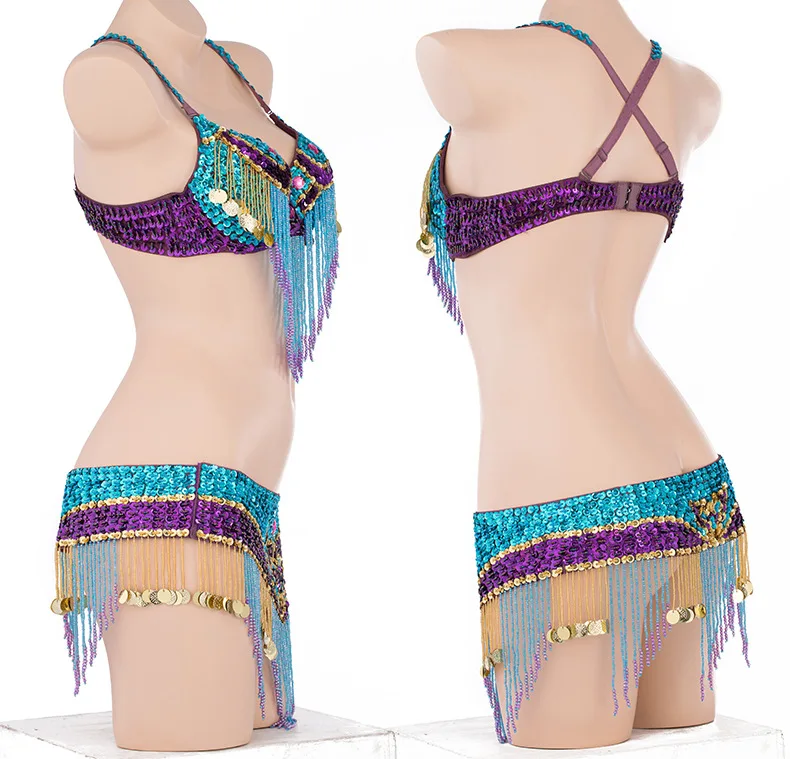
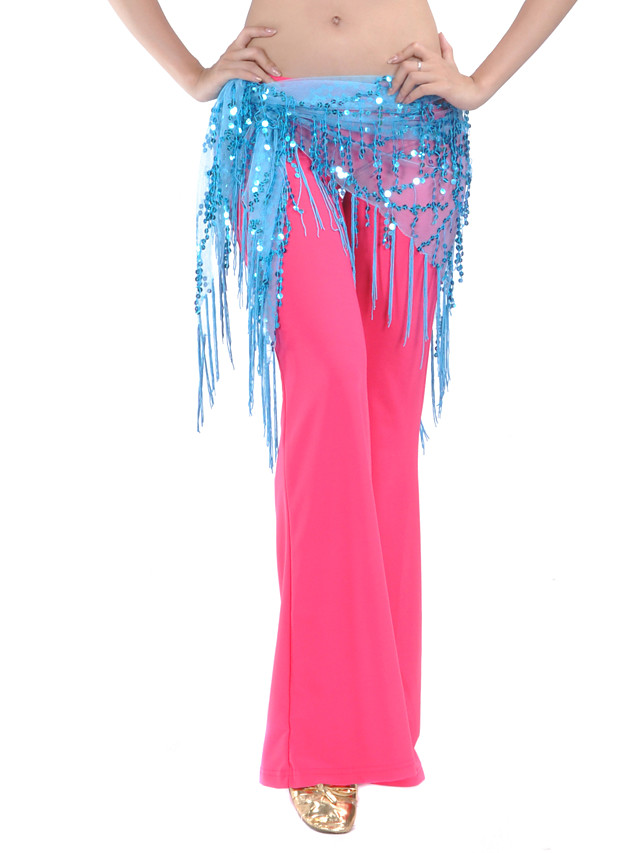
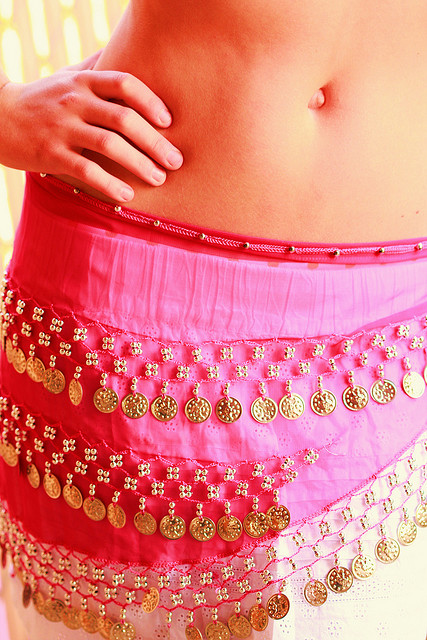
Belly dance scarf
Consider the shape of belly dance scarves.
Square scarf
The classic standard scarf is made of chiffon and has the following parameters:
- Width -1.10 cm;
- Length - 2.20 cm.
For dancing, you can sew a hip accessory according to your own taste and preference. The parameters of the product can vary from 2 to 3 meters in length and from 0.8 to 1.5 meters in width, depending on height, dance style and arm span.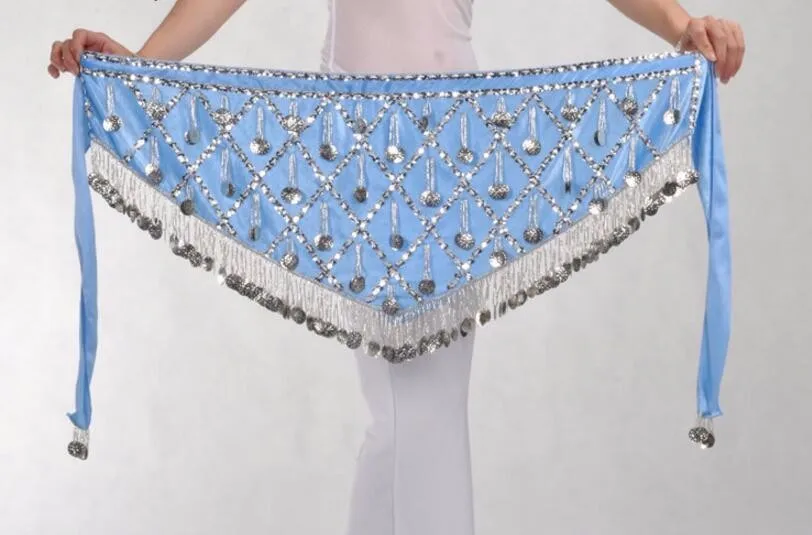 Keep in mind that a short accessory will not allow free movement of the arms, so the length of the fabric should be 25 cm longer than the span of the arms on each side. nine0003
For a dance where the fabric is wrapped around the neck, its length must be at least 3 meters.
Scarf with wings
Dance accessory - in scope resembles butterfly wings. In fact, this is a classic rectangle, cut in half, but not completely. “Wings” are also sewn from two squares 1.10x1.10 cm, the corners of which are fastened together with jumpers made of beads or braid. The upper corners of the wings are attached to the back of the neck accessory.
For ease of dancing, the lower edges of the wings, which hang freely, are rounded off. The squares themselves can be changed in size, at your own discretion. nine0003
Semicircular scarf
Half round accessory, this classic rounded rectangle. Moreover, the corners are rounded only on both sides along the length. How much to round the corners depends on personal preference.
A handkerchief with rounded corners is in great demand in various shows, for the convenience of its use, the fabric is attached to the bracelets not on the hands.
Round scarf
The name itself speaks for itself. The product has the shape of a circle, which has a radius of 2.20 cm. A round accessory is cut in half and wings are made from it. And if you increase the diameter of the fabric and insert sticks along the edges, then the scarf turns not only into beautiful butterfly wings, but with such additions it is very convenient to dance. nine0003
For ease in dancing, attach the fabric to the "collar", and add, if necessary, bracelets.
Tube scarf
Trumpet scarf, unusual belly dance accessory. It is usually used for show programs and for dances with specific movements. The sections of the scarf are trimmed, as a rule, feather boas.
To make such an accessory, you need to take chiffon, crepe de chine or silk, a fabric that will easily fly and flow beautifully during rest. It must be at least 4 meters long and 1.5 meters wide. nine0003
For a trumpet scarf, the fabric must be sewn along the entire length, the short sides should be left unsewn. Finish the edges of the fabric with an overlocker or a zigzag machine.
For decoration use: sequins, beads, coins.
Handkerchief with chopsticks
This accessory is based on the semi-circular version. On the straight side of the material, special sticks are sewn on both sides. For beauty, the sticks must be wrapped with a cloth and stitched on a typewriter. The length of this product varies depending on the desired length of the sticks. nine0003
Corrugated fabric will look very impressive in this version. Wing flaps, turns and rotations will look very beautiful and typical for this accessory.
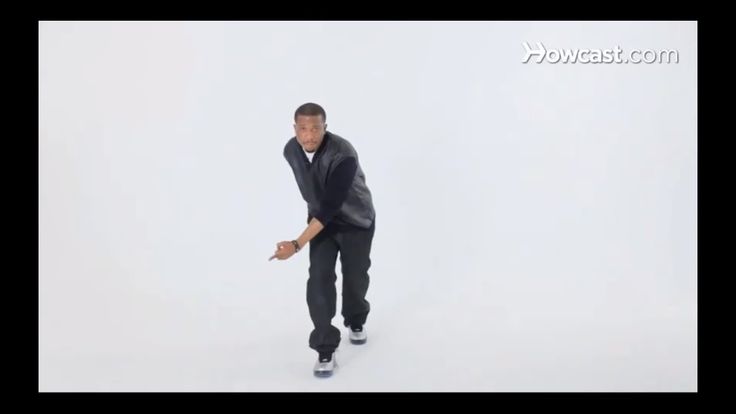
Related videos: Belly dance - “Gives a uniform and safe load, strengthens the pelvic muscles, improves posture, improves mood. Three simple moves will make you the queen of any 45+ party.
 Is there a video. »
 I have been practicing fitness yoga for many years. nine0003
Wrote about this recently. Criticized to smithereens.
This sport is traumatic, has a lot of contraindications, does not contribute to weight loss, does not give cardio load.
As an alternative, I suggested that beginners try soft Qigong, an ancient Chinese gymnastics. I also did it for quite some time.
But I completely forgot about belly dance! It's even better than Qigong. I'm telling.
______________________________________
At the hotel I took part in all kinds of sports animation.
I also tried dancing.
Zumba and Latina did not work for me right away, I have no sense of rhythm.
But belly dance unexpectedly submitted to me, despite the complete absence of the stomach.
And largely due to the presence of such a necessary attribute as a scarf - monisto. The instructor handed them out to us.
This accessory is not only for beauty, but also helps to move correctly, allowing you to control the process of vibration. nine0003
That is why all beginners need it.
I didn't manage to do most of the moves, but I did the hip shaking and figure eights.
The husband was delighted.
On my next visit to Turkey, I purposefully rushed to dance lessons.
And I bought 2 scarves for myself and a friend:
Belly dance
______________________________
At that time (10 years ago) belly dance lessons became popular and were held in many fitness clubs. nine0003
We signed up and started visiting regularly.
By the way, not everyone had scarves.
These classes do not require any special expenses at all.
Any shape. Shoes are not needed.
Here is my fitness look:
Belly dance
How the classes were structured:
- Warm-up
Simple and effective, similar to a yoga warm-up, but more rotational movements
- Separate movements
This is also not difficult, they repeated the same thing after the coach many times
- Connections
Connected together 2 or more elements, for example, rotation of the hips and lifting of the arms. It seems - is nonsense, but requires coordination. Each movement individually turns out perfectly, but together - some into the forest, some for firewood
- An attempt to dance
Only the instructor did it. And we, like chickens, trampled along the wall
- Stretching
Cooldown is the most enjoyable. Sip what you need at the end.
We went for several months, we liked it. But the dance never happened.
Soon this fitness direction was closed as unpromising.
Suddenly, instead of dancing, they did Pilates and fashionable classes with huge balls.
It was a real torment.
I even composed a slogan about our Pilates - Lena is like a log, and Natalka is like a stick. nine0324
But we didn’t work out with balls at all, I almost died under one of these, heavy, infection. One lesson was enough to understand that this is not mine.
We barely waited for our subscriptions to end.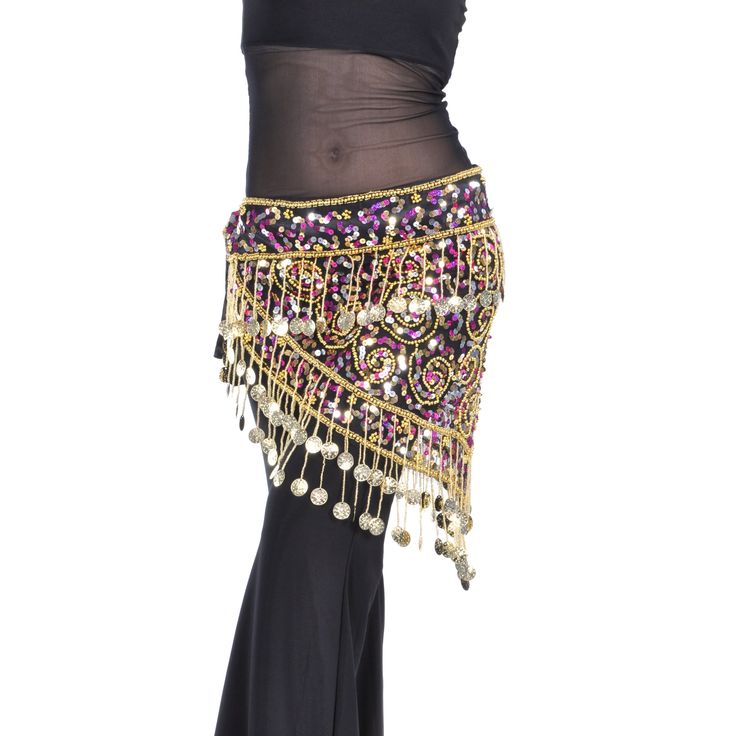
Lena hasn't done anything else since then, and after some time I became interested in yoga.
But before that, I found a dance lesson on YouTube and started practicing at home.
__________________________________________
There are a lot of dances on YouTube.
NO!
Most of them are quite complex.
The video begins simply, everything is clear for about 15 minutes, and then, when the movements need to be connected, I start to slip.
DOES NOT WORK AT ALL. NO COORDINATION. I can only watch and applaud.
I managed to find a course for beginners from scratch. There are many series, but I took only the FIRST LESSON. nine0003
And even I adjusted it to fit my modest abilities.
Using a primitive video editor, I reduced the lesson from an hour and a half to 40 minutes.
I left only a detailed description of the most basic movements, and only those that I could repeat.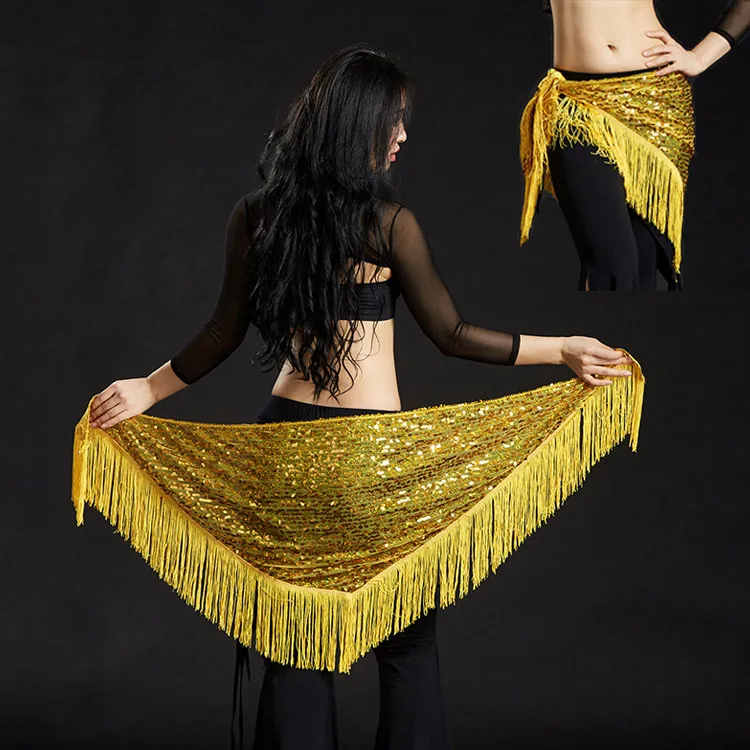
The movements that did not work out for me, I cut out. And removed the link at the end.
Thus, I did not get a dance, but EXERCISES. nine0003
They do not require a lot of space.
I'm standing in front of a computer monitor where the girls demonstrate and pronounce each element to the music.
To see myself as in a mirror, I installed a webcam program.
So I see both the dancers and myself. Yes, I also have the opportunity to record my progress on video.
This is what my place of study looks like:
nine0002 Belly dance. Video lesson
I am in the lower right corner.
So, as the charming host says, let's start with a warm-up!
WARM-UP
This is a complex of simple exercises, but they are all adapted specifically for the future dance. Duration 6 minutes.
Incendiary oriental music sounds.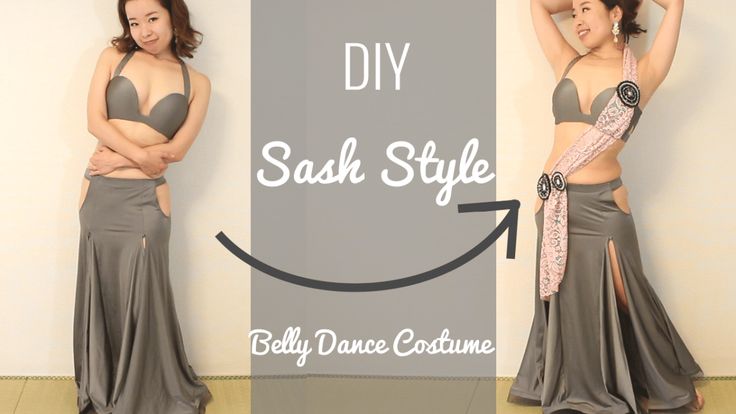 Go!
Go!
- We start dancing right away. Walking in place, toes do not come off the floor. Then the same with turning the hips back and forth and the simultaneous smooth movement of the arms: up, swing overhead and down:
Hip twists is actually already a dance, we step over in place and twist the booty. The beauty!!
_____________________________
Followed by:
- Alternate tilts of the head towards the shoulders
- Circular movements of the head
- Lifting the shoulders up, dropping down. Excellent warming up of the shoulder girdle and back
- Circular movements of the shoulders. This is generally a bombing exercise for posture, strengthening the muscles of the back and chest. nine0030
The arms are extended down along the body, and the shoulders make a circular motion, pushing the chest forward and back. Shoulder joints work so well!
- The lower part of the body is fixed, and the torso is shifted to the left and right.
 Then the same with forward tilt:
Belly dance. Video lesson
- More movements of the upper body. The legs are motionless.
The shoulder girdle is in the same plane, the chest is forward, the shoulders are parallel to the floor.
First we move the body to the left and right, and then in a circle: to the side, back, side, forward, etc.:
On the upper right picture, the girl made a mistake, one shoulder is lower than the other (shown by the arrow)
I'm generally doing it wrong. I have shoulders in all planes. And one went down, and went back. Full twist. But it's beautiful if you don't know that these are mistakes. nine0003
- Now circle the hips.
The top is motionless, the spine is the axis, the hips are in a circle: forward, sideways, back, sideways. Describing a circle:
Very beautiful, as if an invisible hoop can be rotated.
- Tilts to the side and in a circle: left, forward, right.
- Leg bends
- Knee warm-up.
Half-squat, rest your palms on your knees, perform circular movements., then crouching, then straightening up, forward, sideways, back, well, in a circle, you understand? nine0003
- Foot warm-up: circular movements, pulling up and straightening the fingers.
- Wave your hands, calm your breath.
Warm-up is over.
If you are already tired, then you can wrap up.
If not, let's move on.
DANCE MOVEMENTS
This part of my training film takes 30 minutes. nine0003
- The lesson starts with steps.
These are dance steps, not difficult at all, but they look beautiful.
The legs are crossed with each step. Small squat - plie - leg to the side - we grow up and take a step to squat, then the other leg to the side:
A couple of steps forward, then back. Actually swinging on the spot
- Hand movements.
Here I want to pay special attention.
During the dance, the arms should almost always be kept in the air, parallel to the floor. And it's hard.
Here I am doing plie steps:
Belly dance
Muscles really get tired. In the photo on the right, you can see my hand sagged.
But that's what fitness is for, to endure and strengthen muscles!!
But it is very pleasant to make wavy and rotational movements:
Smooth up and down movements with hand rotation:
Belly dance
It's beautiful, but it's more difficult to combine with leg movements.
It reminds me of a coordination exercise when one hand has to do circular strokes on the stomach, and the other - to describe circles in a horizontal plane above the head.
- Breast movements. nine0030
This is the hardest and most tedious part. A lot of energy is expended, while the effect is not too (for me) visible.
Raise the chest up, drop it sharply. And so many times.
To the music and fast.
Pull forward and pull back:
Then more circular movements, moving from side to side, undulating movements. nine0003
The torso is really pumped. And posture, of course, posture is maintained.
- Now my favorite. Shoulder shaking.
It's like the gypsies. Here you can relax.
First in place, then with steps forward on half-toes, then with turns to the sides and squatting in a plie.
Now we got to the main point:
- Hip movements.
Horizontal impacts.
Sharply forward first left, then right thigh.
Shoulders should be still, chest forward.
I got it wrong. Again warped, yellow arrows shown.
Belly dance Belly dance
But then - a favorite, rocking. Just twist the booty, also called twist . Monisto rings, delight!
Followed by hip braces to the sides, twist braces , vertical strokes (sharply raise - lower)
Belly dance
And my favorite moves are eights. Horizontal and vertical.
And here is the promised bonus video.
I filmed this a long time ago, now it's nice to look at myself in my youth.
These are my favorite moves to make up an elementary dance:
Here I am dressed simply, in sportswear.
But imagine dressing up a little, tying a monisto on your hips, plucking a couple of glasses - and I am the queen of the 50th anniversary of the director of a motor transport company))) STRETCHING.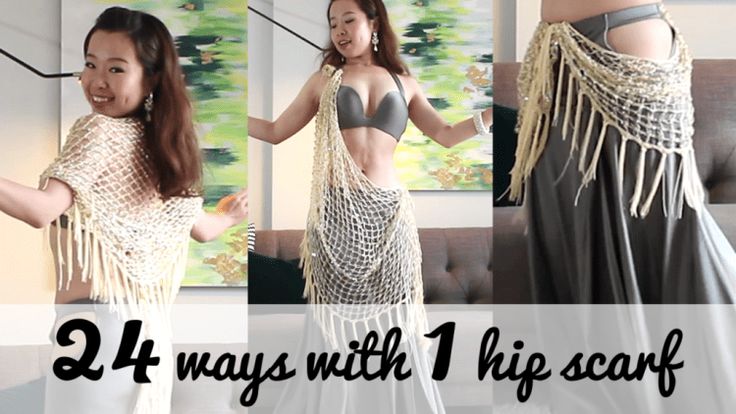
The final part lasts about 5 minutes.
The exercises are:
- Tilts and circular movements of the head. Slowly, we pull the muscles of the neck.
- Stretch the arms by pressing on the elbows. In front of you and behind your head
- Stretch your sides one by one, stretch your arm up
- Bend your back and arch it like a cat, only in a semi-squat position
- Tilts to the side and forward with pull-ups
- For balance exercise - press the heel to the buttock and stand on one leg
- Well, we calm the breath by slowly raising and then lowering the arms.
Excellent, quiet exercise.
They are safe and do not require much space, even if you do it in an elevator) DIFFERENT FEATURES OF BELLY DANCE.
Oriental dances have very ancient origins.
They helped a woman to become beautiful, healthy and hardy in order to attract men and give birth to many children.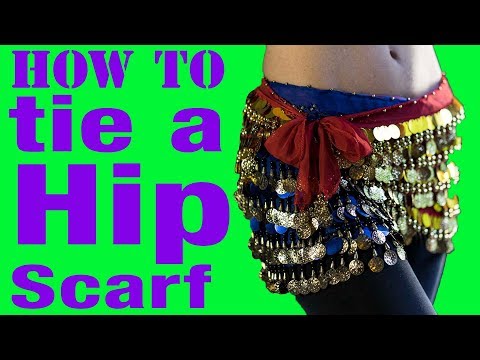
Their main elements are so necessary for ladies. nine0003
- Shaking - vibration, excellent massage of all muscles. Improves blood circulation.
- Rotation and work with the hips - strengthening the muscles of the pelvis, including the small one.
- Work of the chest - useful for chest muscles and strengthening the spine.
Another interesting feature.
In most types of gymnastic exercises, both strength and stretching, the joints work on "flexion-extension". nine0186
We constantly perform such movements in everyday life.
But rotational movements and twisting are not typical at all and are not used often.
Meanwhile, they are very useful for the joints, improve their mobility, promote the production of joint fluid.
Qigong gymnastics coach often told us about this. There are also many exercises for the rotation of the joints.