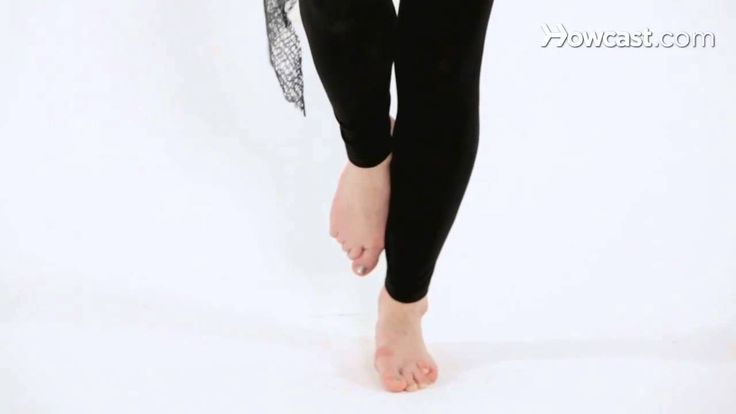
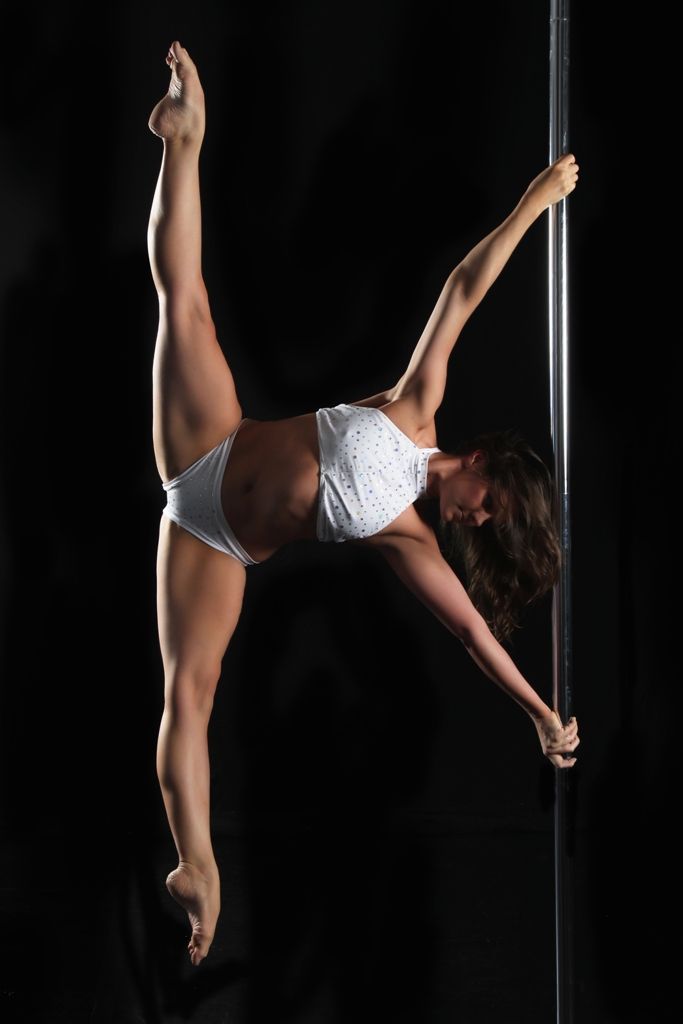
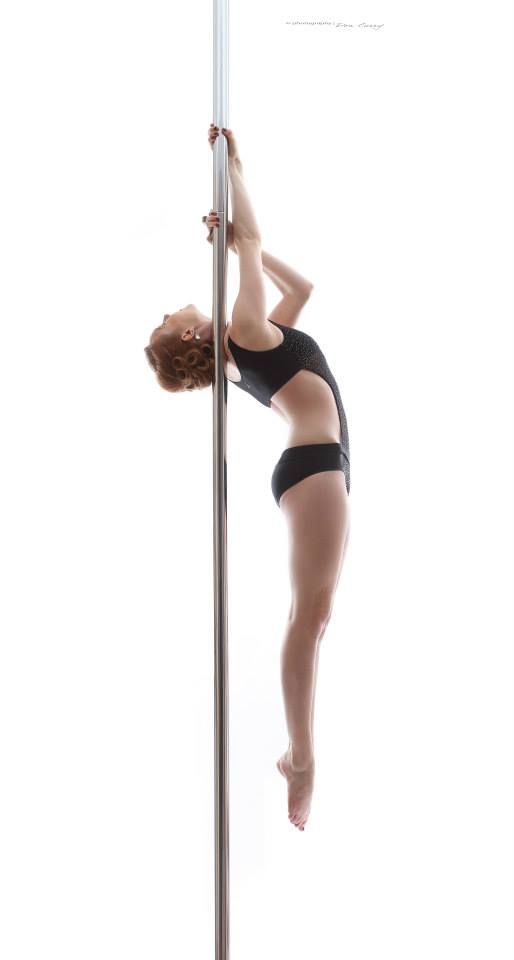
How to improve grip strength for pole dancing
How To Improve Grip Strength & Choose Grip Aids
Today's article is inspired by a question I see a lot on social media.
"I just started pole dancing and I'm slipping a lot - what can I use to help?"
Then come the hoards of pole dancers recommending their favourite grip aids to help you out.
It’s not the average pole dancer that I worry about taking advice on dozens of grips to help with the problem of slipping and sliding
It's the beginners like the person in the quote, the newbies. Anyone in their first 6 months to 1 year of pole dancing.
For this stage of your pole journey the advice is not as helpful as it may first seem.
It's just too soon to be thinking about grip aids, not that you shouldn't be using grip aids at all.
Further along in your pole journey you may make that decision to try a few out and settle on a favourite aid to your pole sessions.
That’s why I’ve written this guide to grip, from grip aids to improving your grip naturally.
There's so much more you can be doing to help your grip problems than reaching for the best quick fix solution in a bottle.
Not that we don't all have our go to solutions for particularly slippery days!
(This page contains affiliate links – my full disclosure statement is available {here})
What You Will Learn
- Why Grip Aids Are Not For Beginners
- How New Moves Affect Your Grip
- How Different Grip Aids Work
- The Best Cross Training Activity For Pole
- What To Use If You Are Especially Sweaty From Nerves
- My Favourite Grip Aids For A Selection Of Grip Slip Scenarios
- How To Improve Grip Without Grip Aids
- Reasons Why Your Grip Aid Is Failing You
Discover Why You Shouldn't Reach Straight For The Grip Aid
Whenever you learn a new move you are often nervous.
Those nerves that can stem from being the newbie in class in front of everyone or the prospect of learning a new spin or trick you haven’t tried before.
You won't be surprised to hear that these pressures can make you sweat more than usual.
This is no reason to reach straight for the grip aid though because it's completely normal.
You should dry your hands on a microfibre sweat absorbant towel and move on, because using tools like grip aids and grip gloves leaves you treating the symptom instead of the root of the problem.
The more you persevere with your new move the less daunting it will become. Your body will grow stronger with every class and with more control and strength comes less slip and slide through natural progression.
For this reason I tend to tell beginners not to rely on grip aid too much. Not because it can’t help or shouldn’t be used but because I know that your grip will improve naturally.
Why Do I Get Better Grip But Lose It Trying New Moves
So you decided to go it alone. You've gritted your teeth and battled on without grip aid.
Your spins are getting good, you're moving with more grace every time you try and sliding is becoming a thing of the past, for now.
Then all of a sudden, the sweaty palms are back!
“What’s that you want me to do? Something new?”
With uncertainty about a completely new move you’ll start to sweat it again. You might be using a new hold to grip the pole or perhaps some new muscle groups which aren’t as strong.
Combine that with the fear of falling over face first as your new spin sends you twirling towards the floor and we're living a sweaty nightmare again, right back where we started!
The body sweats when we are nervous or afraid, it's completely normal and there are a few ways you can prevent anxious sweating.
If this does happen though, it's a great idea to use a grip aid that will dry out your hands or even mask sweat entirely until you are more confident.
It's not so bad as your grip naturally improves to use a little grip aid if you're trying a new move while you get your head around the correct positioning.
Once you have things figured out you should practise without grip aid as much as possible.
How To Prevent Sweaty Palms
Sometimes we sweat so much when learning a new move that it becomes pretty tricky to master.
It’s possible to remove some of that moisture temporarily so that you can nail a move and then continue to work on perfecting things you are more comfortable with as it wears off.
If you desperately need to rid yourself of sweaty palms after persevering for a while, there are a few basic grip aids that dry your skin and don’t technically provide any extra ‘stickiness’.
You can use a simple climbers chalk, or liquid chalk which both contain drying agents.
Then there's also dry hands solution or clinical antiperspirants designed to treat Hyperhidrosis.
If you do try these out at an early stage in your pole journey I would recommend using them sparingly in times of need and not to become reliant on them.
If you suffer from hyperhidrosis you may need to go one step further and invest in a pair of pro-tack grip gloves.
Don't worry about becoming dependent on these because if you have a doctors note to say you suffer from hyperhidrosis these gloves will still be allowed in competition.
You will have a problem spinning on a static pole wearing these though.
Grip Aid 101: Different Grip Aids & How To Use Them
I will be providing detailed reviews on the following grip aids soon but for now I’ll just note down the best conditions to use each one for you.
These are a few that I have tried and quite like for different environments.
Some grip aids such as Dirty Girl Poletice, Kleinerts Dry Body Wipes (also available at MightyGrip.com) and Driclor prevent sweating entirely after applying to freshly washed hands.
This is great if you suffer from Hyperhidrosis, or are experiencing sweat caused by nerves.
Driclor is a clinical strength deodorant that will prevent sweating and Dirty Girl Poletice is a Silica based product that acts as a mask to prevent sweating.
To use them you wash your hands, shower and clean the area you intend to apply the product. Once applied they will mask sweat and prevent sweating in the areas you have applied them.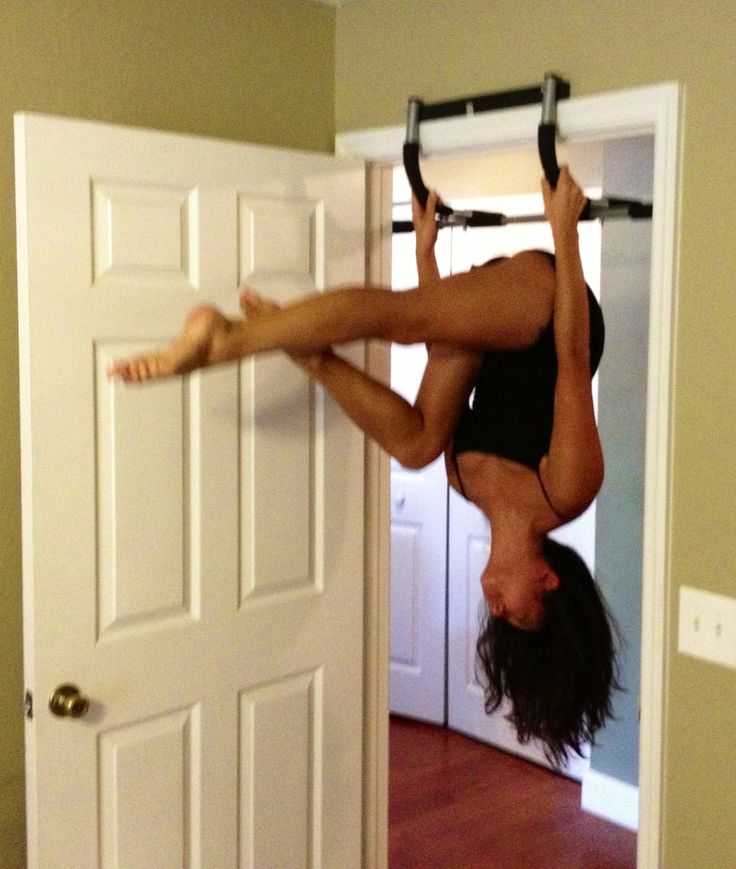
While this is great in hot climates for pole practise I did notice that blocking sweat in one area (which is designed to keep us cool after all) would increase sweating in other areas of the body.
Mighty Grip is a thermoplastic powder. To use it you add a little to your hands and rub your hands together.
As the powder heats up with your body it creates a tacky feeling. The key to this product is heat, so the hotter you are the better, although it doesn't tackle sweaty palms.
That can be a little problematic because obviously the hotter we get the more we sweat.
Mighty Grip have come up with a new special formula for pole dancers that activates at a lower temperature though. That makes it perfect for cold winter mornings too!
Dry hands is an alcohol and Silica based grip that is non tacky and non greasy. Rather than providing a sticky grip it repels sweat and water leaving your hands dry for the pole.
It does leave a residue on your hands and pole that needs to be cleaned off though!
At the moment Dry Hands is my go to grip aid. If my hands are sweaty I dry them off and add a few drops of Dry Hands. While it sometimes needs a little re-application it does build up on your hands so you need less as your pole session goes on.
It totally dries out my hands allowing me to pole in peace and I suffer from Dishydrosis - a rare form of eczema on the hands caused by Hyperhidrosis.
I actually don't mind the re-application so much because it only takes a couple of drops of product and doesn't leave me feeling sticky or greasy afterwards, just dry and ready to pole!
To use you should apply a few drops (not much!) to your hands and spread across your palms, but don't be tempted to rub it in or you might actually rub it off entirely.
This is my favourite grip aid 🙂
Stickum and other sticky grip aids are often Resin based and provide a gluey tacky layer to your hands to help you literally stick to the pole.
Resin based grip aids and other sprays that create a similar tack such as hairspray are banned in most competitions.
I've practically spent most of this post bad mouthing this stuff - but it isn't bad really. I've used it once or twice when I've been having particularly bad days for grip and had mixed results.
While I managed to pull off some strength moves that I would normally struggle with after using this stuff, it did feel a little like cheating.
That's not to say my muscles weren't working but you can definitely feel the difference in a secure grip, which is why you should be working on improving it naturally.
I also found that it is terrible in extremely sweaty conditions, it somehow felt more slippery than before putting any on at all.
Climbing chalk is possibly the cheapest and most basic grip you can find and while it is effective it does need re-application between uses which means it isn't great for competing.
If you're just practising for fitness in your studio though, it works great! Its active ingredient is Magnesium Carbonate which is a drying agent that is also found in Liquid Chalk.
It's used by many athletes world wide who need a more secure grip on their holds, from climbers and gymnasts to weight lifters.
Aside from the usual active ingredient Magnesium Carbonate, the liquid product adds alcohol into the mix which has quick drying and de-greasing qualities for even better grip.
Pro Tack Grip Gloves are a sure fire way to prevent sweaty hands coming between you and your pole.
If you don't feel comfortable wearing gloves in case your hand slips out you can also apply grip to your hands before you put them on to ensure they are secure.
In my experience as long as you measure your hand correctly and buy a tight fitting glove you should be just fine, I haven't experienced any slipping.
I prefer the pro tack gloves to the original tack but they both provide a sturdy grip on the pole.
The pro tack gives me that extra secure feeling, and as long as you have measured up your hand size correctly you should have no problems using these gloves, I even found them sturdy in my handspring.
You can also get pro-tack products to protect your wrists, inner thigh, upper arm, ankles and the back of your knees.
The knee pads are great for when you are working up a sweat with floorwork and want to transition smoothly between floor and pole.
I found them great in hot conditions where a lot of active floorwork would lead to quite the problem if you then wanted to do a simple leg hang.
So if you're feeling hot and are super sweaty behind the knees you can't go wrong with these knee pads.
Get a 10% online discount on all Mighty Grip products with CODE: LOVEPOLEKISSES at www.mightygrip.com
Do You Know About These Moisturising Solutions?
These little gems are not just amazing because they finally allow us to moisturise (hallelujah!) they're great if you're suffering from dry thighs, armpits, arms - you name it!
If it's too dry and smooth and causing you to slip off the pole, just apply a tiny bit of one of these moisturisers for instant stick.
To use them you just apply, wash hands of any product residue, wait 5 minutes and you're ready to go - as long as you're poling alone.
You must be wary, if you're sharing a pole and you use one of these less than an hour before pole class they can sometimes make the pole slippery for other users!
Glycerine is the active ingredient in Body Shop Body Sorbet and Dew Point that makes our skin more sticky.
You can sometimes find this in other moisturisers too but it's important to make sure you find an oil free one. Dew Point itself comes in three different levels of tack from fairly light to ultra sticky!
I just love the Body Sorbet, I can now moisturise in peace and know that I won't go slipping and sliding from the pole as a result of caring for my skin. I have two scents in my arsenal at the moment; Strawberry and Virgin Mojito! Yum 😀
An example of a moisturiser I used to use before Dew Point & Body Sorbet grew in popularity was Essential Healing moisturiser by Vaseline Intensive Care which had a similar effect.
If you would like to try Dew Point for yourself feel free to claim your exclusive 10% reader discount by entering coupon code 'gylovesdew' at the checkout! http://dewpointpole.com/
Have You Made Sure Your Pole Is Clean?
If you do decide to use a grip aid I would recommend keeping some pole cleaning products handy, either a special pole cleaner or just a half water half rubbing alcohol mix solution will work fine!
Keeping the pole clean with rubbing alcohol before use is also another way to ensure you have maximum grip in your sessions. Just put the solution on a cloth, clean the pole down from top to bottom and dry with a microfibre cloth.
The last thing we need when we're trying to grip on to the pole is last sessions leftover residue or in the case of a group class some unthoughtful person's slippery moisturiser.
Why Your Warm Ups Are So Important
I'm sure you've heard it before but I'll say it again in case you forgot. A warm pole is a grippy pole, as is a warm body.
You should already be having a thorough warm up to get your body ready for your pole session, to keep you energised and motivated throughout your session and also to reduce the chance of muscle fatigue and injury!
If you haven't had the chance to do your warm ups on the pole then before you start you should do lots of spins with it set to static to get it nice and warm.
Another reason a warm up is good for you other than to prevent injury and increase stamina is that after a good sweaty warm up there's no better grip aid around! Just let the sweat dry on your skin for around 5 minutes and you'll be good to go, this is the free alternative to Body Sorbet and Dew Point.
So get yourself a great warm up routine that really makes you break a sweat and be ready to stick to that pole like glue!
Warning: Grip Aids You Should Try To Avoid!
Some grip aids that are Resin based or come in a spray form are banned in most competitions.
It's for that reason alone that I suggest avoiding them if you ever wish to train to compete, because it's very easy to become reliant on them.
Just a few examples of grip aids banned at competition are; Stickum, Rosin and Gorilla Grip.
It's not only the grip aids themselves that are regulated either, the method of application should be only to the body, as lots of competitions forbid applying any products to the pole itself.
It's so easy to become reliant on grip aids, and to be reliant on something as sticky as these guys is a hard habit to break.
How to Improve Grip Without Grip Aids
If your ultimate goal is to be totally grip aid free with an independent grip you are in luck. The more you train your grip and the more advanced you become, the easier it is to grip the pole and perform even with sweaty hands.
Your natural grip improves with a combination of grip strength, upper body and core strength.
You'll see improvements as you rely less on your hands to hold you and begin to incorporate more of your arms, shoulders, obliques and core to help out with the heavy lifting.
Rock climbing for example, is a fantastic cross training exercise for pole not just because of the amount of core strength it develops, but for grip as well.
Pro rock climbers measure their grip pressure and can often grip onto the tiniest of holds between two little fingers!
To help the process along there are a few things you can use to work on improving grip by targeting your hand strength specifically.
Grip strength comes from your forearms as well as your hands, and these tools will strengthen both your wrists and your forearms which will also help to prevent injury!
Some of the tools you can use are; A Powerball, Grip Strengthener and Hand Master Plus (or elastic band).
The Handmaster Plus is the only grip strengthener that allows you to work both the squeezing and opposing muscles in your hands using only one tool and The Powerball is a unique strengthener that works on finger strengthening, wrist and forearm exercise.
The Powerball is used by holding it in the palm of your hand and keeping the ball spinning by rotating your wrist, the faster the ball spins the more resistance you will feel.
It's often used to help with rehabilitation of broken bones, carpal tunnel syndrome and repetitive strain injury.
For the purpose of this post I'm just going to show you how to use a simple grip strengthener and elasticated band to exercise your hands effectively.
The muscles in your hand are just like every other muscle in that we need to warm up, strengthen as we stretch and work evenly on both sides to prevent muscle imbalance and injury.
That's why I'm going to give you some quick exercises to warm up and a few to work in the opposite direction to the squeeze you will be training with your grip strengthener.
To warm up you should stand or sit with your arms straight out in front of you, open and close your hands spreading your fingers as wide as you can each time ten times in front of you, remember not to flop your arms!
Now lift your arms above your head pointing up to the ceiling and open and close your hands in the same way another ten times, next put them straight out either side of you and repeat the stretching motion of your fingers ten times again.
You should repeat this again starting with your hands back in front of you and go through the same cycle but this time only doing eight repetitions of the movement.
Once you have worked back around to the starting point again you'll go again but with six repetitions this time, and then four and finally two until you are finished.
Using your grip strengthener is super easy, depending on the strength you have gone for.
Ideally you want to buy a grip strengthener that you find challenging but that you can fully close for maximum range of movement to work all those muscles!
Here in Costa Rica I didn't have that luxury as we barely have online delivery so I had to make do with what I was given at our local supermarket...
As you can see these are hollow and made from a pretty cheap and nasty plastic that might cause me some discomfort while training, but they have a good level of resistance.
I made do because I have to for now but you should definitely go with a more comfy grip, there are lots to choose from on Amazon!
To use the strengthener you just need to hold it firmly in your hand, squeeze the two handles together, hold for around five or six seconds and then release as slowly as possible.
You can do as many repetitions as you can before you struggle but try not to push past that to avoid injuring your hand.
We'll cool down by stretching the fingers in the opposite direction.
You can do these exercises using either a hand master plus or an elastic band, heck I couldn't even find one of those in the house today so in these pictures I'm using a strong hair tie.
Choose a band with a good level of resistance that suits you.
You can either keep the band around the tips of your fingers holding them slightly curved to keep it in place or if you struggle with the band popping off a lot you can loop it once around your forefinger to complete the exercise.
You won't need to do that if you use the hand master because it comes with loop holes to put your fingers through 🙂
With your fingers in place in your chosen band or grip strengthener you're going to open them as wide as possible and close again. Repeat this stretch slowly ten times stretching as far as you can and then do five faster ones.
Repeat that routine twice on each hand after using your grip strengthener.
You only need to do this workout once a day to see an improvement and it's so simple that it can be done while you sit enjoying your favourite TV show in the evening!
Update! Do you have any spare pole extension pieces lying around at home?
If you do, you'll want to check out these awesome grip and forearm strength exercises using your pole extensions from Sarah Scott!
Try them out, they're harder than they look 😉
Final Thoughts
Ok, so to wrap up I just want to clarify, I do use grip aid and I'm not saying that you should be avoiding it completely.
Let's recap the main reasons your grip aid might not be working for you:
- You've been treating the symptoms of your problem instead of the root cause
- You are using the wrong grip aid for your circumstances
- You have become reliant on and built up a tolerance to your grip aid
- You suffer from an extreme form of Hyperhidrosis
- You haven't warmed up your body or the pole enough
- Your pole needs cleaning
- You haven't been actively training your grip strength
My personal circumstances (40 Degree Celsius heat mainly!) mean that I need a good sweat blocker and something to keep my palms from sweating, but I always actively work on grip strength as well.
Without improving your own grip strength you will likely find that your grip aids constantly fail you.
My go to grip aid time and time again and personal favourite at the moment is dry hands and before I tried dry hands I would use basic climbing chalk to absorb any excess moisture.
So while you can use a grip aid if you find it absolutely necessary, I'm a firm believer that you should do your very best to keep them at arms length if possible, at least as a beginner while you build up more grip, upper body and core strength 🙂
It's also important to remember that my favourites listed here are great for my personal situation.
If I go outside in the heat I'll need a sweat blocker like Dirty Girl Poletice, if I visit the UK I'll need to put some Body Sorbet on for moisture and grippier thighs.
The moral of the story is, wherever you are and whatever your circumstances, you'll need to put grip aids to trial and error for yourself because there just isn't a one size fits all solution, it all depends on you and your personal preference.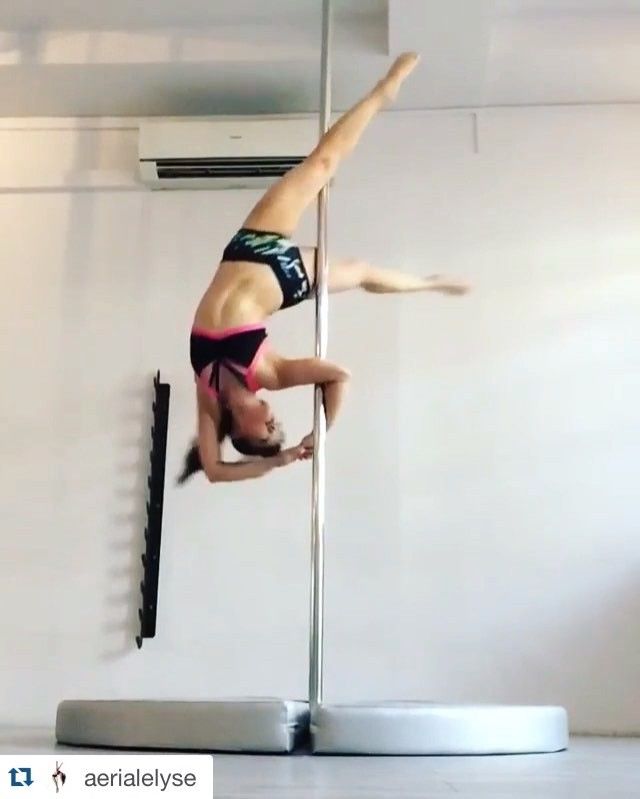
Grip Strength Conditioning | PolePedia Pole Dance Exercises
Grip strength is going to help you in every area of pole whether you’re doing a simple spin, holding yourself up in Janeiro, or trying to master your tabletop. We’ll take you through a variety of grip strength exercises that will help you achieve your goal moves, as well as the different type of hand grips you’ll be training. Typically, pole dancing incorporates a mix of Crush and Support grip. It is, however, important to strengthen all types of grip to keep the muscles in your hands and forearms balanced.
If you’re not interested in learning about the different types of grip you can train, skip right to the “Pre-Strength Training Advice” section.
This post contains affiliate links. By clicking one of these links and purchasing something, you don't pay a penny more, but a portion of the proceeds goes to PolePedia so we can continue to curate and develop free, in-depth articles, guides, and video tutorials just like this one. For more information on this, please see our Revenue Disclosure.
Contents
- Small Wins Are Important.
- Classic Types of Hand Grip
- Crush Grip
- Open Crush Grip
- Pinch Grip
- Support Grip
- Hand Extension
- Pre-Strength Training Advice
- Dead Hang
- Dead Hang with a Towel
- Plate Grips
- Extensor Training
Small Wins Are Important.
If you don’t track your progress, it can be discouraging. It’s easy to ask, “What’s the point?” Not being able to see those small wins will make you less likely to continue with your conditioning routine, especially if you are poling from home.
If you want to see a noticeable improvement, it’s important to track everything. Set a timer, commit to a timeline, and commit to a goal.
For example, we’ll say you’ve committed to doing a dead hang every morning while your morning coffee is brewing; that’s your timeline. You’ve set your goal at 2 minutes. Start your timer, start the hang and record your time. See how much you improve in a week!
Crush Grip
You might see a Crush Grip at the gym while someone is lifting weights – they’ve got their full hand wrapped around the handle and they’re tightening their fingers and palm into it to keep it in place.
In pole, you’ll use it for a variety of things from simply grasping the pole during a spin or hold. This is the most common grip in many pole dance moves because you’re actively holding yourself up or to the pole.
Open Crush Grip
Open crush grip is nearly the same as crush grip. It is common where the object is bigger than the hand can wrap around, which means different muscles are engaged than with regular crush grip.
In pole, there won’t be too much of a use for it, unless you have incredibly small hands and you’re working with a 50mm pole. There is, however, a myriad of uses outside of pole and it’s still important to strengthen open crush grip to maintain overall muscle balance.![]()
Pinch Grip
Pinch grip is commonly used for holding things where any crush grip is impractical. Imagine you’re holding a book by the spine; there’s nowhere for your fingers to wrap around, so your thumb naturally goes to one side while the rest of the fingers are on the other and you squeeze it between your hand to keep it in place.
On the pole, this grip is rarely used, if it is at all, but it is still important to exercise it so you maintain muscle balance.
Support Grip
This grip can be seen when someone is hanging from something such as a bar, or over the edge of something, and all their fingers are to one side. This is commonly called Cup Grip in pole.
In pole, this is used in a variety of power spins, floorwork, and many on-the-pole tricks that require a cup grip, such as shoulder mount.
Hand Extension
A Hand Extension help you let go of something in a controlled manner. These are the muscles that engage when you want to come out of a hand grip.
In pole, this is used any time we come out of a hand grip, even if it’s something as simple as a steparound spin.
Before we get into the exercises, there area few points we want to touch on. With any exercise, it’s always important to begin with discretion; if something hurts, don’t do it! You know your body best. Only push yourself to your own limit, not to someone else’s.
- Always remember to warm up with some stretches!
Giving everything a good warm up will help prevent strain and injury on your muscles. Stretching will also help you keep all your wonderful mobility even as your strength increases. Here are a few quick stretches you can do anywhere you are:
- Hold your arm straight out in front of you and, with your other hand, pull all your fingers back to achieve a nice stretch. Hold it here for a few seconds and move on to each individual finger, from the pinky to the thumb. Reverse and go from the thumb to the pinky.
 Repeat on the other hand.
- Get into tabletop position with your knees hip-width apart, place one hand in front of each knee, palm facing away from you (fingers towards you.) Lean back so you’re sitting on your heels and you can feel a comfortable stretch through your wrist and forearm. Hold it for about 30 seconds.
- Circle your wrists. You can be standing, sitting, laying down – wherever you are. Go as slowly as you want and try to reach the maximum motion you can with these circles.
- Don’t over-do it.
Low-weight reps are fine. Remember, your body repairs muscle tissue during rest periods, and that’s when you’ll see strength gains. If you don’t allow your body that rest period, you’ll tire yourself out, and potentially cause injury.
- Don’t forget the rest of your body!
Strengthening just your hands won’t be the miracle answer to weak holds and overall strength. Good grip doesn’t stop in the hands, but extends to the wrist, elbow, shoulder and upper back. Give everything a good stretch and remember to work out the rest of your body too!
Dead Hang
What You’ll Need:
- A pullup bar
What This Trains: Support Grip
The Dead Hang is a rather easy grip exercise that will, as a bonus, help relieve and compression soreness in your spine.
It’s important to note that your body below the chest is limp here; your hands are engaged and engaging your hand will naturally engage your forearms. Your shoulders are engaged and down to avoid injury and pinching. Everything below that is “dead weight.” You can even see in the image how Destynnie’s shoulders are engaged while the rest of her body is relaxed.
Here’s What You Need to Know:
- Stand underneath your pull-up bar. Engage your shoulders down.
- Grab the pull-up bar in support (cup) grip, keeping the shoulders engaged.
- Remember, support grip has all fingers on one side.
- Let your body below your shoulders hang loose, keeping your feet off the ground.
- You’ll feel the weight transfer to your fingers and upper palm.
- Hang here for 1-2 minutes, or as long as you can.
Dead Hang with a Towel
What You’ll Need:
- A pullup bar
- A towel or small blanket
What This Trains: Crush Grip
This variation of the dead hang helps develop your forearm muscles as well as your triceps and lats. You’re probably thinking “Really? This is what you’re going to show me?” but give it a try. It’s a lot harder to do than it looks, and it’s so beneficial for your support grip! If you thought pull ups were tough in the beginning, get ready for pull ups 2.0!
Here’s What You Need to Know:
- Thread your towel through the pull-up bar.
 Be careful not to have the weight against any joints in the bar.
 - Mine has a joint in the middle, for example, so my towel is over one of the hand grips.
- Engage your shoulders down and grab the towel in a crush grip, thumb wrapped around the opposite side from the rest of your fingers.
- Let your body below your shoulders hang loose, keeping your feet off the ground.
- Hang here for 1-2 minutes, or as long as you can.
Plate Grips
What You’ll Need:
- A semi-heavy book or weight plate.
What This Trains: Pinch Grip
This exercise focuses more on the fingers than anything else, which is beneficial to any grip. You can have a strong hand grip but if you’re still weak in the fingers, you’ll feel a weak grip on the pole. This is one easy way to exercise your pinch grip wherever you are.
Here’s What You Need to Know:
- Pull your shoulders back and stand up straight.
 Grab a weight plate or a heavy book.
 - Try it with a low weight and adjust accordingly.
Extensor Training
What You’ll Need:
- A rubber band (multiple if it’s not tight enough.)
- If you don’t like the feeling of a rubber band or want the “right tools for the job” then try extensor resistance bands.
This is an important part of grip strength training. Extensor muscles are the opposing muscles we use to grab onto things, so they won’t be as strong, and therefore need a lower weight when you’re training your grip here. If you can’t let go in a controlled manner, it doesn’t just look sloppy, but you risk putting strain on tendons and muscles in your hand and forearm. Luckily, wrist extensor exercises are an easy thing you can do anywhere you are, and it’s kinda fun, too.
Light wrist extensor exercises are also one part of rehab exercises for tennis elbow (also called lateral epicondylitis) which many pole dancers experience in their pole journey because of weak extensors and forearm muscles. Keep those forearm muscles healthy, girls!
Here’s What You Need to Know:
- Wrap one or two medium-sized rubber bands around all your fingers, with your hand in a pinch grip.
- Open your fingers, extending them out and to the sides.
- Repeat 5-10 times or until lightly fatigued.
- If you need more resistance here, you can change to a lower size rubber band or add more of the same size band.
This website uses cookies to improve your experience. To continue browsing, please accept the use of these cookies. Cookie settingsACCEPT
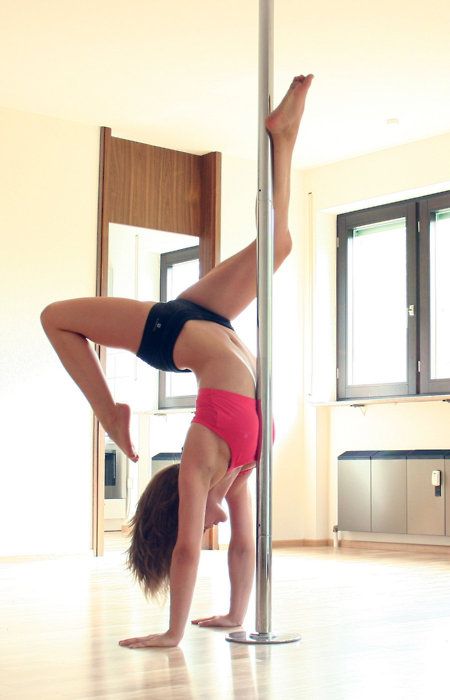
How to improve the effect of pole training - 5 recommendations
Pole dance classes are interesting and effective. They help improve physical fitness and stretching, lose weight, improve posture, become more confident, relaxed and graceful. The combination of strength and cardio loads, exercises for the development of flexibility and plasticity gives good results, which appear after the first month of training. However, they can also be accelerated if you follow a few simple tips.
Here are five top tips to make pole dancing even more effective.
Drink plenty of fluids and watch your diet
These are the simplest and most common tricks that really work. Scientists say that an adult should drink 1.5-2 liters of pure water per day. Compliance with this rule allows you to maintain water balance, normalize metabolism and, thereby, accelerate the loss of excess weight.
A balanced diet also plays an important role in the weight loss process. Keep track of the number of calories consumed, the ratio of proteins, fats and carbohydrates. Eat more often, but in small portions. In no case do not resort to debilitating diets and starvation.
Stick to your workout schedule and don't skip classes
Your workout schedule is designed to get the most out of it. A missed workout takes you back a few steps and slows down the process of achieving the desired result at times. In addition, it is important to give all your best in class and not feel sorry for yourself. Training that does not take place at full strength is practically useless and does not allow you to develop in the right direction. They, of course, also provide physical activity, but its level is insufficient.
Stick to a daily routine
This advice is good for everyone, not just pole dancers. A full night's sleep, compliance with the regime of work and rest have a beneficial effect on appearance and well-being. For a rested body, training will be much easier and more productive. You will be able to cope with heavy loads, which means that you will further increase the effectiveness of Pole dance.
Try water treatments
Visiting a bath or sauna is good for health, beauty and well-being (unless, of course, you have no contraindications for health reasons). The healing properties of these procedures have been known since ancient times, so they will be an excellent addition to the comprehensive fight against excess weight. Another good remedy is a contrast shower. If you resort to it daily, metabolism, blood circulation will improve, the skin will become tighter and the appearance of cellulite will decrease.
Exercise daily
On non-scheduled days, don't sit idle: exercise, take time to stretch, or do simple exercises to keep yourself in good shape. Stretching, by the way, should also be done after each Pole dance workout. It removes krepatura (muscle pain) and significantly increases the effectiveness of pole exercises.
8 exercises to help you prepare for pole practice
Pole practice: is it possible to practice without preparation?
In theory, yes, but in practice... “Training on the pole requires stretching, flexibility and strength,” says Polina Volchek, two-time world champion in pole dance, ex-soloist of Cirque du Soleil, artist of the Leningrad Center troupe ". “That is, of course, you can try to do without them, but the number of elements that you can perform in this case will be significantly reduced.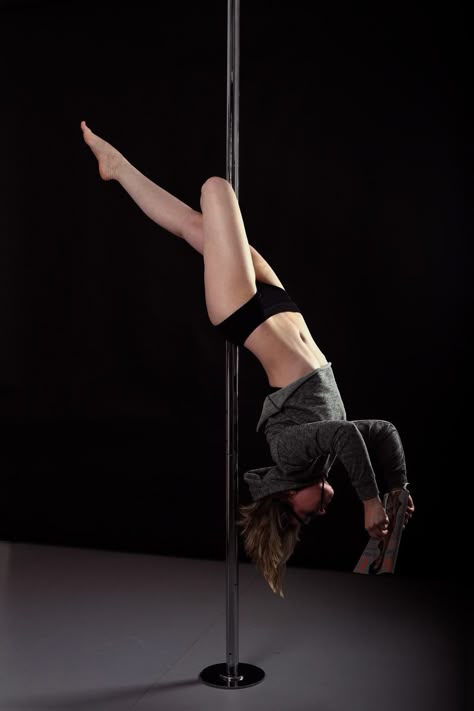 ”
”
For beginners, it is important to strengthen the muscles of the upper body, as arm strength is important in the initial stages of mastering pole tricks. “In the first lessons, we study near-pylon choreography, some basic tricks at the“ lower ”level, simple twists,” comments Vera Kefner , teacher of pole dance, stretching and other fitness areas at the Yaradance dance studio, author of the complex that we will show today. - And only then we transfer them to the “upper floors”, to the pylon. With strengthened arm muscles, it is much easier to work on the pylon: it is easier for a person to pull himself up, statically hold himself in certain positions on the pylon, without touching the floor. As for a good stretch, it makes the muscles more elastic, gives more joint mobility, increasing the range of motion, which makes the task easier and reduces the risk of injury. Don't forget about the visual effect - a good stretch allows you to perform tricks gracefully and beautifully.
So if you have long wanted to try the pole, but did not know where to start, start with strength exercises and stretching. We asked Vera Kefner to compile and show us a suitable set of exercises.
How to build a session
* Start your workout with a warm-up. 10-15 minutes of simple articular gymnastics will prepare the muscles, joints and connections for the upcoming load.
* Perform exercises in sequence.
* Practice this program 2-3 times a week, gradually increasing the load. The pace is medium or slow, which will allow you to concentrate on the correct technique for performing the exercises.
To complete the complex, you will need a mat, a chair and dumbbells (weighing 2-3 kg).
Ready to start class? Then repeat after Vera Kefner.
Wide Arm Push-ups
Get into an emphasis lying on straight arms (can be supported on your knees). Put your hands wider than your shoulders, fingers look forward and widely spaced, distribute the load on a full palm. The neck is a continuation of the spine, the gaze is lowered down, the abdominal muscles are tense. While inhaling, keeping the body absolutely straight, bend your arms, spreading your elbows to the sides. Your chest should almost touch the floor. As you exhale, focusing on how the pectoral muscles contract, push up and return to the starting position. While you're a beginner, do as many push-ups as you can. You can start by doing it on your knees 8-10 reps in 1-2 sets of , gradually increasing the load to 10-15 reps in 3 sets of . Further, without support on the knees, perform the same number of repetitions and approaches with straight legs (feet hip-width apart).
Push-ups with narrow arms
Get into an emphasis lying on straight arms (possible with support on your knees).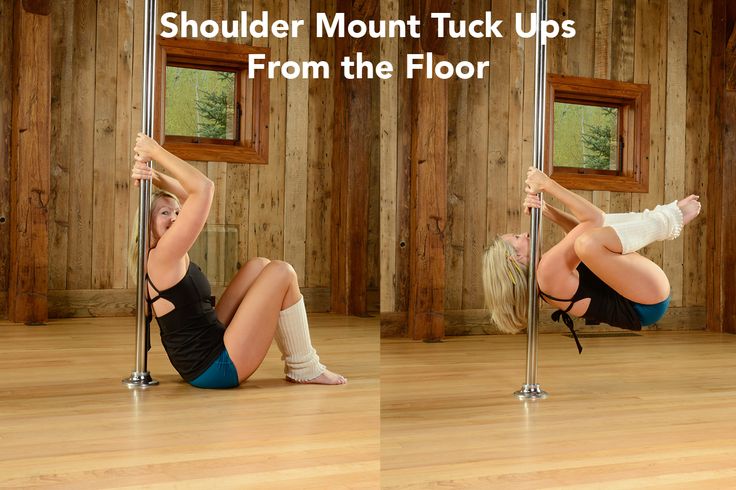 Place your palms shoulder-width apart, fingers look forward and wide apart, distribute the load on the entire palm, the neck is a continuation of the spine, look down, the abdominal muscles are tense. While inhaling, keeping the body absolutely straight and moving it slightly forward relative to the hands, bend the arms, pulling the elbows back. Your chest should also almost reach the floor. Exhale as you push up and return to the starting position. While you're a beginner, do as many push-ups as you can. You can start by doing it on your knees 8-10 reps in 1-2 sets of , gradually increasing the load to 10-15 reps in 3 sets of . Further, without support on the knees, perform the same number of repetitions and approaches with straight legs (feet hip-width apart).
Plank
Get into an emphasis lying on straight arms, arms shoulder-width apart, hands in line with shoulder joints, feet together (fingers in line with heels).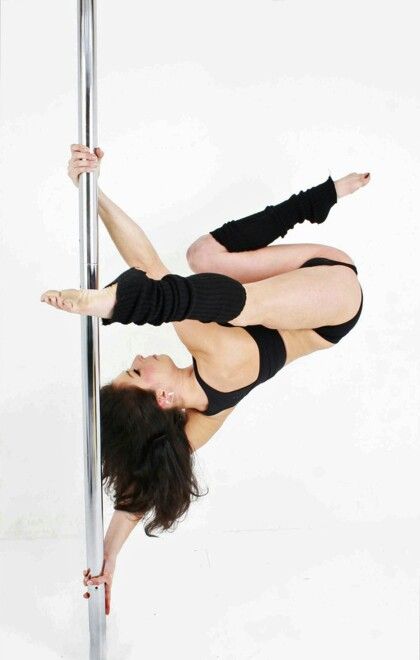 Make sure that the muscles of the legs, buttocks and the press are in tension. Do not arch your back and keep your torso straight as a single line from crown to heels until the end of the exercise. Hold this position starting from 15-30 seconds to 2-3 times , gradually increasing this time.
Shoulder stand (“Birch”)
Lie on your back on the mat, arms along the body, palms on the floor, legs bent at the knees or straight, knees and feet touching each other. Throw your legs over your head as much as possible. Bend your arms at the elbows, place your palms on your lower back, straighten your legs up. The body should be straightened, extended upwards so that the body and legs form one straight line. Keep your feet and knees together, hips and buttocks tense, palms on the lower back. Breathing during the exercise is deep, even, calm. You need to finish the rack in the reverse order, slowly, without jerking, supporting your back with your hands. Hold this position 15-30 seconds . Repeat 2-3 times . A variant with the support of the feet on the wall is possible.
Reverse Chair Dips
Sit on a chair, place your palms under your shoulder joints shoulder-width apart, fingers forward. As you inhale, slowly lower your pelvis by bending your elbows to a right angle. Make sure your forearms are perpendicular to the floor throughout the movement. As you exhale, push yourself back to the starting position. Do as many push-ups as you can. The main thing is that each repetition is done correctly and in full amplitude. You can start from 8-10 reps in 1-2 sets of , gradually increasing the load to 10-15 reps in 3 sets of .
Dumbbell Curl
Sit on a chair with 2-3 kg dumbbells. Lower your arms with dumbbells along the body. The hands are turned towards the body. Fix the position of the elbows, pressing them to the body, tighten the press. Slowly bend your elbows. When the forearms are parallel to the floor, begin to turn the hands outward, that is, upward with the wrists. Next, raise the dumbbells to the point where your wrists almost touch your shoulders (at the top of the exercise, there should be a few centimeters between your wrists and shoulders). Hold at the top for 1-2 seconds and just as slowly return to the starting position.
Important! When performing this exercise, jerks and the use of inertia should be avoided. Do not sway or lift your elbows off your body. Start with 8-10 reps of in 1-2 sets of , gradually increasing the load to 10-15 reps of 3 sets.
Sitting Fold
Sit on the mat with your legs straight out in front of you, feet together and firmly pressed together.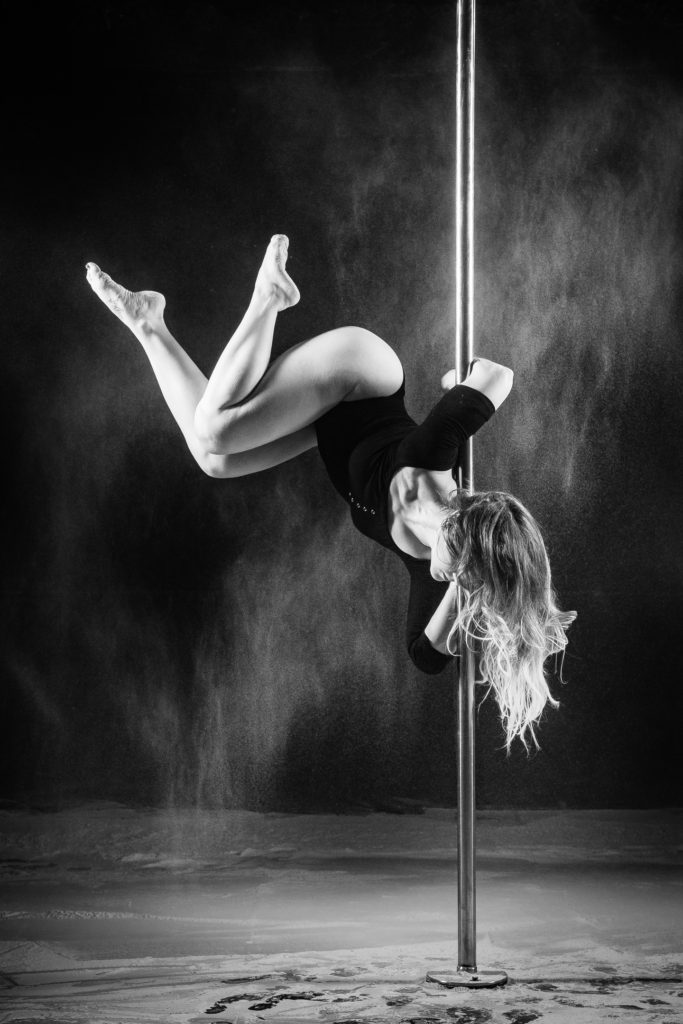 Stretch your arms up, back is straight, shoulder blades are brought to the spine, shoulders are lowered down, the crown is stretched up. Gently lean down towards your feet, keeping the stretch forward. Reach forward with your entire back, lengthening the thoracic and lumbar region, stretch the spine out of the pelvis. Help yourself with your hands, first holding on to your shins, and then clasping your feet. On each deep exhalation, relax and move your chest forward. Hold position for at least 30 seconds.
Stretching the muscles of the anterior surface of the thigh in the half split position
Starting position - half split position: the right leg is bent, extended forward (the foot is located under the buttock, the left foot is straight, extended back. Leaning on the forearm of the left hand, lower the pelvis below and fix Next, bend the left leg at the knee, pulling the heel to the buttock with the right hand.