How to get a more flexible back for dance
How to Improve Back Flexibility for Ballet Dancers
In dance and especially in ballet, not having a flexible back is whack. Plain and simple. You’ve probably heard the phrase, “work your core” or “keep your center” from your dance teachers over and over, but where exactly is your center? It’s not just your abs!
You might have thought working out your core only meant squeezing your abs while you’re at the barre and doing some planks and crunches in center, but your core includes your back too! Any professional dancer will tell you how important it is to stretch your back. Considering all of the flexibility and strength you need to do ballet comes from your core, it might be time to give your back the love and care it deserves.
Exercises to Improve Back Flexibility for Ballet
Here are some exercises to improve back flexibility!
Warm up your back and core
First, it’s important to stretch out your back muscles before doing any type of workout.
To start, get on your hands and knees and arch and curl your back a couple times through. Then stretch out your legs flat on the ground and use your hands to push yourself up into a cobra pose. To further warm up your back muscles, lift yourself into a half cobra pose, and take your hands off of the ground. Now, do the reverse, resting your head on your hands and this time lifting your feet off the ground. Make sure the feet are pointed! This is a great exercise to help with your arabesque.
Work the upper back
Lying on the floor, just as you were for the arabesque stretch, lift your legs, with the feet pointed, and arms stretched out in front of you. Lift your arms and legs off the floor at the same time. Sweep the arms behind you and then lower back to the floor.
Repeat and feel the burn.
Leg pulses are great to help improve back flexibilityLengthen your leg to as high as you can go, but don’t force it to go higher than is comfortable and then pulse your legs! Returning to the floor with the head rested on the arms, lift your leg off the floor, feet pointed, and pulse. Repeat on the other side.
Just keep swimming
Still laying on the floor, lift both your legs and arms at the same time, really squeezing your lower back muscles, and make a swimming motion! If you get tired, just keep swimming! It’s all in the name of prettier lines.
Breathing is essential for back flexibilityTake a break with the child’s pose, stretching back onto your feet with the arms out in front of you.
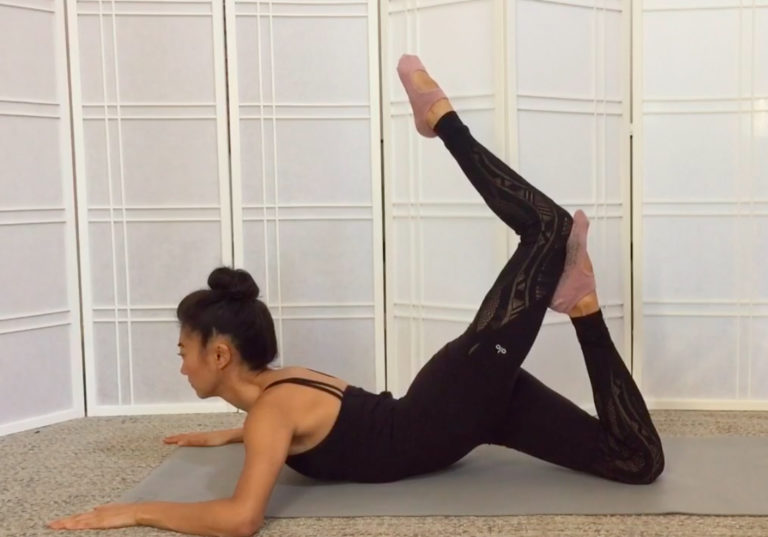
Work your core for ballet flexibilityBack on your hands and knees, lengthen your left arm in front of you and right leg behind you. Now pulse both at the same time, but keep your center intact! This is to work your arabesque, so a solid core is key to a good workout and a good arabesque!
Switch sides and remember to lengthen and lift!
Arabesque for ballet back flexibiiltyNow that you’ve done some exercises to work out your back and your entire core, try doing some arabesque! Even if you don’t have a barre, you can use a chair at home. Face your barre or kitchen chair with your hips squared and toe pointed behind you, lifting up into an arabesque and then returning back to the standing leg. You can do this ten times through on each side. According to Healthline, this is a great stretch for both dancers and non-dancers, so be sure to pass it on to your non-dancer friends who want a stronger back! Take care that the supporting leg is straight and you’re not bending it in order to get the full stretch and employ your technique! If you practice with bad technique, it could end up hurting more than helping.
Cool down the same way you warmed up by arching and curling your back. Then finally, relax into the child’s pose once again. Practice this workout and you’ll be bending over backwards at the barre in no time!
Final Thoughts: Improve Back Flexibility for BalletIt can be hard to gain flexibility, but not impossible! Unfortunately, if it doesn’t hurt then it’s not doing the job, so it takes a little pain to stretch your back to its fullest point, but in the long run it’ll make you that much better! Push through, listen to your body, and watch yourself slowly get more and more flexible each and every day.
For more exercises to improve flexibility and strength at the ballet barre, click here for all of our ballet exercise articles!
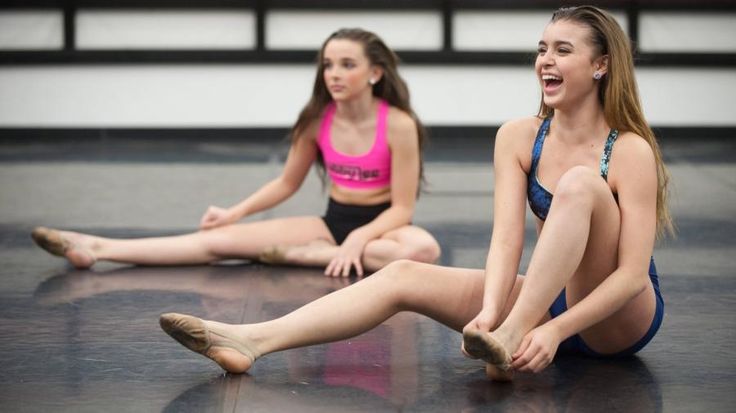
So you want to be flexible... — A Dancer's Life
L: Hyperextension R: Normal knee
There's always that one person in every class whose bones seem to be made of rubber (if indeed, there are any bones!) and who can lounge around in splits just as easily as they can hold a split penché; which is to say, effortlessly. Now, this person might be you, but if it isn't.. fear not! We've got some helpful pointers to get you on track to acing that arabesque! First of all, it's important to remember that just as we are born with different body types, there are different types of flexibility too. What we mean by this, is that certain people will be born with a naturally higher capacity for flexibility. Bodies vary greatly from person to person and some people will have longer muscle fibers, allowing them to stretch their muscles further, and with more ease - and some people will have shallower, less restrictive joints and sockets, giving them a greater range of movement (you know those people with hyper-extension in their knees and elbows, yep, that's them) being 'flexible' is going to come a little easier to these individuals.
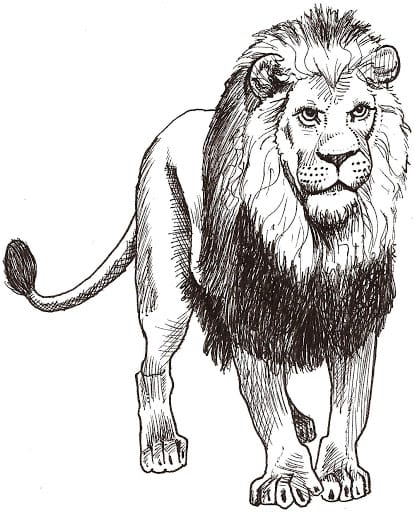
Miss/Mr flexible that we were talking about above will probably fall into this category, so it's important not to get frustrated or annoyed with yourself if you've been trying for ages and you still can't touch your toes to your head whilst they can... It's okay, have a brief Lion King moment* and then get on with it. The key is to remember that how you start does not determine how you finish, just because you couldn't touch your toes in the beginning (and everyone else could) doesn't mean you won't be knocking everyone over with a perfect Grand Battement a little down the track. It's all up to you.
*Scar: giving us a life lesson
So, you've accepted the fact that you're not the most flexible.. yet, and that getting flexible is hard, but you also know that flexibility is an important physical advantage, if not a necessity, for a dancer (and that you reallllyy want to have Darcy Bussel's arabesque, and split kicks like those dancers on SYTYCD!) now what are you going to do about it? Well, these exercises for starters!
Remember: Make sure your body is adequately warm (see our warm-up guide here) before you begin these stretches to prevent muscles seizing up and causing injury to yourself. Don't push yourself too hard in one go, keep in mind that long term improved flexibility is much more rewarding than being uber flexible for one day, and then being so stiff you can't stretch all week!
1. Stretching for back flexibility.
Lower back stretches. To begin, start by laying stomach side-down on the floor, legs straight out arms bent with hands placed next to either armpit, elbows by your side. Push the upper body up of the ground and towards the ceiling, keeping the hips firmly on the floor and pushing back away from your hands to give your back a gentle stretch (See Image 1.). Return to the neutral lying position, this time with arms by your side and bend the knees so that the feet are brought up and in towards the back. Reach your hands up and take hold of your ankles and pull the legs up and over towards the head whilst simultaneously lifting the torso up off the ground towards your feet (See image 2.).
Basic lower back stretch.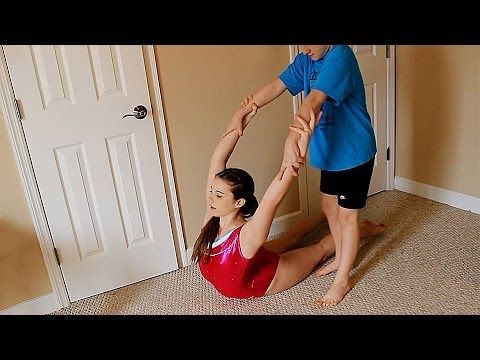
The second back exercise
Upper Back Stretches. Next, kneel on your knees, with the feet flat to the ground (so tops of the feet will be against the floor) and keeping everything below the hips vertical, lower the upper back and head backwards over the legs, allowing the arms to remain by your side. Go back as far as you need until a stretch is felt in the upper back (see Image 3.), if this is quite easy then raise the arms above the head and repeat, allowing the the pelvis and upper legs to also tilt backwards with the aim being placing your hands (stretched up above your head, not by your side as before), and finally your head on the floor (See Image 4.). This should also gently stretch your quadriceps.
Basic stretch
The advanced stretch
Advanced bridge: This is a great stretch to further increase your flexibility if you're comfortable doing a bridge (see Image 5.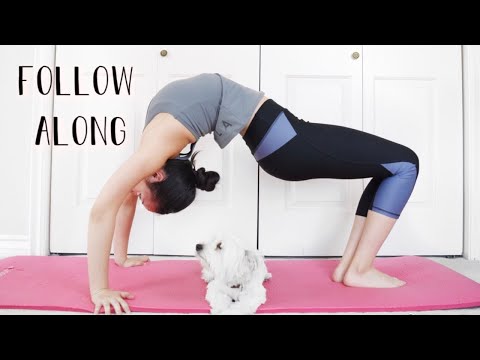 ) - If this stretch is still a little difficult for you then just keep practicing bridges, and re-asses in a couple of weeks. - Once you are up in a bridge shift your body so that your weight rests primarily over the arms, and gradually try to straighten you knees. This is very effective in stretching out the upper back and shoulders (See Image 6.). Don't worry if you can't get their just yet, gentle daily repetition will lead to gradual but significant improvement. If you can easily straighten your knees then relax back to a normal bridge, walk the hands a little closer to your feet and repeat until a reasonable stretch is felt. From here the next step is to bend the knees once more and lower yourself down so that your upper body is supported on your elbows, and your hands are folded under your head (see Image 7.)
The bridge.
Head to floor
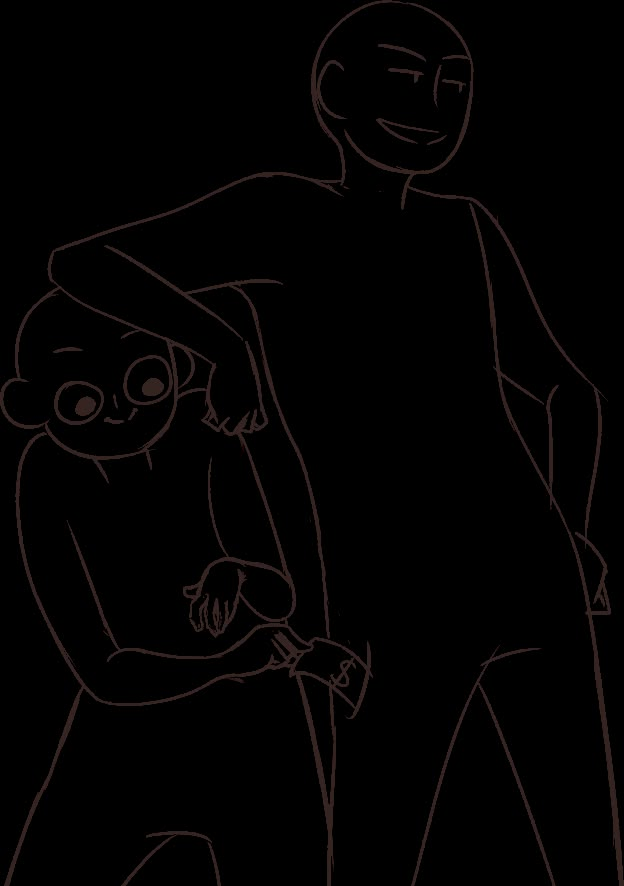
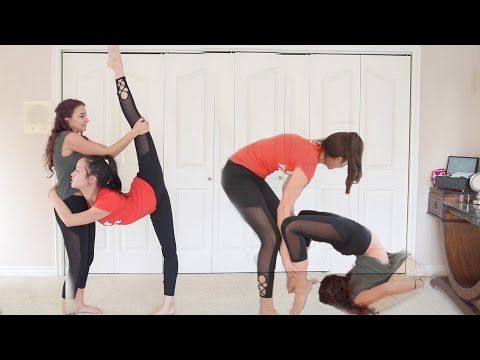
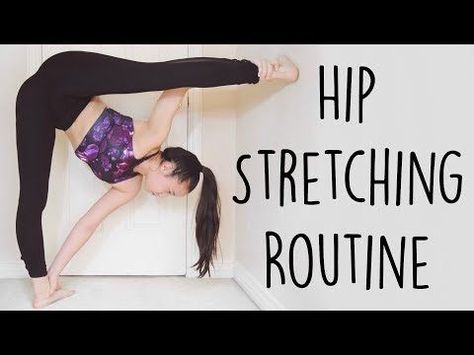
Stretch for Arabesque/attitude: Now for a stretch that will aid with increasing your splits and back flexibility, improving the line of your arabesque/attitude and lengthening the quadriceps. Using a theraband, bend one leg backwards at the knee, and with one end of the theraband grasped in each hand, loop the centre over the flat top of your foot. Sometimes it can be good to have someone supporting you as you do this (but not necessary), once you've steadied your balance, begin to extend the leg up and backwards, keeping the supporting leg straight, as well as tension in the theraband and using it to pull your leg up and over your head. Make sure you don't let the upper body collapse, but hold yourself upright with as straight a back as possible (See Image 8.). Try to hold it here for 10 to 15 seconds and then repeat with the other leg.
Stretching for Splits/Arabesque
2. Stretching for splits / leg flexibility.
Inner thigh / Middle Splits stretches. The next few stretches will focus on improving the flexibility in your inner leg (adductors), hamstring and gluteal muscles to aid in getting a flatter side splits and higher kicks/battements.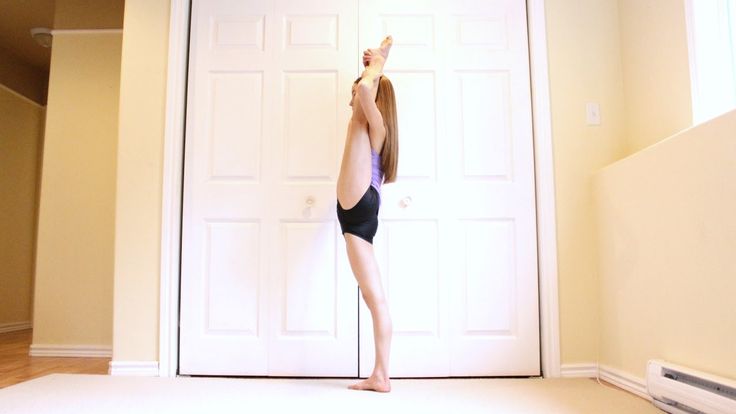 Remember to breathe and relax into the stretch, never force or 'bounce' it!
Standing Straddle Stretch: From a neutral standing position, split the legs so that the distance between the heels of the feet is approximately one and a half times the width of your shoulders, or a little wider, and you are now standing in a straddled position, with your feet facing forwards in a slight turn-out. Shift the torso to your right, so that the upper body is in line with the right leg and gradually lean forward trying to keep the spine relatively flat. At the same time use your hands to wrap around your ankle and gently pull the body closer; You should be aiming to press the entire upper body against your leg with the head reaching as close to the ground as possible (See image 9.). Return to the upright 'straddle' position and repeat to the left side. Perform the stretch again, this time keeping the upper body over the middle of the legs and leaning forwards, one hand on each ankle, until the chest is almost in between the legs, or as close as possible (See image 10.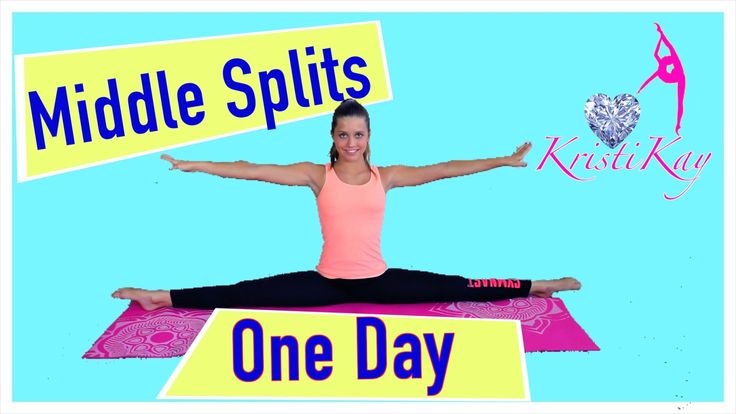 ).
).
Focus on getting the stomach and chest flat, rather than just the head.
View fullsize
View fullsize
Frog and Butterfly Stretch: Now for some floor stretches that will greatly improve your middle splits, hip range, and also your turnout. Please keep in mind that people with a very limited range of movement in their hips sockets may find these stretches to be too uncomfortable, so make sure you modify your routine as needed, not all stretches are suited to everyone which is why it's important to listen to your body.
Start sitting on the floor with your knees bent and the soles of your feet pressed together, legs drawn in and hands resting on your ankles. Gradually press your knees down towards the ground until a stretch is felt (See image 11), if no stretch is felt and knees can be flattened easily then hold the legs down, and keeping a long spine gradually bend forwards with the aim of touching your forehead to the your toes.
Keeping good posture is essential.
Next, position the body so that you're resting on your elbows and knees, back straight, and gradually spread the knees apart, pressing the hips down towards the floor and making sure you keep the knees in line with the hips (this bit is important!). It is helpful if you can get a friend or partner to gently press down on the lower back to increase the stretch. Once you have gone as far as you can, take several deep breaths and relax into the position, holding for 20 - 30 seconds before relaxing.
Finally, lay flat on the ground, stomach to the floor and draw the legs up in a turned out position with the soles of the feet touching (Don't sickle!). Keep bending the knees until you're in the 'frog position'. Unlike the previous stretch where the hips had to be held directly over the knees, the focus of this exercise is to keep the pelvis firmly connected to the floor, aiming also to get the ankles as close to the ground as possible. Don't be worried if your feet are stuck up in the air to begin with, some people will be more limited by their hips sockets (and turn-out capabilities) than others, and some will be able to get their hips and ankles to the ground immediately (See image 13.). Practice is the key here, with repetition everyone has the potential for improvement.
Hips remain pressed to the floor as knees draw in.
Next, sit up with your legs stretched out to the sides (in a relaxed middle split position) and make sure your toes are facing up towards the ceiling with no rolling forwards. If you like, you might find it beneficial to sit with your back against a wall to ensure you're not sinking or collapsing your posture. Now reach your left arm up from the side, and over your head, and still facing forwards bend towards your right leg, trying to feel the stretch all along the leg and up your side (See image 14.). Keep going until you feel a stretch and then hold for a count of 10. Relax, and repeat on the other side. Now repeat the exercise, this time shifting the upper body towards the leg and flattening all the way from your lower spine to your head until you are folded over your leg (See image 15.). This should give you a completely different stretch, as you engage new muscles to the ones targeted in the previous exercise. Once again hold the position for a count of 10 and repeat on the other side. Finally, return to the upright, forward-facing position and placing your hands in the centre, begin to walk them forward away from your body, allowing the chest to eased forward with them. Maintaining a straight a spine as possible, lower yourself towards the ground as you continue to walk the hands out. As you do this you should find your pelvis also rotating a little and coming forwards, placing you in a deeper, flatter middle split. Make sure to pause every few beats and take a couple of deep breaths, and then creep the hands forward a little further and repeat until hopefully you look like this (See image 16.
 )! Once you relax from the stretch be sure to shake your legs out a little bit so your muscles aren't storing the tension.
Toes facing upwards, upper body facing forwards.
The body has now shifted to face the leg, toes remain pointed towards the ceiling (they may be flexed or stretched according to preference).
Flatten from the lower spine, so the back stays as flat as possible, this provides a much more effective stretch.
Et Voila! There you have it; A selection of fantastic stretching exercises that will help you improve your flexibility in leaps and bounds (not without practice and dedication though)!
Article by Elly Ford
Read Next:
Preventing Muscle Soreness
Pointe Shoes the Perfect Fit
Coping with Injury
Dance Advice, Fitness, New to Dance, Advice + Tips, Health + FitnessEnergetiksdance, stretching, dance advice, tips, ballet tips, flexibility, flexibility tips, splits, flexible, stretching tutorial, ballet stretches, dance stretches, So you want to be flexible, Elly Ford7 Comments
0 LikesExercises for a flexible back - Lifehacker
August 7, 2017Sports and fitness
A healthy back should bend and twist without problems.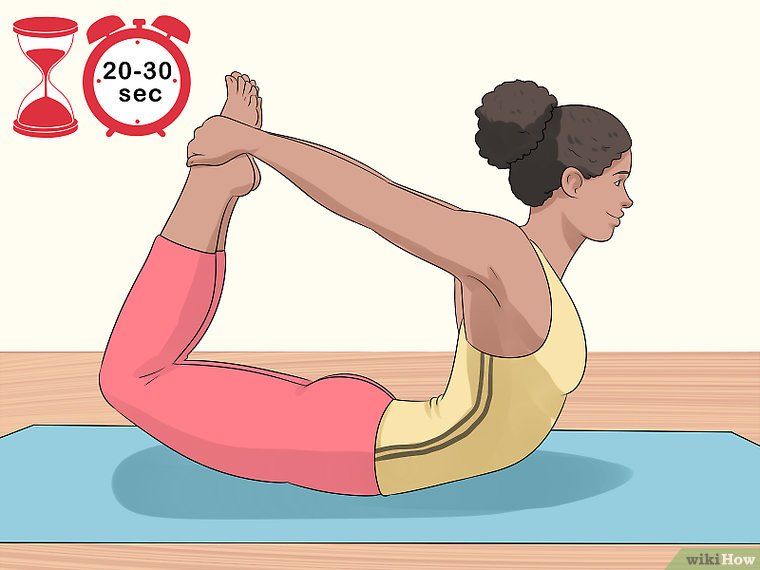 If you have limited mobility, it means that stiff muscles spoil your posture and do not allow you to move in full range. Special exercises will help restore the back to its natural flexibility.
Iya Zorina
Author of Lifehacker, athlete, CCM
Share
0In the gym, we often hear that the back must be strong in order to serve as a lever that transmits force during exercise.
Strong back muscles are really necessary, they protect the spine from injury and ensure the correct position of the body. However, the back must also be flexible.
The spine bends forward and to the sides, unbends back and twists.
If you cannot reach the floor with your hands without bending your knees, or, bending to the side, you cannot reach your knee with your hand, it is not the spine that is to blame, but the rigid muscles of the back and abdomen.
Stiff or weak muscles prevent you from moving through your full range of motion, causing posture problems and back pain.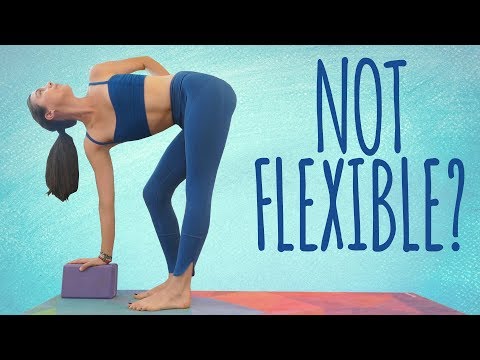 Therefore, it is so important to pay attention not only to muscle strength, but also to their flexibility.
Below are some exercises that will help restore the natural flexibility of the back in all directions.
Flexion
A healthy back can flex vertebra by vertebra.
Reverse Floor Crunch
blog.teambetter.com- Lie on the floor, lift your legs and bend your knees to 90 degrees, shins parallel to the floor.
- Lift the pelvis off the floor, lift it as high as possible.
- At the extreme point, only the shoulders touch the floor, the knees are bent at an angle of 90 degrees and are overhead.
- Lower yourself to the starting position. Do three sets of 20 reps.
Cat-Cow by Segment
- Get on all fours.
- Slowly round your back, starting at the waist, gradually moving to the chest and neck.
- Arch your back back, vertebra by vertebra, starting at the neck and ending at the waist.
- Repeat five times.
Jefferson twist
This is a more advanced crunch variation for those who can already reach the floor with their hands.
- Stand on a chair or cabinet with your toes on the edge.
- Lower your chin to your chest, then vertebra by vertebra, begin to twist the thoracic region, and then the lumbar region.
- Lean over until you reach your full range of motion. Wrists should be below the edge of the cabinet or chair, do not bend your knees.
- Just as slowly and gradually rise back up.
Start crunches without weight, just trying to get your wrists as low as possible. Then try doing crunches with a light weight in your arms - 2-8 kg depending on your fitness level.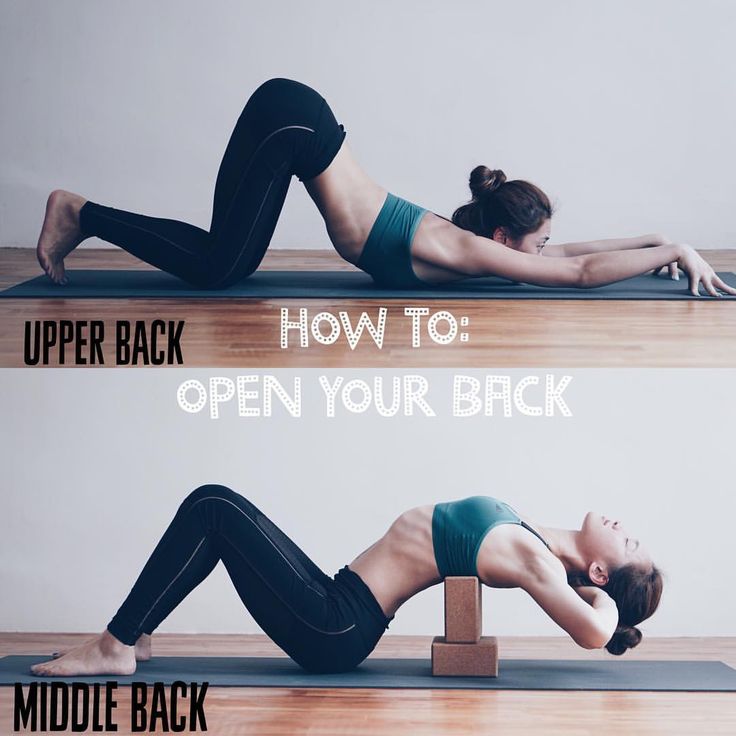 Every month, increase the weight in your hands by 1-2 kg.
Twisting
Most back injuries occur during twisting due to stiff and weak muscles. Strength and flexibility exercises with twists and turns will help you protect your back.
Chair twist
This exercise can be done anywhere, even at your desk.
- Sit on a chair with your spine extended.
- Leaving the pelvis in place, turn the body and shoulders to the side.
- Grasp the back of a chair with one hand, helping yourself to increase the turn of the body.
- Hold the pose for 10-20 seconds and repeat on the other side.
Leg bending complex
breakingmuscle.com- Sit on the floor with your legs wide apart.
- Grab a 2.5 kg barbell pancake and lift it above your head, stretch your back up.
- Bend sideways to the leg, stretch the ear to the knee - this is the first tilt of the complex. You can linger in this position or make a few smooth springy movements.
- Turn your body and stretch your chest to your leg - this is the second slope of the complex. It can also be done statically or dynamically.
- Return to the starting position and do these two tilts to the other leg.
- Return to the starting position and lean forward trying to touch the floor with your chest and belly, then straighten up and lean forward again.
Side Plank Crunch
breakingmuscle.com- Stand in a side plank position on your forearm with your other arm behind your head, elbow pointing up at the ceiling.
- Lean forward and touch the floor with your elbow.
- Get back up and repeat.
- Do 15 crunches on each side.
Thoracic bridge
- Get on all fours, hands under shoulders, knees under hips, feet on balls.
- Lift your knees off the floor, weight distributed between your hands and the balls of your feet.
- Lift your left arm and right leg off the floor while turning your torso to the left so that your left shoulder is facing the ceiling.
- Place your right foot on the floor, shoulder-width apart from your left, tighten your buttocks, both thighs look at the ceiling.
- The shoulders are perpendicular to the floor, the chest is maximally open, the gaze is directed to the floor.
- Return to the starting position on all fours and repeat the exercise on the other side.
- Perform the exercise five times in each direction.
Side bend
The ability to bend sideways depends largely on the condition of the oblique abdominal muscles. There is one good exercise that, on the one hand, helps to stretch tight muscles, and on the other, strengthen them.
Kettlebell Bends
breakingmuscle.com- Stand straight with feet shoulder-width apart, hips and shoulders facing forward.
- Hold a dumbbell in one hand - from 2 to 10 kg depending on your fitness level.
- Slowly move the dumbbell along your leg, flexing your spine to the side until you reach the maximum range.
- Slowly straighten up and repeat.
- Do five bends in each direction.
Back extension
This back movement is very important if you want strong muscles that keep your spine straight during weight training. Probably the most popular exercise for strengthening the extensor muscles of the back is hyperextension.
Hyper
You can do this exercise on an incline or horizontal hyper machine, a GHD machine, or even on a bench if you have something to hook your feet on.
- Lower the body until parallel with the floor. You can cross your arms over your chest, hold them on the sides of the body, or put them behind your head.
- Straighten your back, pull your shoulders back and pull your shoulder blades together, pulling your chest up. Hold this position for a couple of seconds and repeat the exercise.
- Perform 3 sets of 15-30 reps depending on your fitness level.
Start small and build up gradually
There are many more exercises to develop back flexibility, but these are enough to get you started. Do them at least three times a week, and even better - every day. To avoid injury, follow a few rules.
- Perform all exercises slowly, smoothly and without jerks. When it comes to the back, you need to be doubly careful, so in no case do the exercises abruptly.
- Increase the weight gradually. In free-weight exercises, increase the weight no earlier than two months of regular training. So your muscles will have time to get used to the new weight and you will exclude injuries.
- Do the exercises consciously, feel which muscles tense and stretch. This is especially important as you approach the end of your range of motion, where you need to be especially focused and careful not to get injured.
Top 20 best exercises for back flexibility (with PHOTOS)
Flexibility is hardly an optional condition for a beautiful athletic body. However, the ability to make a "bridge" is necessary not only for beauty, but also for health. Sufficient mobility of the spine is a guarantee that you will never be haunted by back pain, and your posture will always be royal.
Top 10 Back Flexibility Exercises (For Beginners)
If you regularly perform effective back flexibility exercises, you will get rid of tension, fatigue, muscle cramps for a long time and will not only feel good, but also look great. In addition, you will learn how to do many difficult yoga poses and be proud of yourself.
Do each exercise for 5-10 breaths or time it for 30-40 seconds. You can increase the time later.
1. Standing backbend
What is the use of : Makes the thoracic spine mobile, strengthens the deep back muscles and has a good effect on posture.
How to do : Stand straight and feel the hard floor under your feet. It is important to stand firmly on the floor, feeling it with the entire surface of the feet. Then put your hands on your waist and start tilting back, bending as much as possible in your back. Keep your balance so as not to lose balance, for this the hips can be moved forward a little.
How to simplify : Decrease the arch to a comfortable level, you can stretch your arms along the body or hold on to a chair.
2. Sphinx Pose
What are the benefits of : Develops the flexibility of the lower spine, promotes ventilation of the lungs and relieves muscle clamps.
How to do : Lie on your stomach, resting on your forearms. Raise your body without lifting your pelvis off the floor. Palms can be closed or left to lie parallel to each other. Look straight ahead without tilting your head. Feel the soft stretching from the neck to the waist.
How to make it easy : Even absolute beginners can easily do this back flexibility exercise, but if you have lower back problems, it is recommended not to raise the body high and stay in the pose for only a few seconds.
3. Backbend
Benefits of : Improves mobility of the spine in the upper section, stretches the back muscles, relieves tension and clamps in the shoulders and chest.
How to do : Lie on your stomach, resting on your hands or forearms. Then put straight arms behind your back, stretching them along the body, and lift the body. You should feel the tension in the back muscles, as well as the stretching of the chest. Try not to tilt your head back or lift your legs.
How to simplify : Backbend with palms on the floor.
4. "Swimmer"
Benefits of : Develops back muscles, improves spinal flexibility, strengthens legs, develops balance and coordination.
How to do : Lie on your stomach with your arms stretched out in front of you. Raise your right arm and left leg as high as possible, then switch sides. You can perform the exercise in static, lingering in a pose with raised limbs. Or perform in dynamics - alternately raise opposite arms and legs, imitating the movements of a swimmer in the water. Perform the exercise with maximum amplitude, but moving smoothly, not abruptly.
How to make it easier : Do the back flexibility exercise with a small amplitude or raise the arms first, then the legs in turn.
5. Cat
Benefits of : Relaxes the back muscles, improves the mobility of the spinal column, helps develop the flexibility of the back.
How to do : Get on all fours with your hands directly under your shoulder joints and your hips under your hip bones. Then arch and arch your back, imitating a cat. When bending, lift your chin up, and when arching, lower your head down. Work with maximum amplitude, but at a slow pace to prevent pain.
How to simplify : Reduce the amplitude and pace if you have problems with the lower back, neck or other parts of the spine.
6. Quadruple foot grip
Benefits of : Improves balance and coordination, improves back flexibility, has a calming effect.
How to do : Get on all fours and lift one leg up without extending your knee. With the opposite hand, grab the ankle or foot of the raised leg, arching in the back. Keep your balance, to do this, transfer your body weight to the leg and arm that are on the floor. Don't forget to repeat for the other side.
How to simplify : Do the back flexibility exercise by bending your knee, but not too high off the floor. You can also use a fitness band or a towel to grab the foot.
7. Half Bridge Pose
Benefits of : Strengthens the muscles of the back, buttocks and thighs, stretches the spine, strengthens the muscles of the pelvic floor.
How to do : Lie on your back with your feet close to your pelvis by bending your knees. Raise the pelvis up, while the shoulders, neck and head lie on the floor, the feet are shoulder-width apart. Hands can be clasped around the ankles or placed along the body. Tighten the buttocks at the top and try to raise the pelvis as high as possible to develop the flexibility of the back as much as possible.
How to simplify : Support the lower back with your hands while doing the back flexibility exercise, this will reduce the load on the lower back, but work the chest more.
8. Frog Stomach Pose
Benefits of : This back flexibility exercise develops spinal mobility, helps develop back flexibility and strengthens muscles. The shoulder girdle is straightened as it is performed, the stoop is eliminated.
How to do it : Take your hands back, bend your knees and grab your ankles with your palms, pulling your feet towards you. Raise the top of the body. Strengthen the arch by bringing the feet closer to the head. Try to bend not only in the lumbar, but also in the thoracic region. Since this exercise is for beginners, it is not necessary to lift your hips off the floor, they lie on the floor.
How to simplify : Grab the left foot with your right hand, opposite hand and foot on the floor. Stretch, then switch sides.
9. Stretching Puppy Pose
Benefits of : This exercise stretches the spine, helping to develop back flexibility, relaxes the shoulders and lower back, relieves fatigue from the whole body.
How to do : Get on all fours with your arms extended in front of you. Arch your back as if you are crawling under a low stick. The coccyx stretches upward, the deflection is carried out due to the thoracic region. Feel the stretch in your shoulder girdle. Stretch your back without overloading the lumbar region.
How to simplify : Simplified version performed with minimal arching, no arching of the back and arms.
10. "Arc" lying on the back
What is the use of : This back flexibility exercise stretches the spine, improves its mobility, opens the shoulder region, and also relaxes the lower back.
How to do : Lie on your back with your hands together above your head.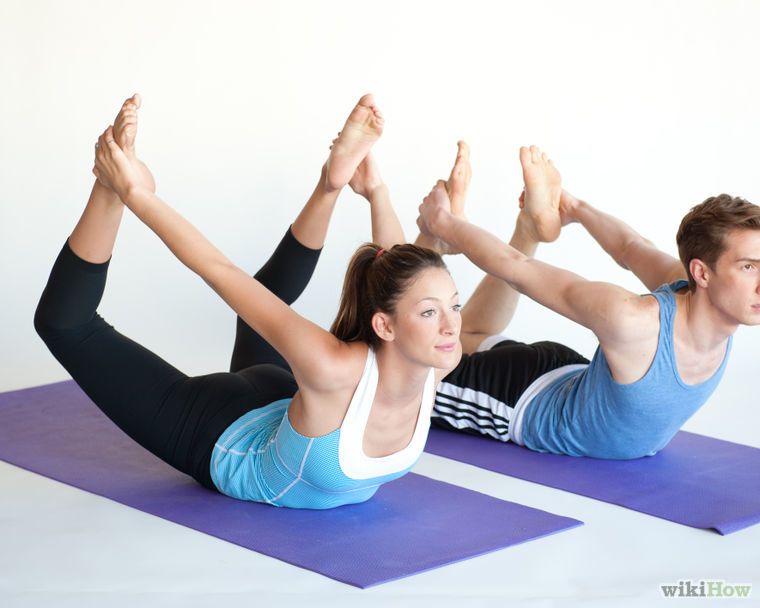 Put one foot on the other. Turn the body and legs to one side, the body seems to form an arc. Feel how the spine is stretched in the thoracic and lumbar regions, as well as the shoulder joints open.
How to simplify : Place your hands on both sides of the body without folding them behind your head.
Collections for stretching on the back and lower back: 9000 9000
- 20 Exercises for stretching back
- 10 Exercises for relaxation of the back
- 15 Exercises for stretching the top of the back and neck
TOP-10 exercises for flexibility of the back ( for advanced)
In order to develop the flexibility of the back, you need to include yoga and stretching exercises in the training plan, which help stretch the muscles and make the spine more mobile. As a result, you will not only be able to do the “bridge” without any problems, but also master the position of the king cobra, bow or fish, which require good spine flexibility.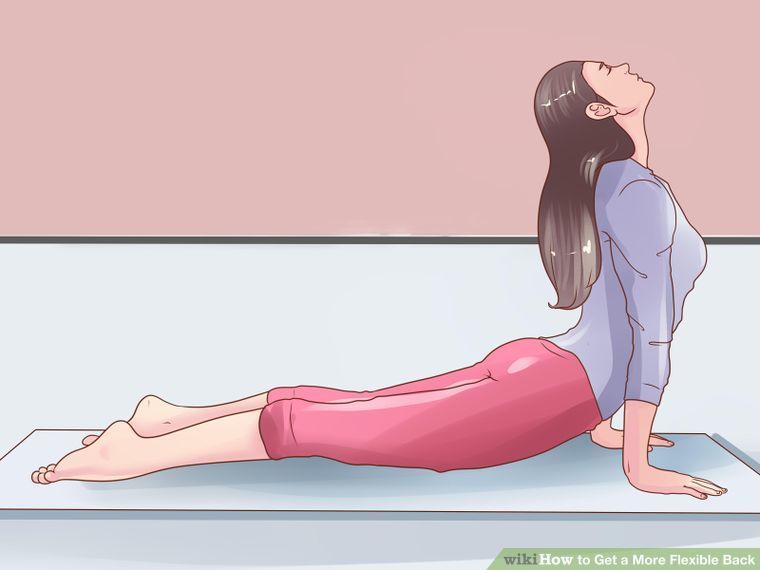
Do each exercise for 5-10 breaths, or set a timer for 30-40 seconds, you can increase the time later.
1. Upward Dog Pose
Benefits of : One of the best exercises for back flexibility. The spine is strengthened and the back muscles are stretched.
How to do : Lie on your stomach with your feet resting on your toes. While inhaling, slowly straightening your arms, raise your head and body up. Arch your back, do not throw your head back. Try to lift your stomach and hips off the floor, keeping your upper body on outstretched arms and feet. Make sure that there is no pain in the lower back.
How to simplify : Lower your hips to the floor, don't lift your legs.
Variant of the pose with legs down on the floor:
2. Cobra pose
What are the benefits of : Develops the flexibility of the lower spine, improves posture, eliminates pain in the lower back.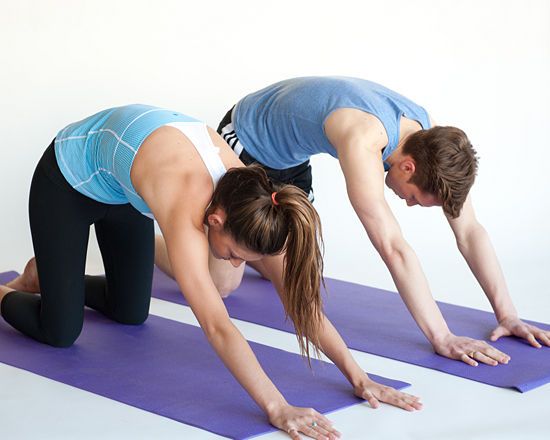
How to do : Lie on your stomach with your palms facing forward on the floor. Then straighten your arms, lifting the body up. In this case, the pelvis and legs are on the floor. Look straight and do not bend too much in the lower back, so as not to be injured.
How to simplify : In case of back problems, it is recommended to slightly lift the pelvis to relieve the load on the lumbar region. You can also bend your elbows to reduce arching. After doing this, do the child's pose to relax the lower back.
3. King Cobra Pose
Benefits of : Helps develop back flexibility, relieves pain, stiffness and tension throughout the body, improves posture.
How to do : Lie on your stomach and rest your palms on the floor. Then lift your torso as in the cobra pose. Remaining in this position, bend your knees and at the same time bend your back, pulling your head back. Stretch your toes to the back of your head, arching your back as much as possible.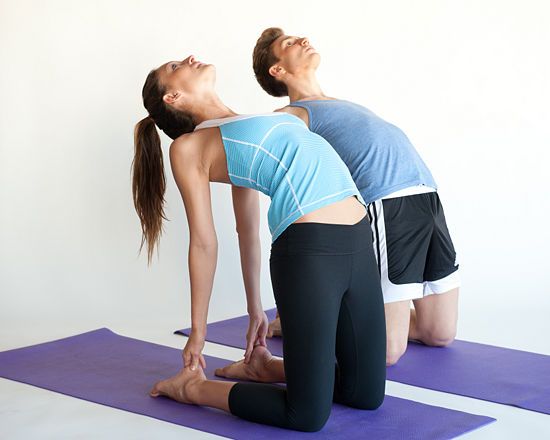
How to simplify : Bend your knees while continuing to pull your toes, but look straight ahead without tilting your head back.
4. Camel Pose
What are the benefits of : Develops the flexibility of the spine, eliminates clamps in the thoracic region, promotes a beautiful posture.
How to do : Get on your knees, making a right angle between your shins and your thighs. Bend back without throwing your head back and grab your ankles with your hands. Stretch your pectoral muscles as you arch back, pulling your shoulder blades together, but avoid discomfort in your lower back.
How to simplify : During the backbend, keep your hands on the lower back, not lowering them to the ankles, but trying to bring the elbows inward.
5. Superman Pose
Benefits of : Strengthens the arms, core and back, makes the spine more flexible, improves the sense of balance.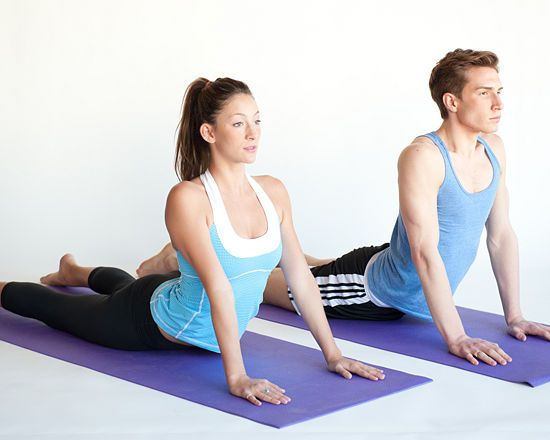 Heals the spine.
How to do : Lie on your stomach and hold your hands as comfortably as you can. The legs and pelvis are pressed to the floor. Then extend straight arms forward, lifting the body. Feel how the back muscles work, the spine stretches and the buttocks tighten. Do not tilt your head back, look straight ahead, concentrating on muscle work and breathing.
How to simplify : Perform the exercise by extending each arm alternately while resting the other on the forearm.
6. Bow Pose
What are the benefits of : Strengthens the muscles of the arms, back and buttocks, helps develop back flexibility, trains balance. Super effective back flexibility exercise.
How to do : Lie on your stomach, resting on your hands or forearms. Put your hands behind your back and bend your knees at the same time. The heels should be pointing up. Grasp your ankles with your hands and bend as much as possible in your back without throwing your head back.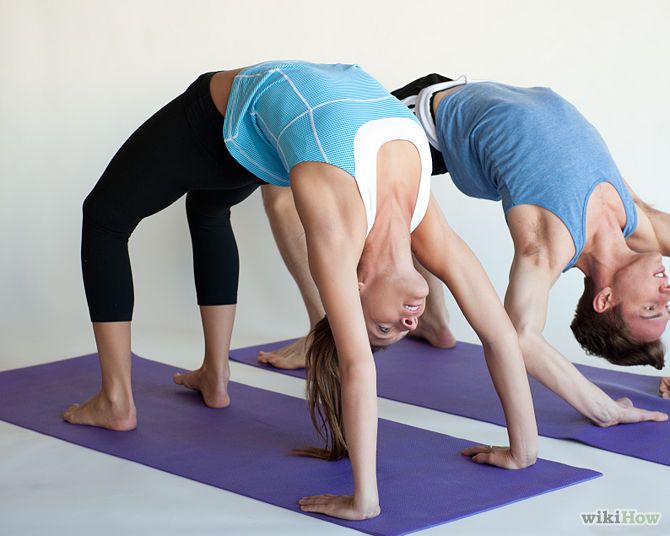 Stretch your toes towards the back of your head, resulting in a pose that looks like a stretched bow.
How to simplify : Use a towel or fitness band to grip your ankles. You can also do the pose without lifting your hips too high, which will be easier for beginners to master.
7. Bridge Pose
What are the benefits of : Stretches the spine, developing back flexibility, relieves pain, relaxes the shoulders, corrects stoop, calms the mind.
How to do : Lie on your back and place your palms on either side of your head, turning them inward. As a result, the palms should be directed towards the feet, and the elbows raised up. Bend your legs and lift your pelvis up while straightening your arms. Try to straighten your arms at the elbows so that the deflection in the back resembles a real semicircular bridge. Keep a small distance between your palms and feet.
How to simplify : A simplified version of the bridge pose is any variation of the half bridge that is easy for beginners to do.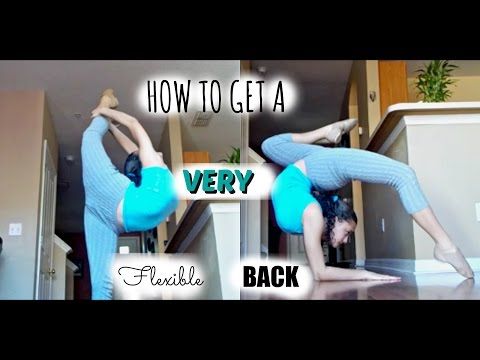 See also: How to stand on the bridge step by step.
8. Fish Pose
Benefits of : Improves lower back flexibility, relaxes pelvic floor muscles, develops hip flexibility.
How to do : Lie on your back and bend your knees with your shins on either side of your body. Then lift the body up, while the back of the head and buttocks should touch the floor. Hands lie freely along the body. You can also do the fish pose from the prone hero pose. Sit on your knees, shins on either side of your thighs. Then lean back, lowering the pelvis and the back of the head to the floor.
How to simplify : A simplified version of the fish is done with straight legs. To do this, lie on your back and lift the body up, arching your back. If this option is easy to do, then try bending one leg at the knee and pulling it towards you.
9. Table Twist
Benefits of : Stretches the upper shoulder girdle, chest and back muscles. The flexibility of the spine will improve, the clamps will go away, the exercise will also help with stoop.
How to: Lie on your stomach with your legs together and your arms straight out to your sides. Leave the shoulder girdle in this position, turn the rest of the body on the right side, leaving the bent left leg behind the right. Complete this transition by placing your left hand on the palm in front of your face.
How to simplify : Do not roll over completely on your side, stop half a turn.
10. Downward dog twist
What is the use of : Stretches the shoulders and back, strengthens the arms, relaxes the lower back.
How to do : Stand in plank position then lift your pelvis up into downward dog pose. Grasp the ankle of the opposite leg with one hand, keeping your back straight. After a few breaths, switch sides.
How to simplify : Bend your knees, stand on your toes, or spread your legs wider while performing the pose. You can also reach out with your hand not to the opposite leg, but to the nearest one, in this position it is easier to twist.
Child's Pose
What are the benefits of : Relaxes the back, especially the lumbar region, increases the mobility of the spine, calms the mind and body. This exercise does not directly affect the flexibility in the back, but it helps to relax after backbends and difficult poses. Perform Child Pose every 5 minutes during your back flexibility workout.
How to do : Get on all fours and lower your pelvis on your heels, extending your arms in front of you. The head touches the floor, the back is straight, you can bend a little so that the effect of stretching is more pronounced.
How to simplify : Place your hands on both sides of the body without stretching them forward. The head can be turned to relax the neck. This position relieves tension from the spine as much as possible and gently stretches it.